lapping plates

Home Model Engine Machinist Forum

Help Support Home Model Engine Machinist Forum:

This site may earn a commission from merchant affiliate links, including eBay, Amazon, and others.

Hexbasher

Well-Known Member
Joined
Sep 24, 2007
Messages
73
Reaction score
1
Haven't seen any posts about them here, though, not useful for flatness for engine building, but good for making tooling, fixtures and for surface finish for models

Finally made one today that i've been wanting to make for a while now, 6 hours of relaxed work

DSC00176.jpg

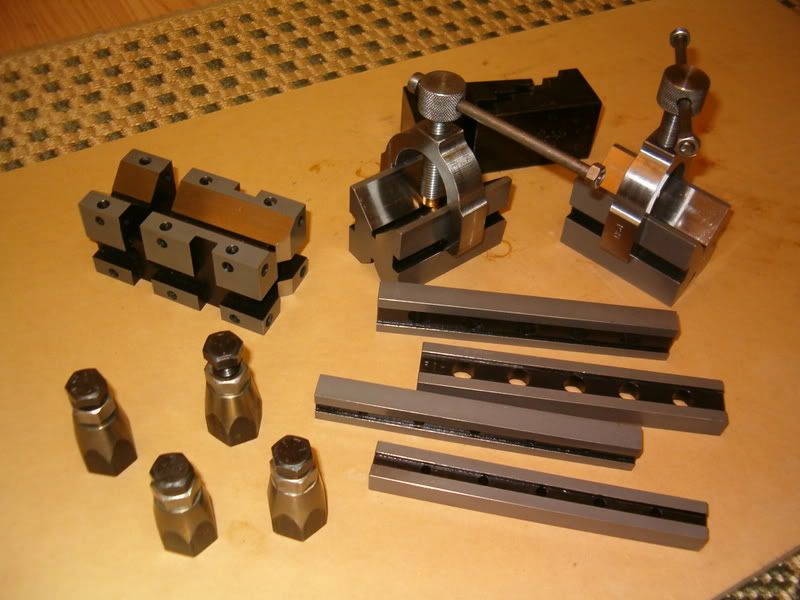
(^^^notice those precision 6inch scale parallels)
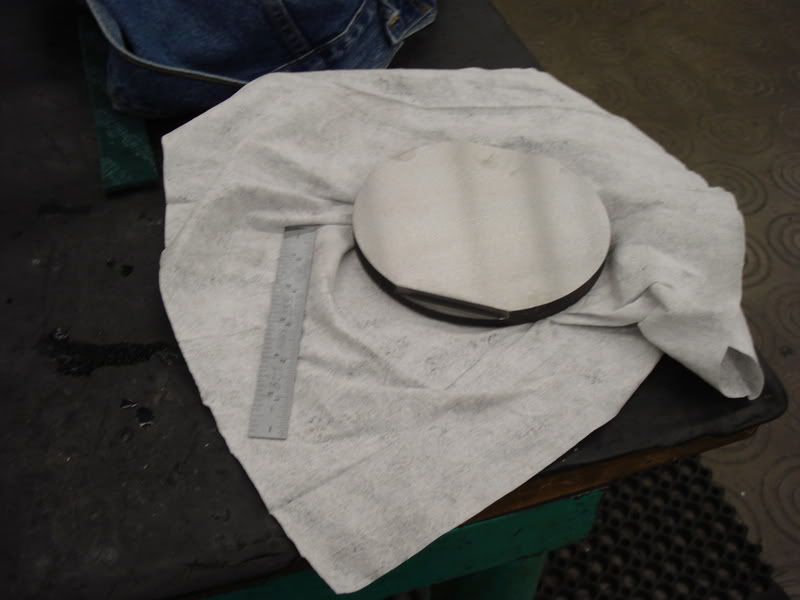
DSC00179.jpg

(^^^after grinding)
DSC00178.jpg


(i didnt take many pics cus i cant take a nice picture while the VMC is running)

first step was tossing the piece of cast iron on the lathe and faced both sides

second was to mill the two little steps on the sides. these are here for two reasons, 1 to have better bite to clamp with the vise while milling the serrations. 2 to have something to clamp nicely and solid in a bench vise while actually using the plate for lapping

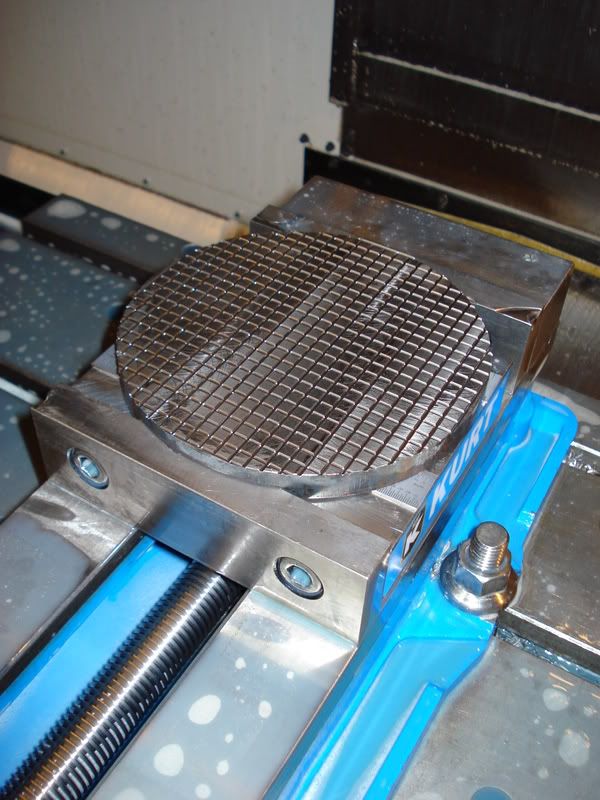
next was the face mill and do the serrations on the cnc mill...the serrations can be done with no problems on a manual horz mill with a 90 deg duel angle cutter, or on a vert mill with a 90 deg end mill...i used a 1/4 solid carbide chamfering tool. ran at 6000 RPM and 3.0 IPM....took 1 3/4 hours to mill the serrations on the cnc....a horz mill or a shaper wouldn't take long at all

next was to surface grind the back side then the top side (side with the serrations)....surface grinding is very important to give it flatness if you want to lap accurately...a fly cutter or a 'good lathe' will give you acceptable flatness for lapping for good surface finishing

when grinding cast iron (or iron in general) use al ox. with a soft bond and reasonably coarse grit...if ya don't (all i had was a al ox. wheels with a med grit and hard bond) grind dry, rough at 0.001 and finish 0.0005 or less...dress the wheel as often as possible

mine was made from class 3 grey iron ('cast' is the best, nice and soft for the compound to get embedded, any material with 'embedibility' properties will work, but cast iron is the most practical for plates, but brass and bronze are great for making cylindrical laps for holes, i'll post up nice time i make one of those, prob great for lapping cylinder bores)

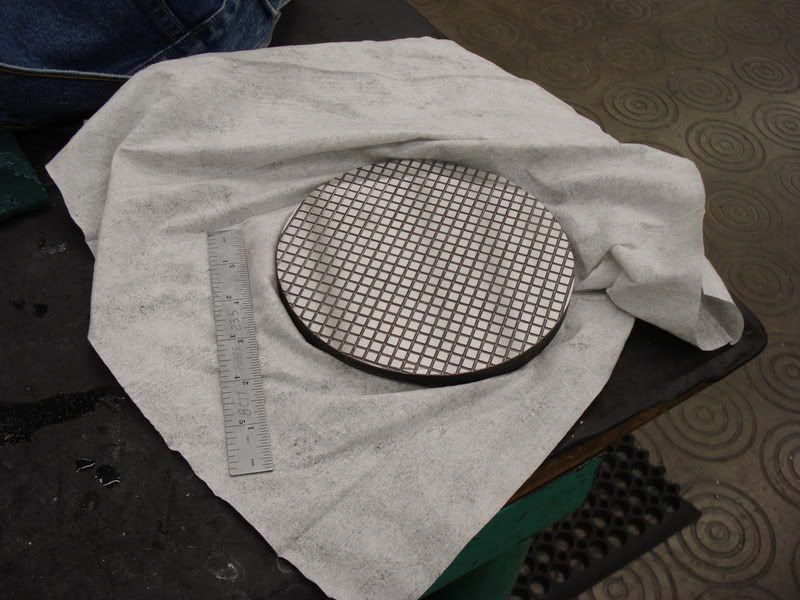
my plate is 6.25 dia and the serrations are 0.025 deep (x 90 deg = 0.050 wide) with a 0.25 step over....and the backside also serves as a small surface plate
 
Brass_Machine said:
Cool. But how do you use it?

???

Eric

ok.....i was first shown lapping from a 80-something year old english tool and die maker at school....i'm 22 year old cowboy machinist, so i'm sure some old timer will chew me up for not explaining this %100


first thing is first when lapping, clean the table if youre doing anything precise, clean with methyl hydrate or something similar

put the lapping plate on a surface plate and sweep it with a 0.0001 test dial and see how worn it is

re-grind on the surface grinder if needed, enough to grind it flat

next, load up the table with lapping compound (whatever grade you need for the material youre lapping, and finish before lapping and finish you want) i like i use 'C' for most of my stuff

to load up, spead out the compound, cut it with oil, and use a peice of cold rolled steel like a "rolling pin" and really work it in

wipe off the excess

place the clean part you want to lap face down on the table

make 'figure-8' patterns and apply pressure.....add oil as you go or needed....clean, inspect, measure, and continue to lap the part

******lapping is a lot like using a small hole gage to measure a small shallow slot, theres a feel for it.


afew things that are important about lapping

1) never lap something bigger than your lapping plate, you'll never be able to lap something flat if it overhangs the lapping plate, if the part is bigger, you're doing nothing more than polishing

2) never lap 'back-and-forth', this will make an uneven surface...lap in large fig-8s and circles..the more random the patterns the better...

3) make sure you use THE WHOLE plate...2 reasons....one is it speads out the compound around the table for a even spread...and 2 is you spread the wear throughout the plate


the serrations on the plate dont 'cut' the material...the abrasives embed in the plate and those cut the material...the serrations hold pockets of oil for lubrication's and excess compound....as wel, if swarf or a partical from the part was to come loose, it could find itsself in these serrations and not gouge your part

afewofmyprojects.jpg

(these vee blocks and parallels i made in school 2 years ago, they were machined, hardened, precision ground and then hand lapped)
>>>yes, hand lapped...barrel laps (lapping a hole), lapping machines, honing machines* are another story

reasons to lap.....surface finish, flatness, precision sizes, ...

*lapping envolves an abrasive embedded in a soft material, honing involves stones of some sort or another
 
Hi
the natural effect of lapping like that is to create a curved surface. Its the same way a telescope mirror is ground spherical. If your lapping for flat you must use the A B C method. Over time your single lapping plate will form a spherical dip in the middle so re facing is required from time to time as a mattter of course. The single plate method is fine for semi flat but will not replace the A B C method of lapping A to B B to C C to A and then an alternating combination of all. Its a long job but the only way to get a true flat surface.

lapping to fit is what your doing with a single plate lap.

If there are any telescope guys on here that have made optical flats ask them the method for true flat.

mind you you did a nice job on that lapping plate well worth the time you put in.
Cheers kevin
 
tattooed_machinist said:
ok.....i was first shown lapping from a 80-something year old english tool and die maker at school....i'm 22 year old cowboy machinist, so i'm sure some old timer will chew me up for not explaining this %100
...

You explained it quite well. No worries, I see what it is used for now. Thanks!


Eric
 
compound driver 2 said:
Hi
the natural effect of lapping like that is to create a curved surface. Its the same way a telescope mirror is ground spherical. If your lapping for flat you must use the A B C method. Over time your single lapping plate will form a spherical dip in the middle so re facing is required from time to time as a mattter of course. The single plate method is fine for semi flat but will not replace the A B C method of lapping A to B B to C C to A and then an alternating combination of all. Its a long job but the only way to get a true flat surface.

lapping to fit is what your doing with a single plate lap.

If there are any telescope guys on here that have made optical flats ask them the method for true flat.

mind you you did a nice job on that lapping plate well worth the time you put in.
Cheers kevin

If you want the ultimate flat lap, this is correct. But I think Mike's relying on the surface grinder to establish flatness, and he cautions to revisit the surface grinder periodically. It won't be as flat as a 3 plate setup, but it should be excellent for many uses this way.

Cheers,

BW
 
I thought I recognized those shop projects, I went to BCIT too! Nice work!
-Kevin
 
For those that DO NOT HAVE a surface grinder and still want to hand lap finish any article and still get a good flat surface finish, there is a way of achieving this quite cheaply and very easily.
All you need is a piece of float glass about 400 mm square, a piece of ply a bit bigger, maybe 420 x 420, some edging of any sort, be it quad or small square. Nail the edging to two sides of the flat ply, place the glass onto this flat surface, up against the two edges already nailed to it and mark where the other two edges need to be nailed to it, so as to secure the glass to the ply, so that the glass does not move.
When you have this glass plate ready, go get some emery paper squares of whatever grade grit you reckon you will need, place the emery paper sheet onto the glass, add some kerosene as a cutting agent, it cleans the paper as well as helps with the cutting action. Now just start to do the figure 8's with the object you want to lap, you can even progress to a finer grade emery paper as you go, until you achieve the finish you so desire. Oh, the quad also holds the kero to the plate and stops it from running all over the joint.
Use this type of plate at work when somebody ask for anything to be a lapped finish, if it fits the glass, then we do it, if it's too big, of to the grinders to be worked on. For home consumption, the glass trick will work a treat.


uhhh? who's mike???? ;D


ahem......

phil.........

cough cough cough.....

*(i don't typically through my name at the bottom of posts, not that i want my name a secret or something along those line...but lets stop these roomers now)
 
Oops!

Brain fart. Happens more and more often as you get older.

Cheers,

BW
 
Back
Top