Homemade dovetail cutter.

Home Model Engine Machinist Forum

Help Support Home Model Engine Machinist Forum:

This site may earn a commission from merchant affiliate links, including eBay, Amazon, and others.

DICKEYBIRD

Well-Known Member
Joined
Sep 27, 2007
Messages
653
Reaction score
46
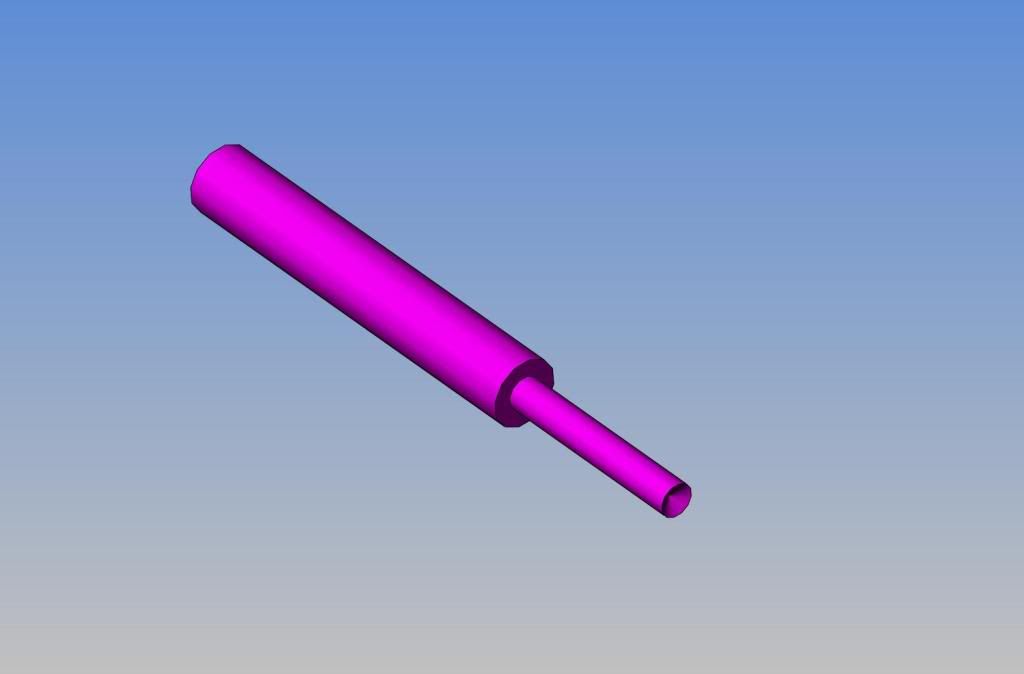
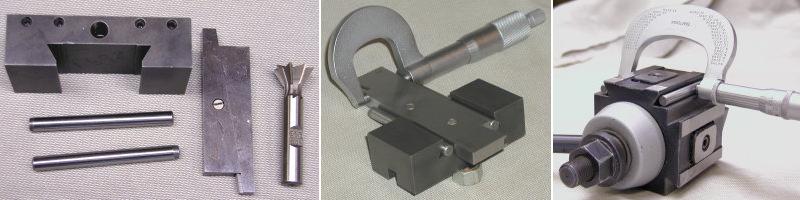
My project for the weekend was supposed to be a tangential toolholder for the QCTP like John Moran shows on his site but I didn't have a dovetail cutter.

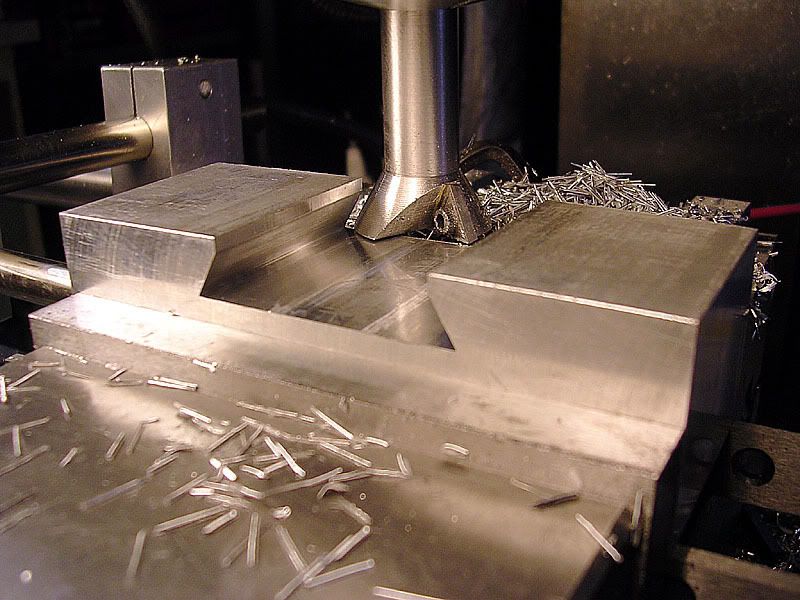
Using the info on his and Bob Warfield's sites I made my own from a chunk of 4140 pre-hard I had on hand and a cheap TCMT insert I got from CDCO.

Dovetail2.jpg


Dovetail3.jpg


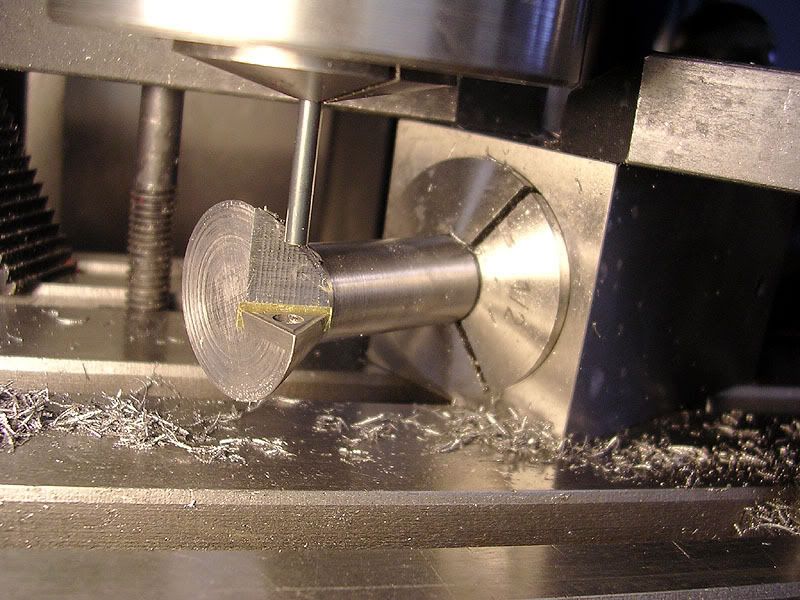
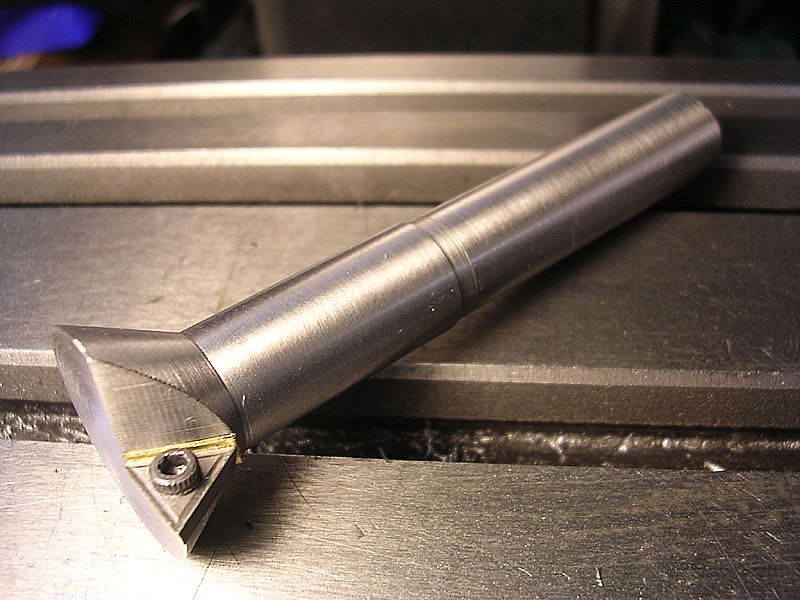
You have to be patient with the 4140 but it came out nice and the finished tool cut the dovetails real nicely in 6061 aluminum. It remains to be seen how it does in steel.

TangentHolderDovetail.jpg

 
Thanks Bernd. Yessir, it's 60 deg. to match the QCTP dovetail angle. I miscalculated slightly cutting the toolholder and the QCTP handle rotates about 1/4 turn too far. A .006" brass shim fixed it up.

Milton
 
Nice job Dickeybird!

Can you show us how you measured that dovetail to get it right. That's a tricky business.

Seems like I recall using a couple pins and micing an adjustable parallel or some such.

Best,

BW
 
It can be calculated? Geez. I used the cut and try method when I made some tool holders. ;D.

Dickey, you make some sweet tools. I am too impatient to make a lot of tools. I keep thinking it's taking away from engine building time. Once I have made a tool it saves so much time, I wonder what took me so long.

I have a VFD and new motor for my lathe. I keep thinking it will take too long to install, so I keep using my lathe as is. I need to look at the big picture like you do!

Nice job. I need to make one. I have a HHS dovetail cutter that has a chipped tooth. They are so expensive. Making one is the solution.

Eric
 
AllThumbs said:
It can be calculated? Geez. I used the cut and try method when I made some tool holders. ;D.

Aha, I knew I'd squirreled away this info somewhere:

dove1.jpg


femaledove1.gif
maildove1.gif


Cheers,

BW
 
BobWarfield said:
Aha, I knew I'd squirreled away this info somewhere:
Wow some real science in that post Bob!

I measured the depth of an AXA holder with my handy-dandy Marv Klotz depth gage and the width with my inside mike. I milled a slot to those exact dimensions and then measured between 2 - 1/4" dowel pins inserted into the dovetails of a brand new holder. I did great with the cutter until the final cut and then made a .006" math error that left it a touch too wide. I glued in a brass shim with super glue and it works great now.

Come to think about it, the brass shim will last longer than the aluminum so I'll put it next to the moving wedge to help keep a nice snug fit for a longer period. Maybe I should've said I planned to cut it .006" oversize to allow for the shim. ;D
 
Let me point out for the formula-challenged that the equations Bob shows are implemented in the free program, DOVETAIL, on my site.
 
I think I've got there, better minds will let me know. Its not an elegant formula.

Assuming a 60° dovetail, the amount to be removed from the face is:-

REM = cot30°{Spost - Sholder +2D(1 + cot30°) - 2Hholder x tan30°}

Which simplifies to .577{Spost - Sholder +3.155D - 3.464Hholder}
 
Last week when I was making the two part valve housing for the hit and miss air/steam engine, I found that I had a terrible air leak between the upper and lower half of the valve housing. I had some gasket material left over from a carburetor rebuild, but the question came up---How the heck do I put in 1/8" diameter holes for the three #5-40 screws that hold the valve body together. I took a peice of 1/4" mild steel rod and chucked it up in my lathe, then used a 5/16" drill bit in the tailstock mounted chuck to drill a "cone" into the end of the rod. Then I turned that same end down to 1/8" diameter. Then I layed the gasket material on my mini anvil and positioned the punch over the area where I had marked the holes. One whack with the hammer and it cut a perfect 1/8" circle out of the gasket material. then I used the sharp end of my scribing tool to dig the peice of gasket out of the end of the punch (It comes out very easy) and finished the other holes. A very cheap and effective way to punch perfect holes.----Brian
GASKETPUNCH.jpg
 
Back
Top