Going to build my first engine!

Home Model Engine Machinist Forum

Help Support Home Model Engine Machinist Forum:

This site may earn a commission from merchant affiliate links, including eBay, Amazon, and others.
Charlie, what did you used to take the picture with? I have had trouble in the past because I was taking pictures with my iphone, if I am going to post pictures from the phone, I have to be careful of the orientation when taking them. I save my posted photos on photobucket, I rotate to the correct orientation, but they revert back to upside down when posted. I did google this problem, and there were a few ideas to fix it.

As far as barbed hose fittings and clamps, I never have to use them. The maximum pressure I use is only about 15lb, no enough to blow the hose off a straight fitting. Most engines will run on about 5lb - 10lb if all friction points are reduced.

Paul.
 
Thanks, Tin!

Frank, the Little Husky looks like a great retirement project, but I think, with my limited machining expertise, I am going to start with the simpler Lucy. But I see a Little Husky in my future! Thanks for mentioning it...


Lucy is a very forgiving engine to built. Was my very first engine. The inlet and exhaust ports must be aligned to get good spin. Slight misalignment is forgivable.
 
Charlie, what did you used to take the picture with? I have had trouble in the past because I was taking pictures with my iphone, if I am going to post pictures from the phone, I have to be careful of the orientation when taking them. I save my posted photos on photobucket, I rotate to the correct orientation, but they revert back to upside down when posted. I did google this problem, and there were a few ideas to fix it.
Paul.

Paul,

I think you hit the nail on the head. I took the photos with an iPad mini. It is my first Apple product and I've only had it a few months. I will have to pay more attention in the future and flip the photo in a photo program before posting, if necessary.

Re the fitting, I guess my issue is really where to get ANY such fitting, barbed or not.
 
Small air line fittings are available from pneumatic valve suppliers like Festo, I think that the smallest thread was M5. But I just usually make mine from some brass.

Paul.
 
Small air line fittings are available from pneumatic valve suppliers like Festo, I think that the smallest thread was M5. But I just usually make mine from some brass.

Paul.

Hi, Paul,

Thanks... I should have realized that, as my employer is a long time supplier to Festo! :wall:
 
On my first engine (an EZ runnner) which is what got me to this forum initially, I had some aluminium tube which I think was the spout off a cheap oil can so I just pressed it in. No barbs are required at the pressures involved. I poked the end of my air duster in one end of some hose and the engine into the other. That held enough to get up to about 8000 rpm....
 
On my first engine (an EZ runnner) which is what got me to this forum initially, I had some aluminium tube which I think was the spout off a cheap oil can so I just pressed it in. No barbs are required at the pressures involved. I poked the end of my air duster in one end of some hose and the engine into the other. That held enough to get up to about 8000 rpm....

Hi, Rod,

Thanks... Seems like maybe I am making too much of it...
 
Hi, All,

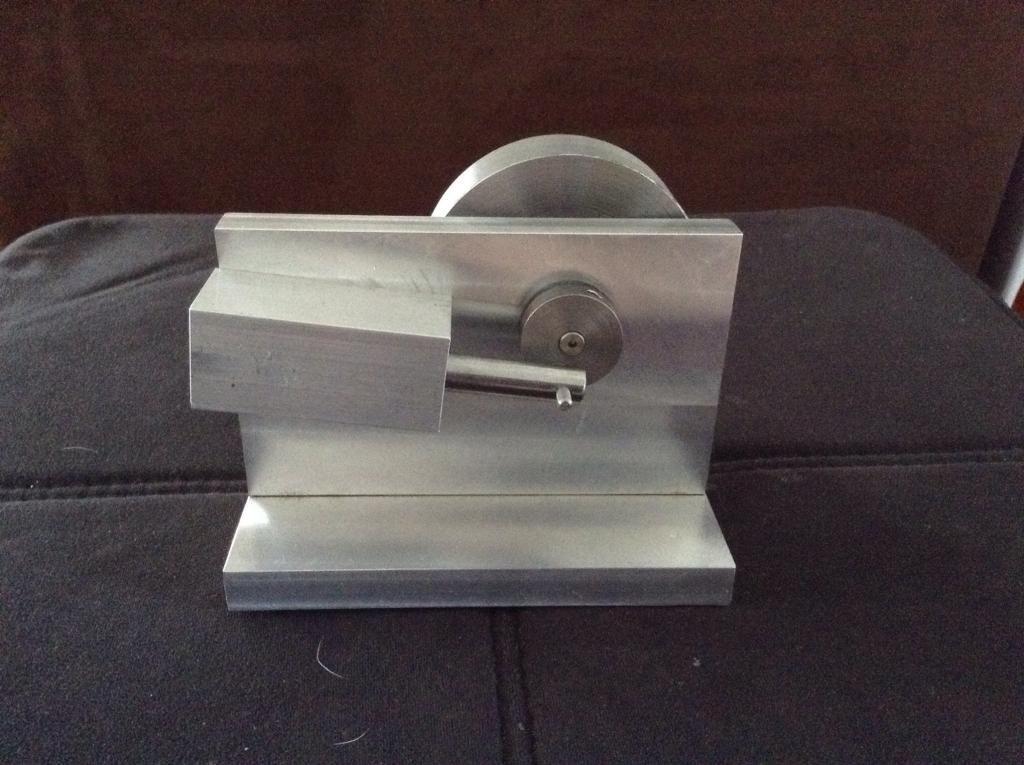
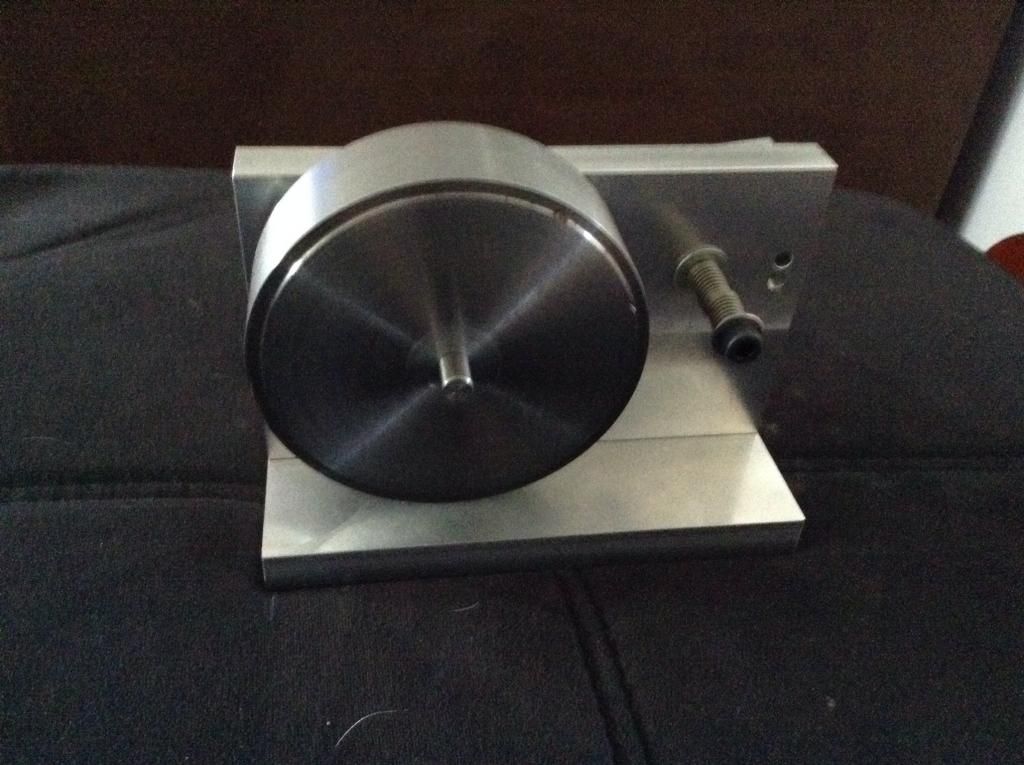
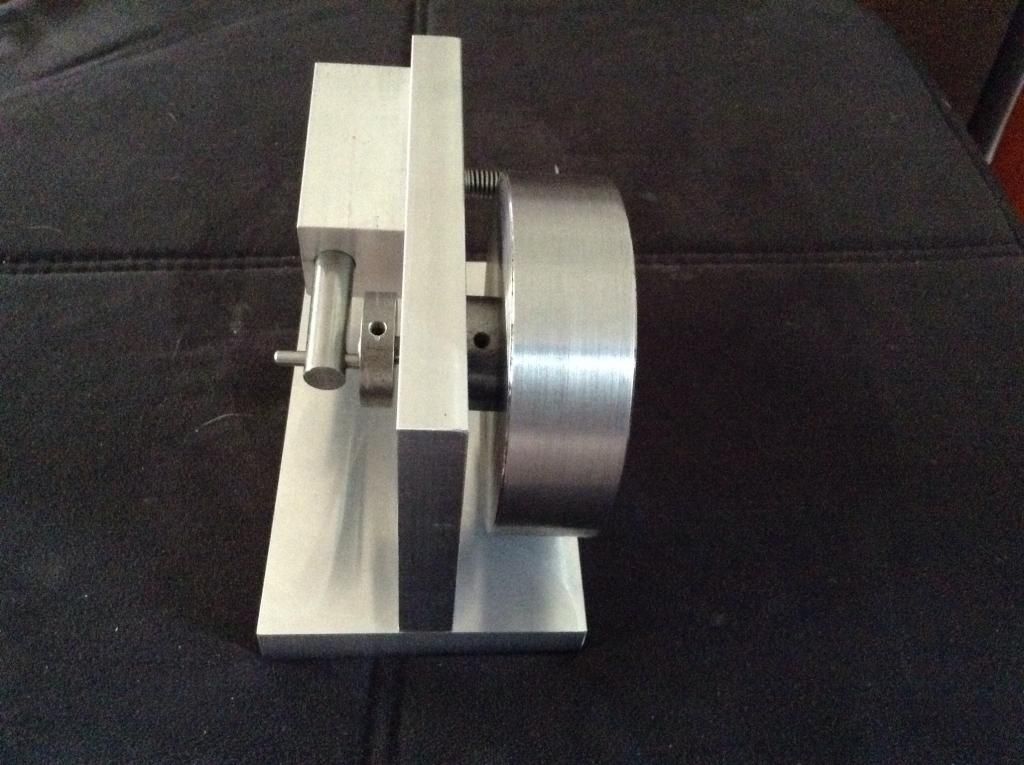
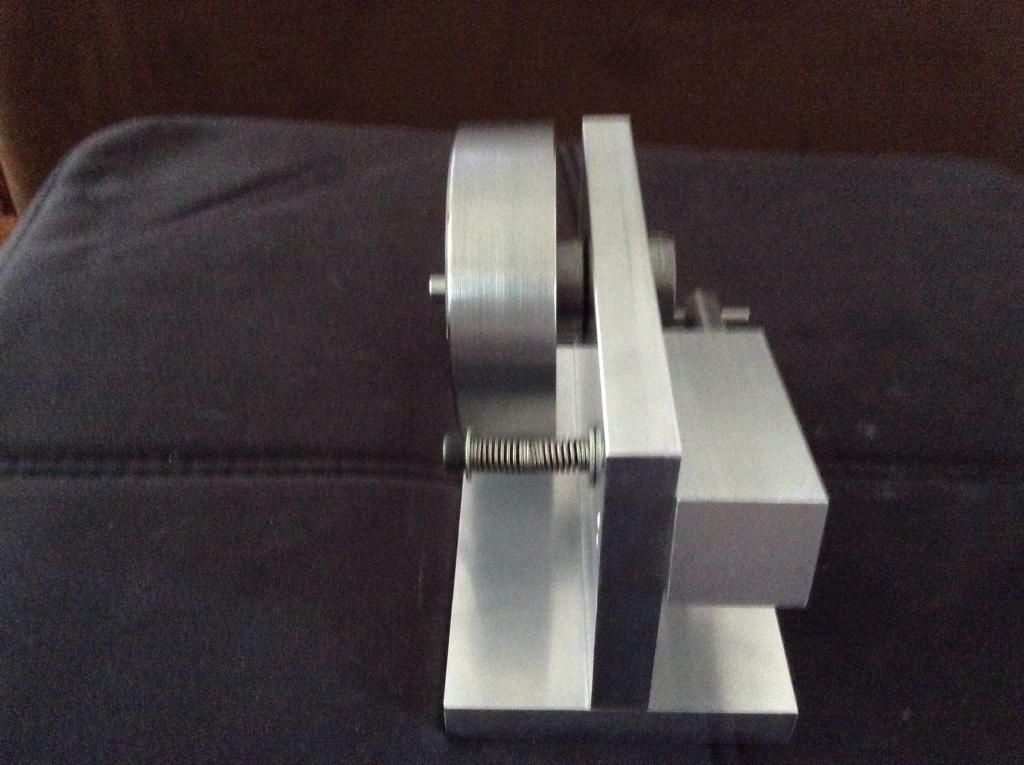
Well, I just finished machining and assembly of my Lucy-style wobbler this afternoon. I didn't chase down the air fitting yet, so I just held my air gun against the intake opening where the fitting would thread. I got half a turn, and then nothing. After numerous repeats, I realized that there was a little binding going on in a few spots, so I corrected them. (Opened the hole slightly in the piston and polished the crankshaft further to reduce it's diameter. In spite of being really careful to drill the crankdisk square, and making a little fixture to make sure it went in square when I pressed it in, it was still a bit off.) Now it makes about 1 3/4 turns but won't continue. I guess tomorrow I'll rig up the air properly so I can take some pictures/video while it's failing to run.

The one big variable is the spring. I tried to use a spring about the same wire diameter and spacing as the original plans, but whether I succeeded is anyone's guess. To compensate, I bought screws of various lengths so I can use them to adjust tension.

BTW, these original plans from Western Kentucky University have a few errors. There were numerous missing dimensions, most of which could be calculated from the other parts, but one of which could not. (This was the horizontal position of the crankshaft hole in the valve plate. I ended up scaling it from the drawings.) There were also some errors (wrong drill size specified for tapping a 10-32), and some things that I would have done differently (for example, using 10-32 threads for strength in aluminum. I would have specified a coarser thread, but this is a moot point since that was the wrong drill size issue [yes, I should have checked it myself BEFORE drilling] and I ended up going to 1/4-20.) I mention all this primarily in case someone else is using the plans. They were free, they were clear, and they got me started, so I'm glad they were available.

I'll post some photos/video tomorrow, and then maybe those of you with more experience than me (i.e., everyone on the site) can feel free to make suggestions...
 
Hi...

I am posting some not so great photos below. I plan to add an air fitting tomorrow for a better test. Any comments welcome!

LucyWobbler1_14-Aug-2014_zpse7633ebc.jpg

LucyWobbler1_14-Aug-20141_zpsfa971e85.jpg

LucyWobbler1_14-Aug-20143_zpsf30980b9.jpg

LucyWobbler1_14-Aug-20142_zps003db15c.jpg
 
Looks great...nice and clean looking.

Careful, when you get this running you will be hooked!

Save your pennies!
 
Looks great...nice and clean looking.

Careful, when you get this running you will be hooked!

Save your pennies!

Thanks, Chris...

I got a fitting installed and I can get about 20 turns out of it. If I "help" by adding some speed to the flywheel, the motor will gradually slow down and stop. I assume that this means I am losing energy to friction, so I need to recheck the crankshaft for binding tomorrow. Hopefully that's the only remaining issue...
 
What is your flywheel made out of it?


Sent from my iPhone using Model Engines
 
What is your flywheel made out of it?

Jyman,

It is made from "free-machining", leaded steel. The main body of the flywheel is 3" in diameter, and it's 1" wide. The drawing calls for a piece 1 1/4" wide so that a 1/4" wide collar can be turned for the set screw, but I only had a 1" thick blank. So I turned a piece of 1" with a 3/4" diameter, 1/4" thick shoulder, bored the main flywheel and pressed them together.
 
I got a fitting installed and I can get about 20 turns out of it. If I "help" by adding some speed to the flywheel, the motor will gradually slow down and stop. I assume that this means I am losing energy to friction, so I need to recheck the crankshaft for binding tomorrow. Hopefully that's the only remaining issue...

So, I got it working! I needed to reduce the end play on the crankshaft and polish it to get the diameter down a bit, add a few strategically placed drops of oil, and then it ran fine. Well, I guess it's running fine. It takes it a while to build up to speed. I assume that's normal since it has to accelerate the flywheel. I checked one of the early runs and was reading 1300+ RPM with an optical tachometer; it seemed to be faster in some later experimenting but I didn't measure it. I made a video with an iPad, but I am having a bit of a challenge uploading it. I'll post a link when I do...
 
Finally... I got the video uploaded!

You can see it here... (I hope... at least I can see it here when I go in from HMEM...)
 
Way to go dude...keep um coming!

Thanks, Chris! I learned a lot building this, even though it is incredibly simple and forgiving compared to some of the others that people have posted here. So I need to start thinking about the next one... something simple, but maybe a bit more complicated than the wobbler...
 
So I need to start thinking about the next one... something simple, but maybe a bit more complicated than the wobbler...

Excellent looking and running first engine. For your next one I would suggest one of Elmer's engines. There are lots to choose from and many are good for beginners. I have built six of them so far with more to come. Plans can be found at http://www.john-tom.com/html/ElmersEngines.html.
 

Latest posts

Back
Top