gingery metal mill

Home Model Engine Machinist Forum

Help Support Home Model Engine Machinist Forum:

This site may earn a commission from merchant affiliate links, including eBay, Amazon, and others.

Norman

Well-Known Member
Joined
Jul 21, 2010
Messages
63
Reaction score
1
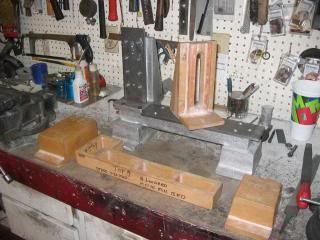
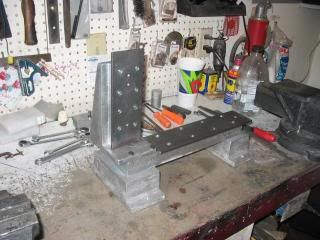
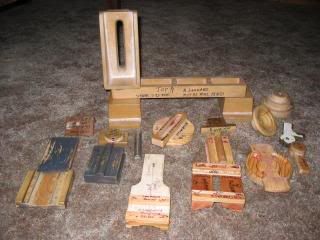
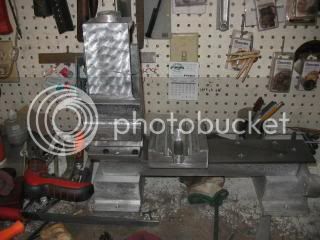
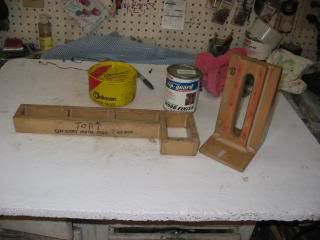
I started to make the patterns for the mill a couple of days ago. So far the main bed and the spindle tower are made. I may do some casting in the next couple of days.
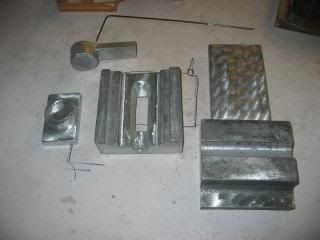
The patterns are made from fiber board there is no grain to worry bout the stuff is easy to cut and sand. I use wood glue and staples to hold the parts together.
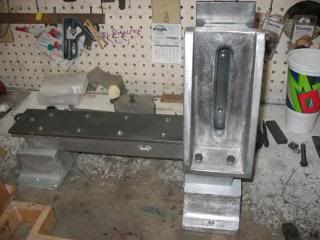
For miss matched parts I use bondo to fix the problems. I paint the parts in water based varnish 2 coats then coat the part in 2 coats of Johnson's paste wax, hand rubbing them for a fairly slick finish.
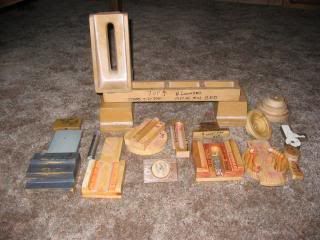
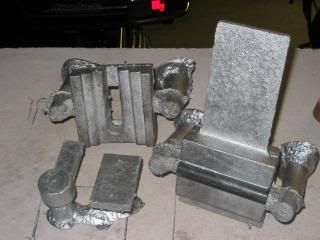
I made the bases tonight just put the first coat of varnish on, they should be ready to use Saturday, so I'll be doing some casting as long as it don't rain,it never rains here in the Texas panhandle unless you want to go ride the motorcycle or cast metal???? Living in tornado alley can be pretty hair raising at times.
Norman
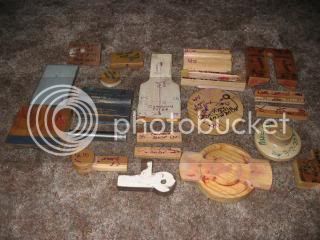
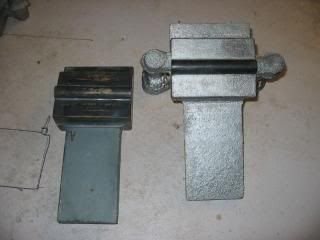
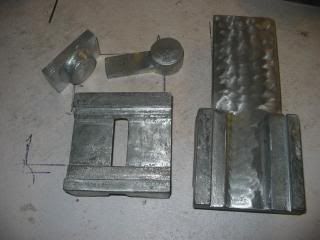
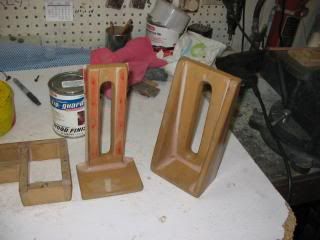
the base and the spindle patterns.
mill001.jpg

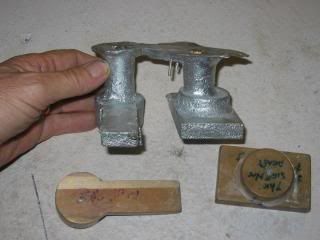
the spindle pattern is a split pattern. I like casting these it's more fun to see if I can get it out of the sand with out messing it up.
mill002.jpg
 
Been casting the head stand,the bed, and the 2 base mounts.
I have the steel ways installed on the head stand and the bed along with the bed mounted on the 2 bases. I now need to make the pattern for the spindle head.
I'll put up a couple of photos at a later date .
Norman


Very nice patterns Norman, and I am looking forward to seeing your castings and progress. I started a Gingery Lathe several years ago, but kids and rennovations got in the way.
 
Here's some photos of the mill.
patterns and the parts.
mill005.jpg


mill004.jpg


mill003.jpg

On the back side the bed has a little flaw where I cut off the pouring gate a small void. I'll not worry about it. I had to cast the head stand 2 times I had a nasty void on the first one at the base of it. I did the small base casting 2 times the first pour, I didn't have enough metal in the pour I did fill the mold but very little metal was in the gate maybe 1", it wasn't real good looking at the bottom of the base . So I redid it, both bases are 1/2" thick instead of 1/4" thick. The reason is, I didn't have 1/4" material to make the patterns and didn't feel like cutting them down to the 1/4" thickness,I did have the 1/2" material so I used the 1/2" MDF instead
they should be a little more stout?
mill007.jpg

Now its back to pattern making I need to make the spindle head pattern next.
 
Thanks for posting, Norman - it's coming along brilliantly!
 
Thanks for the reply.
I made the head spindle pattern today. I just put the first coat of varnish on about 10 minutes ago. I use the water based varnish it doesn't smell the big plus is clean up is with water once dry the varnish is water resistant. On this pattern the book calls out for the front part where the spindle goes through to be 4 3/8" wide by 4" tall.
The measurement should be 4 3/8" by 3" if made to the plans then the bottom part of the head spindle will need extra long bolts at least for the one pinch bolt that goes on the bottom. I hope I didn't mess up as I did it 3" instead of 4". Looking at the photos of the mill shows it to be 3" as far as I can tell.
Norman
 
Norman,

For your project to be even more scratch built, you need to grow the trees and mine the ore. :big:

I will be watching your build closely.

SAM
 
Sam That's funny! :big: I am working under the shade of an oak tree as it's pretty warm working in the man cave this time of the year. Don't think that I haven't eyed that tree for some lumber for pattern material!
That poor tree has some of the leaves scorched from the foundry in operation. I also have some scorched grass from the OOOps! ;D when pouring the aluminum.
 
Scorched grass better than scorched concrete! Ask me how I know...
 
I don't have to ask I have first hand experience, patched spot in the drive where I spilled some aluminum , that's when I figured I'd better move it to the grass, good thing, I've had molds leak and a couple of times spilled more liquid metal when pouring excess metal into an ingot mold. The small pitting in the drive is not the bad part of aluminum being spilled, it's the flying liquid aluminum that can hit you after the super heated steam from the concrete throws the metal everywhere.
Its a lot worse than putting a lit firecracker in fresh cow poop and seeing who will not run before it goes off. :big:
 
Here's all of the pattern that have been made for this mill got a few more to make. Bunch of small patterns some patterns get used for multiple parts.

mill011.jpg


mill012.jpg


mill013.jpg

Not pretty but should work fine. I write notes on the patterns to help me remember where things go. I tried using spray primer on one pattern then realized that I was covering up the notes so back to brushing on the varnish.
I'll have to start casting some of these soon.
Norman
 
instead of primer why not spray on clear coat car paint to get the smoothe finish im cyrrently trying to make some patterns for brian rupnows flyball governor and a 2" curved spoke flywheel for the twentieth time and this time i havent stuffed it up
looking forward to seeing the end result of this thread id love to have one of these machines and be able to say i built it
the best of luck with the build
john
 
John
I'm using materials that I have on hand trying to get rid of old spray paint and other coatings that will work that have been in the cabinet.
aka being cheap!
The finish on these parts are not real important to me, only where they need a good finish do I take extra care, well sort of. :big:
Using home made sand for casting I can't expect a real slick finish at least I don't. My sand is play sand with cat litter for a binder.
I'm going to start casting again today I'll try knocking out the head slide( not sure if that is what its called) of the mill and a couple of hand wheels, parts that are going to be needed to keep plunking on with building.
I need to go get some waste oil at my friendly oil changer's store(free oil!) and a little diesel( expensive almost $3.00 a gallon here) for starting the foundry on then its sand pounding time.
thanks for your reply good luck on your project.
Norman
 
Some of the castings I did late yesterday.
Fresh out of the sand. I broke off the little aluminum wires that form from the venting process.
mill018.jpg


mill017.jpg

The steel core is still in the part I'll take it out to use on the other half of the spindle slide that I'll be casting soon.
mill014.jpg

They all turned out good enough to use.
 
what play sand im intreagued now on two counts
1 do you grind up the kitty litter before adding it to the sand and 2 what raatio do you use in sand to kitty litter its gotta be cleaner than digging sand up from the old foundry near me mums house its full of coal dust i think they used to do pig iron there
regards john
 
John
The play sand I use is from Walmart about $3.00 for a bag is silica sand I sift it through screen wire. It is pretty clean hardly any pebbles in the bag of sand. This sand is already damp so when I add the water I don't need to use much. I use clumping cat litter its called "Special Kitty" also from walmart this stuff is made from bentonite. I grind it up in a blender and sift out the pebbles and regrind it until its in powder form.
I mix 10 lbs of sand (damp)to 1 lb of litter. I then mix it up dry( remember the sand is damp) then add water to make it sort of feel like brown sugar, let it set for a day and keep it sealed container, then remix it by hand it is then ready for use.
I live in a dry climate so I have to keep the sand in sealed containers or it will dry out completely. I use old ice cream buckets,tupperware container, and bucket that I line with trash bags so I can keep them air tight.
 
cheers fella im off to me local shpos in the morning to get me some of this gear with livving on this damp little island we call the uk i dont think theres any danger of the sand drying out so ill store it in me cement mixer its clean enough to mix food in but not for the want of trying and covered up it should be ok out of the way of me daughter coz i dont yet know if kitty litter is harmful to kids who like eating sand th_wtf1
regards john
 
johnthomp said:
cheers fella im off to me local shpos in the morning to get me some of this gear with livving on this damp little island we call the uk i dont think theres any danger of the sand drying out so ill store it in me cement mixer its clean enough to mix food in but not for the want of trying and covered up it should be ok out of the way of me daughter coz i dont yet know if kitty litter is harmful to kids who like eating sand th_wtf1
regards john

John,

I would keep it covered up so a cat won't use it.

SAM
 
the parts cleaned up ready for some machining
parts sitting on the mill
mill021.jpg

back side
mill020.jpg

front side
mill019.jpg


cleaned up fairly nice.
 
haveing heared the old saying the first mill was made without a mill is it possible to build this one without useing a milling machine or am i being daft
regards john
 
Back
Top