It might be a bit late to start a thread on this I guess because I have done a lot of the work already.
I've been interested in Stirling and Hot Air engines for a long time and in about 2002, my wife bought me a Stirling Engine kit for my birthday. It turned out to be a box of barstock (cut near to size) and a set of drawings. At the time I had only hand tools and no chance of getting a lathe or drill press so I put the box away for the future.
Fortunately I now have the space and over the last couple of years have bought and been getting familiar with some machines (Myford 'M' Type, Drill Press and an old stripped down Denford Triac which I have rebuilt).
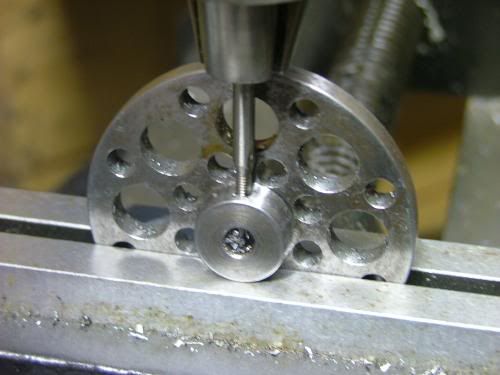
I have recently been making some progress on the Stirling engine. The part with the most machine operations so far has been the cooling block. It took me an age to drill the 102 x 4.1mm holes.
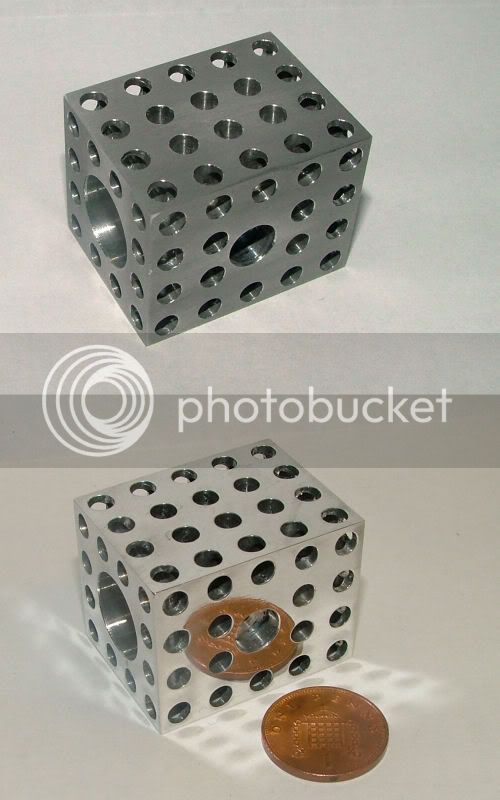
Anyway, this being my first proper engine, I want to give it a bit of a shine so I read with interest the tutorial on polishing which rcplanebuilder has done. Having bought a small mop bit for my Dremel (not actually a dremel but almost identical) and some metal polish (can't get MET-ALL in the UK so bought PEEK instead) I set to it last night and am pleased with the results. Here's a before and after pic.
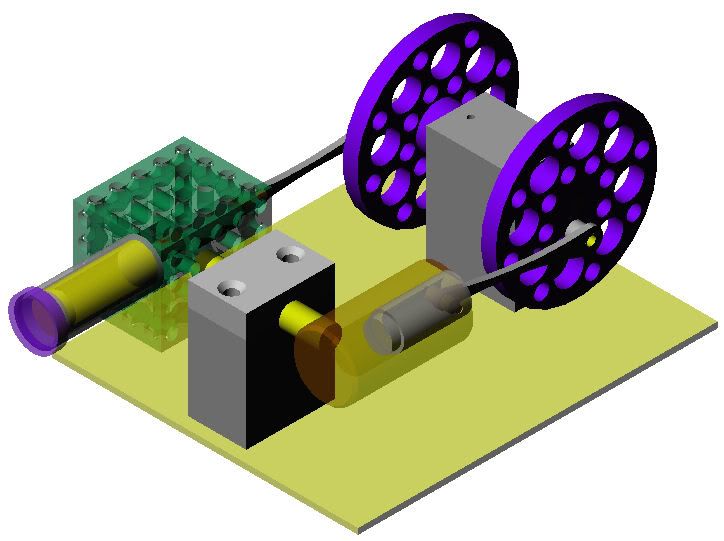
I'll add some more photos as I get on with bits but here's an Alibre representation of what it might look like assembled.
I've been interested in Stirling and Hot Air engines for a long time and in about 2002, my wife bought me a Stirling Engine kit for my birthday. It turned out to be a box of barstock (cut near to size) and a set of drawings. At the time I had only hand tools and no chance of getting a lathe or drill press so I put the box away for the future.
Fortunately I now have the space and over the last couple of years have bought and been getting familiar with some machines (Myford 'M' Type, Drill Press and an old stripped down Denford Triac which I have rebuilt).
I have recently been making some progress on the Stirling engine. The part with the most machine operations so far has been the cooling block. It took me an age to drill the 102 x 4.1mm holes.
Anyway, this being my first proper engine, I want to give it a bit of a shine so I read with interest the tutorial on polishing which rcplanebuilder has done. Having bought a small mop bit for my Dremel (not actually a dremel but almost identical) and some metal polish (can't get MET-ALL in the UK so bought PEEK instead) I set to it last night and am pleased with the results. Here's a before and after pic.
I'll add some more photos as I get on with bits but here's an Alibre representation of what it might look like assembled.
") - Regarding reduced cooling effect, I never gave it a thought :big:
- Regarding reduced cooling effect, I never gave it a thought :big: