Fixing a three point steady

Home Model Engine Machinist Forum

Help Support Home Model Engine Machinist Forum:

This site may earn a commission from merchant affiliate links, including eBay, Amazon, and others.

SBWHART

Project of the Month Winner!!!
Project of the Month Winner
Joined
Jan 17, 2009
Messages
887
Reaction score
81
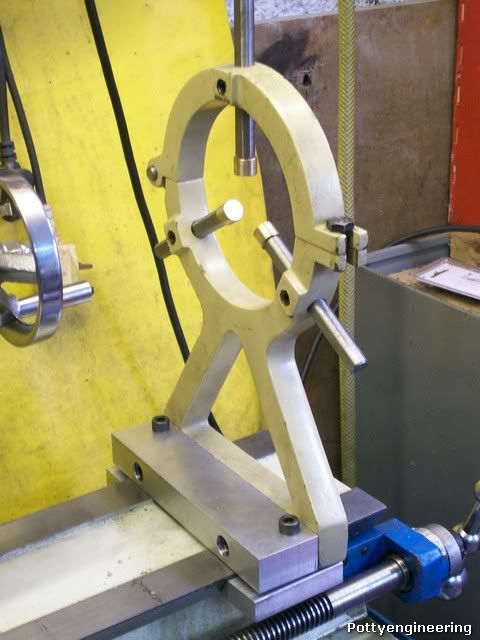
The three point steady as delivered with my lathe when new a few years back now has a lot to be desired I don't like its design and build quality at all, but I didn't worry too much about it at the time as its one bit of kit you don't use a lot, in fact the one and only time I've used one was way back in my apprentice days.

But I now need one to trim the 3 3/8 dia copper tube down to length for my boiler, it has to be square and neat.
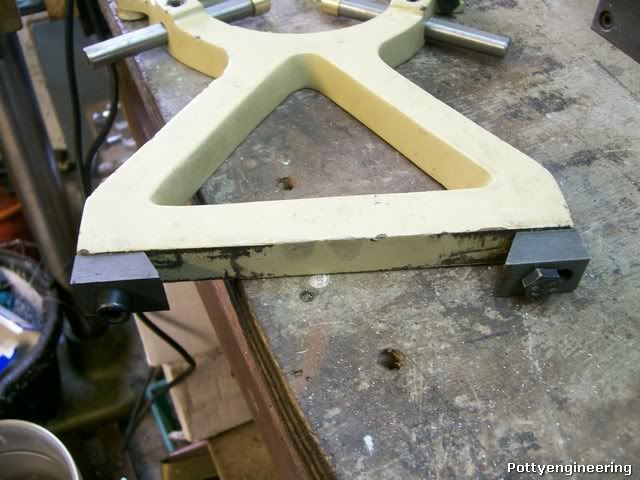
Here's the steady.

100_3671.jpg


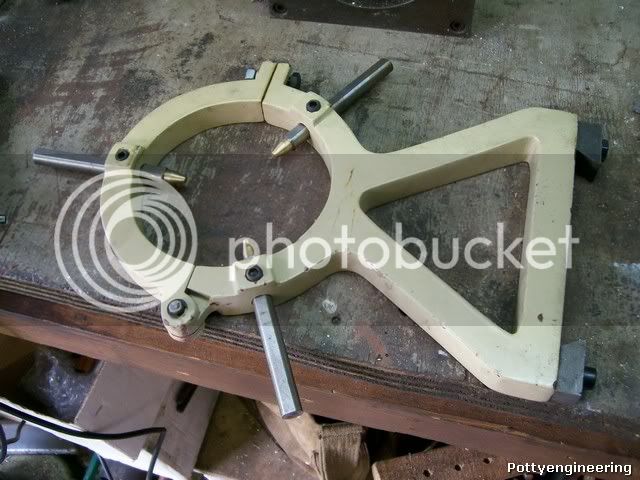
What wrong with it well for a start when it's clamped on the lathe it wobbles more than Dolly Parton on a bad bra day, the hinge is very sloppy the clamp doesn't pull up tight on the lathe bed, and those pointed steadies are just not right, I don't think the frame is substantial enough, I cant do anything about the frame but the other things I can.

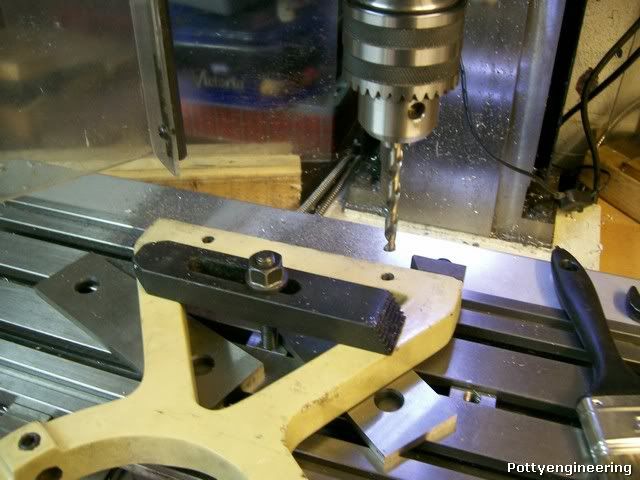
To fix the hinge I opened the hole up from 8mm to 3/8" first with a letter U drill then a 3/8 hand reamer, and fitted a 1mm copper spacer to take up the slide slop.

100_3673.jpg


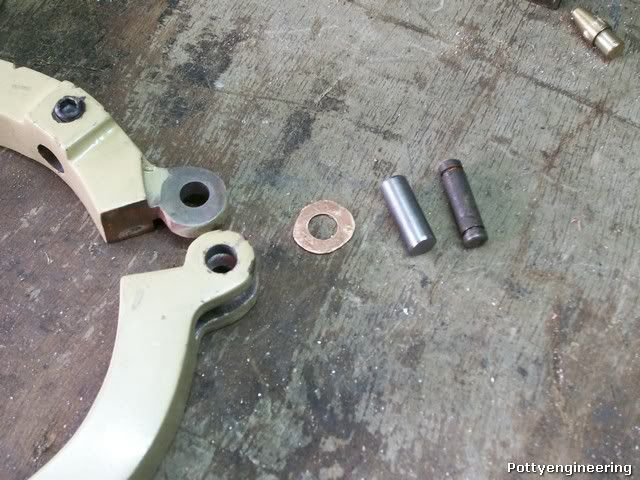
The rusty pin is the one that was supplied.

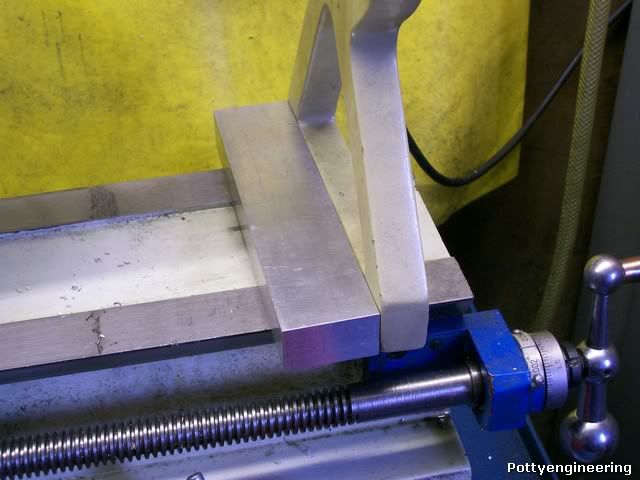
The points on the steadies are just brass I thought they would be screwed in but No they were glued in place, once I worked that out I managed to nock them out. Then turned up some new ones that will give a nice supporting area and fixed them in place with supper glue.

100_3672.jpg


100_3674.jpg


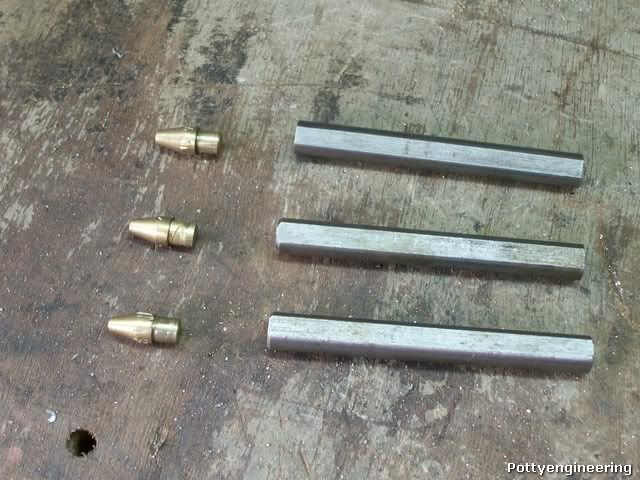
As the new brass bits have a larger diameter than the rods they have to be assembled from the inside, they wouldn't assemble as the bars had just bin left as parted off no chamfer, back in the lathe and a chamfer was added: job sorted, the build standard of some Chinese made parts have a lot to be desired its a great pity as people remember the bad things and not the good.

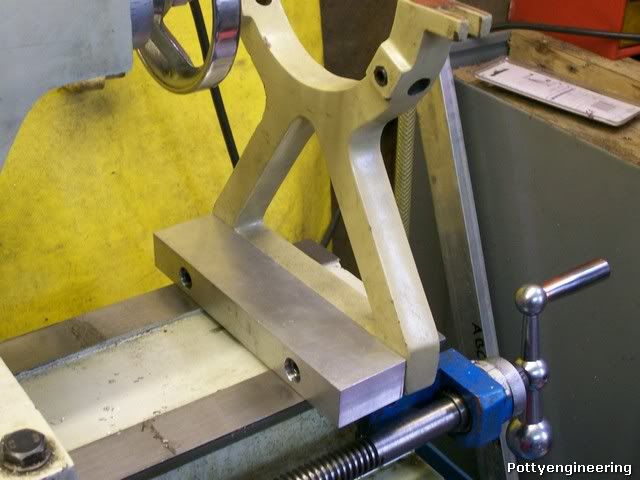
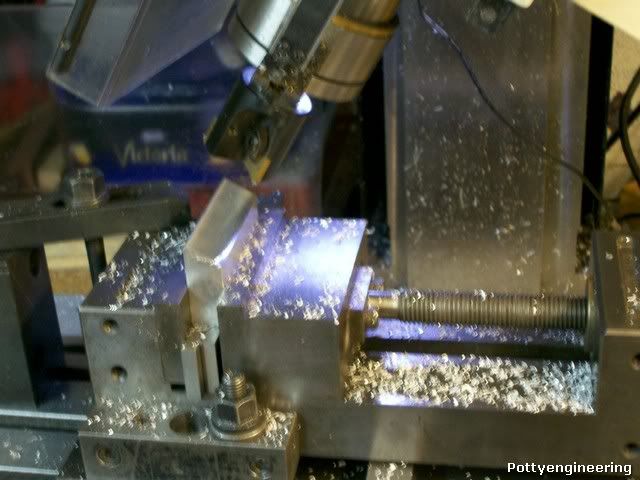
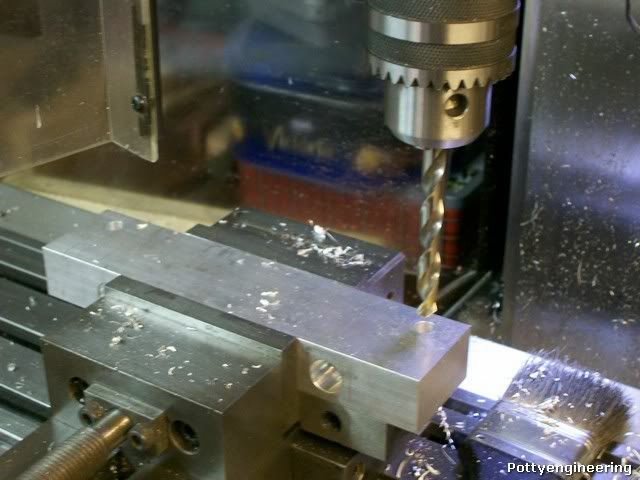
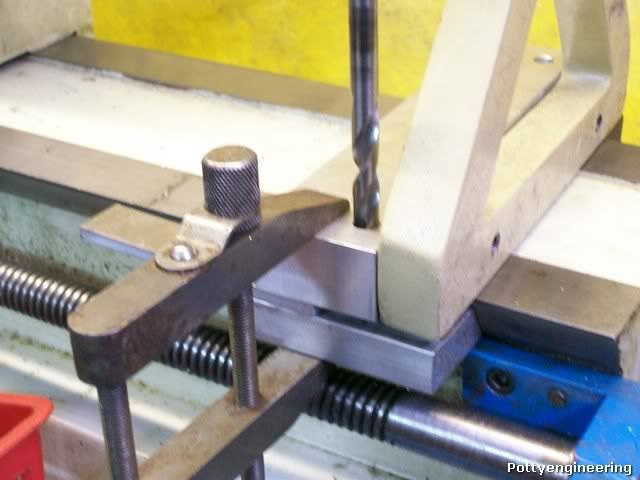
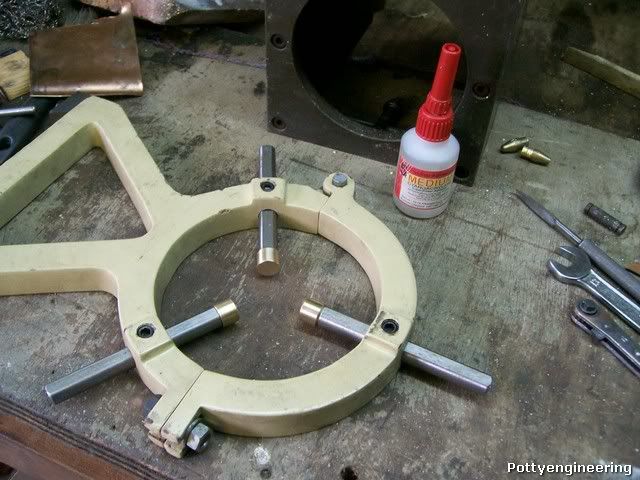
I'll make some new clamping blocks to fix it firmly to the lathe, but thats a job for tomorrow.

Cheers

Stew


just a thought why not put small ball bearing for the tips if you have them. i find them in old vacuums and such for free


I did think of adding ball bearings, but decided against it as I'll be running the lathe on slow speed to trim the boiler, and I just don't see me having much call for using the steady that much, if a job comes along though that having bearings would help, I would go that way.

Cheers

Stew
 
I've read that ball bearings are to be avoided on a steady. If any swarf gets in their path, the bearings will tend to press it into the workpiece. Solid points on the steady will tend to sweep the swarf aside.

Caveat: I've never verified this myself. It's offered only to stimulate a discussion on the point since I'd like to see this issue resolved.
 
Hi Stew, just a pic of a home made steady I use for trimming up tubes.Its just a revolving head with a bearing and three adjustable screws took no time to make and gets round the problem of pick up on a fixed steady .
regards Frazer

001.JPG
 
Out of interest how would you go about fixing ball bearings to the ends of the steadies ?

Cheers

Jim
 
Thats a very valid point Marv, I can see swarf being a problem in that way, on multi spindle lathes we used things called roller boxes to support work for heavy material removal, which were in essence steadies that used roller bearings, but the work in this instance was flooded with cutting oil that I supposed washed the swarf away, you wouldn't get that in a home application.

I suppose you'd have to position the steady away from where the swarf was being generated to try and avoid it getting trapped, or fit wipers in front of the rollers to keep them clear.

Thats an interesting looking steady Frazer you could use it for turning along a diameter.

Jim:- I guess I would slot the end of the bar and cross drill the slot to take a pin that would fix the bearing.

The use of steadies is certainly an interesting topic you don't often see them in used, the only other time I used one was to turn up a shaft for a machine, from memory:- it was about 1" dia by 18" long I had to turn a series of steps along, some to take bearings, it also had screw threads at each end with a keyways, I had a lot of help and guidance from my apprentice master in setting the job up and doing it.

Cheers

Stew

 
Ahhhh, I think the light's just come on, when talking about ball bearings you mean these

bearing.jpg


I was trying to work out how you'd fix a single metal ball to the end ::)

Cheers

Jim
 
That's one of those common misuses of the language - they are properly known as 'ball races'.
 
Ball bearings used in steady rests are usually called rollers.
Precision rollers are purchased in matched sets and they can be rather expensive.

LMS offers a modified to ball bearing steady rest for the small lathes HERE.

You DO need to guard the rollers from the chips.
A piece of thin cardboard taped to the tool side of the steady rest frame
with the center cut close to the diameter of the work piece will do that
quite effectively.

Rick

 
tel said:
That's one of those common misuses of the language - they are properly known as 'ball races'.
Well I object. :) There are TWO races in each ball bearing ASSEMBLY. :)
...lew...
after thinking about I should add: and inner race, an outer race , a cage, and a
bunch of BALLS . :)
...lew...
 
The word "ball bearing" could mean either a single steel ball or a complete bearing here.

I worked inside sales for a company called Gipson Bearing Company for a time in my younger years.
When a customer called for a 7/16" ball bearing it may have been for a 7/16 ID bearing, a 7/16" OD
bearing or a 7/16" steel ball. Our job was to determine which one of those were in need without
making the customer feel that he didn't understand the terminology correctly. The last thing you
want to do is insult a customer.

Rick


rake60 said:
LMS offers a modified to ball bearing steady rest for the small lathes HERE.

Rick

Now thats a better fixed steady than the one that came with my machine, looks nice and robust with screw adjustable steady arms.

Stew

PS sorry about the misunderstood term "ball bearing" its just one of those common usage terms that you need to know the context to get the correct meaning, in this case that wasn't too clear.

Stew
 
Ok now for fixing the clamp set up, what's wrong with it ?,

1: The clamp area is too small to give a stable fix,
2: Its fixed with a dove tail arrangement, one half of which hooks over the back of the bed, whist the other is slotted and your supposed to press this into bed way vee and tighten it down, no way does this pull the steady tight.
3: The dove tail hooks are steel they will damaged to bed ways.

This is it

100_3676.jpg


Quick rummage in my ally stash for some suitable material this is the first bit to increase the clamping area

100_3678.jpg


Drill some and counter sink some 8mm holes in it for cap screws.
Then drill and tap the steady M8.

100_3679.jpg


OK that's the first bit sorted.

100_3682.jpg


Now for the clamps:- put a angle on two nice bits of 75 mm long ally.

100_3686.jpg


Sorry the pics crap.

Then back to the base bit at a suitable position drill two more 8mm holes.

100_3687.jpg


Then with a nice bit of packing clamp so that the angle will pull down on the bed, and with the other end is hooked over the bed with the old clamp, and mark position. (note to self get some transfer punches), drill and tap M8, repeat for the other side.

100_3688.jpg


Thats it Job sorted: when you tighten the two clamps up they pull the steady down onto the bed and because they are ally they won't damage the bed.
All the wobble has gone I will be a lot more confident using the steady now

100_3689.jpg


I can get back to the boiler build know.

Cheers

Stew
 
Stew, :bow: - that's some really nice improvements.

As an aside; I've used my 3 point steady quite a bit to drill center holes in or to face longish pieces of shafting; works a treat for that.

Kind regards, Arnold
 
Thanks Arnold

Now that I've fixed mine it will give me the confidence to use it more often.

Stew
 
I personally would not have put so much packing in the clamps, now when you tighten the clamps you are bending the bolts. I would have put in about .010" then drilled and tapped, remove the clamps and relieve the surface where you had the packing, all but 1/8" on the outside edge this will give you a much better clamping action. JMHO ;)
 
Hi Duckman

Yes your correct I had to put some spacers in their, it works just fine now, it was a case of suck it and see.

Stew
 

Latest posts

Back
Top