Bridgeport - All Dressed Up

Home Model Engine Machinist Forum

Help Support Home Model Engine Machinist Forum:

This site may earn a commission from merchant affiliate links, including eBay, Amazon, and others.

Sshire

Well-Known Member
Joined
Jun 29, 2011
Messages
936
Reaction score
259
All dressed up.

The Bridgeport has been at home for 5 days and I've been busy.
First I sat down at the mill with the manual and went through every procedure.

UPS has been busier than usual here. Packages every day.

After installing the VFD, I bolted on:
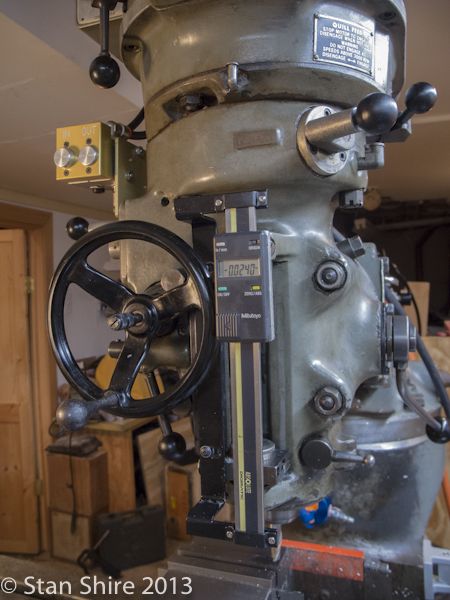
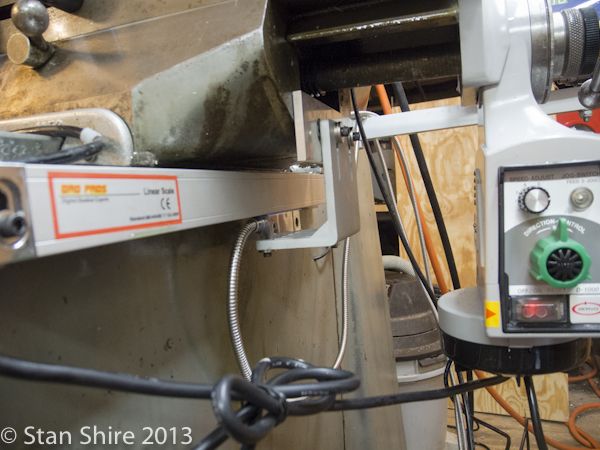
DRO (2-axis; glass scales)
Quill DRO
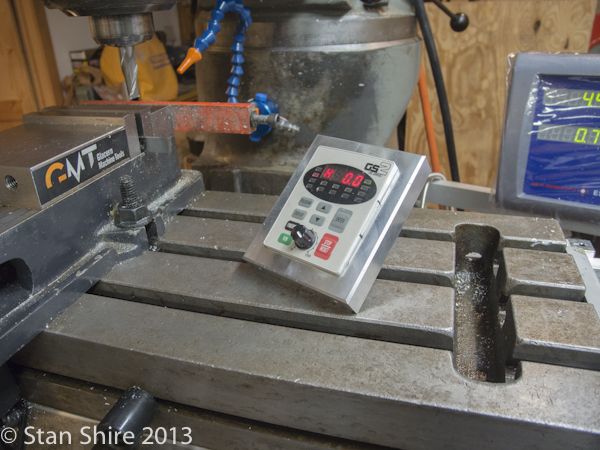
X-axis power feed (Servo Dynamo)


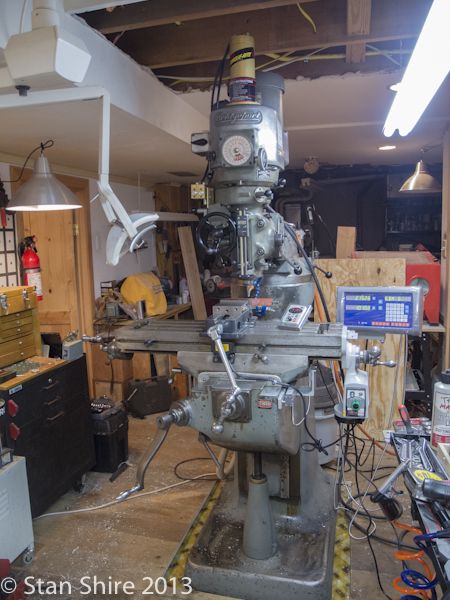
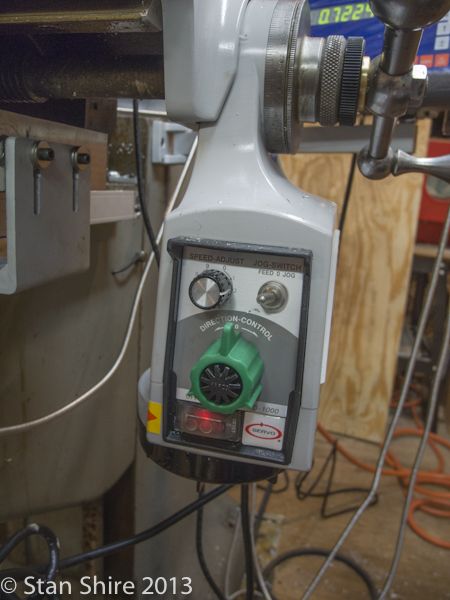
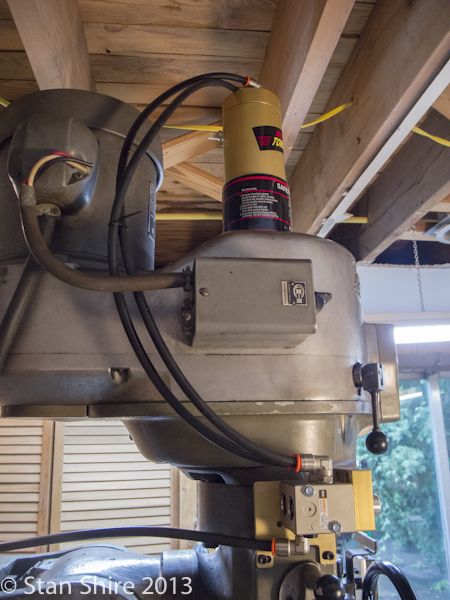
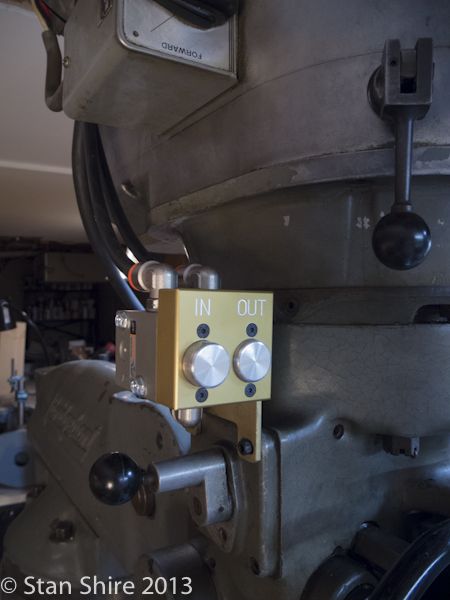
Finally, my shoulder was hurting big time from reaching up to the drawbar. The stepstool was a PIA and it seemed as if I were tripping over it every 2 minutes. Here's the solution. It's not one of the butterfly wrench conversions but designed from the ground up as a power drawbar. Heavy chunk of machinery, built beautifully, great directions and MADE in the USA.


One more project. Clean out the Bijur One-shot oiler and make sure all lines are clear. Then, back to Elmer's Pumping Engine.
 
Stan,
A very well set up machine using some quality accessories. A suggestion? If it were me I'd pull the table off and verify your one shot is also pumping correctly to every point it should. And if you haven't had the table off yet? You'll probably find more than a bit of swarf packed into areas you'd swear it can't get into. It's also a good time to flush out the X,Y nuts using something like a contact cleaner spray, clean the feed screws and table ways, and then adjust the backlash on those feed screw nuts. You'll find it makes an amazing difference to how smoothly the machine operates. It's not a tough job, and should only take a couple of hours. Just adjust the knee to the correct height, remove the handles and bearing supports from each end of the table, unscrew the X axis feed screw, pull the gib and then just slide the table off onto a couple of sawhorses. Flip it over for cleaning and then the re-assembley is just the reverse except you need to run the table all the way in one direction and then tighten the bolts that fix the x axis bearing supports in place. This aligns them to the center of the feed screw and feed screw nuts. You may have factory installed pins that align those bearing supports so that step doesn't need to be done. Normal everyday usage will create lots of wear particles mixed in with old oil, swarf, etc. Try doing the above just once and you'll see what I mean.

Pete
 
Last edited:
Missed the Bridgeport and Heidenhan DRO,I bought for the factory. Sold to scrap merchants when the plant was shutdowned and moved to China 2001.
Now make do with Mini Sakai Mill and Sakai Mini Lathe and a cheapy US$100 Cheapy China Bench Drill Press which had to be coaxed when drilling 1/2" holes.

How nice if i could move to Thornleigh,or Hornsby,Sydney buy a nice landed property with twin garage for car and machineshop..
 
Gus
It's sad when good machinery ends up as a car or a Harbor Freight lathe.

Pete
That is on the list for next week. Thanks for the detailed tips. I also have the Bridgeport restoration manual with lots of pictures. It, however doesn't mention some of the things that you did. Should be even easier with my short table.
I've now done two things to eliminate that dreaded malady, "Bridgeport Shoulder." 1. Power drawbar. 2. Power knee.
The Turbo on the knee has also helped my sore thigh. I no longer have a knee handle to walk into.
I did replace all wipers, did a major cleaning on the Bijur oiler pump, and cleaned and re-greased the crown gear on the knee lift mechanism. Surprisingly, there were only a few small chips in there. This was a very lightly used (same family shop since new in 1969) tool room mill. Obviously run by someone who knew what they were doing and how to maintain a mill. There is one, .2 deep, hole on the table. Nothing else. I saw some tables that looked like Swiss cheese when I was mill shopping.
 
Stan,
No problem on the tips and I'm glad I could help. But my experience is with a Taiwan built Bridgeport clone, so some of my information may not directly apply to a real Bridgeport. But removing that table should match up with how mines done. One thing I should have mentioned and didn't. The X,Y nut assembly would have been carefully aligned at the factory with each axis and it's travel. Yours may or may not be pinned to set that alignment. But either way I wouldn't remove that X,Y nut assembly. I would as I said just flush them out in place with something like that CRC contact cleaner. Also make sure to double check the retaining bolts on those nuts. It's not totally uncommon for them to loosen off, and if they do it starts to put severe wear on the nuts from being out of alignment. It's probably unlikely, but also check the ends of those lubrication tubes too. If someone has been in there before you, things can get slightly out of place. Depending on how your tubes are retained, they can sometimes get moved a bit too far till there riding against the table or Y axis slide. So it's worth just doing a general visual check on all of this while your in there. But it's starting to sound like your mill was very well maintained and operated.

Plus one on that knee feed. I hate those knee handles, but do love having the knee. Oh yeah, one more tip. Always make sure your screws that adjust the knee gib are always tight. Due to all the weight they can get loose with you really noticing it. With the gib moving around and if some swarf also gets in there it can and has locked up a mills knee. Even worse is a broken gib. There's a few threads on the PM forum about just how tough it is to solve that problem.

Pete
 
Last edited:

Latest posts

Back
Top