Associated Engines

Home Model Engine Machinist Forum

Help Support Home Model Engine Machinist Forum:

This site may earn a commission from merchant affiliate links, including eBay, Amazon, and others.

putputman

Senior Member
Joined
Nov 22, 2008
Messages
600
Reaction score
55
There has been a lot of discussion on a couple other threads about the Associated engines and I think a new thread just for these engines should be started.

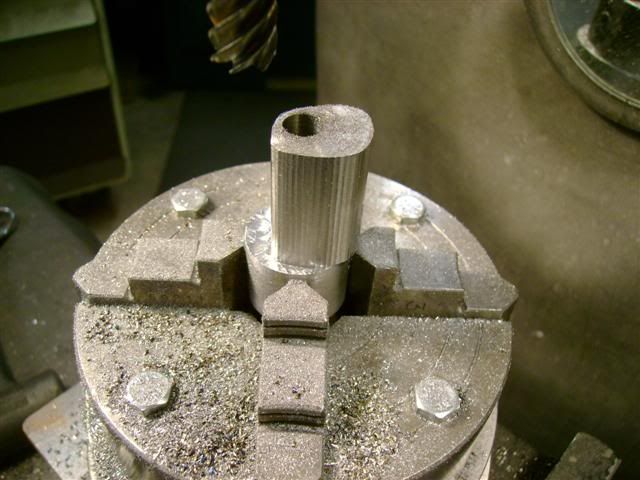
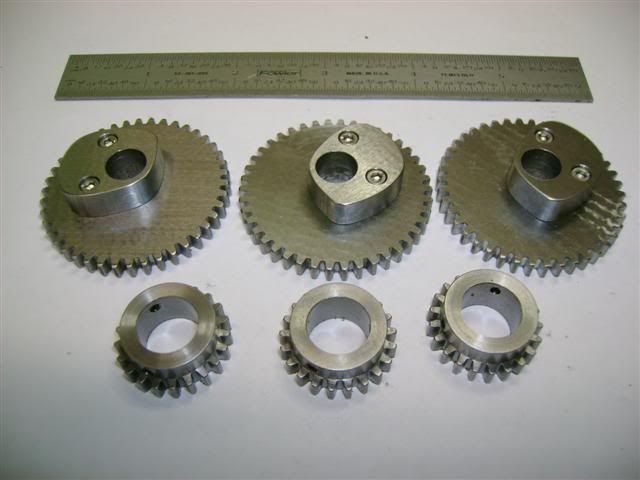
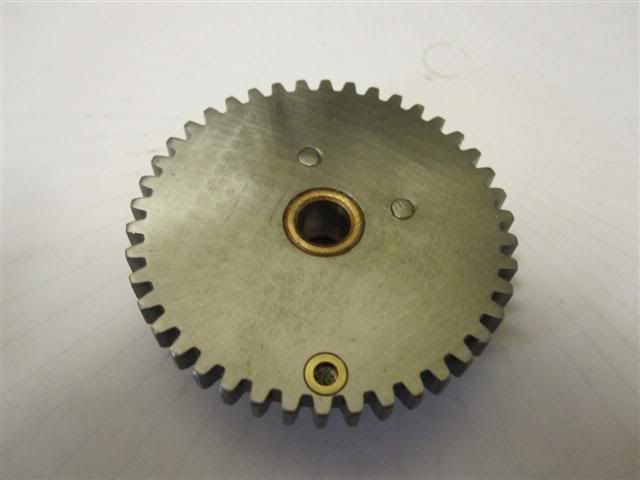
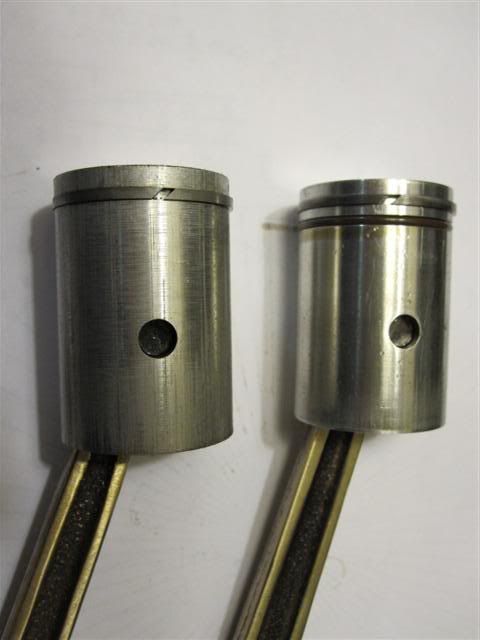
I am in the process of completing three Associated engines. Two Hired Man & one Hired Hand. They are built from some of the old patterns from Paul Breisch. The patterns were purchased by a guy in PA. So far the castings are very good quality and reasonably priced. I have been very happy with mine.


To answer Chad's question from another thread I will post it here.
I have attached a print of the spark plug I made for my Associated engines. So far they have worked very well on all three engines. It will require counter boring the spark plug hole in the head.

View attachment Spark Plug.pdf
 
Hey PPM, you've got my attention. Even though I'm not working on an Associated, as of yet, maybe some of the discussions will help me in compleating the Economy I'm working on. Hopefully I'll find a touch more time to work on it as the days are getting short. Anyway, I look forward to future posts.
 
CMS, the Economy and Associated are very similar engines. I built an Economy some time ago using many of the same setups.
 
Don, I think this will answer some of the questions about the cam & gear.

The prints provided with the castings give you cam points at 15 degrees. I felt that was a little too coarse so I redrew the cam and added points at 5 degrees. It was very easy too blend in the cam with a file and then buff it smooth. I'll post a PFD of the cam layout and cutter movements that you can download.

The cam design that comes with the castings is for the engine that uses an igniter. My castings were for the engines that use spark plugs. It never dawned on me that I didn't need the entire cam surface to run my engines. You could just cut a 7/16 radius from 195 degrees to 30 degrees. That would make the cam easier to cut and provide a better mounting surface.

As I was building three engines I cut the cam extra long and sliced off three cams.

Cuttingcam.jpg


I used a ¼ I.D. X 3/8 O.D. Oil-lite bushing to locate the cam & gear. A couple 4-40 cap screws secure the assembly.

In these photos you can see where I mounted the magnet for the CDI unit. I used a brass bushing to keep the magnet from contacting the metal gear.

Camsongears.jpg


Backofgear.jpg


As far as your question on using o-rings on pistons, yes I have used them. I used them on Tiny I.C. And the Webster engine. You must use Viton o-rings if you wants them too last. They will take quite a bit of heat where the Buna N o-ring will get sticky when they get hot.

For the Associated engines I made a bunch of metal rings using the print dimension that came with the castings. I used one ring on each engine and run them in for about an hour driving the engine with an electric motor. The air cooled engine seated the ring very well and held very good compression. The other two engines would not seat even when trying new rings in them. Rather than making more rings, I added another groove in the pistons too accept a Viton o-ring. That sealed the engine and the compression was very good and the piston worked freely. By having the o-ring behind the metal ring, it should not see much heat at all. Cylinder lubrication will be more critical though.

Piston.jpg


View attachment Cam Layout.pdf
 
Thats some great information. I just finished the fixture to hold the engine base in my vise. I like how you mounted the cam to the gear. It looks like I will be stealing a lot of your good ideas. I also printed the cam pdf. I will be sure to use it.
Thanks,
Don
 
When I built my Associated Hired Man, I loc-tited the cam and gear to a common bushing, and then added a couple of dowels in the locations where the above photos show screws.
 

Latest posts

Back
Top