


arnoldb
Well-Known Member
- Joined
- Apr 8, 2009
- Messages
- 1,792
- Reaction score
- 12
Well, the rocking engine fever bit - and I put myself a target to finish the little Rocker this weekend - start to finish.
Best of all, I actually finished it - and it runs! - making it my first completed and running engine! woohoo1
If you don't want to see the build pics - just go down - the finished engine and (hopefully)video is at the end.
I changed the bush and axle sizes, as well as all screws and threads to fit my available metric tools - so screws were made 3mm, bush ID 4 mm, bush OD 5mm, and out of sheer laziness (I guess), I made the shaft diameter for the flywheel 5.05 mm for a press-fit. Being a bit frugal, I opted to make the base from 2 pieces, rather than the single called for in the construction. The base plate is screwed to the mounting column using a 5mm countersunk screw.
I planned for an early start yesterday, but had to run out & get some drills I would need, as well as some piano wire - one hobby shop in Windhoek actually sells it. Bugger - as I'm leaving, the power goes out, so I just KNOW both the tool supplier for the drills and the hobby shop's systems will be down, as well as total chaos on our streets... So waited until the power cam back on 3 hours later for the run-around.
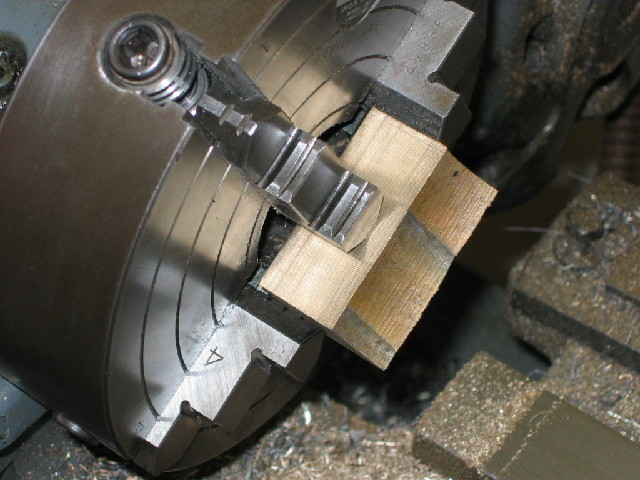
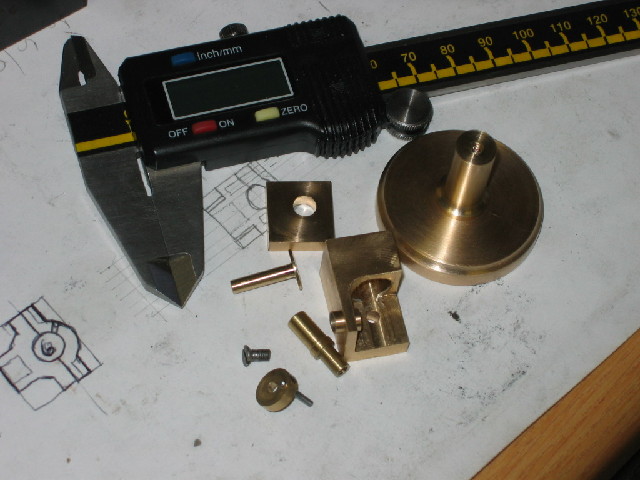
I started with a piece of brass from a longitudinal wedge of brass "pipe" - this had to be squared on all sides:
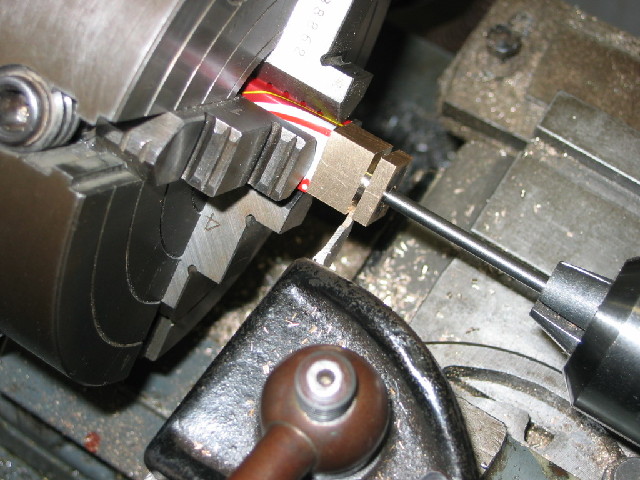
As I don't have a suitable boring bar, and did not want to spend time making one, I drilled the required size hole (5.5mm) for some brass pipe I have right through the block, and parted off the cylinder head - to be soldered back on later:
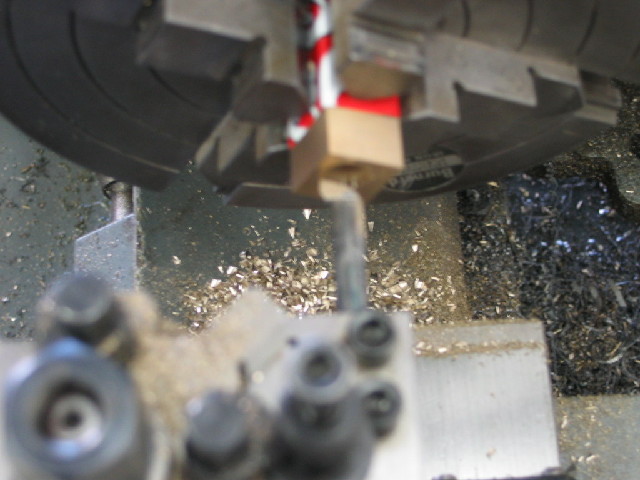
Then I bored the cylinder - I don't have a suitably sized reamer, so boring had to be spot on and smooth. The little boring bar I made last weekend did it's second job:
(Sorry - Photo's a bit fuzzy; my camera insists on picking up the swarf even in macro mode)
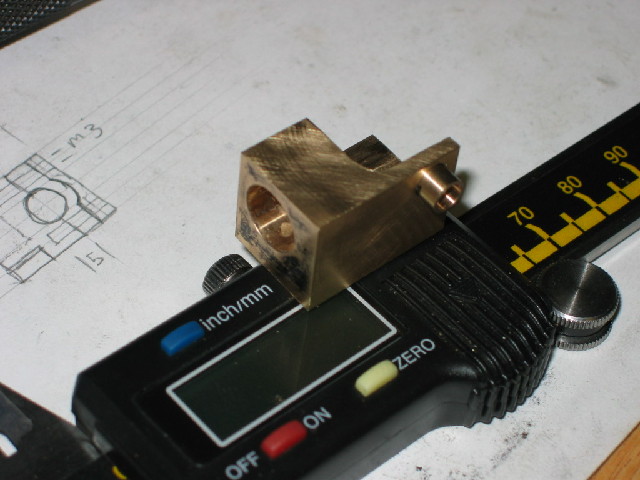
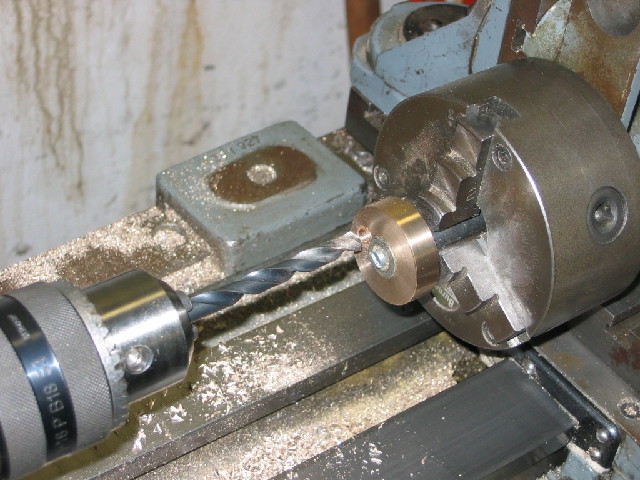
Then I cross-drilled the block for the mounting hole and bush hole; then reamed the bush hole 5mm, but not all the way through the length of the reamer, so that the bush can be a press-fit.
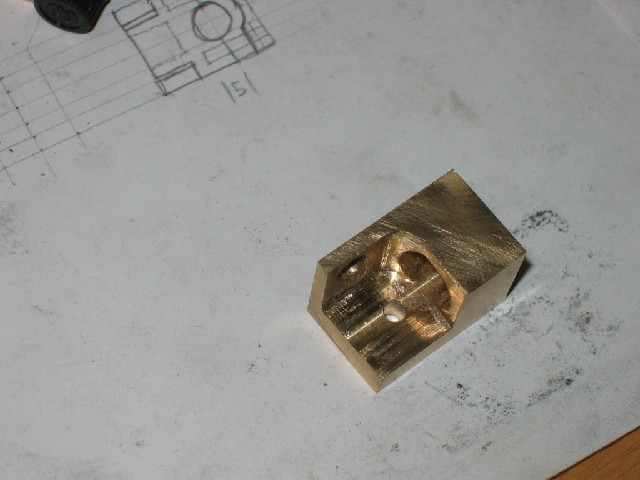
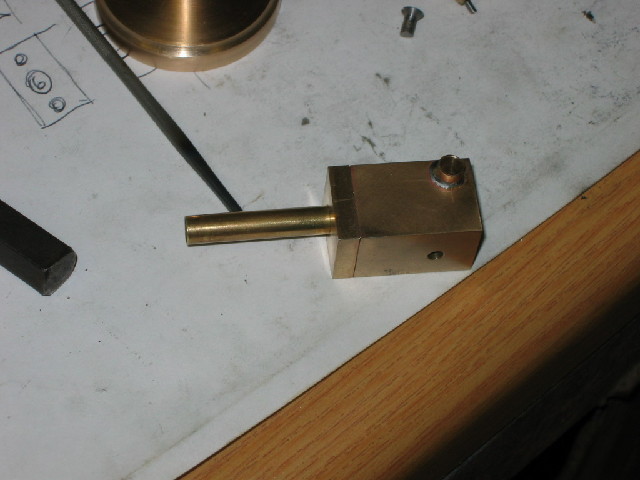
Now the part that I thought would be the most difficult - milling out the cylinder block on the vertical slide - my lathe's headstock bearings are not prime anymore, so milling is at best "risky". This turned out to be a bit bothersome, but I managed; though not a pretty or neat job. The most difficult job was still to come...
Then I turned the little bush - reamed 4mm on the inside and 5mm dead on the outside. Turned out to be a nice press fit in the block. And YES - chasing this little bugger around the floor is no fun at all! :rant:
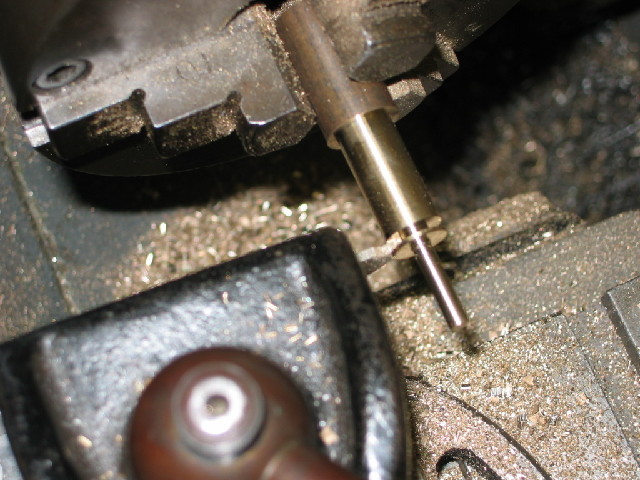
Next up, I turned the little shaft and added it to the pile of junk:
There I stopped yesterday evening - everything was grumbling for grub; my tummy was grumbling, the dogs kept under my feet, and Shrek the 'grey was hollering for cheese & potato - so the motley crew had to be fed & bed.
Actually I'm a lazy rotter, and one thing I like is my Sunday Morning sleep-in - no alarm clock! - so I only woke at 10:00 this morning and had to get a move on.
First thing, I turned the piston. The plans call for the crank and piston OD at the same diameter, so I turned it and finished it to required piston size - A check with the cylinder confirmed proper diameter after some final sanding work. Then I turned the connecting rod to size and parted the piston off at the required thickness (or - in this case - thinness") ):
):
Still having the correctly sized piece of brass in the lathe, i just "touched" the end with the smallest center drill I have - then with dividers set to the correct size, marked a radius from the center hole for the crank pin. A quick transverse scratch from a toolbit in the cross-slide, and X marked the spot for the crank pin. Then I drilled clearance through the center and countersunk for a 3mm countersunk screw. - Another problem popped up here; I didn't have 3mm countersink screws (like I thought I had!) and it's head would have been too big anyway. Did the next best thing, and turned the head of a cheese-head 3mm screw down to the required size and counter-sink - problem solved.
Then I tuned the base and pillar from brass - nothing special; just plain turning (anyway, I was on a roll & forgot to take pictures :-[ )
More pieces added to the "junk pile" :
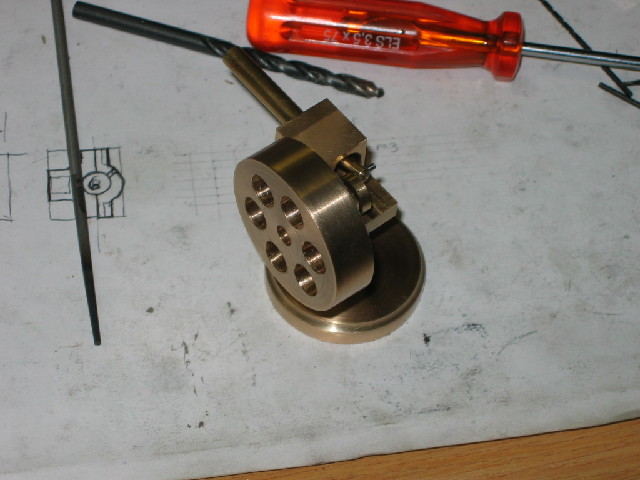
Next up was the flywheel - simple turning; I just faced it both sides and drilled & reamed a 5mm hole in the center. Then turned a mandrel with a nice shoulder on some 1/2" rod with a 4mm thread, and mounted the flywheel on that. Turned OD. Then on to the vertical slide & dividing head with chuck containing mandrel & flywheel - drilled the 6 holes. Next picture shows first hole drilled - the drill - chuck is in the headstock, an I didn't mid drilling through the washer either:
Next some soldering needed to get done - I cleaned everything of all oil, then with an ear-bud coated in oil, I wiped the cylinder bore and around the bush/block. A ring of 60/40 solder around the bush, heat up the block/bush from underneath & it just flowed nicely in. For the cylinder head, I made a ring of solder and placed around the bore. Then put the cylinder head on top. Heated with the propane torch all-round, and when the cylinder head dropped down when the solder melted, just used a piece of wire to "accurately Rof} " locate it & let it cool down.
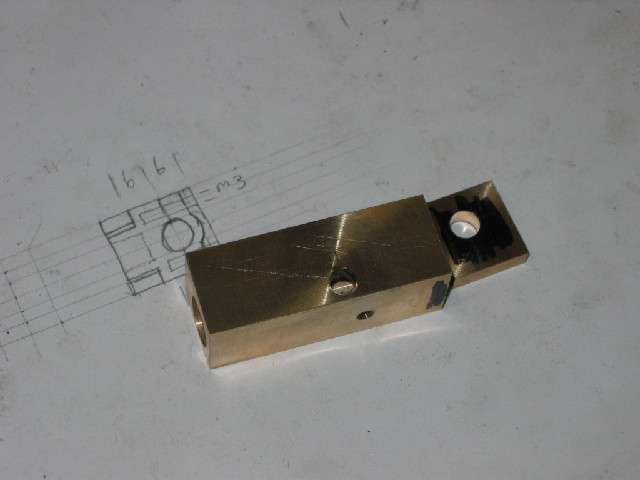
All soldered up:
Oh yes, the brass pipe was just "pressed" into the cylinder head - 5.5mm hole, and 5.54 OD mm brass pipe - Persuasion tool (aka "hammer") worked well
Earlier on I said the most difficult job was still to come - it was! - The most difficult part of this engine was to get the darn 3mm screw screwed into the shaft while juggling the piston as well!
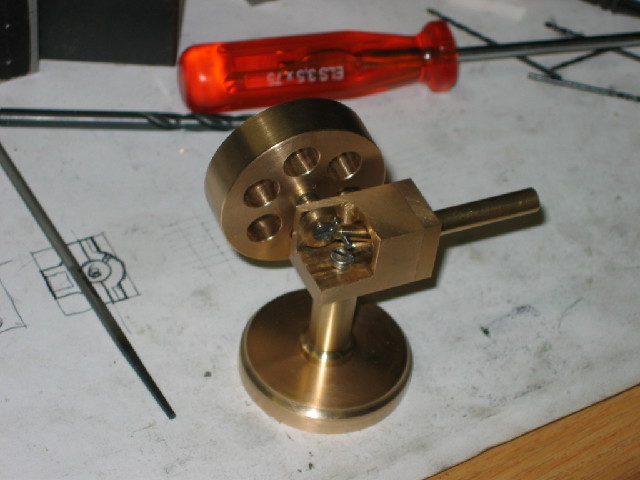
All Assembled:
and
And here it is running:
http://www.nam-engineering.com/pics/steam2/MVI_1146.AVI
This is my very first completed working engine, so some very special thanks are in order:
To my Dad who gave me the Myford, and a LOT of life skills - THANKS DAD!!!
Marv, THANKS for guidance, inspiration, motivation and a whole hog of maths - I REALLY appreciate it.
Rick, This is a great forum you started - Thanks a LOT!
And last, but definitely not least, to all the great members of this forum; long-time and new - for your valued input, comments and banter - Thanks Guys & Gals!
Kind Regards, Arnold
Best of all, I actually finished it - and it runs! - making it my first completed and running engine! woohoo1
If you don't want to see the build pics - just go down - the finished engine and (hopefully)video is at the end.
I changed the bush and axle sizes, as well as all screws and threads to fit my available metric tools - so screws were made 3mm, bush ID 4 mm, bush OD 5mm, and out of sheer laziness (I guess), I made the shaft diameter for the flywheel 5.05 mm for a press-fit. Being a bit frugal, I opted to make the base from 2 pieces, rather than the single called for in the construction. The base plate is screwed to the mounting column using a 5mm countersunk screw.
I planned for an early start yesterday, but had to run out & get some drills I would need, as well as some piano wire - one hobby shop in Windhoek actually sells it. Bugger - as I'm leaving, the power goes out, so I just KNOW both the tool supplier for the drills and the hobby shop's systems will be down, as well as total chaos on our streets... So waited until the power cam back on 3 hours later for the run-around.
I started with a piece of brass from a longitudinal wedge of brass "pipe" - this had to be squared on all sides:
As I don't have a suitable boring bar, and did not want to spend time making one, I drilled the required size hole (5.5mm) for some brass pipe I have right through the block, and parted off the cylinder head - to be soldered back on later:
Then I bored the cylinder - I don't have a suitably sized reamer, so boring had to be spot on and smooth. The little boring bar I made last weekend did it's second job:
(Sorry - Photo's a bit fuzzy; my camera insists on picking up the swarf even in macro mode)
Then I cross-drilled the block for the mounting hole and bush hole; then reamed the bush hole 5mm, but not all the way through the length of the reamer, so that the bush can be a press-fit.
Now the part that I thought would be the most difficult - milling out the cylinder block on the vertical slide - my lathe's headstock bearings are not prime anymore, so milling is at best "risky". This turned out to be a bit bothersome, but I managed; though not a pretty or neat job. The most difficult job was still to come...
Then I turned the little bush - reamed 4mm on the inside and 5mm dead on the outside. Turned out to be a nice press fit in the block. And YES - chasing this little bugger around the floor is no fun at all! :rant:
Next up, I turned the little shaft and added it to the pile of junk:
There I stopped yesterday evening - everything was grumbling for grub; my tummy was grumbling, the dogs kept under my feet, and Shrek the 'grey was hollering for cheese & potato - so the motley crew had to be fed & bed.
Actually I'm a lazy rotter, and one thing I like is my Sunday Morning sleep-in - no alarm clock! - so I only woke at 10:00 this morning and had to get a move on.
First thing, I turned the piston. The plans call for the crank and piston OD at the same diameter, so I turned it and finished it to required piston size - A check with the cylinder confirmed proper diameter after some final sanding work. Then I turned the connecting rod to size and parted the piston off at the required thickness (or - in this case - thinness
):
Still having the correctly sized piece of brass in the lathe, i just "touched" the end with the smallest center drill I have - then with dividers set to the correct size, marked a radius from the center hole for the crank pin. A quick transverse scratch from a toolbit in the cross-slide, and X marked the spot for the crank pin. Then I drilled clearance through the center and countersunk for a 3mm countersunk screw. - Another problem popped up here; I didn't have 3mm countersink screws (like I thought I had!) and it's head would have been too big anyway. Did the next best thing, and turned the head of a cheese-head 3mm screw down to the required size and counter-sink - problem solved.
Then I tuned the base and pillar from brass - nothing special; just plain turning (anyway, I was on a roll & forgot to take pictures :-[ )
More pieces added to the "junk pile"
:
Next up was the flywheel - simple turning; I just faced it both sides and drilled & reamed a 5mm hole in the center. Then turned a mandrel with a nice shoulder on some 1/2" rod with a 4mm thread, and mounted the flywheel on that. Turned OD. Then on to the vertical slide & dividing head with chuck containing mandrel & flywheel - drilled the 6 holes. Next picture shows first hole drilled - the drill - chuck is in the headstock, an I didn't mid drilling through the washer either:
Next some soldering needed to get done - I cleaned everything of all oil, then with an ear-bud coated in oil, I wiped the cylinder bore and around the bush/block. A ring of 60/40 solder around the bush, heat up the block/bush from underneath & it just flowed nicely in. For the cylinder head, I made a ring of solder and placed around the bore. Then put the cylinder head on top. Heated with the propane torch all-round, and when the cylinder head dropped down when the solder melted, just used a piece of wire to "accurately Rof} " locate it & let it cool down.
All soldered up:
Oh yes, the brass pipe was just "pressed" into the cylinder head - 5.5mm hole, and 5.54 OD mm brass pipe - Persuasion tool (aka "hammer") worked well
Earlier on I said the most difficult job was still to come - it was! - The most difficult part of this engine was to get the darn 3mm screw screwed into the shaft while juggling the piston as well!
All Assembled:
and
And here it is running:
http://www.nam-engineering.com/pics/steam2/MVI_1146.AVI
This is my very first completed working engine, so some very special thanks are in order:
To my Dad who gave me the Myford, and a LOT of life skills - THANKS DAD!!!
Marv, THANKS for guidance, inspiration, motivation and a whole hog of maths - I REALLY appreciate it.
Rick, This is a great forum you started - Thanks a LOT!
And last, but definitely not least, to all the great members of this forum; long-time and new - for your valued input, comments and banter - Thanks Guys & Gals!
Kind Regards, Arnold