Acrylic Pug

Home Model Engine Machinist Forum

Help Support Home Model Engine Machinist Forum:

This site may earn a commission from merchant affiliate links, including eBay, Amazon, and others.

kustomkb

Project of the Month Winner!!!
Project of the Month Winner
Joined
Dec 14, 2007
Messages
1,181
Reaction score
31

I made a couple of pieces for Paul's "Pug" which can be found in the uploads section and here;

http://www.homemodelenginemachinist.com/index.php?topic=5161.0

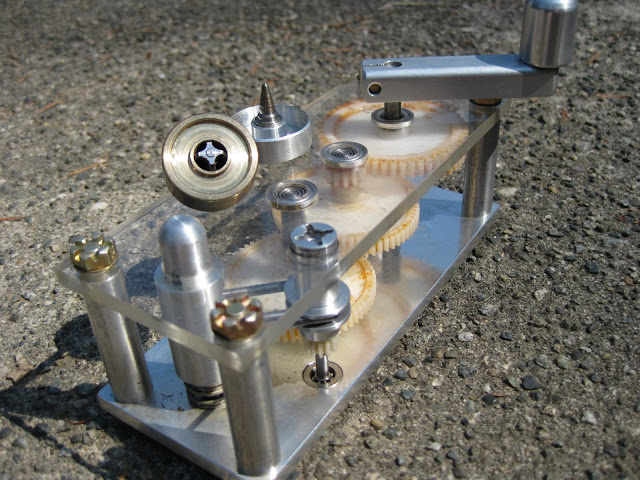
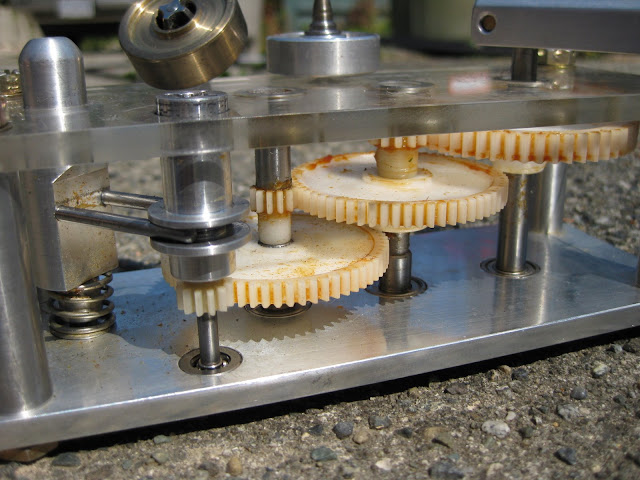
I'd like to have an engine running on my desk and allready have the pump.

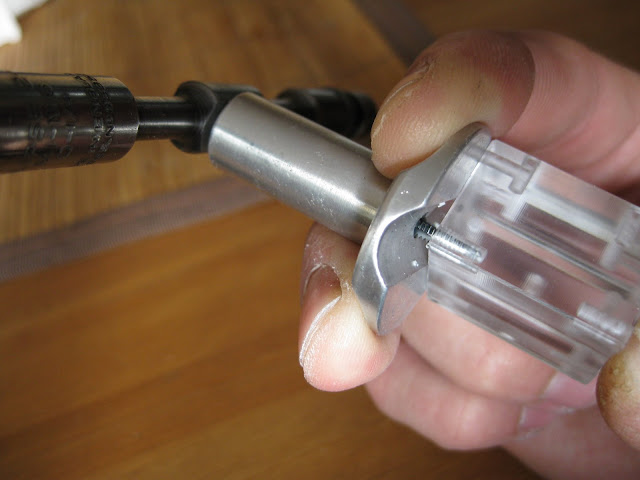
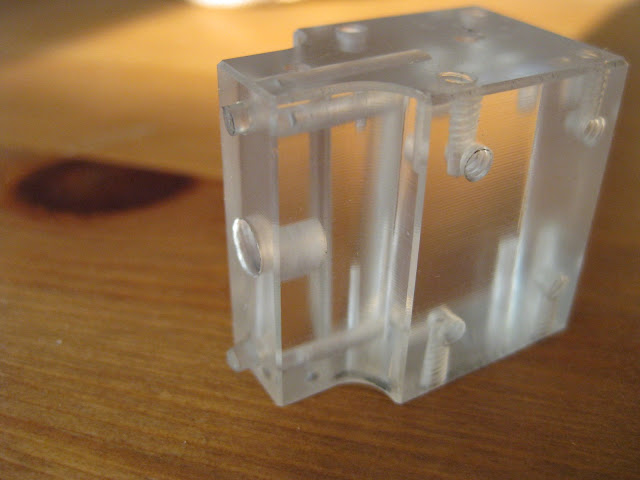
I started with the cylinder and valve chest which I think I can make out one piece by drilling the valve holes and inserting plugs then bore the valve passage;

PUG%20026.jpg


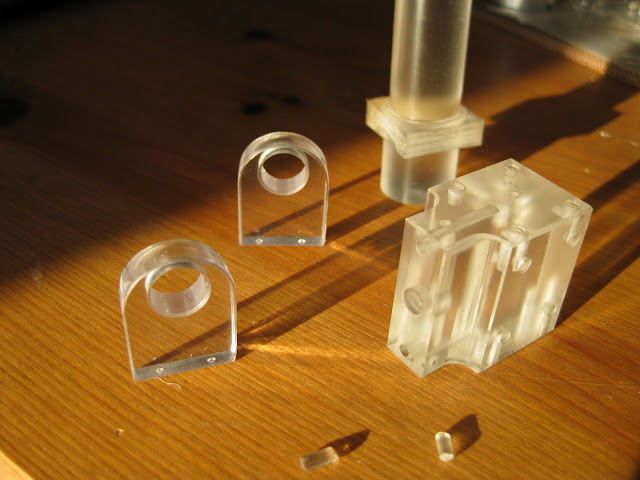
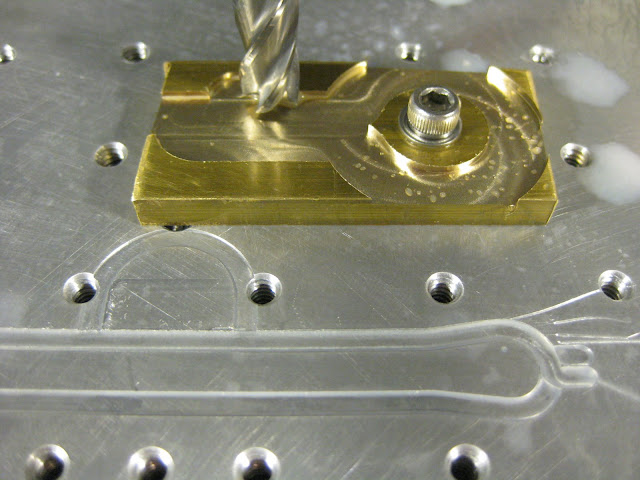
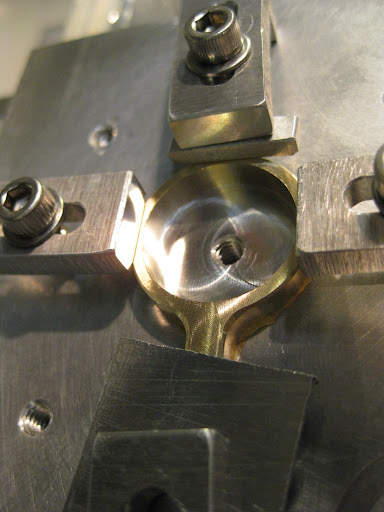
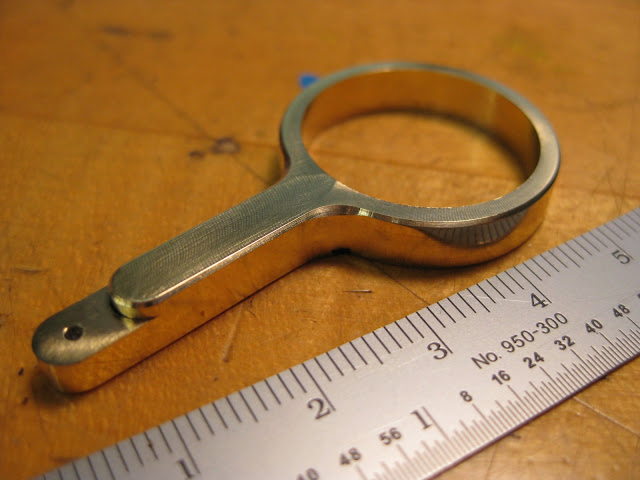
Then screwed a brass blank for the eccentric strap onto a sacrificial plate and faced it to thickness, Then roughed out the outer profile;

PUG%20005.jpg
PUG%20006.jpg


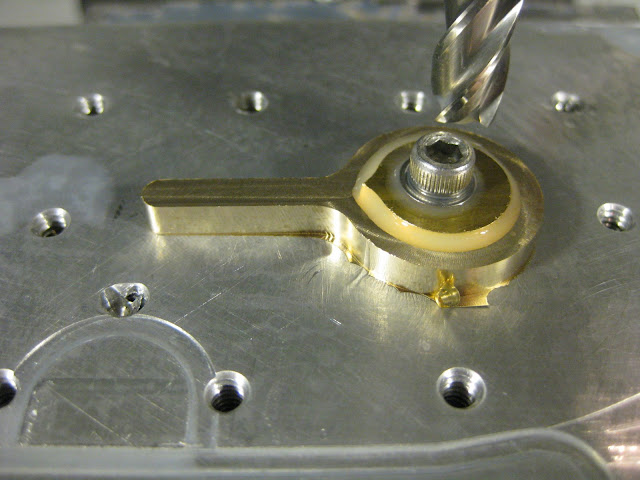
And finished the outside;

PUG%20010.jpg


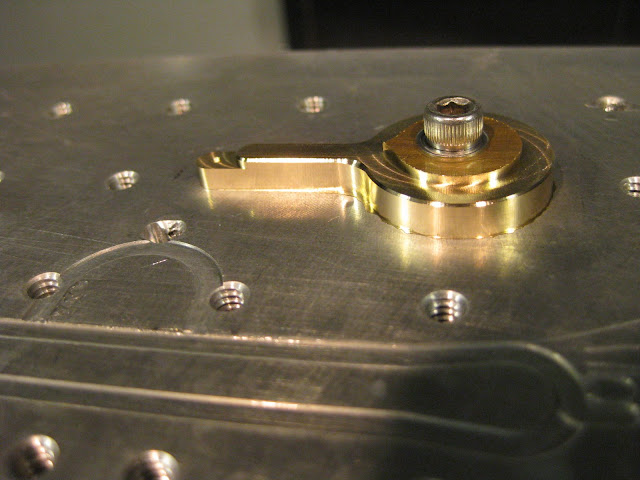
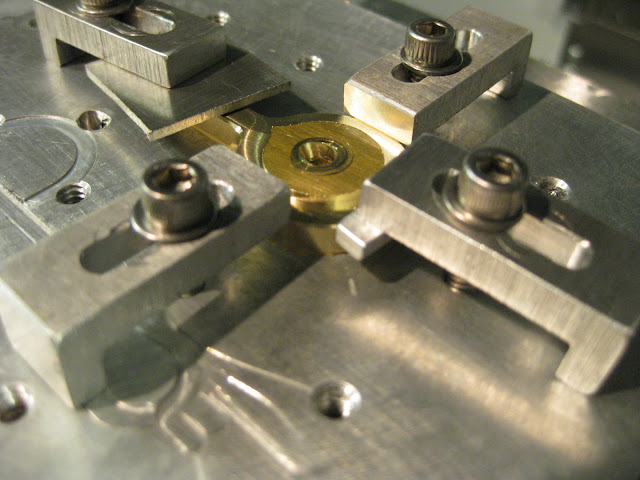
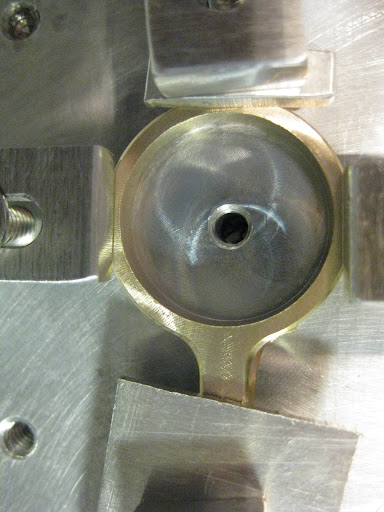
before removing the centre screw I installed clamps then milled out the ID;

PUG%20013.jpg
PUG%20014.jpg


PUG%20015.jpg
PUG%20021.jpg


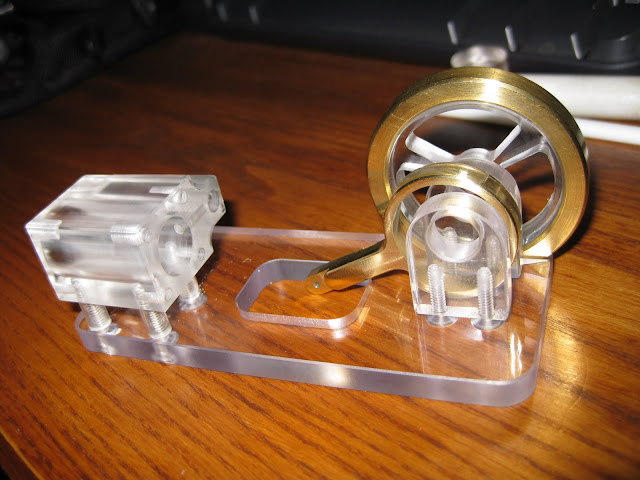
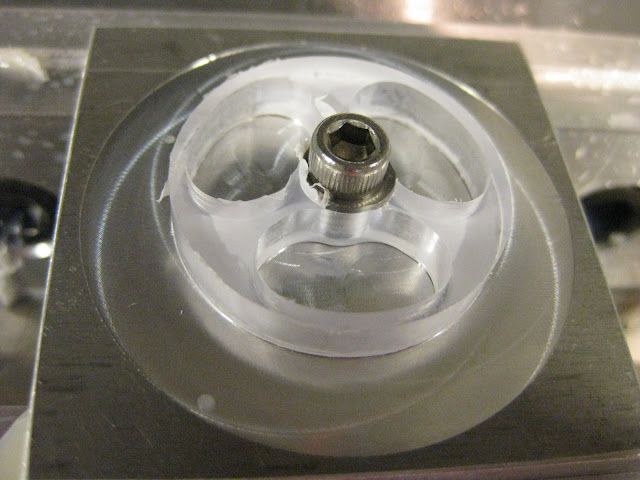
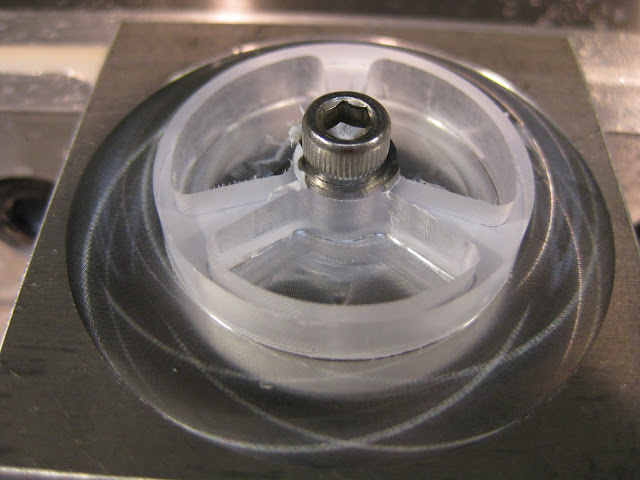
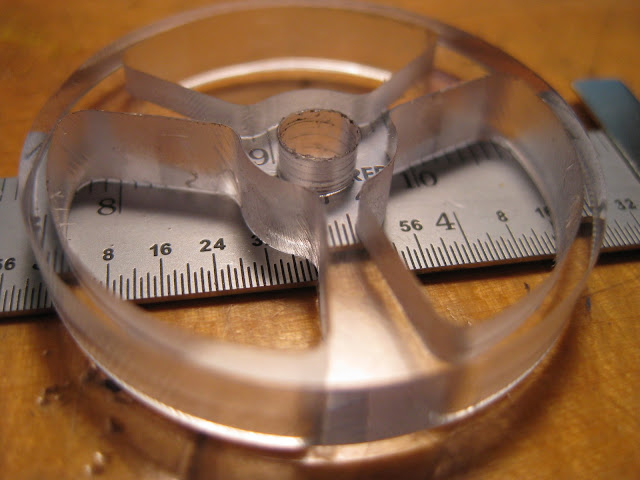
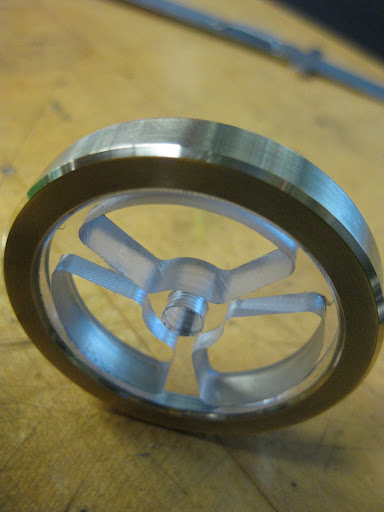
Next came the flywheel;


PUG%20027.jpg
PUG%20028.jpg


PUG%20032.jpg
PUG%20036.jpg


PUG%20043.jpg


Thanks for the design Paul!

Have fun,

-Kevin.

 
Is your mill a CNC or are you doing this manually? what ever, it looks great, I will be following the build.
Thanks for sharing
Mel
 
What a terrific spin-off of one of the coolest and nicest looking small engines to come along in a long while. That's going to look so 'executive' sitting on the corner of your desk.

BC1
Jim
 
Very nicely done !
Regards, Arnold
 
Looks very nice, curious as to what speeds used for cutting the plastic. My only try at it seemed to give results that slow, the material galled up. The faster the speed the smother the cut. Lathe tops out at around 3K and gave reasonable surface finish.

Makes for interesting effects. Get to see the inner workings and all

Robert
 

Thanks very much fellows,

It was machined with a cnc but unfortunately its not mine :'(

I used the same speeds and feeds as I do with aluminum and flood coolant. Its the heat that's your enemy.

I've always liked transparent machines where you can see what's going on too. I hope it works out ;D

-Kevin.


Here is a gearbox I made years ago for a table top sized version of "Wayne Gretzky's Rocket Hockey" that I haven't built;


Rocket%20hockey%20gear%20box%20001.jpg


Rocket%20hockey%20gear%20box%20004.jpg


kustomkb said:
Here is a gearbox I made years ago for a table top sized version of "Wayne Gretzky's Rocket Hockey" that I haven't built;
Ah, man, you've GOTTA finish that! :bow: ;D :bow:
 

Drilled and tapped some ports and mounts with my "ergonomically correct" tap guide. ;)

As well as rough out the standards and turn some plugs;

PUG%20060.jpg
PUG%20082.jpg


PUG%20074.jpg


How are you machining the acrylic so smooth and keeping it clear? Are you polishing it after the cutting? What specific material is that?
 

Ive been side milling with a sharp end mill and LOTs of coolant. Haven't polished anything yet.

The standards came out of flat stock with the plastic still on so they were clear from the start.

The main body is made from plexiglass which is a name brand for polycarbonate I think.

Has anybody done any chemical polishing, suspend the part in MEK fumes or something like that?
 
Plexiglass or perspex and polycarbonate are 2 different materials. On a laser cutter polycarbonate burns with a nasty smell. Have you tried polishing with a flame? It works well on thin surfaces and I suppose on the larger ones will do as well.
 
WOW! That's some kinda FINE work. I love the flywheel, too. :bow: For polishing, I would suggest progressively finer wet/dry sanding, looks like not much is needed. Use a block to hold the sandpaper. Be careful not to round over the edges, and to keep the faces flat. You'll remove material faster than you think. Meguiar's Plast-X polish is really good stuff, ( about $7.00 at Wally Mart's auto dept. ), it puts that 'liquid' shine back on the plastic. I can't wait to see the final product.

Davyboy
 
It has been years (don't ask) since I have had to deal with polishing 'plastics', I would think that some very fine wet sanding would be in order followed up by a session on the buffer using a loosely sewn buff and some white compound, taking extra care not to break the corners too hard.
If in question, polishing by hand might be the best way to accomplish the task, a bit more time consuming but way easier to control the cut action.
BC1
Jim
 
To polish polycarbonate, I have spread silverware polish, or Simichrome polish on copy paper put on a flat surface and rubbed the part back and forth on it. Easier to keep the surface flat. When it dries out, add more polish.
 

Thank's for the kind words,

Have you tried polishing with a flame?

Once with limited success, Half the part shiny the other half with little bubbles. Works very well but takes a skilled hand. ::)

Be careful not to round over the edges, and to keep the faces flat. You'll remove material faster than you think.

a session on the buffer using a loosely sewn buff and some white compound, taking extra care not to break the corners too hard.

You's aint kidding, one lick against the buff and those little chamfers turned into radii real quick. :-[

I have spread silverware polish, or Simichrome polish on copy paper put on a flat surface

I have some good plastic polish but will definately try it on the copy paper instead of the usual rag. Like a lap eh?

When drilling the cylinder bore I started with too large a pilot drill and the second drill grabbed worse than brass. I new better and did it anyways. The finish reamer and shoulder of the end caps (brass?) will conceal the damage. :-X


PUG%20098.jpg
PUG%20101.jpg


Has anybody done any chemical polishing, suspend the part in MEK fumes or something like that?

Many years ago we used to chemical polish polycarbonate with MEK fumes on a regular basis. We used a large tin can (about a foot sq X 1-1/2 ft high) with a little MEK on the bottom, heat it up until you could see vapor rising from the can, and then just pass the poly part through the vapor. It would essentially melt the surface and would come out clear. Timing is important. Too long in the vapors will cause crazing on the surface.

I don't know if there is a similar process that would work on Plexiglas (acrylic).

Although we did this in a well ventilated space and never had an accident, like a fire etc. with this practice, I sometimes wonder how dangerous it was to our health. I doubt very much that this practice still goes on today.

If you do try it, be sure to take all the precautions you can to protect yourself.

MEK is also used to bond (melt) polycarbonate pieces together. If you mix a little fine polycarbonate (sawdust from machining) with MEK and let it sit in a sealed bottle until it dissolves, it makes an excellent bond.
 
MEK? I thought Acetone was the chemical of choice? They are very similiar compunds. A quick dip in Acetone/MEK followed with a warm air drying. will leave the plastic as clear as water.

Must be quick though and the drying must be rapid. It is the equivalent of dipping an ice cube into water...instant surface melting by dissolution. May not be possible with any parts that have a very tight fitting surface tolerance.


Latest posts

Back
Top