A Small Vertical Steam Engine

Home Model Engine Machinist Forum

Help Support Home Model Engine Machinist Forum:

This site may earn a commission from merchant affiliate links, including eBay, Amazon, and others.
Thanks for the encouragement Rob:)

With tooling complete the next engine part was the cylinder cover. The tool used for the recess is 1/8" HSS held in a home made holder. The small toolbit is inexpensive and quick to grind.

CylinderCoverTurn.jpg


Off to the mill to drill the holes, the work is centered precisely and coordinates used to place the holes.

CylinderCoverAlign.jpg


With the holes drilled it was back to the lathe to part to width.

CylinderCoverDrill.jpg


No picture of the finished item, I forgot to take one!
 
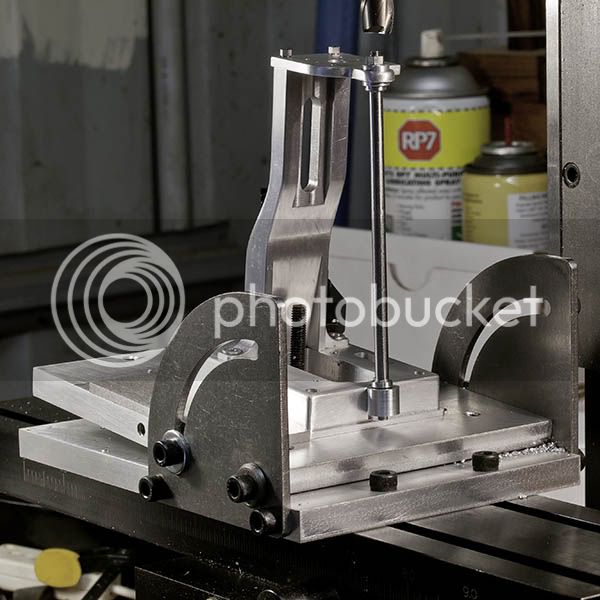
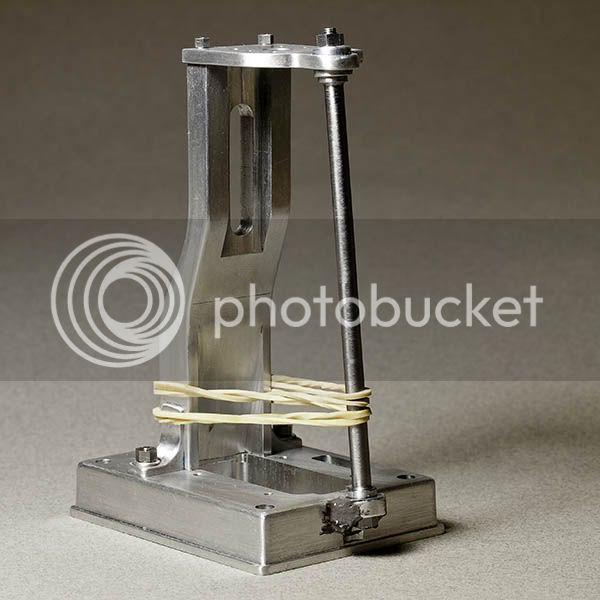
Thanks Todd, the large body does indded rotate on the 3/8" diameter pin. The spigot on the front of the large cylider has a flat on it to take the grub screw from the die holder. The short die holders are quicker to make and save material realtive to making the holder in one piece. Each time I make a piece of tooling I feel more comfortable in my shop:)

Agree with you. Die holders mounted on to tail stock cuts out so much hard work using the die wrench. Have got any tooling to tap on the lathe??

made lotsa tools myself too.There are occasions when I wreck a piece when a simple tool would have done the job best than monkeying around.
 
Only managed a few hours in the workshop this weekend due to life getting in the way :) Next part to make was the valve chest. Most of this is pretty standard machining, a repeat of steps performed on other parts. The Sherline mill is good for drilling holes up to 1/4" after which you need to mill or bore. Having recently received a boring head I decided to bore the hole in the valve chest to remove material that would otherwise be milled.
ValveChestBore.jpg

With the hole enlarged close to the marked lines the rest was milled out following the lines by eye.
ValveChestMill.jpg

The hole for the valve rod was drilled along with the counterbore for the gland. The hole for the rod is 2mm diameter at the top and 1.5mm at the bottom. By drilling the surface of the bottom part with the 2mm drill I ended up with a nice countersink for the 1.5mm portion.
ValveChestTap.jpg

I have started the fitting process of the assembly and needless to say it needs a "bit" of adjustment. At least it's provided the opportunity for another mock up shot.
OctMockUp.jpg

That's it for this week, a lot of detail work remains but most of the major parts are now done.
 
Wow Jan, that is really taking shape now.

Vince
 
Great looking engine. I'd love to make one like that. Can't wait to see it run.
 
Decided to make the valve rod in one piece but this turned out to be a poor choice. While gripping the 2mm shaft in order to mill the head, the force of the cut caused the part to spin ruining the head. After a few choice words I made a separate head to be soldered on. The soldering turned out to be very easy and the fillet of solder improves the appearance :cool:

ValveRod.jpg


The valve and valve nut should be up next
 
With most of the parts made I have now turned my attention to doing a bit of sculpting and finishing. The base still needed to be shaped and boss added to mount the stay bar. A draft angle of 2 degrees was milled on the base using the angle table. After milling the edges where rounded with a file and sanded to blend.
BaseEdgeDraft.jpg

I only had a vague idea of how the boss was to be made and fitted. Started off by milling a pocket in the front of the base to take the boss. The base is held down with two clamps and there is a parallel between the base and angle table to resist rotation.
BaseMillNotch.jpg

Leaving the base on the mill, I started to turn the boss. A test fit showed that the parts where in alignment.
BaseTestFit.jpg

Before gluing the boss was shaped to provide access for the fixing nut. The boss will be fared in using JB Weld followed by a bit of filing and sanding.
BaseGlueup.jpg

A mountain of filing and fitting now awaits my attention but at least assembly can follow just behind :)
 
Back
Top