


Well I managed to anyway...
I hesitate to post a "how to" in the presence of the illustrious contributors to this site but I have seen several comments about modifying (mostly Chinese) ball screw nuts using angle grinders or bench grinding equipment.
I am in the middle of an upgrade of my CNC BF20 mill from the initial trapezoidal leadscrews to a set of ball screws and realised (rather late in the day, I admit) that the nuts were not going to fit into the spaces allocated to them... Reading other descriptions suggested that the only fix was to hit the nut with some serious grinding effort. I was reluctant to do this partly because I loath the vast quantities of grinding dust generated and pertly because I was unhappy about the heat that would be generated to the detriment of the nut.
Having successfully machined the ball screw with a reasonably rigid setup in my lathe, I decided to see whether the same setup could be used on the nuts. By the way, they appeared at first sight to be very hard (file check) but a closer examination showed that the file had actually marked the nut - albeit only just.
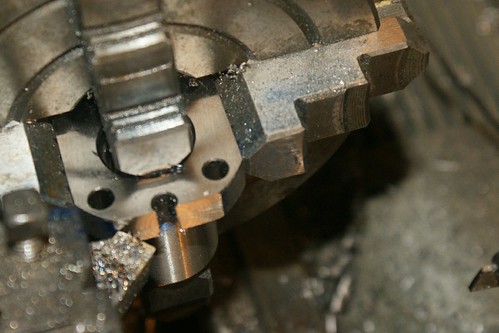
My initial setup is shown in the following 3 photos - my home made boring bar for carbide bits which is a piece of 16mm steel was setup in the mill and a teeny cut setup....DoC at 0.5mm and feed rate at 30mm/min, dry cut. Rather to my surprise, the cutter coped quite happily as can be seen in the photos. I carried this solution on for a period until I mis-typed a command and requested a 5mm cut.....when the unstoppable meets the immoveable, something has to give - in this case, scratch one carbide tip.
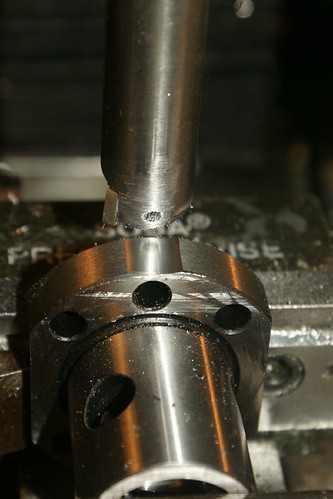
DSC06870 small by simon0362, on Flickr
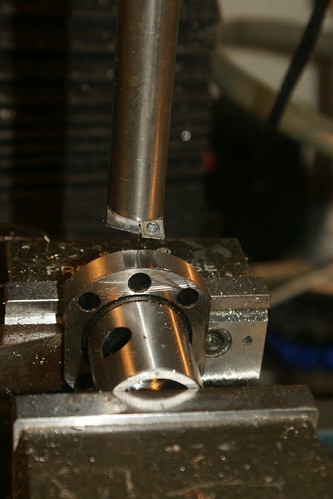
DSC06871 small by simon0362, on Flickr
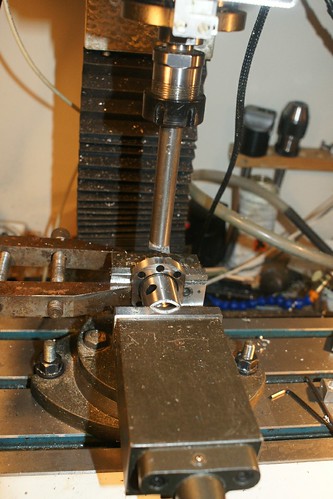
DSC06872 small by simon0362, on Flickr
After that I moved to the lathe since this was not the most solid of setups. The second set of photos show the solution adopted for one end of the nut. Again, I took light cuts (DoC at 0.5mm) at a slow speed (~330rpm) and was rewarded with a reasonable finish at a good rate of metal removal.
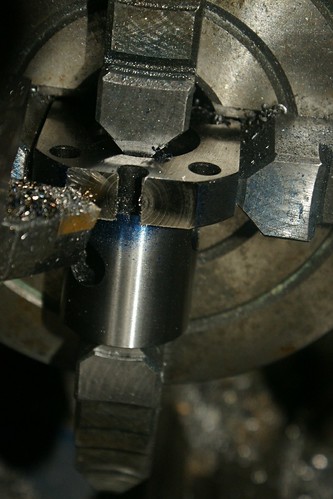
DSC06891 small by simon0362, on Flickr
DSC06892 small by simon0362, on Flickr

DSC06893 small by simon0362, on Flickr
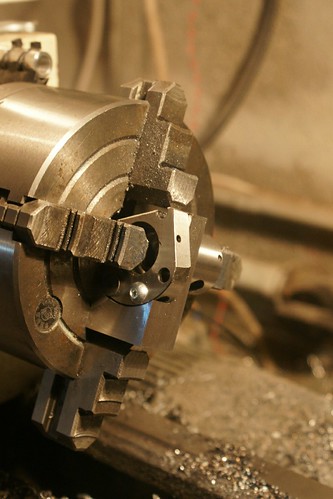
DSC06894 small by simon0362, on Flickr
Not sure why but the cut was most successful when I started from the centre and worked outwards rather than the other way around - this might have been the state of the carbide tips though.
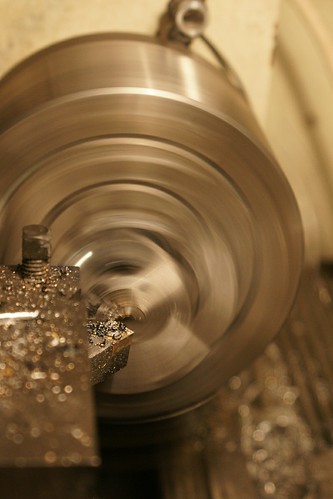
DSC06895 small by simon0362, on Flickr
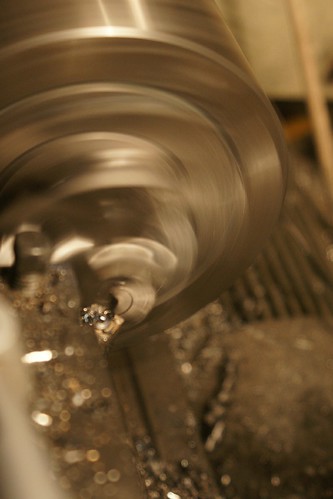
DSC06896 small by simon0362, on Flickr
The chips come off blue as can be seen on several of the photos....and I can recommend some form of protection to the left hand....
I used one edge of a tip for the first cut, although it was not new by a long way, and I started with a fresh tip for the secondary cuts shown in the later photos. There was clear signs of wear on the tip, primarily on the vertical faces rather than on the horizontal face. I don't know what grade they are but the top face has a chip breaker built in with a zero rake to the cutting edge.
So in conclusion, it can be done and has the advantage of not stressing the nut from extra heat.
Hope this helps any budding CNC builders out there.
Simon
I hesitate to post a "how to" in the presence of the illustrious contributors to this site but I have seen several comments about modifying (mostly Chinese) ball screw nuts using angle grinders or bench grinding equipment.
I am in the middle of an upgrade of my CNC BF20 mill from the initial trapezoidal leadscrews to a set of ball screws and realised (rather late in the day, I admit) that the nuts were not going to fit into the spaces allocated to them... Reading other descriptions suggested that the only fix was to hit the nut with some serious grinding effort. I was reluctant to do this partly because I loath the vast quantities of grinding dust generated and pertly because I was unhappy about the heat that would be generated to the detriment of the nut.
Having successfully machined the ball screw with a reasonably rigid setup in my lathe, I decided to see whether the same setup could be used on the nuts. By the way, they appeared at first sight to be very hard (file check) but a closer examination showed that the file had actually marked the nut - albeit only just.
My initial setup is shown in the following 3 photos - my home made boring bar for carbide bits which is a piece of 16mm steel was setup in the mill and a teeny cut setup....DoC at 0.5mm and feed rate at 30mm/min, dry cut. Rather to my surprise, the cutter coped quite happily as can be seen in the photos. I carried this solution on for a period until I mis-typed a command and requested a 5mm cut.....when the unstoppable meets the immoveable, something has to give - in this case, scratch one carbide tip.
DSC06870 small by simon0362, on Flickr
DSC06871 small by simon0362, on Flickr
DSC06872 small by simon0362, on Flickr
After that I moved to the lathe since this was not the most solid of setups. The second set of photos show the solution adopted for one end of the nut. Again, I took light cuts (DoC at 0.5mm) at a slow speed (~330rpm) and was rewarded with a reasonable finish at a good rate of metal removal.
DSC06891 small by simon0362, on Flickr
DSC06892 small by simon0362, on Flickr
DSC06893 small by simon0362, on Flickr
DSC06894 small by simon0362, on Flickr
Not sure why but the cut was most successful when I started from the centre and worked outwards rather than the other way around - this might have been the state of the carbide tips though.
DSC06895 small by simon0362, on Flickr
DSC06896 small by simon0362, on Flickr
The chips come off blue as can be seen on several of the photos....and I can recommend some form of protection to the left hand....
I used one edge of a tip for the first cut, although it was not new by a long way, and I started with a fresh tip for the secondary cuts shown in the later photos. There was clear signs of wear on the tip, primarily on the vertical faces rather than on the horizontal face. I don't know what grade they are but the top face has a chip breaker built in with a zero rake to the cutting edge.
So in conclusion, it can be done and has the advantage of not stressing the nut from extra heat.
Hope this helps any budding CNC builders out there.
Simon
")