Bernd's post on Geo Thomas prompted me to get going on a photo post of my UPT i've been meaning to do
I made this awhile ago but just got around to taking some pics of it a few weeks ago. I experimented a bit with the photos its just a black piece of cardboard with the shop lights off and sunlight through a window. Camera is a P&S Nikon P3 (I affectionately call it my POS P&S). It does have the advantage over other P&S that you can control aperture. Everything is done with a tripod and no flash. I also put my name on each pic, what the heck, I made em ;D
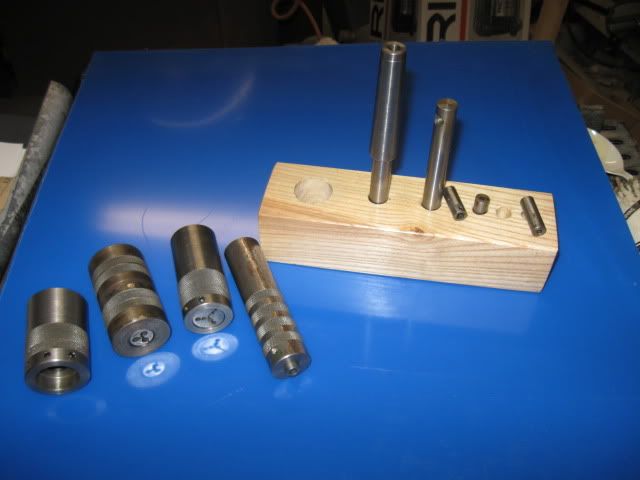
The project is the Universal Pillar Tool, a classic designed by George Thomas. I went full bore and made all the accessories including the sensitive drill head.
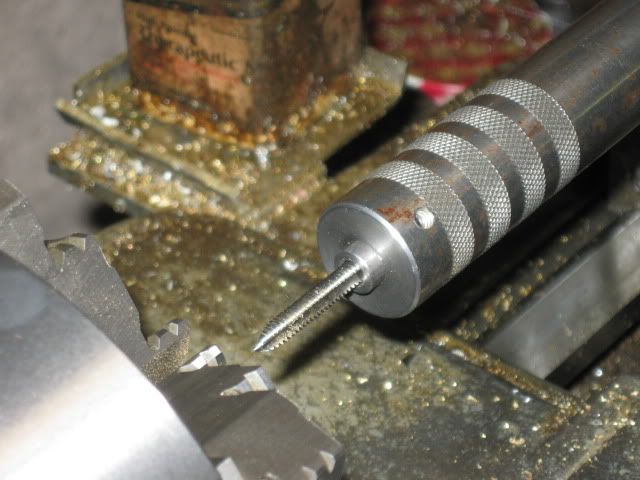
Heres a smaller tapping head. For the newer guys, not breaking taps depends on keeping them straight so this tool is very handy. I used the end off an Eclipse pin vice of some sort, but still had to make a collet to fit common small tap dia. The bushing in the arm has a small spring underneath the threaded brass cap that presses light on the rod very handy as the tapping head stays where you leave it and doesnt fall into the work.

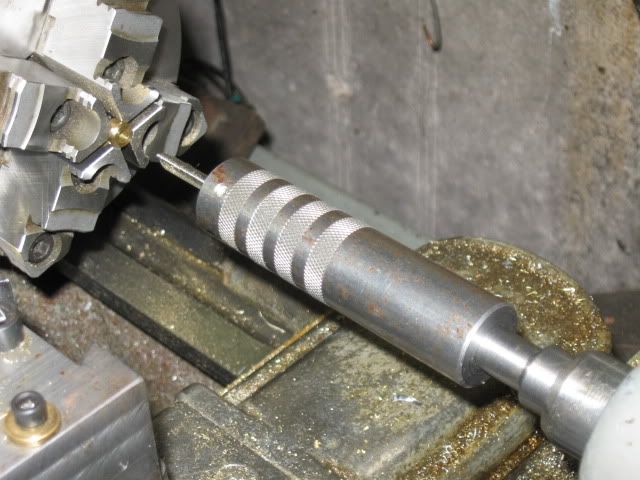
Heres a close of the small tapping head handle showing the D coupling. This is my design and gives and positive drive without having to tighten anything. Its a snug fit, wont fall off accidentally.

Heres a larger tapping head

Its handle is held on by a hex I laid out and hand filed. Id heard filing hexs that fit perfectly in each position was the sort thing theyd assign apprentices to teach them to file so thought it would be a good test. It fits amazingly well, the secret is to use a bit of blue as youre getting close and be very specific about where you are removing material

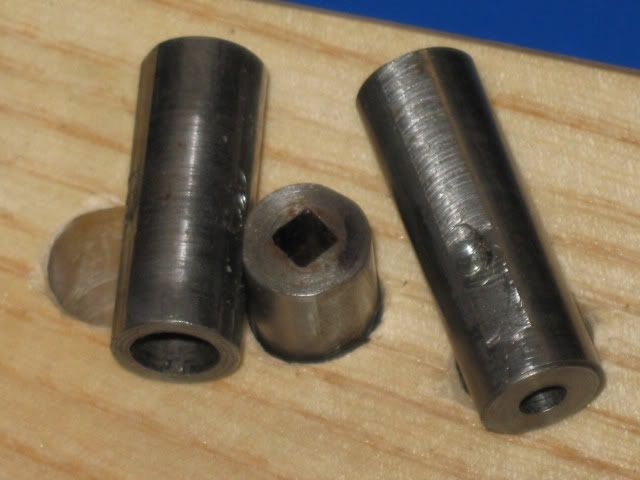
Reconfigured a bit, the tool becomes a staking/riveting tool. Here a couple of blank tools are shown.

Similarly, a square bushing holds number/letter stamps

The bushing for the square punches is interesting there are two springs with detent balls underneath to hold the punches in place a very nice feature!

The most complex accessory is the drill head. It works very well and is a pleasure to use. There is an extra casting for this kit but they wanted a fortune for it so I carved my own.

Heres a close up.

Lots of accessories to make. This photos a little dark, I still need more exposure experimentation I guess. Most of the staking/punching tools are made but not yet hardened.

It resides in an old drawer with a lid. Hey at least it keeps the condensation off. One day a better made box will get done

Hope that was of interest
I made this awhile ago but just got around to taking some pics of it a few weeks ago. I experimented a bit with the photos its just a black piece of cardboard with the shop lights off and sunlight through a window. Camera is a P&S Nikon P3 (I affectionately call it my POS P&S). It does have the advantage over other P&S that you can control aperture. Everything is done with a tripod and no flash. I also put my name on each pic, what the heck, I made em ;D
The project is the Universal Pillar Tool, a classic designed by George Thomas. I went full bore and made all the accessories including the sensitive drill head.
Heres a smaller tapping head. For the newer guys, not breaking taps depends on keeping them straight so this tool is very handy. I used the end off an Eclipse pin vice of some sort, but still had to make a collet to fit common small tap dia. The bushing in the arm has a small spring underneath the threaded brass cap that presses light on the rod very handy as the tapping head stays where you leave it and doesnt fall into the work.
Heres a close of the small tapping head handle showing the D coupling. This is my design and gives and positive drive without having to tighten anything. Its a snug fit, wont fall off accidentally.
Heres a larger tapping head
Its handle is held on by a hex I laid out and hand filed. Id heard filing hexs that fit perfectly in each position was the sort thing theyd assign apprentices to teach them to file so thought it would be a good test. It fits amazingly well, the secret is to use a bit of blue as youre getting close and be very specific about where you are removing material
Reconfigured a bit, the tool becomes a staking/riveting tool. Here a couple of blank tools are shown.
Similarly, a square bushing holds number/letter stamps
The bushing for the square punches is interesting there are two springs with detent balls underneath to hold the punches in place a very nice feature!
The most complex accessory is the drill head. It works very well and is a pleasure to use. There is an extra casting for this kit but they wanted a fortune for it so I carved my own.
Heres a close up.
Lots of accessories to make. This photos a little dark, I still need more exposure experimentation I guess. Most of the staking/punching tools are made but not yet hardened.
It resides in an old drawer with a lid. Hey at least it keeps the condensation off. One day a better made box will get done
Hope that was of interest