The Artful Bodger's nutating engine!

Home Model Engine Machinist Forum

Help Support Home Model Engine Machinist Forum:

This site may earn a commission from merchant affiliate links, including eBay, Amazon, and others.
Joined
Aug 26, 2009
Messages
24
Reaction score
0
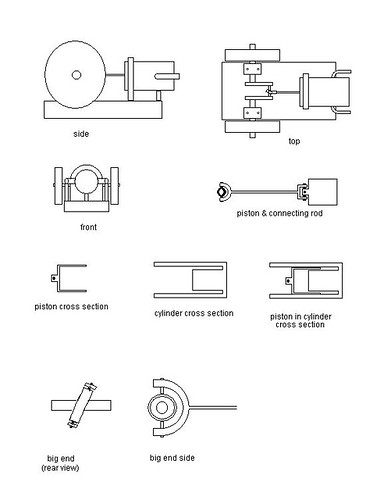
For my first serious attempt at metal turning I decided to design and make a little steam/compressed air engine. Although the principle of rotating the piston to get the necessary port timing is not new I have not seen anyone do it the way I did!

Concept:
3675858547_76fa63a1ae.jpg


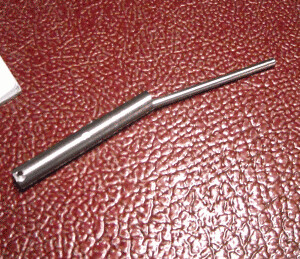
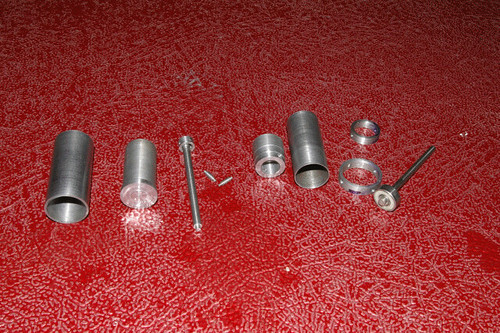
Some of the components:
3703848550_44968d9615.jpg


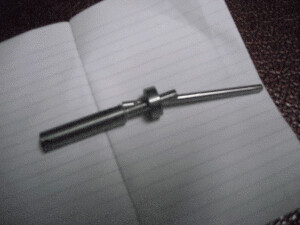
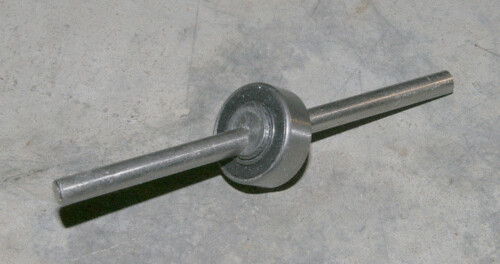
The 'nutating' big end bearing
3708657625_c0f6b0309d.jpg


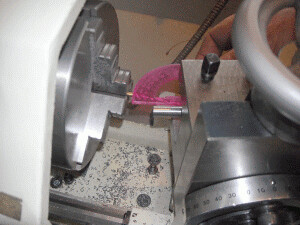
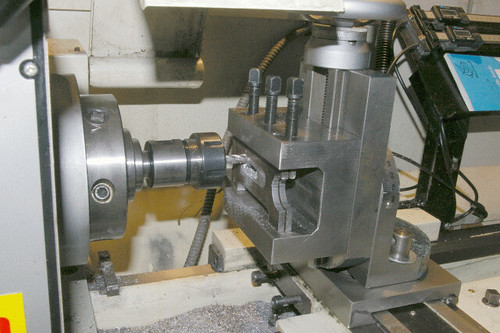
Milling the side frames in my lathe
3726403672_9710a88d98.jpg


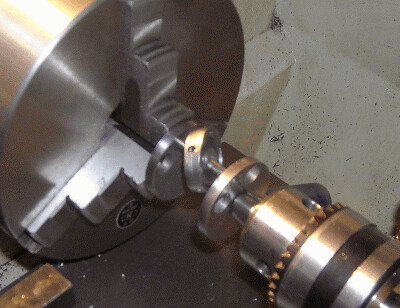
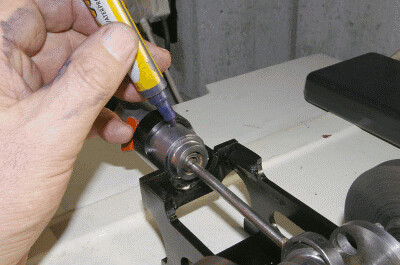
The crank shaft is assembled, I took the easy way and used adhesives.
3784558994_64b6e9a6e2.jpg


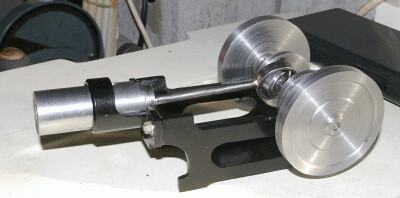
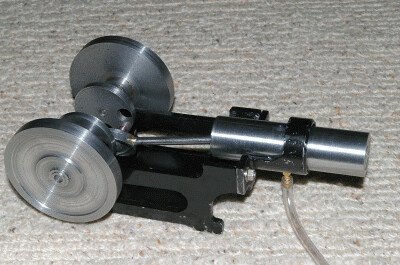
All the bits together in one place
3799559577_1382b67e12.jpg


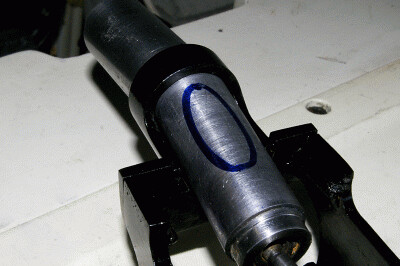
Marking the position of the exhaust port, I put the felt pen in the cylinder port and turned the engine through one revolution.
3799559537_de0129fe9e.jpg


The cylinder was drawn aside and this is the shape that appeared on the piston sleeve.
3800378114_36e5680887.jpg


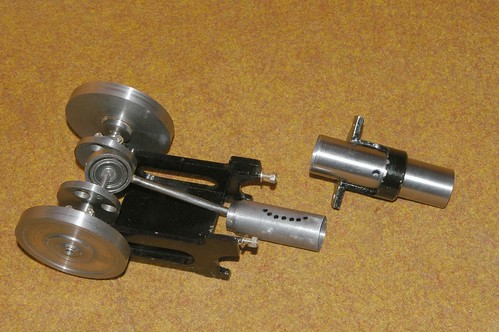
Just before final assembly, the row of exhaust ports drilled in the piston sleeve and the cylinder port visible in the cylinder. The inlet port is at the bottom of the cylinder and has been drilled in the same manner but obviously covering the other half of the cycle.
3813506593_b21d15875b.jpg


Sorry but my camera froze the action so you will just have to take my word for it that here it is running!
3813519903_d2be397e6e.jpg

 
Welcome aboard Mr Bodger ;) .............. nice little engine Sir 8)

CC
 
Nice engine, clever mechanism for twistin the pistin. I'm a fan of unusual mechanisms so if you don't mind, a few questions.

1. What is the angular offset of the big end bearing to the journal?

2. How did you make the offset boss that the bearing is mounted on?

3. Can you post a video. I'd really like to see the motion.

Jerry
 
Hi Captain

The offset angle on the big end bearing is not critical. I found a suitable bearing and put my crank pin material through it for measuring the angle which if I recall correctly is about 32 degrees.

I then took a piece of rod that was considerably bigger diameter than the bearing bore and I mounted this on the cross slide at the angle and drilled a hole through it to accommodate the crank pin.

3686528650_80e6003805.jpg

This is the rod in lathe while I am trying to figure out how to drill it! What I finally did was to use a fly cutter to put an angled face on the end of the rod which made it practical to start the drill.

3686528656_047f6389ae.jpg

After drilling the rod I tried the crank pin material in the angled hole.

3686528638_36ac83d093.jpg

After turning the rod down to the diameter of the bearing bore I could slip the bearing on and poke the crank pin material through.

The final step was to carefully cut the required section out of the rod, which was quite difficult and had to be done with hand tools.

Do not be confused by the angles in these photos as these were taken before I found the big bore bearing. I figured big bore would be better as it 'opened' the pattern of the piston ports.

Unfortunately I do not have a video camera available, maybe soon.
 
Thanks for the reply. I am designing some swash plate engines which use a nutating spider plate to rotate the shaft. Making the offset boss for the bearing was a real nightmare and since I'm using only a small unimat SL, it took some thinking. I finally came up with a fixture for holding the boss for drilling, and now it's a piece of cake!

Sorry I can't show you the fixture at the moment. I'm travelling with the wife and am away from the shop for another week or so. I hope to get started on a three cylinder axial swash engine when I get back and I'll post some pics.

Jerry
 
Jerry, I had to do quite a bit of thinking but once I started on that bit it all went rather easier.
 
Welcome Mr. Bodger ;) - and a most interesting engine you have there :)

Regards, Arnold
 

Latest posts

Back
Top