Stuart 10V First Timer

Home Model Engine Machinist Forum

Help Support Home Model Engine Machinist Forum:

This site may earn a commission from merchant affiliate links, including eBay, Amazon, and others.

kartwood

Member
Joined
Jun 5, 2009
Messages
12
Reaction score
0
I hope I'm getting this is the right place....

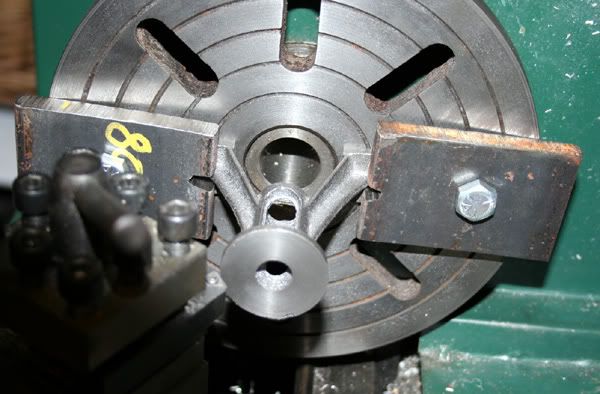
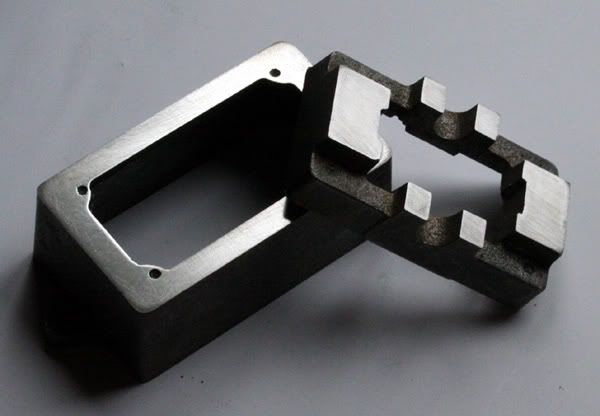
I'm just getting started on the 10V. I don't have a mill, so I'm doing the facing in the lathe. It took a long time because my four jaw chuck is not turning true. I found I had to do a lot of shimming and ended up finishing the soleplate on the face plate after I trued it up. I lapped the top and bottom surfaces.

Next up, I have to prepare the bearing seats. The book suggests doing it with a file but I don't look forward to that and welcome any suggestions.
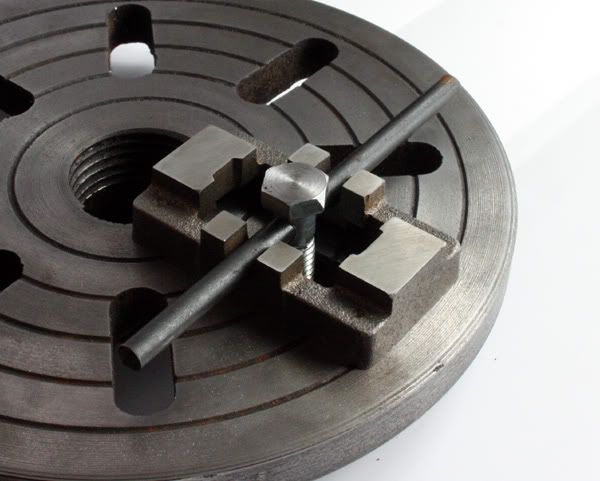
box-bed-sole-plate.jpg


Goodie goodie goodie!!
I'm real excited to watch your progress.
Pics of setups are interesting too.

You're in the right place.
 
My wife thanks you for the encouagement, Zee! :big:

I don't yet have many bits to press into service when I need to clamp a piece of work. This morning, I came up with this simple, one-bolt solution. I only needed to touch up the facing on one end of the casting so it worked out well.

soleplate-held-fast.jpg
 
Great looking finish KW, and you appear to have those first couple of castings cleaned up nicely as well. Sans a mill, those bearings are going to be a hand fit job, get your self a good, sharp, round and rat tail file (medium to fine) and settle in for a few hours of fun. Careful, even, gentle strokes are in order and take your time about it. They will not be that difficult to fit up if you take it easy. Best of luck and keep us posted of your progress. th_wwp

Cheers

BC1
Jim
 
Kartwood,

A possibility it to mount the part on the cross slide, (or special purpose :) I made it myself bracket :) mounted in the toolpost), packed up to the centre height of the bearing seats. Mount a through boring bar between centres, (ensure it's running true) and adjust the swing of the tool to the radius required. Use the carriage feed to through bore the bearing seats.

Hope this helps. ??? ???

Best Regards
Bob
 
Jeff02 said:

Jeff02, that site has lots of good ideas. I did a Babelfish translation on it but some of it is still a mystery! ???

Yesterday was fairly productive. I got the standard monted on the face plate after kluging some clamps.

standard-setup.jpg


The boring commenced last night. I'm using these inexpensive tools:

480.1246.jpg


I've experimented with them and find they tend to bore nice tapered holes.... never used them on cast iron before, though.

As I read ahead and look at what other folks are doing, a small mill/drill is looking like a possiblility.

Thanks for looking and for your comments.

Kevin
 
Hi Jeff,
I have a suggestion on your faceplate setup. This also applies to similar setups you will encounter in the future with a milling machine. When you clamp something down always use a spacer piece under the heel of your clamp which is at least the thickness of the part or possibly just a little bit thicker. The way you have it clamped means the clamp is only touching the outside corner of your part and doesn't have much holding power. The easiest way to do this is to tape the spacer to the heel of your clamp and then you don't need 4 hands to hold everything in place. On a mill it's not a concern because gravity helps. Something else that will help is to use a washer under the head of the bolt. This will keep the clamp from trying to rotate when you turn the head of the bolt.
gbritnell
 
gbritnell said:
Hi Jeff,
I have a suggestion on your faceplate setup.

Thanks for the comments, gbritnell, I sort of had a feeling I should be putting something under the other end of those clamps. Fortunately, I got away with it this time... ::)

Cheers,

Kevin
 
kartwood said:
I've experimented with them and find they tend to bore nice tapered holes.... never used them on cast iron before, though.

Yep I noticed that tonight, it's the first time I have bored with them in the lathe. (usually use then in a boring head on the mill).
I ground the side of the tool to give more clearance ( made the angle less than 90 deg) and also ground more clearance under the cutting edges both on the side and the bottom. It seems to have helped allot. (used a normal grinding wheel, nothing fancy and it still did the job.

Cheers
Phil
 
I too have a 10V, but mine is still in it's box, so I will be very interested to follow your progress.
This is my first engine project.
I have my lathe just about set-up (1963 Colchester Chipmaster) and am looking to get a mill/drill in the next few months, time permitting.


Stuart
 
Majorstrain said:
Yep I noticed that tonight, it's the first time I have bored with them in the lathe. (usually use then in a boring head on the mill).
I ground the side of the tool to give more clearance ( made the angle less than 90 deg) and also ground more clearance under the cutting edges both on the side and the bottom. It seems to have helped allot. (used a normal grinding wheel, nothing fancy and it still did the job.

Cheers
Phil

Thanks for the tips Phil! I tried re-grinding the boring tools but still ended up with a bit of a taper. I reversed the casting in the lathe and proceded to bore from the other end. That worked somewhat but, having had some bad experiences in the past with boring, I am trying not to screw-up the castings. The 10V Standard wants to be bored out to .625 but the book suggests that there is more wiggle room than there would be with a cylinder.

I visited my local (1 hour away) tool supplier yesterday and found he didn't have a 5/8 reamer in stock (except for a NA made adjustable at $140.!!) I remembered seeing instructions in one of my books explaining how to fabricate a reamer from a piece of tool steel. A "D" reamer I think it was called. So today I bought a piece of 0-1 oil hardening steel (they called it) and proceded to make me a DIY reamer. I have a book, Hardening, Tempering and Heat Treating by Tubal Cain, which explains in detail how to harden the tool after grinding it to shape. So this evening, I went ahead and made me a 5/8 reamer. To my surprise, it worked! YAY! Saved a lot of $$ and learned a lot about heat-treating.

Cheers!
Kevin


Kevin,

Goodonya mate. :bow: Now to make reams of swarf. ::)

Best Regards
Bob
 
Congrats! I think there are very few things that give you more of an "I-Can-Do-Anything" feeling than making your own tools to make your own parts. ;D
 

Latest posts

Back
Top