


Tony Bird
Senior Member
Hi,
Simple Boiler.
Earlier this year I was asked that if I thought it was possible to build a boiler for a small model steam driven boat. The model which was to be about 60cm (2 foot) long with a 125mm (5) beam unfortunately the hull wasnt very deep about 35mm (1.25). The boiler was a prominent part of its design it was very small of a water tube type with its chimney coming out of the centre of it. The model was to be to a Stand-off Scale looking like but only close to scale measurements.
Some thoughts and several drawings made, even with an increased size the boiler would be very small. Eventually it was decided that the only boiler that would give some running time would be of a Pot design. The engine to be powered is quite small but it was thought that it would be a good idea to increase the heating area of the boiler with the addition of Hedgehog spikes. The boiler needed to be as low as possible so there wasnt a great deal of combustion space for the burner so a ceramic burner would be needed. It might also be possible to use Sterno jellied meths used a chaffing fuel in a tray to fire the boiler, though it wouldnt put out as much heat as the gas burner.
A start was made on the boiler but the project stopped as the guy that started it lost interest, so the two boilers were left in a box for the last six months. Recently I decided I needed a boiler to power a small steam engine built and it was decided to complete the boilers.
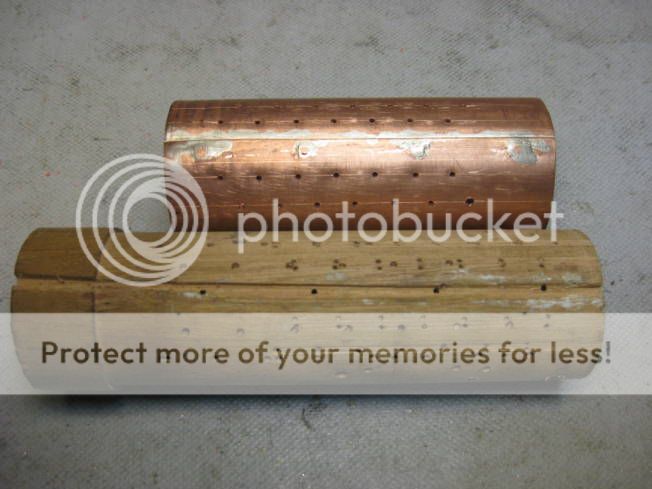
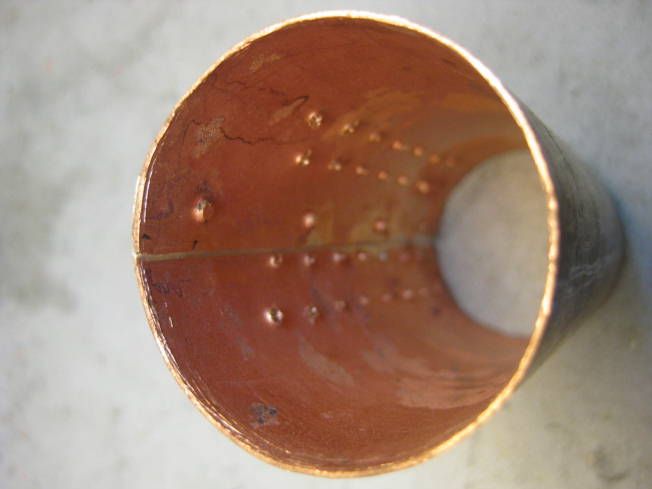
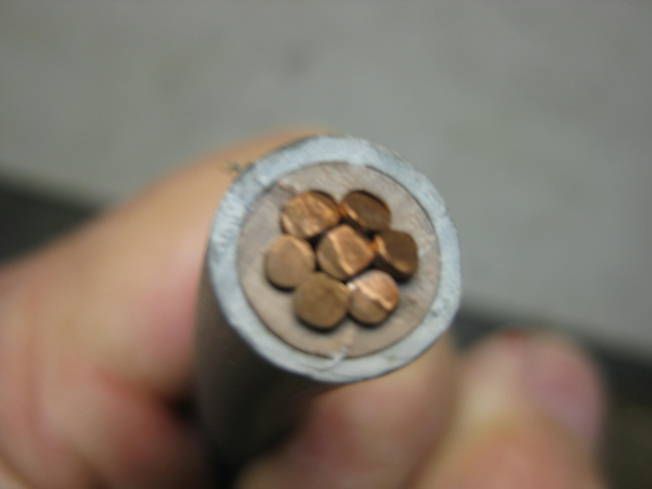
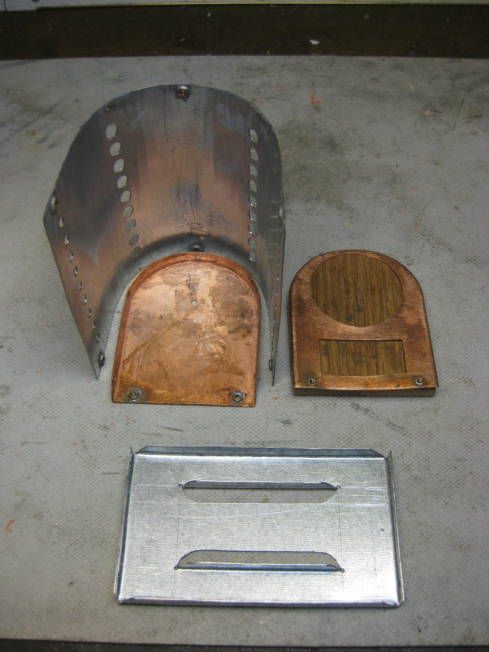
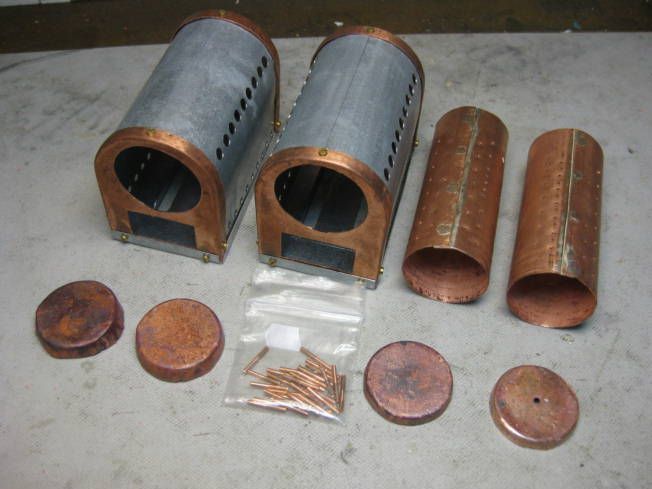
Some notes on the build so far. The copper sheet used for the boiler is 0.8mm (1/32) thick and came from a redundant water tank. The galvanised steel sheet came from B&Q (UK hardware store). The 2mm copper hedgehog spikes came from some electric earth cable, which I think are know as Tailings?
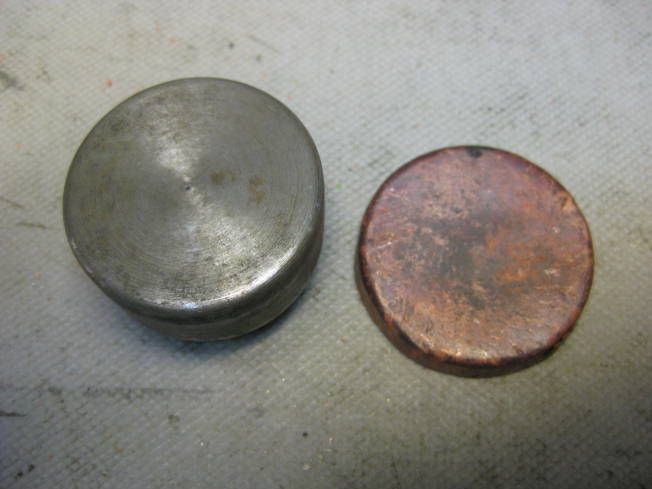
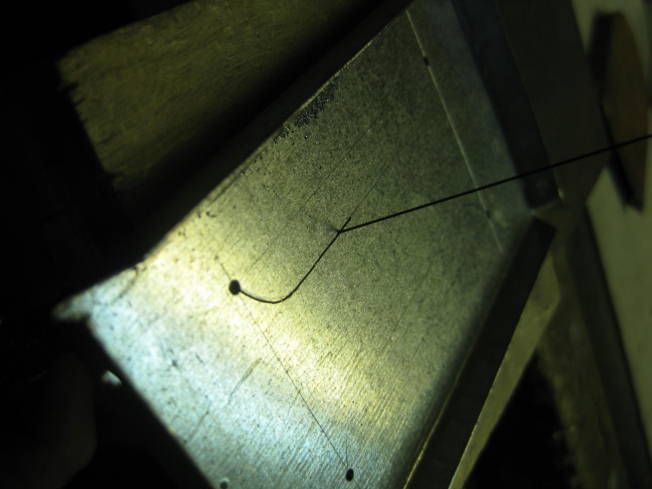
The boiler is a low-pressure design for around 20psi to power small oscillating engines and will be hard soldered together. The annealed copper for the boiler tube was bent around a wooden former and held in place with plastic cable ties while the holes for the rivets were drilled. After riveting the seam of the tube was soldered. After pickling the boiler tube was put back on the wooden former and the holes for the hedgehog spikes were drilled. The end caps were hammered to shape around a steel former. The steel flame guard was cut using tin snips and the holes drilled with a step drill. The copper boiler supports were hammered around a wooden pattern. The flame guard/boiler support is held together with screws going into stepped nuts soldered into its parts. This is as far as the boilers were constructed to six months ago.
Yesterday I found all the pieces and cut some guides in the bases for a ceramic burner or Sterno tray.
I will post further photographs as work progresses but the boilers are of a very simple design and construction.
Regards Tony
Simple Boiler.
Earlier this year I was asked that if I thought it was possible to build a boiler for a small model steam driven boat. The model which was to be about 60cm (2 foot) long with a 125mm (5) beam unfortunately the hull wasnt very deep about 35mm (1.25). The boiler was a prominent part of its design it was very small of a water tube type with its chimney coming out of the centre of it. The model was to be to a Stand-off Scale looking like but only close to scale measurements.
Some thoughts and several drawings made, even with an increased size the boiler would be very small. Eventually it was decided that the only boiler that would give some running time would be of a Pot design. The engine to be powered is quite small but it was thought that it would be a good idea to increase the heating area of the boiler with the addition of Hedgehog spikes. The boiler needed to be as low as possible so there wasnt a great deal of combustion space for the burner so a ceramic burner would be needed. It might also be possible to use Sterno jellied meths used a chaffing fuel in a tray to fire the boiler, though it wouldnt put out as much heat as the gas burner.
A start was made on the boiler but the project stopped as the guy that started it lost interest, so the two boilers were left in a box for the last six months. Recently I decided I needed a boiler to power a small steam engine built and it was decided to complete the boilers.
Some notes on the build so far. The copper sheet used for the boiler is 0.8mm (1/32) thick and came from a redundant water tank. The galvanised steel sheet came from B&Q (UK hardware store). The 2mm copper hedgehog spikes came from some electric earth cable, which I think are know as Tailings?
The boiler is a low-pressure design for around 20psi to power small oscillating engines and will be hard soldered together. The annealed copper for the boiler tube was bent around a wooden former and held in place with plastic cable ties while the holes for the rivets were drilled. After riveting the seam of the tube was soldered. After pickling the boiler tube was put back on the wooden former and the holes for the hedgehog spikes were drilled. The end caps were hammered to shape around a steel former. The steel flame guard was cut using tin snips and the holes drilled with a step drill. The copper boiler supports were hammered around a wooden pattern. The flame guard/boiler support is held together with screws going into stepped nuts soldered into its parts. This is as far as the boilers were constructed to six months ago.
Yesterday I found all the pieces and cut some guides in the bases for a ceramic burner or Sterno tray.
I will post further photographs as work progresses but the boilers are of a very simple design and construction.


Regards Tony


