Silver Soldering - a question about fluxing

Home Model Engine Machinist Forum

Help Support Home Model Engine Machinist Forum:

This site may earn a commission from merchant affiliate links, including eBay, Amazon, and others.

arnoldb

Well-Known Member
Joined
Apr 8, 2009
Messages
1,792
Reaction score
12
I have NEVER used silver solder before (my experience runs to many lead-soldered cable connectors and meager arc-welding and gas brazing). Also, I've done some checking on other threads regarding silver-soldering and found a lot of answers, before I even needed to ask a question - Thanks everyone!!

Today I made an "investment" in 10 Easyflow 40 silver solder rods and the appropriate Easyflow powdered flux.
The "investment" is worth a LOT more than I've spent on materials over the last couple of years, so I am not keen on wasting any of it on trial-and-error tests, so I would appreciate some feedback on the following (and any additional feedback anybody might feel worth-while repeating :) )

For fluxing my research came up with:
FLUX APPLICATION:- flux is best mixed with water and a drop of detergent to a creamy consistency and applied by brush to joints during assembly prior to soldering. Too much flux will rarely hurt but...

Now for question no 1: Does this mean that if I want to solder 2 pieces together, I must apply the flux to the outside of the male (or inside of the female) part over the <entire> section that must be joined <before> joining the parts, or should the joint be made and then flux applied in the corner(s) made by the parts <after> joined?

Question 2: The quote also states some detergent should be added to the flux when mixing - any suggestions on <how much> of <what> detergent, if really needed?

Many Thanks, Arnold
 
Arnold, I usually apply flux to both parts before mating together and, if necessary, a little afterwards.

If you're using the technique of putting tiny pieces of silver solder in place before heating, too much flux can bubble up and move them out of position.

A good tip if appying solder from a rod is to heat the end of the rod and dip it into dry powdered flux before applying it to the joint - it stops it from sticking when you don't want it to (you'll discover this no doubt!).

Washing up liquid seems to be the preferred detergent although I've never used it so can't vouch for it.

Another good idea is to apply a 'resist' to stop solder getting where you don't want it - 'Tippex' or other correction fluid does the trick (and so apparently does pencil 'graphite').

 
Thanks Paul :)

I'll definitely be doing the "tiny pieces of silver solder in place", and I am concerned about bubbling up, mostly because of vapours generated by the water (and at higher temperatures other compounds) evaporating from the flux. For a start, I'll be doing round pieces with a circle of silver solder, with the solder in a horizontal position. So I'm thinking that by keeping the water/liquid content in the flux to a minimum, that should mitigate the bubbling effect ???

I'm also keeping the resist in mind; it seems that all the resists mentioned everywhere are carbon-based (or produce a carbon layer when heated),and that can be extremely useful :)

How do you determine the
if necessary, a little afterwards.
need to add flux?

I'm happy if no additional detergent is needed or recommended - reminds me too much of the household chores ;)

Thanks once again!
Regards, Arnold
 
What sort of size are the pieces you'll be soldering? Personally I prefer applying solder from the rod as you've much more control over where it goes although it does take a steady hand ;)

I just guess how much additional flux is needed. You should dedicate 6 inches of one of your rods to practicing - half a dozen goes and you'll be a dab-hand at it.

Another tip: collect together your short lengths of unused silver solder (the bits that are too hot to hold any longer) and join them together into a nice long/cool rod :D
 
Just remember - gentle heat until the water evaporates out of the flux, then bump it up a bit and when the flux goes molten you are close to flash point
 
First lets start with fluxing. Both parts should be fluxed initially. But you say "if I flux them both how can I keep them together?" The idea of silver soldering is to leave a tiny gap so that the solder flows between the parts and creates a thin bond. Many years ago when I first read Kozo Hiroaka's article in Live Steam Magazine about building the Shay he repeatedly showed how to create fabricated parts from 2 or more pieces and silver soldered them together. At times he would drill and tap the pieces to be joined and hold them together with a small screw which would either be silver soldered over or just filed and polished down after soldering. It's darn near impossible to solder 2 pieces together without some type of fixturing otherwise when the flux gets liquid the pieces move. I have a fixture with 3 homemade steel aligator clips on it. I can move them about as needed to align the parts prior to soldering. The reason for making my own aligator clips is because the manufactured ones are for electrical work and when you apply heat to them for silver soldering they melt or fuse to your work. I have simple clamps that more resemble spring type clothes pins made out of steel so they won't melt and don't conduct alot of the heat away. If you really need your parts to touch each other then fixture them up, flux them on the outside and then solder. As long as the parts are clean the solder will wick in and around them forming a small fillet and a solder joint. Depending on the size of your work you might want to invest in something other than a Propane type torch as the heat pattern is to wide for small work. I have used one but have since purchased a Smith's Little Torch (oxycetylene) for really small stuff. The best thing to do is practice on a few small pieces to see how everything works. The small amount of solder used will be inexpensive compared to what you will learn. As was stated, bring the parts up to temperature till the flux gets clear and watery and shortly afterward see if you can dab a little bit of solder on to see if it will flow. If it does your temperature is just about right. And remember, the solder flows toward the heat so after you make your first application move the heat along the joint and the solder will follow. Depending on how large your joint is you might have to dab a little more on but in most cases the wicking action of the first application will be more than enough to do the job. After soldering, put your parts in an old saucepan with some water and bring it to a boil. This will disolve the remaining flux. If you are soldering brass, the brass will be discolored in places. You can mix up a small amount of water with sulfuric acid to clean up the parts. There might be other ways to clean up the parts but this is what I read and used when I built my steam boiler.
gbritnell
 
Thanks Paul & Tel

I'll be soldering 6 and 12 mm (1/4" and 1/2") pieces for a start with fairly close (reamed) tolerances.

I've done some brazing in the past (my Bakkie / Pickup Truck / Ute ;D ) needed exhaust pipe repairs, and I used brass brazing rods for it with the "heat the tip in the torch, plunge in flux, apply to workpiece" method. Some ( :hDe: ), actually a _lot_ ,of the brazing rod ended up on the floor; I <DON'T> want to see the silver solder on the floor ;)

So, thanks guys, I'll do it slow & steady on the heat, and pay my school fees by practice.

And Paul :bow: :bow: :bow: : thanks for the tip on putting the small/left-over pieces together - everybody can learn from that!
I've had to do that on a couple of occasions with lead solder and brazing rods ;) (as well as picking up dropped splatters off the floor with needle-nosed and re-using those ;)

Regards, Arnold
 
gbritnell. you raise some good points there. One thing I do with mating flat surfaces is make a few centre punch marks - the little crater around these will provide plenty of clearance for penetration. For holding pieces together I usually use little bits of 1/16" brazing rod tapped into holes put in at various angles in the workpiece(s). You can built up quite complex fabrications in this way.


CYLINDER#3.JPG
 
gbritnell, would you please post a photo or sketch of the steel clamps or clips you made for holding parts while silver soldering. My last clamping setup turned out to be more of a heatsink than a clamp.

Regards,

Chuck
 
By and large silver solder will wick into pretty much any face to face joint. Many people hammer the silver rod flat - cut down the length of the hammered part and cut across to produce little blocks of silver solder. What jewellers call pallions.

remember to put a finger over the ends when you cut across or they will all go on the floor"

These can be placed round the joint with the flux. When the metal gets to the right temp the solder will melt and run into the joint avoiding the solder on the floor episode - i have done the same with brass brazing rod.

In general to braze steel you need to be able to get it up to cherry red hot. The brazing rod (I prefer thin rods) will melt on contact with the hot steel and run into the joint rather than form balls and fall on the floor. This is where a very hot fine flame helps to reduce the overall amount of heat you need.

My father could, and did often, braze on a coke forge just putting the items in the coke and pumping up the heat but then again he practised for 48 years +!

 
Hi Chuck,
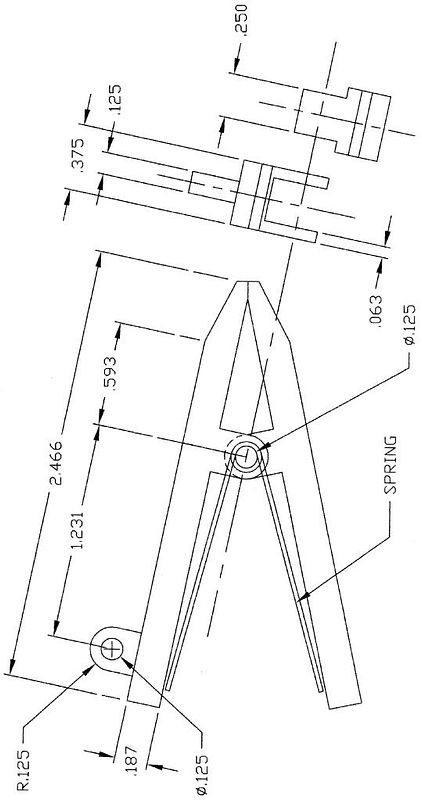
Here's a sketch of the clamp. It's made of steel so it doesn't absorb much heat when doing brass. You can make it practically any size you want. I have a couple with notches in the nose for holding round pieces. The eyelet on the top goes to a bar with a ball on the end so it will swivel to whatever postion I need. I orginally bought one of those cheap "helping hands" soldering fixtures with the 3 aligator clamps and the magnifying glass. As I stated, I removed the aligator clamps because they're too thin and burn up when you put enough heat on them to silver solder. The spring is just a piece of piano wire with a loop in it to go around the pivot pin. Nothing fancy but handy. I even use them when I TIG weld small parts.
gbritnell

SPRINGCLAMP176.jpg


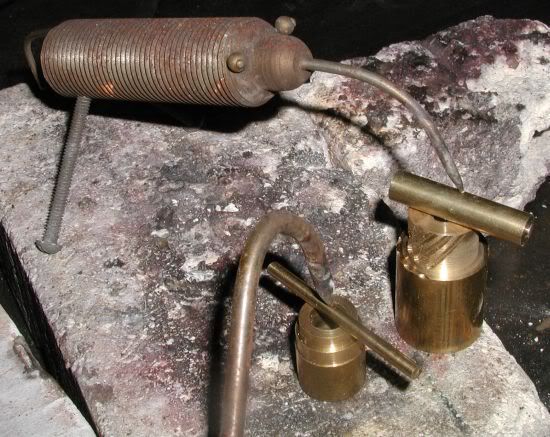
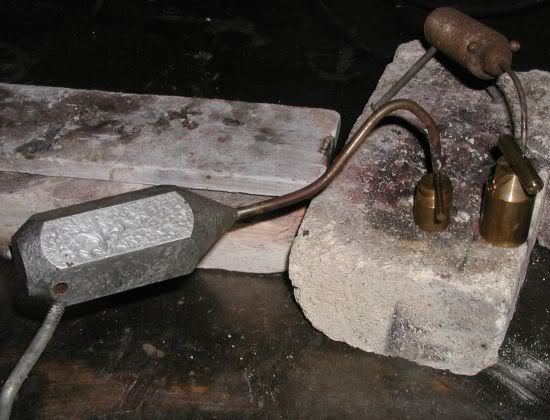
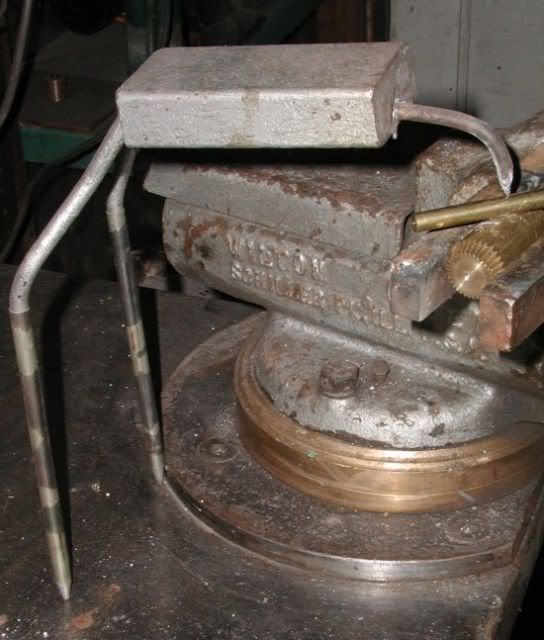
Good idea on the clamps, gotta make a couple. Got some guys hanging behind the bench that sometimes come in handy for holding a part in place for soldering.
Shortyholder.jpg

Coupleholdingguys.jpg

longlegs.jpg
 
hello!

I have resumed this thread instead of starting a new one because my question is about the flux too

for some reasons that I can't understand (probably because I'm a novice in this field, and because my hands aren't firm enough :-\), when I do silver soldering the flux changes from white powder to transparent liquid (and I know that this is the ideal moment to put the silver rod onto the piece), but I'm not firm and quick so the flux still changes to a black powder and things become more difficult

my question is: may I carry on with soldering and apply the rod on the joint or it is irremediably gone at this point?

thank you
 
To a black powder? Never had that happen. What sort of flux are you using?

I use CIG no.2 silver soldering flux, which is a water based paste. First the water boils off to leave the white powder, which in turn melts to form the 'transparent liquid', at which point you apply the s.solder.

Bear in mind that the joint needs to be scrupulously CLEAN, as any foreign material will float on the flux and impede the process.
 
If the flux becomes charred and black, you applied too much heat to the joint. You must clean up everything to bright metal, reflux, and start again. When the flux turns a dark gooey brown, back off on the heat, and approach the "clear" flux stage more slowly. Once at the clear stage, use only enough heat to get the silver solder to flow. The solder will follow the heat, so keep it moving until the joint is complete. You don't need to flood the joint with solder. It is preferrable to heat the joint indirectly whenever possible, to keep the flame out of the flux. The flux should remain clear and usable for 3-4 minutes if you don't overheat it. Plenty of time. If the flux appears to be disappeaing, add more and keep going.

Jeff
 
ok, thank you
I suspected that at that stage the soldering process was (or had?) compromised :'(

ariz

I have some difficulties with my English language :)
 
I sometimes get careless and get charred black flux when I am working with stainless the only answer is to dump it in the nitric acid tank and go and have a cup of tea. Then start over with a little less heat.
 
well, I tried to solder today

this time I used any care and I followed all the advices that you gave me, but everything was worthless: the silver soldering failed another time!

so, I have inspected every piece with attention, and have noticed that the melt silver metal has adhered well to the steel rod (I have to solder a steel rod in a hole of a titanium plate), but only upward the plate/hole
in the hole there isn't any trace of silver, not on the steel rod, neither on the titanium

indeed when I was soldering I had noticed that the silver, at the correct stage, became liquefied, but it cannot find the way to go down and so it floated around the steel rod base and finally (in part) adhered to it and (in part) fell on the floor

I repeat: this time I prepared the parts very well
I don't say that solder titanium is impossible, but that extra actions need to be taken
My idea is that titanium expands more (and more again) than other metals under heat, so there is not sufficient space / gap for melted silver

I'm sure that in my case there was a gap well over the 0,05 mm or 0,002 in

however, I'll never solder titanium again. only steel, brass and simple things :)
all these trials have costed a small fortune :'(

thank you all for the support


Back
Top