Well, I’m finally back to report on the mTech 3-axis DRO I bought from thedrostore.com. It took far longer than it should have but wow, am I glad to have it now! I’ve had the mill for over 8 years now and have made & bought a steady stream of tooling for it as money & time permitted. Knowing what I know now and if I had it to do over again, I would’ve got the DRO first then moved on to all the other stuff. There’s no telling how much time would’ve been saved over those 8 years not to mention the far fewer numbers of mistakes and scrapped parts. Did I mention how much I like this thing?
Anyway, here are a few pics of the items I had to deal with over & above the standard installation tips you gentlemen posted above. Thanks very much for all your help.
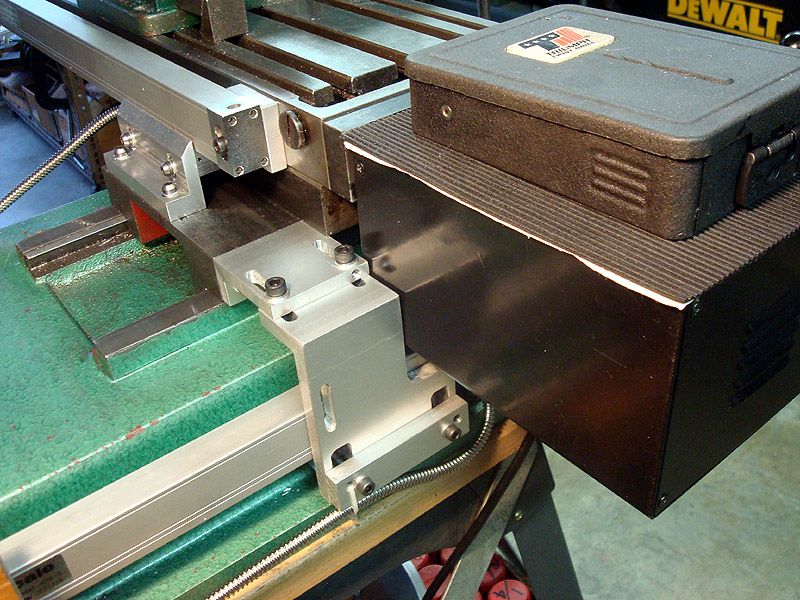
My X3 has a Grizz X-axis power feed installed (couple years ago) which makes the Y-axis reader bracket a little bit awkward. I just juggled the supplied kit brackets a bit and fitted it around the unit with it run fully to the right.
You can also see the aluminum scale mounting pads on the Y axis. That was one of the hardest things to get right since the X3 casting is angled in all directions & lumpy. I milled the inner face of the pads to match the angle, spot glued them to a straight bar to keep the outer faces aligned and juggled it around to fit & glued the pads on with super glue after cleaning & roughing up 2 spots on the side. The rear one fit pretty well but the side of the casting was twisted and the front one had a gap at the top. I filled the gap with epoxy filler & once that cured, drilled & tapped the mounting holes. I was able get the scale dialed in to less than a thou at full travels so I guess I did OK.
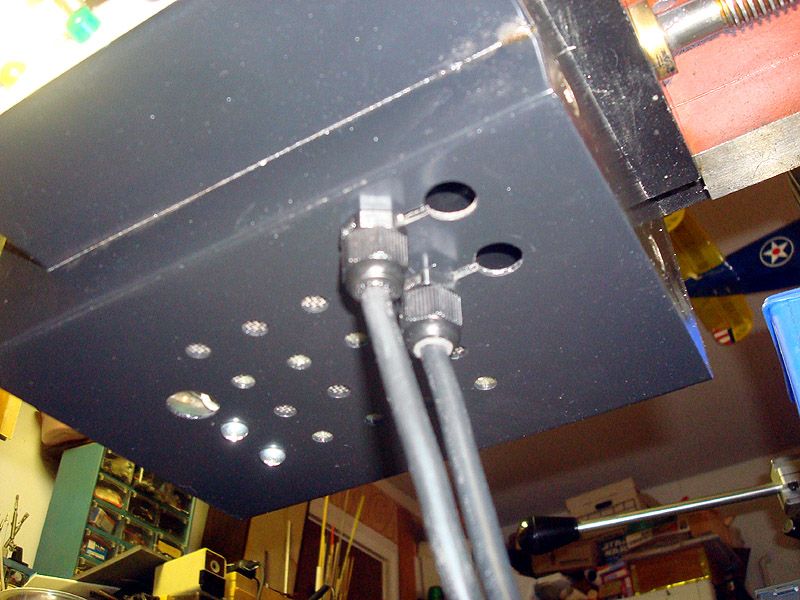
The electrical cable glands on the bottom of the case hit the scale body at full travel so I had to shift them over about an inch. You can see I took the lazy way out & cut connecting slots between the holes so the wires could be slid across without unplugging everything. I told myself it increased the cooling airflow as well.

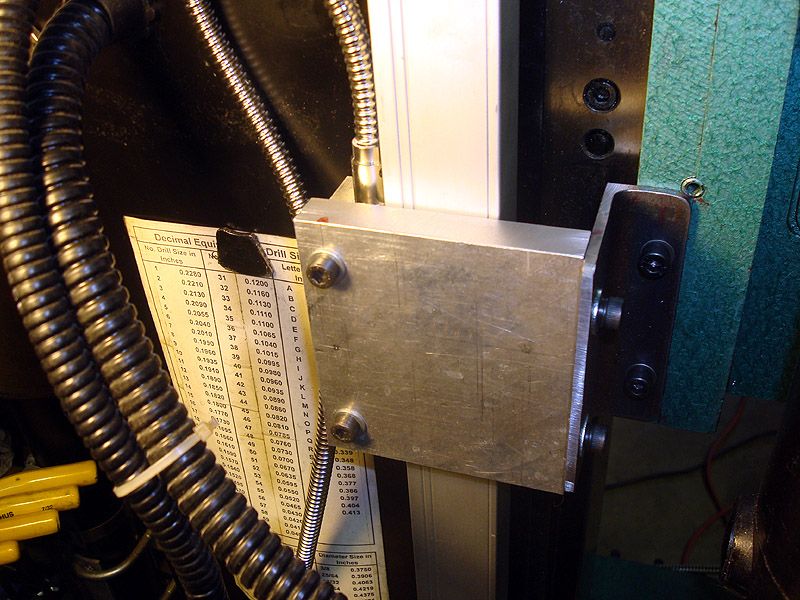
I scratched my head a bit on the Z-axis reader bracket and ended up using stuff I had lying around to get it mounted. It’s slotted in all needed directions and once tightened up was very rigid and I was able to dial it in almost perfectly.
I’ve done a few jobs with it now and am still grinning ear to ear! I’m still figuring out the various onboard functions and I’m sure there are a multitude of time-saving tricks to learn as time goes by.
Cheers!


