PMR 2A Wobbler- my first engine from castings

Home Model Engine Machinist Forum

Help Support Home Model Engine Machinist Forum:

This site may earn a commission from merchant affiliate links, including eBay, Amazon, and others.

DOC123

Well-Known Member
Joined
Jun 1, 2010
Messages
65
Reaction score
0
Dear All
This is my first attempt at making an engine from castings and only my second steam engine. It runs (just) with me blowing into it and easily on a little compressor.
I modified the kit a little as it is imperial and all my taps etc are metric. I didn't take any WIP images. I must start doing that.
I'm quite pleased with it considering I'm very new at using a mill and lathe.
I just need to mount it on a base. Not sure whether I should paint the cylinder or leave it bare.
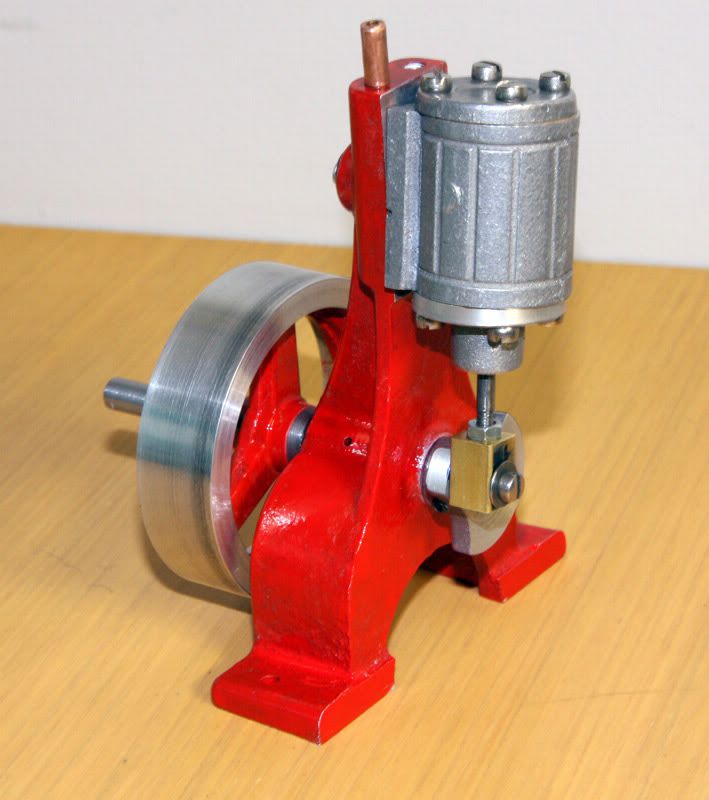
wobbler.jpg
 
Fantastic Doc...sounds like it runs well too from your description. PRM use to offer this in a bronze casting set too but stopped doing that some years back...I always wondered why. So what do you have planned for your next project?

Regards,
Bill
 
Great looking job for only your second engine attempt Doc. And to say that it is the first go at castings is all the more impressive. Many get intimidated by castings but it appears that you have overcome that fear and produced a fine running engine. PMR stuff is all good quality to begin with and their customer service is quite good as well. At least if you bodged up a piece you could easily have gotten a replacement with just a simple phone call. If you paint the cylinder, highlight the details with a darker color for contrast, or mask them off before applying color, that would be very eye catching. Thm:

BC1
Jim

 
bearcar1 said:
Great looking job for only your second engine attempt Doc. And to say that it is the first go at castings is all the more impressive.

Yes. :bow:

Many get intimidated by castings

Well, I know I do. :-\

Great work Doc. :bow:

Best Regards
Bob
 
Well done Doc,keep up the good work. th_wav

Ian (seagar)

Coffs Harbour,
N.S.W.
 
Hi doc123. You did a real nice job of machining your engine! I'm a big fan of the wobbler style steam engine, and I have built quite a few. One of my very first projects 3 years ago was the very model you built.

Mine doesn't look quite as good as yours, and has more wobble in the flywheel than the cylinder!
But it sits proudly on my shelf of engines never the less. :big:

Congratulations on you successful build! :bow:

-MB
 
Nice job !! This was my 1st casting model too !!

b.lindsey said:
PMR use to offer this in a bronze casting set too but stopped doing that some years back...I always wondered why.

I have a feeling it was cost. Aluminum is cheaper then bronze.

Mike
 
Metal Butcher said:
Hi doc123. You did a real nice job of machining your engine! I'm a big fan of the wobbler style steam engine, and I have built quite a few. One of my very first projects 3 years ago was the very model you built.

Mine doesn't look quite as good as yours, and has more wobble in the flywheel than the cylinder!
But it sits proudly on my shelf of engines never the less. :big:

Congratulations on you successful build! :bow:

-MB

Thanks all
Mine has a little wobble in the flywheel as well. This is as a result of stuffing up the hole that the drive shaft runs through. I drilled it and then reamed it with a hand reamer. The end result was an oval hole. When I made the shaft to fit I lapped them together. It was lovely and smooth bit woudn't turn if the force came from the crank. The shaft fited perfectly vertically but moved sideways due to the oval shape of the hole.
I then drilled out the hole enough to make it round again. I didn't ream the hole but left it as the drill created. It was a bit rough but seems to be OK.
I made another crankshaft out of mild steel.
it is different to the kits one as I put a flange on the back of it that allows the flywheel to be further out on the shaft.
How do I stop the problem of the hole becoming oval using the hand reamer?
Cheers

Terry
 
DOC, Avoid hand reaming, it seldom gives perfect results. On your next flywheel I would drill the hole under size by say about .010 and then replace the drill with the exact size reamer. Do both operations (drill/ream) in one set-up, on the mill, lathe, or drill press with out moving the work piece (flywheel).

Later when you get a little more experience and tooling, you can get back to your flywheel and install a thin wall bushing to get rid of the wobble.

-MB
 
It's been said a bunch now but I'll also chime in...

Nice job Doc!

:)
 
Metal Butcher said:
DOC, Avoid hand reaming, it seldom gives perfect results. On your next flywheel I would drill the hole under size by say about .010 and then replace the drill with the exact size reamer. Do both operations (drill/ream) in one set-up, on the mill, lathe, or drill press with out moving the work piece (flywheel).

Later when you get a little more experience and tooling, you can get back to your flywheel and install a thin wall bushing to get rid of the wobble.

-MB
Thanks.
It isn't the flywheel that has the problem but the cast stand that the drive shaft passes through. It still slightly concentric but I didn't want to make the hole too much bigger. Your right though. I could drill it out much bigger and insert a brass/bronze bush to solve the problem.
So what use are hand reamers? any?
 
DOC123 said:
So what use are hand reamers? any?

Can be really helpful if your out of sight of a power point. ;D

Seriously, there are many situations where a part needs to be reamed in situ, usually because it's 100 times easier to take the reamer to the part rather than the part to a machine.

Hope this helps

Best Regards
Bob
 
I built this same model a few years ago. I also messed up the hole for the crank. I just bored it oversize and made a brass bushing for it.


IronHorse
 
Back
Top