


DICKEYBIRD
Well-Known Member
- Joined
- Sep 27, 2007
- Messages
- 653
- Reaction score
- 46
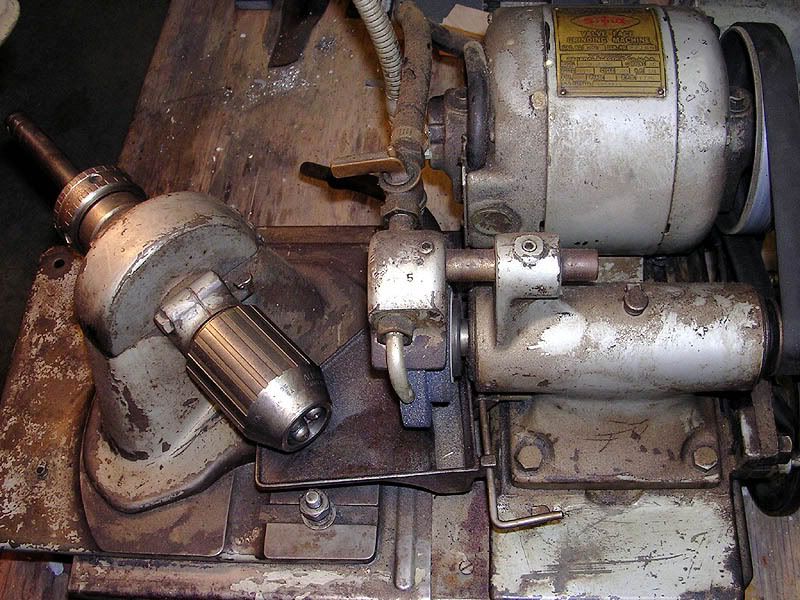
I mentioned in another post here that a friend gave me this old Sioux #621 valve refacer. My plan was to lightly refurbish it and use it to reface the odd engine valve and modify it for a little tool grinding.
I wanted to make a few accurately ground pointed shafts from drill rod in various sizes. They will be used to accurately locate pop marks for hole drilling without having to change the collet in the mill...ie: need 1/4" hole? Fit 1/4" collet, locate pop mark with pointy 1/4" drill rod, lock the table, install drill bit and go. It should save a little bit of time and will be accurate as I'll need.
When I chucked up the 1st piece of drill rod, I checked the runout and found .0045". YUCK! I took the chuck apart, cleaned, lubed and reassembled it with the rollers in different relative positions but the best I could get was .004". Goodbye old worn chuck!
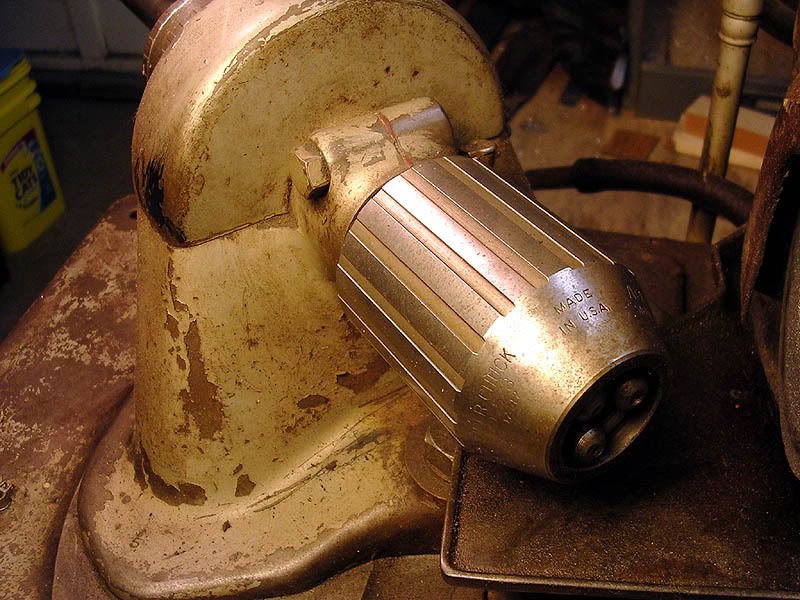
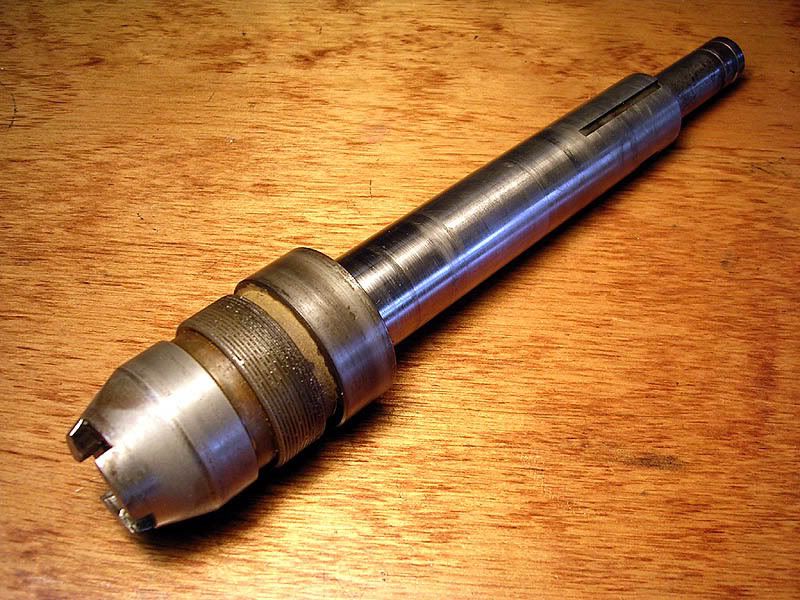
I checked the runout of the spindle itself without the chuck and it was almost perfect. I removed it and sawed off the chuck nose just outside of the threaded section. It then went into the 4-jaw and dialed in 'til it showed no runout. Fortunately, the chuck portion wasn't super hard and I was able to turn the threaded area down with a carbide insert to leave a nice, smooth surface to fit an adaptor for a replacement chuck. The spindle itself is VERY hard; a file just skids on it. It runs in cast iron with oil grooves and oil cups placed for easy lubing. The system must work because the 50 yr. old shaft shows only light polish marks with little measurable wear.
I ordered in an inexpensive 3" 4-jaw chuck from Little Machine Shop and was well pleased with it. http://www.littlemachineshop.com/products/product_view.php?ProductID=1175&category=566826475 I sketched up an adaptor in TurboCAD using the dimensions on LMS's website. I printed it out and glued it to a chunk of 1/2" aluminum plate. The blank was clamped in the mill and the 4 mounting holes spotted and drilled. It was then rough-cut to a lumpy round shape on the bandsaw and bolted to the back of the chuck. The chuck jaws were removed and the little feller was chucked & dialed into the bigger 4-jaw on the lathe. The adaptor o.d. was turned to size and the i.d. drilled & bored carefully for a push fit onto the spindle. The adaptor was then drilled/tapped 10-24 for the clamp screw and a slot was cut with a slitting saw.
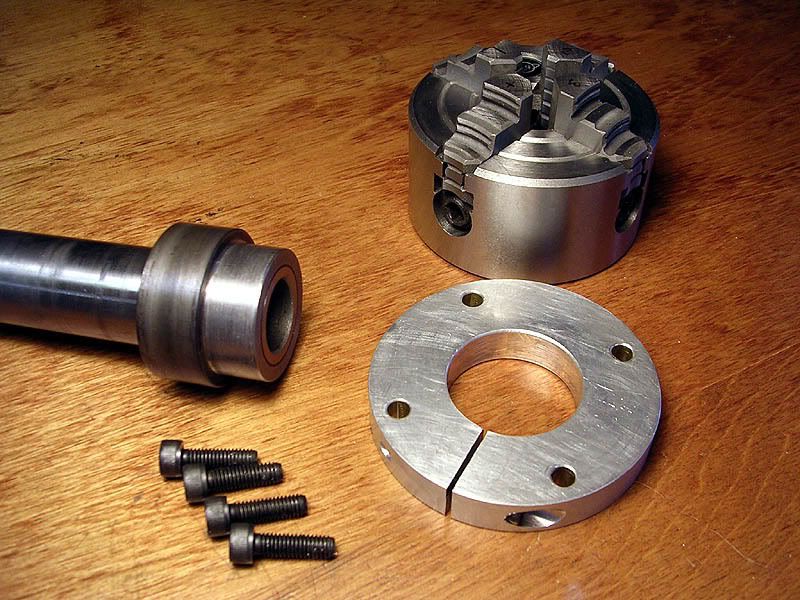
It fit perfectly and has minimal runout. Of course, any runout of the work can now be dialed out easily in the little 4-jaw.
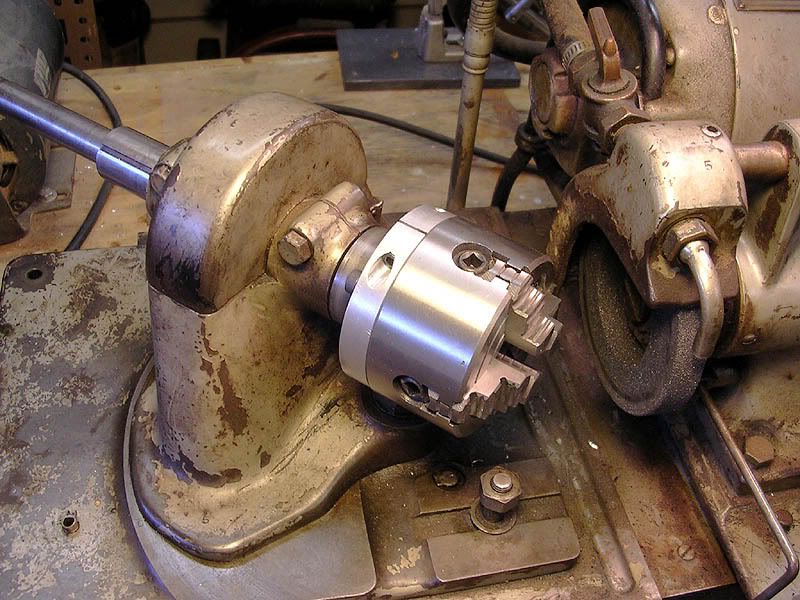
Can't wait to get the new belts in so I can pour in some coolant and begin using it. I think I can also use the 4 jaw to finish grind model engine crankpins and eccentrics. I hope so anyway.
I wanted to make a few accurately ground pointed shafts from drill rod in various sizes. They will be used to accurately locate pop marks for hole drilling without having to change the collet in the mill...ie: need 1/4" hole? Fit 1/4" collet, locate pop mark with pointy 1/4" drill rod, lock the table, install drill bit and go. It should save a little bit of time and will be accurate as I'll need.
When I chucked up the 1st piece of drill rod, I checked the runout and found .0045". YUCK! I took the chuck apart, cleaned, lubed and reassembled it with the rollers in different relative positions but the best I could get was .004". Goodbye old worn chuck!
I checked the runout of the spindle itself without the chuck and it was almost perfect. I removed it and sawed off the chuck nose just outside of the threaded section. It then went into the 4-jaw and dialed in 'til it showed no runout. Fortunately, the chuck portion wasn't super hard and I was able to turn the threaded area down with a carbide insert to leave a nice, smooth surface to fit an adaptor for a replacement chuck. The spindle itself is VERY hard; a file just skids on it. It runs in cast iron with oil grooves and oil cups placed for easy lubing. The system must work because the 50 yr. old shaft shows only light polish marks with little measurable wear.
I ordered in an inexpensive 3" 4-jaw chuck from Little Machine Shop and was well pleased with it. http://www.littlemachineshop.com/products/product_view.php?ProductID=1175&category=566826475 I sketched up an adaptor in TurboCAD using the dimensions on LMS's website. I printed it out and glued it to a chunk of 1/2" aluminum plate. The blank was clamped in the mill and the 4 mounting holes spotted and drilled. It was then rough-cut to a lumpy round shape on the bandsaw and bolted to the back of the chuck. The chuck jaws were removed and the little feller was chucked & dialed into the bigger 4-jaw on the lathe. The adaptor o.d. was turned to size and the i.d. drilled & bored carefully for a push fit onto the spindle. The adaptor was then drilled/tapped 10-24 for the clamp screw and a slot was cut with a slitting saw.
It fit perfectly and has minimal runout. Of course, any runout of the work can now be dialed out easily in the little 4-jaw.
Can't wait to get the new belts in so I can pour in some coolant and begin using it. I think I can also use the 4 jaw to finish grind model engine crankpins and eccentrics. I hope so anyway.