Mills 1.3cc diesel - Plans by Ron Chernich from Model Engine Builder magazine

Home Model Engine Machinist Forum

Help Support Home Model Engine Machinist Forum:

This site may earn a commission from merchant affiliate links, including eBay, Amazon, and others.

Metal Mickey

Well-Known Member
Joined
Jul 5, 2008
Messages
612
Reaction score
6
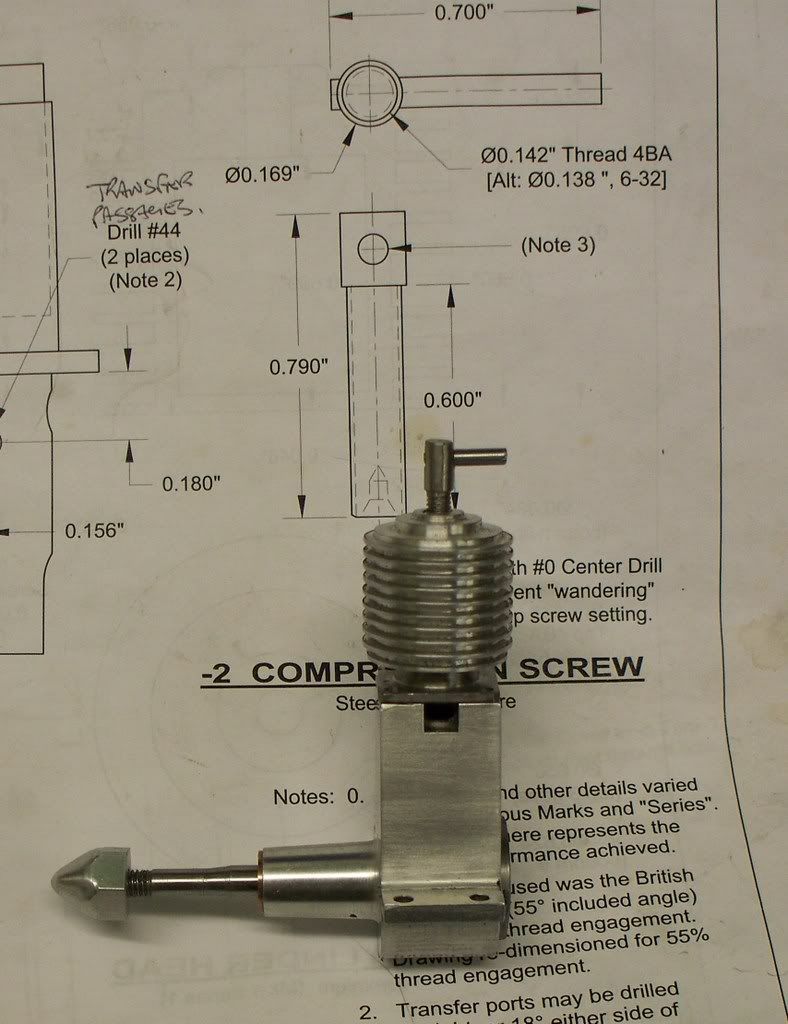
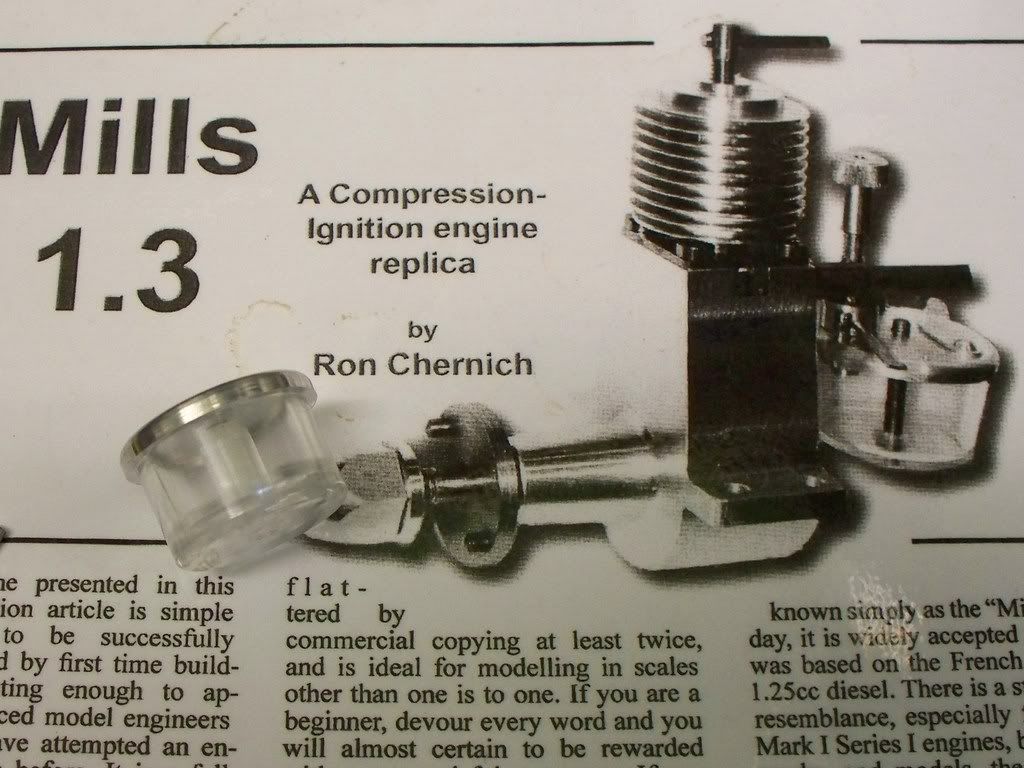
Hello, thought I would share with you the progress of the model diesel engine I am building from the article and plans of Ron Chernich (Australia) he published in issue 1 of Model Engine Builder magazine. I started in January this year. My progress depends on the time I can get in the workshop and how fit I am (excuses I know!) The build is documented on my website (along with all the other projects I have done this year) http://www.mikes-models.com I hope the photo's load as this is my first time.....

slidesawandMills018.jpg

about to start turning the front taper.....

millscrankshaft12072008006.jpg


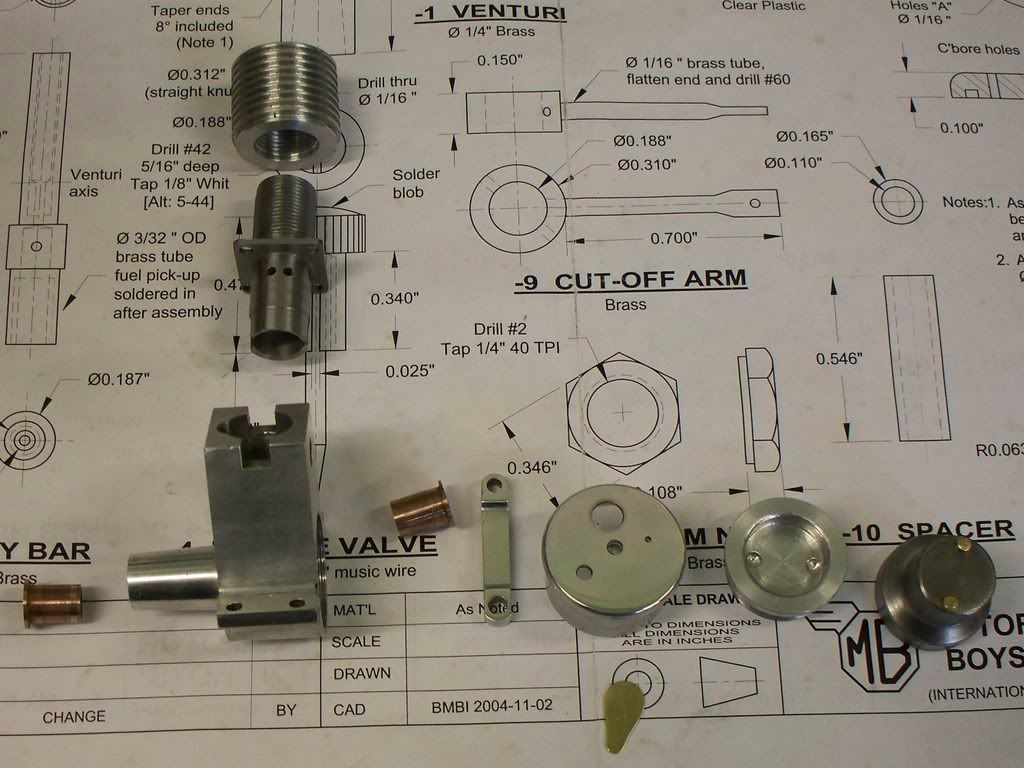
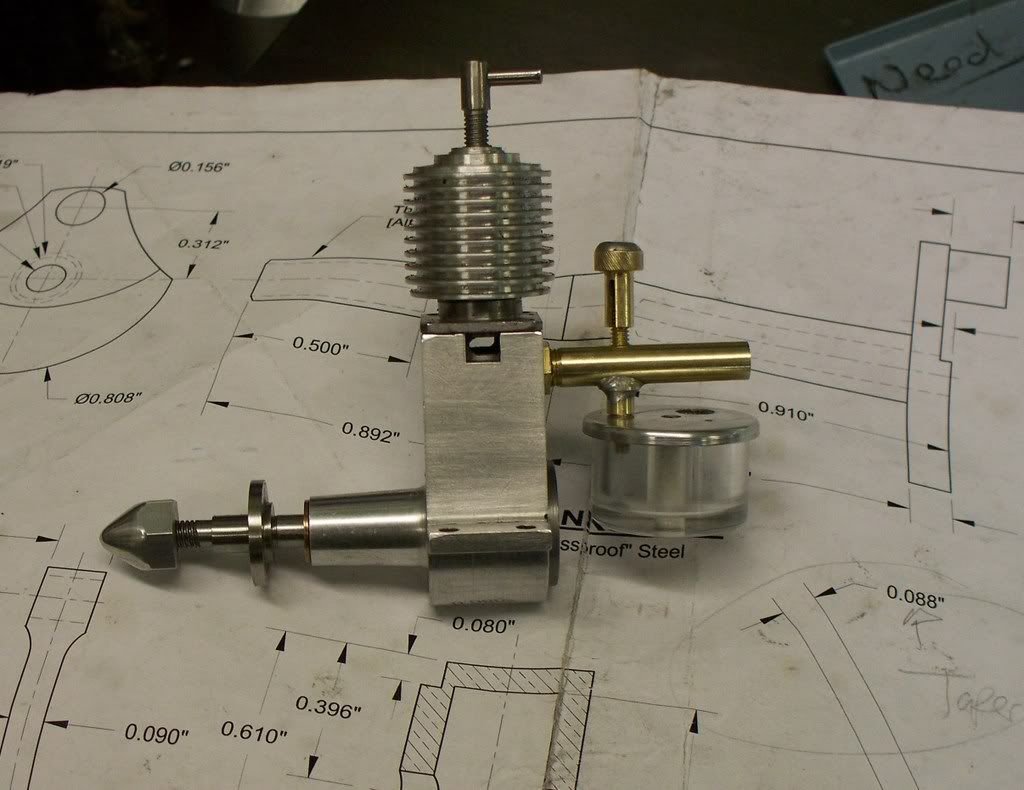
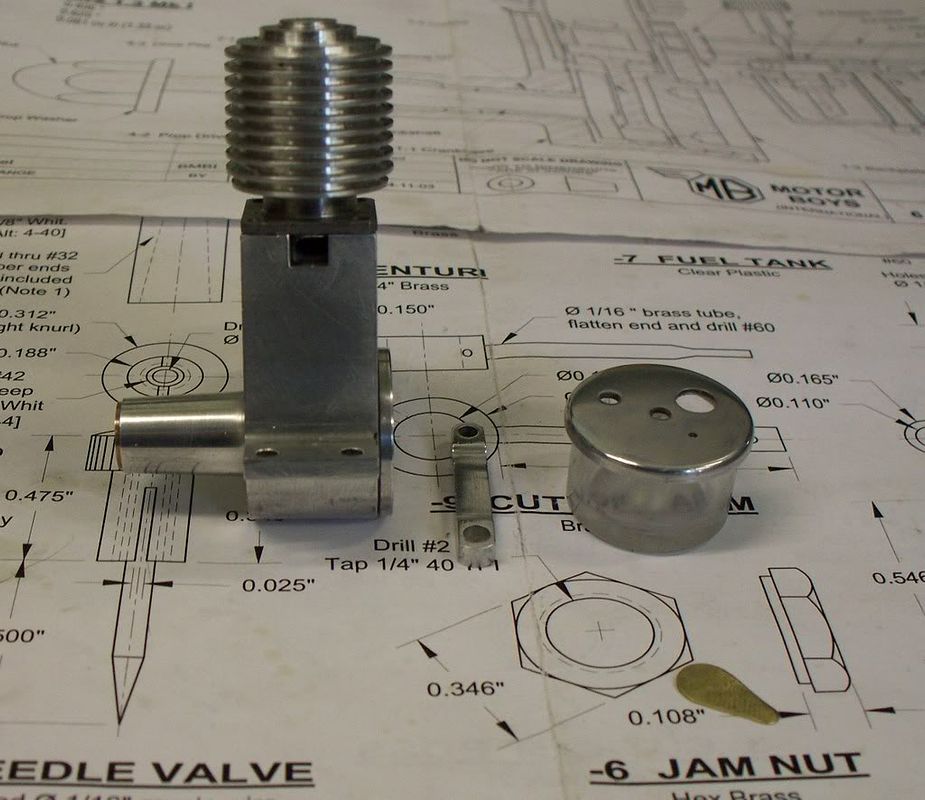
Where I have got to at the moment........

millsfueltanksess24072008025.jpg


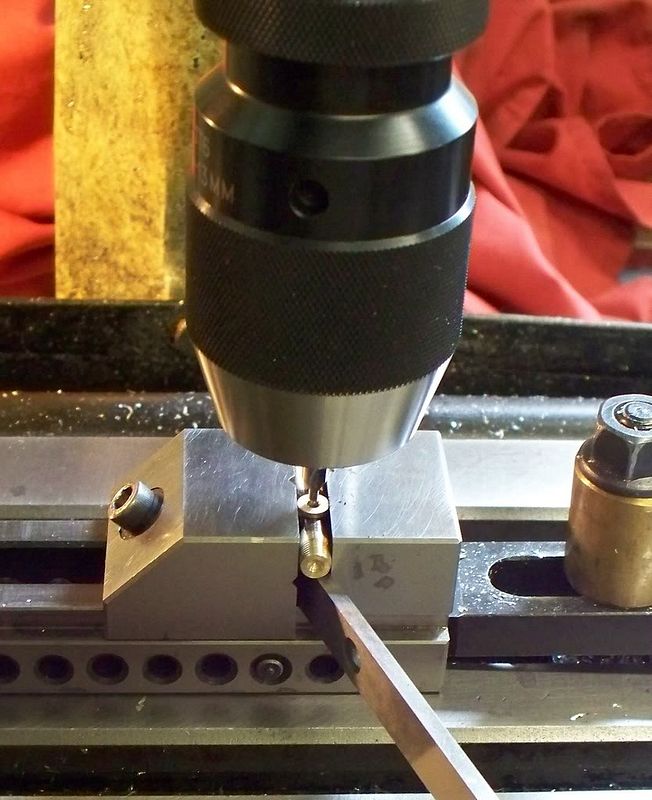
Made 2 fuel tanks and tops. One for a reader of my website and the other for mine.

millscrankshaft12072008003.jpg


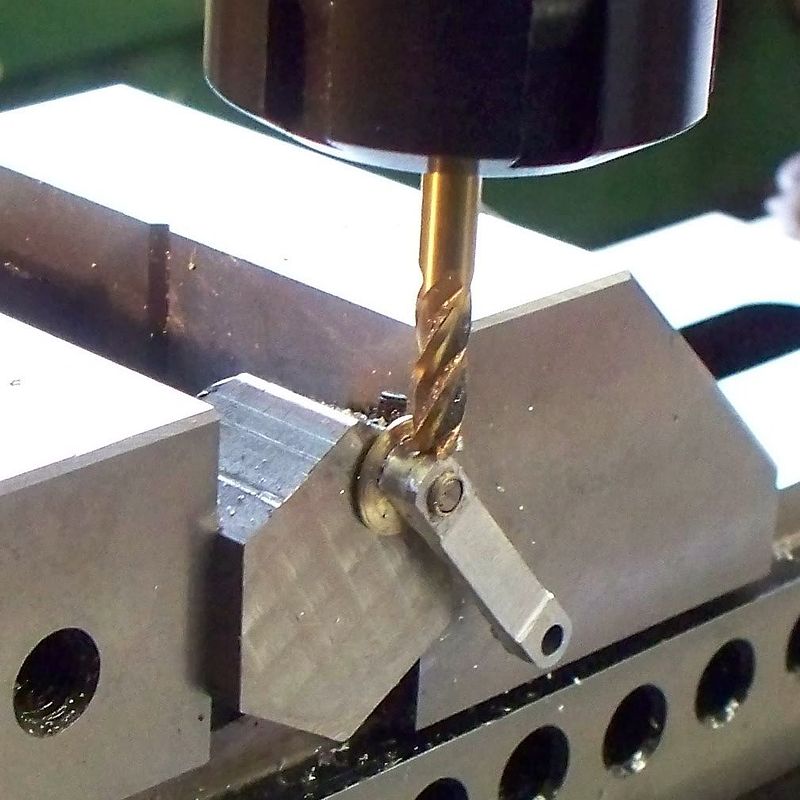
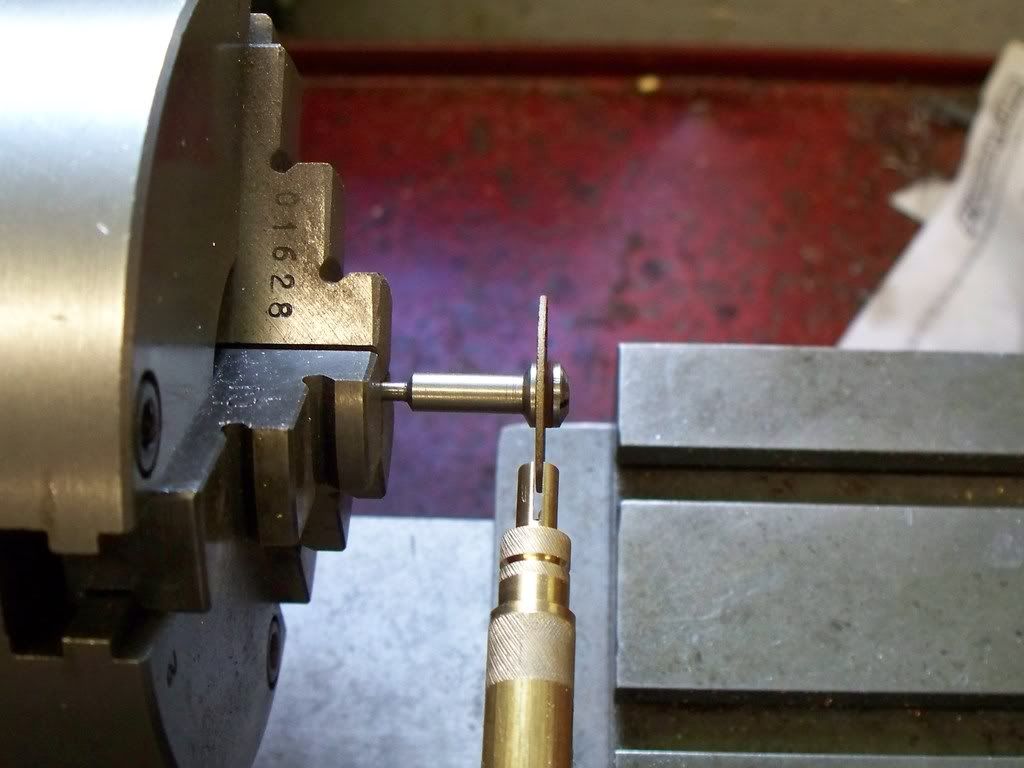
Turning the radius on the end using the method described by Ron Chernich

millscrankshaft12072008010.jpg


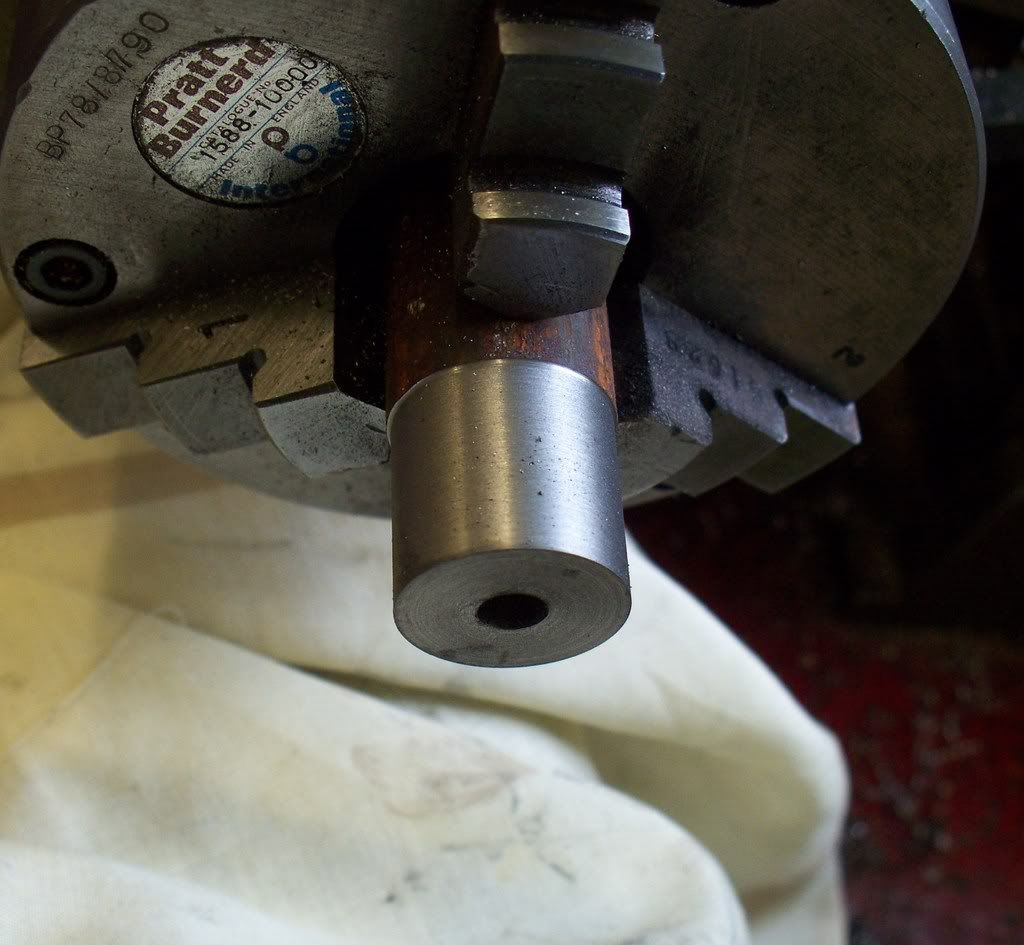
Where I am now and I have jsut started to make the crankshaft.......more to follow......

And here they are......getting on with the crankshaft and the prop nut.....

millscrankshaft13thJuly2008013.jpg

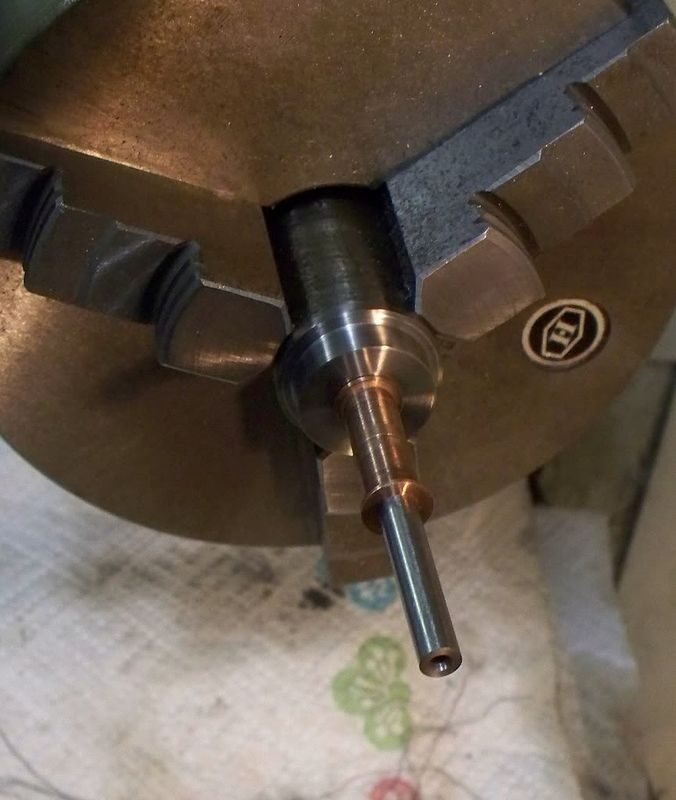
the two phosphur bronze bushes trial fitted to crankshaft blank..
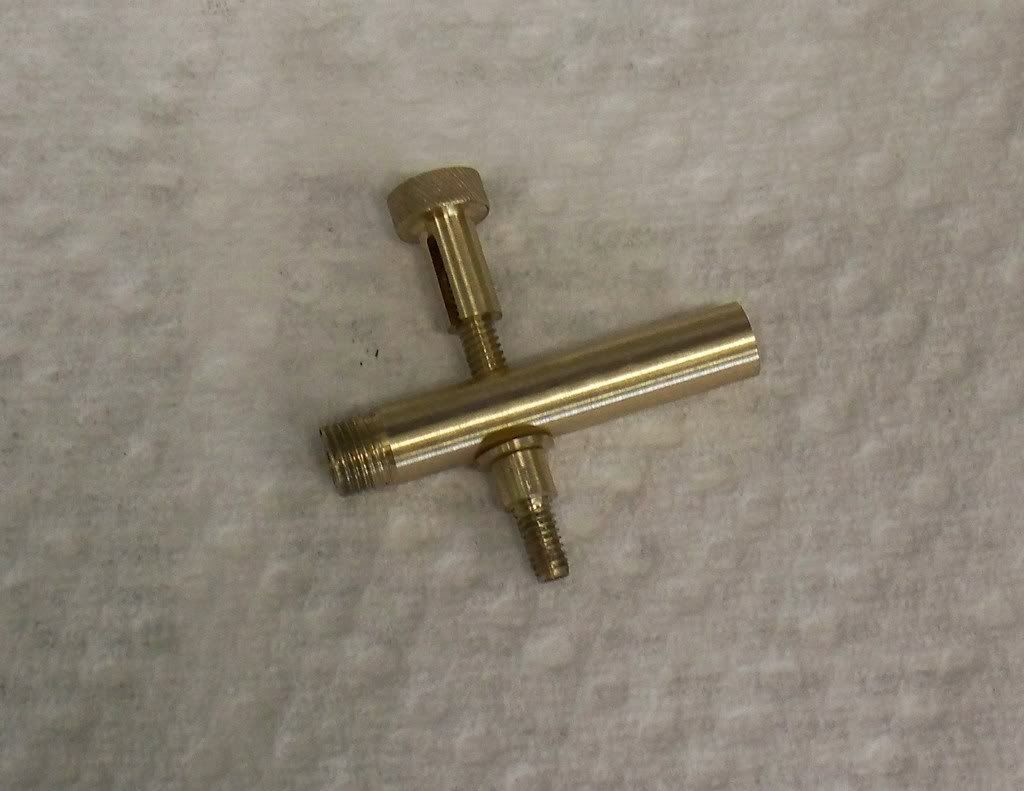
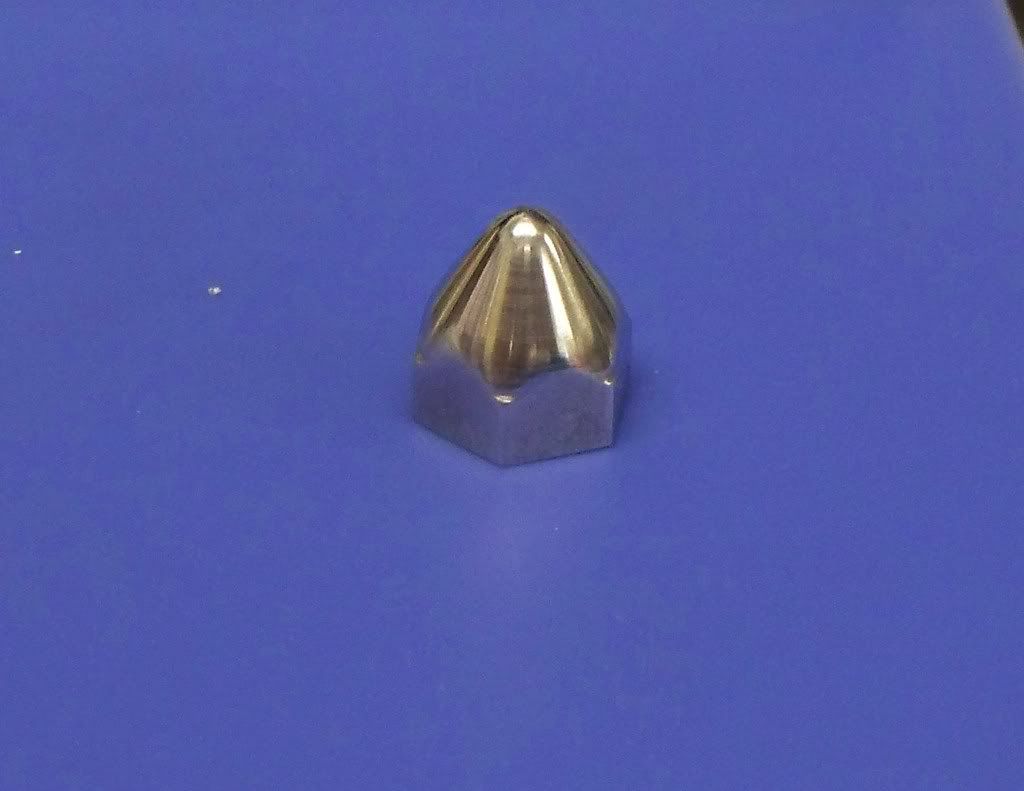
millscrankshaft13thJuly2008009.jpg
the prop nut....

millscrankshaft13thJuly2008022.jpg
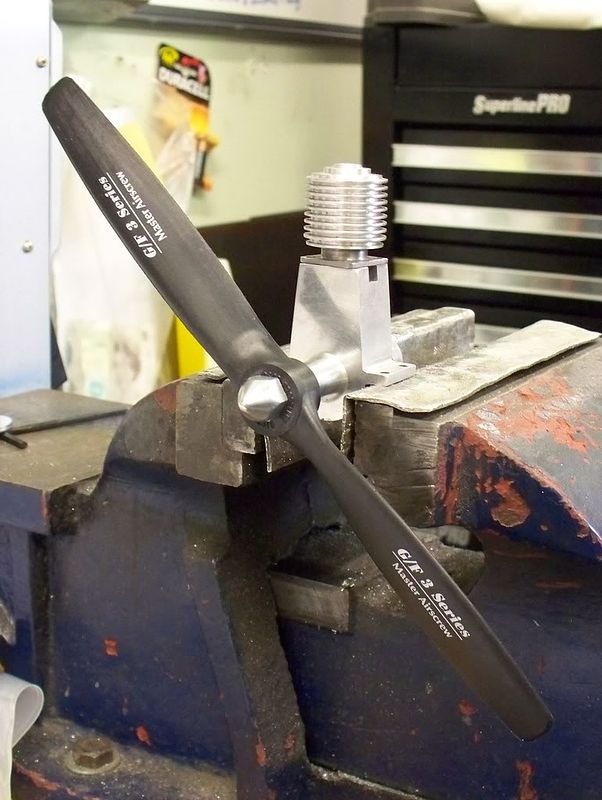
why do we always trial fit to see what its going to look like when finished! (well at least I do......)

millscrankshaft13thJuly2008020.jpg

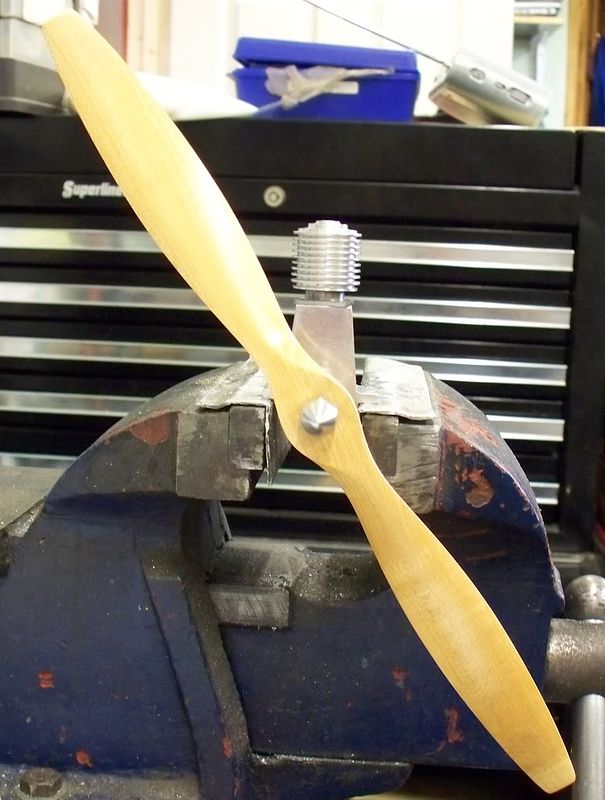
Ron Chernich, the designer of this engine says it will swing a 12" wooden prop.......well it looks big to me!
 
Very nice
Splendid looking shop you have there
I enjoyed looking at your web site
John
 
Sorry about the photo's. I found the page where it suggested using Photo Bucket. Seems to have worked. So every day we learn a little more........... ;D
 
All clear to me Mike ;D I think I just clicked on it as you updated the photo's ;)

Nice looking engine you got going there.... I've never seen a model diesel engine, it will be nice to see/hear one running ;D


Ralph.
 
Top quality work and photos Mike, an old friend of mine had a Britton Norman Islander RC aircraft running on a pair of these, everyone stopped what they were doing when it started.

David
 
Thanks. I have been told these engines are very flexible and it will (not necessarily mine though!) drive a 12" wooden prop. Look forward to it breathing...........
 
12"????????Wow,that's a BIG prop :big:
Looks like a nice engine,Mike.I've owned a couple of diesels in my time(DC,Philtech),but could never get along with them.Please post a video of it running if you can,once you finish it.
They do sound lovely when running well.
 
And don't flood it when trying to start it, cos if it's like its' little brother, the 75, it backfires and starts backwards! been,seen,done,video,T-shirt, etc.
Regards Ian
 
Hello bentprop, interesting name...story there I bet! I am working all out to get it finished (subject to health) instead of rotating my projects. I want to here it run as well and IF it does I will post a video here.
;D


Thanks for the tip re flooding Circlip. I remember many years ago my first diesel when I was about 14 and how I knew it was alive. How do I know it was alive? It kept ^&&%$g biting me!

I have read about people using a starting stick. I guess that's simply a stick with some protection that is used instead of fingers? Any experience of using them, and a general description?


Stiff upper lip man, you're BRITISH, no damn lacky bits of wood/plastic. Wear the Admiral's stripes (Right forefinger) with PRIDE.
Also get ready for the three day Caster Oil perfume.
And just to correct the term it's called a CHICKEN stick (Check it out)
And in the model world there's only two types of IC engines, Diesels and four strokes

Regards "Admiral" Ian
 
You can get a rubber finger sleeve from most model shops or you can make a starting stick from a piece of dowel about 1/2" diameter with some silicone exhaust tubing forced over one end to protect the prop.
 
Thanks Twinsquirrel but since the 'Admiral' has posted I must go 'bareback'.....
 
And I know it's only posed Mike,but PLEASE don't sha..... ruin such a beautiful engine by gripping and starting it in the vise, seen too many crankcases with knurl marks.

Regards Ian
 
Hello Circlip, caught you! The Mills is only sat on the vice and not held. But the comments you made are still of value. I am going to make a stand/clamp when I run it (as ever hopeful). Its the first time I have been well enough to get back out into the workshop today and only managed to make the compression screw and what a problem I had for a 'simple' job. I used a taper tap in the cylinder head to make sure it was a tight fit and used the die as open as it could be but the screw cut in BMS was not as tight as I would have liked. In the end I turned it from stainless steel on the hope that it was a harder metal. Fortunately it seemed to work, at least better than BMS.

A couple of photo's for your delectation

compressionscrew16-07-2008009.jpg


compressionscrew16-07-2008019.jpg


millspiston004.jpg


millspiston005.jpg


After making the conrod I made a start on the last two items today. One the piston and the second will be the contra piston. In anticipation of trying to make the engine run I have been trying to tie down a supplier of diesel fuel in my area. That is from Plymouth, Exeter and Torbay. All to no effect. I had quite a few comments of "oh we don't stock that, very old engines that!
 
Just had a couple of sessions in the workshop....making the fuel system for the Mills and here are a few photo's of the progress. Details are on my website www.mikes-models.com

The latest picture......but don't be conned...still have the contra piston and piston plus finishing the crankshaft......but it is getting closer..........

millstaperfuel22072008013.jpg


Cross drilling using the parallel's to make sure its level and also support......using a button to centre.....
Millscarburettorsystem19072008014.jpg


Cutting a slot in the thumbnail.....holding the brass bar in the tool holder as per Ron Chernich's advice
Millscarburettorsystem19072008023.jpg


The parts made and trial fitting prior to soldering up......
Millscarburettorsystem19072008028.jpg


Well I have gotten back into the workshop at last and have the piston and contra piston left. After that I perhaps face the hardest task....finding a small supply of diesel fuel!

Anyway the piston has been completed in relation to machining but has yet to be honed to fit. I have two fixtures to make. One a temporary con rod to hold the piston when honing and the second is the piston hone itself. I am following the directions as per issue 2 of the American magazine Model Engine Builder (and excellent it is too...). SO it shouldn't be too long now before I finish my first model diesel engine (subject to remaking if it won't start!).

When it does....I can then get back and put some real effort into my Fowler traction engine and I am really looking forward to it!

Some photo's for your delectation..............


pistonmills31072008010.jpg


pistonmills31072008016.jpg


pistonmills31072008018.jpg
 
Back
Top