Mill Table Reference Ruler

Home Model Engine Machinist Forum

Help Support Home Model Engine Machinist Forum:

This site may earn a commission from merchant affiliate links, including eBay, Amazon, and others.

kcmillin

Project of the Month Winner!!!
Project of the Month Winner
Joined
Jan 19, 2010
Messages
1,193
Reaction score
41
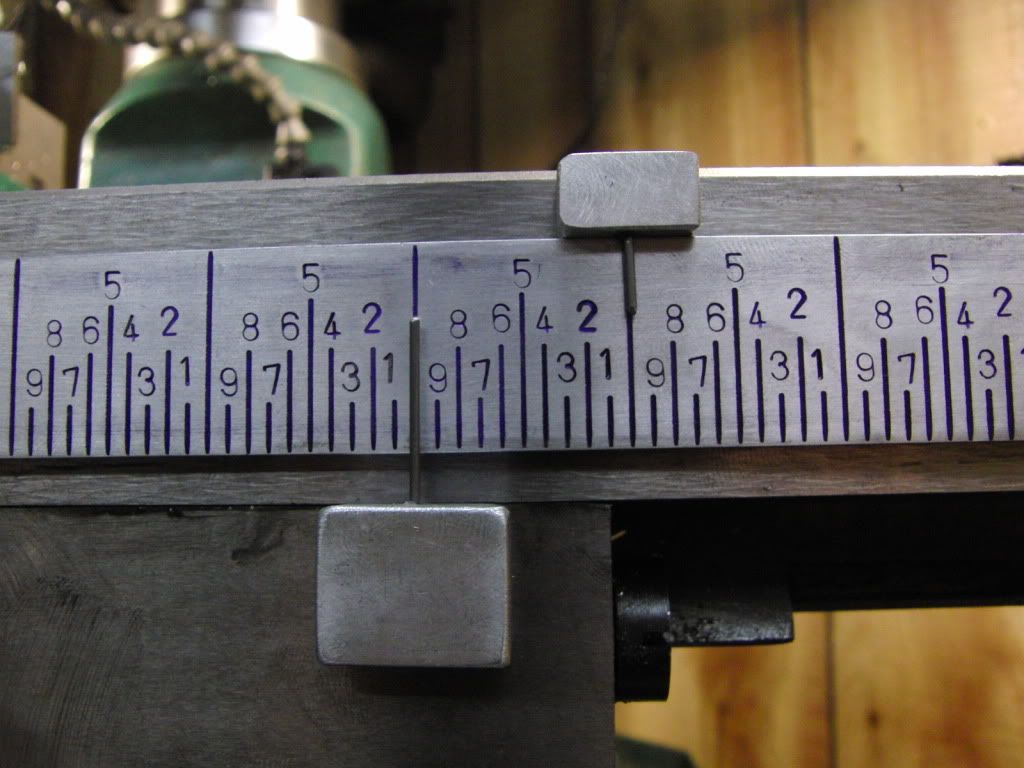
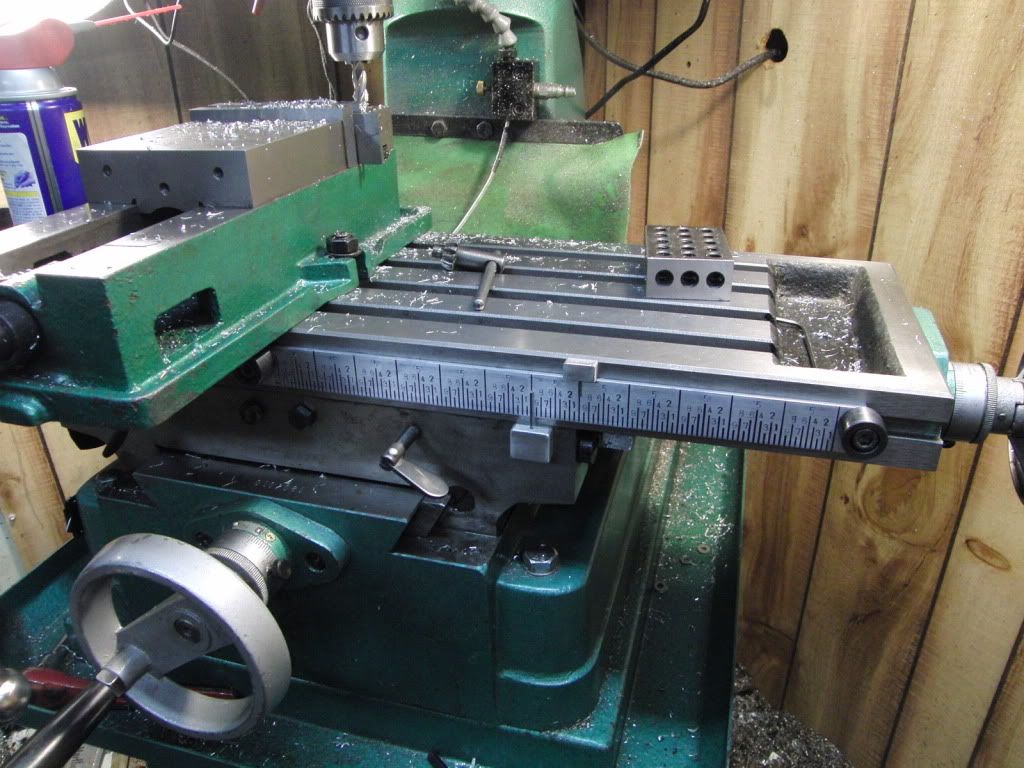
When using the mill table dials, keeping track of how many turns you cranked can be easy to forget if you have allot of milling to do. In the past I have used a small 6 inch ruler with 10th marks on it. This is small, and sometimes not long enough. So I decided it was time to make a better one.

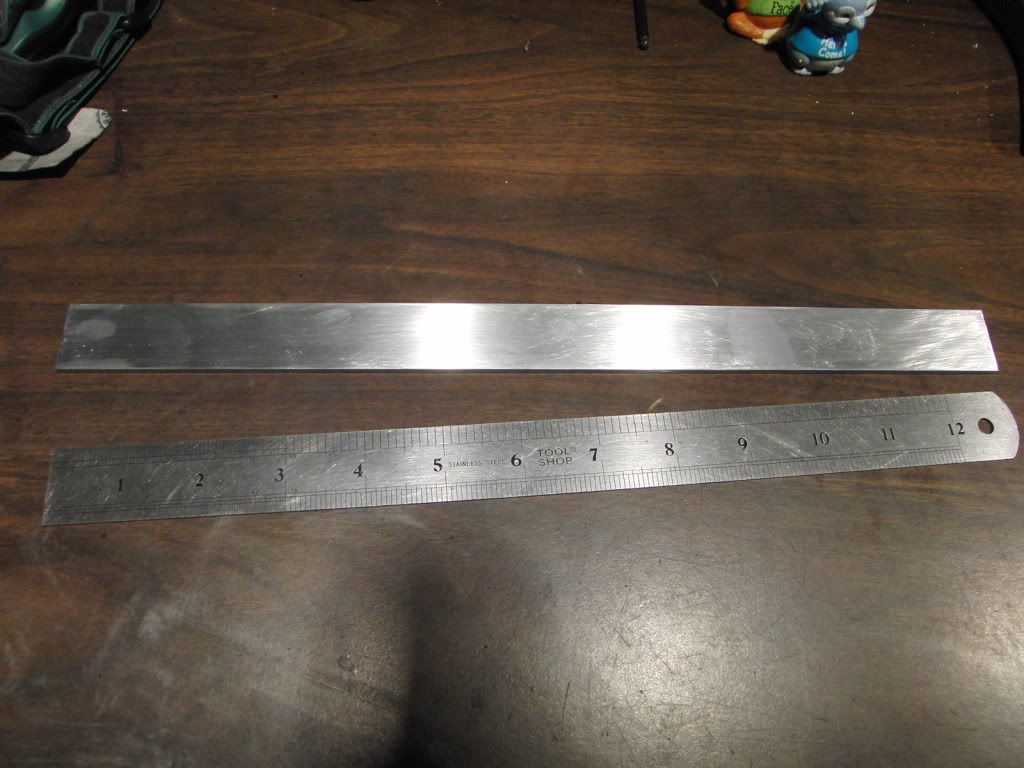
I started with, what els, but a ruler shaped piece of aluminum. 1/8 inch thick, and 13 inches long. (it will be a 12" ruler, but I need room on either end to mount it.
CIMG0644.jpg


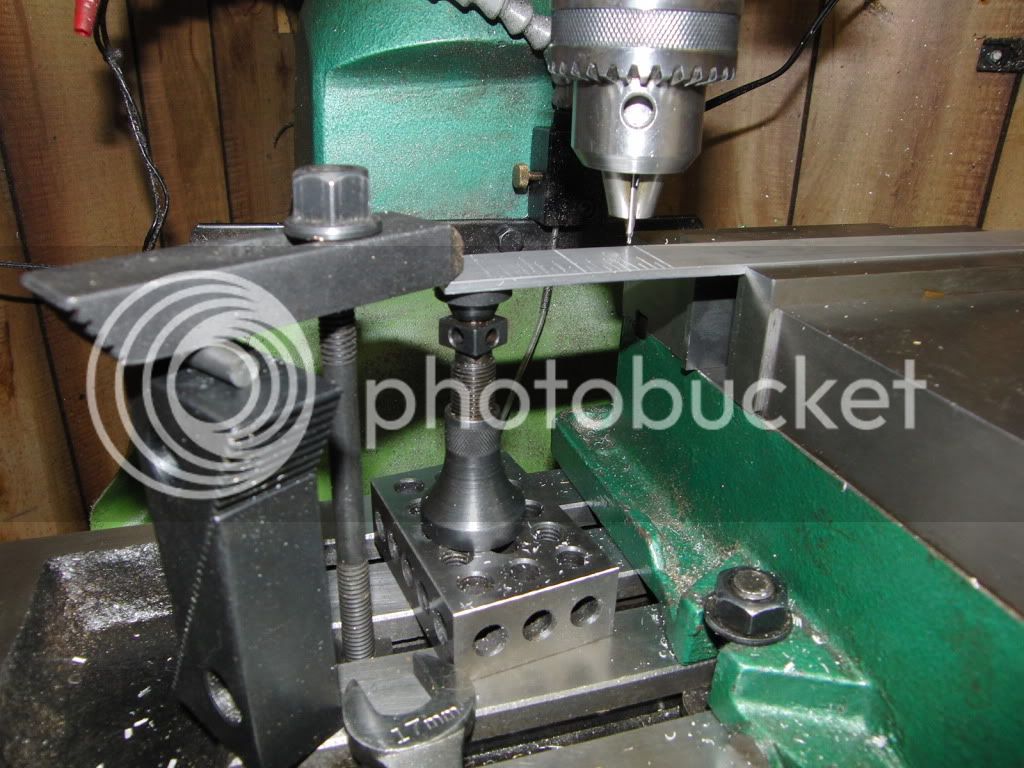
From there It went directly into the mill vise. But Oh no! My vise is only 5" wide. Well since I was not doing any heavy milling, a machinist jack was in order. I used this in combination with a step clamp, to prevent any vibration.
CIMG0645.jpg


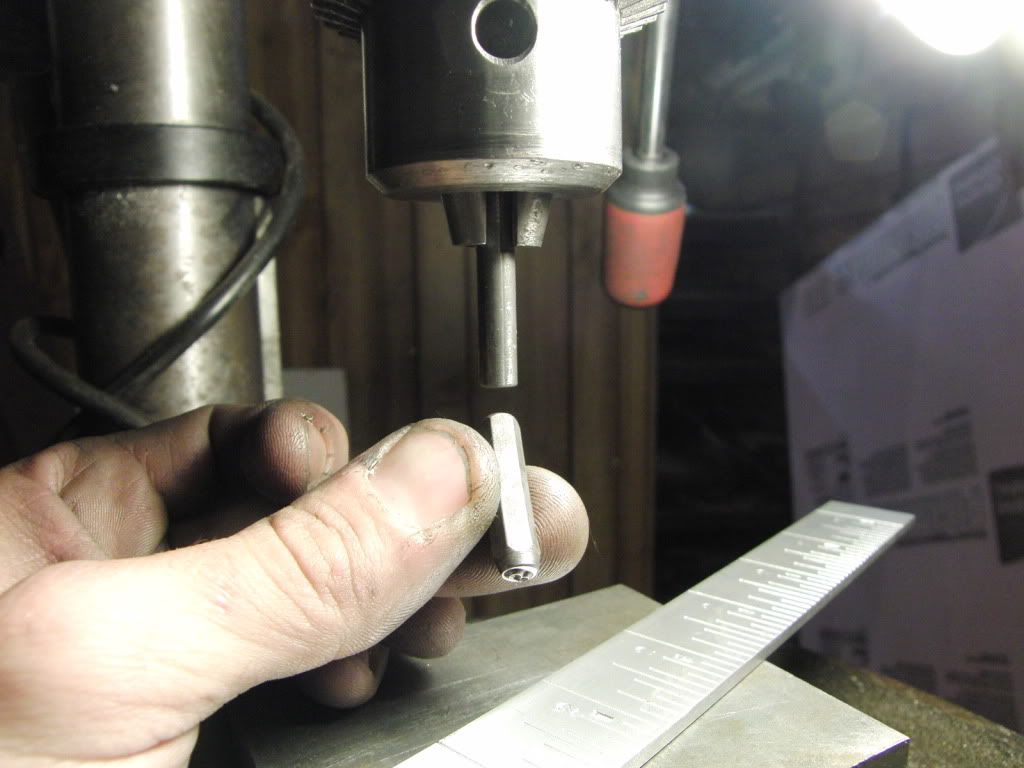
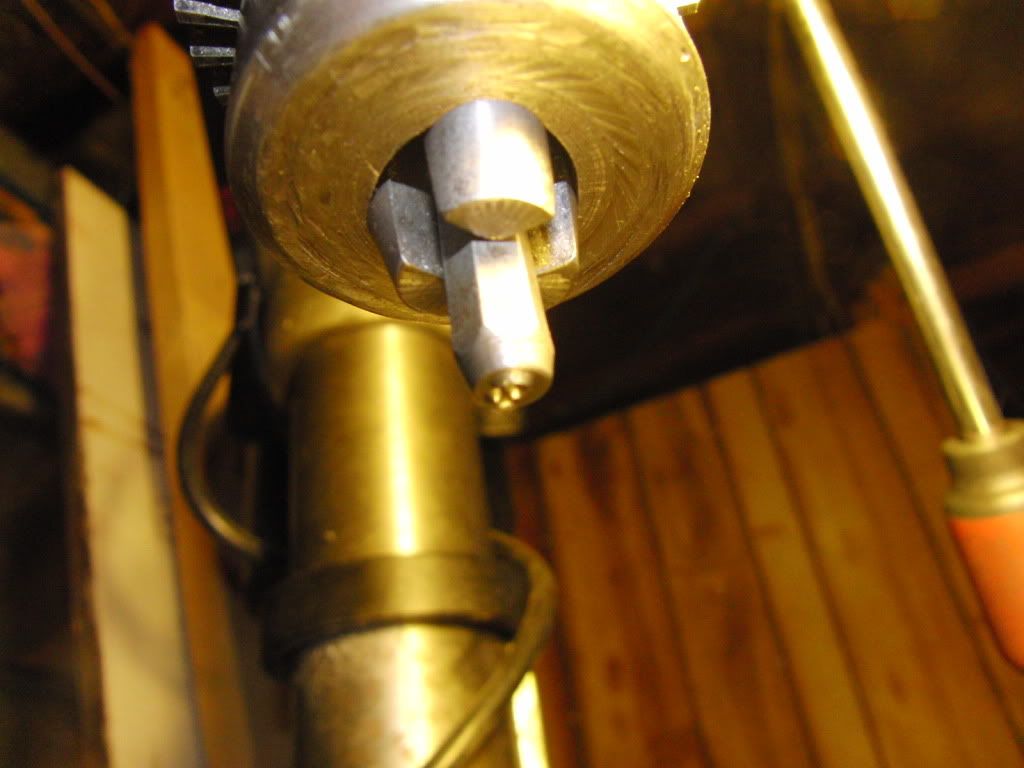
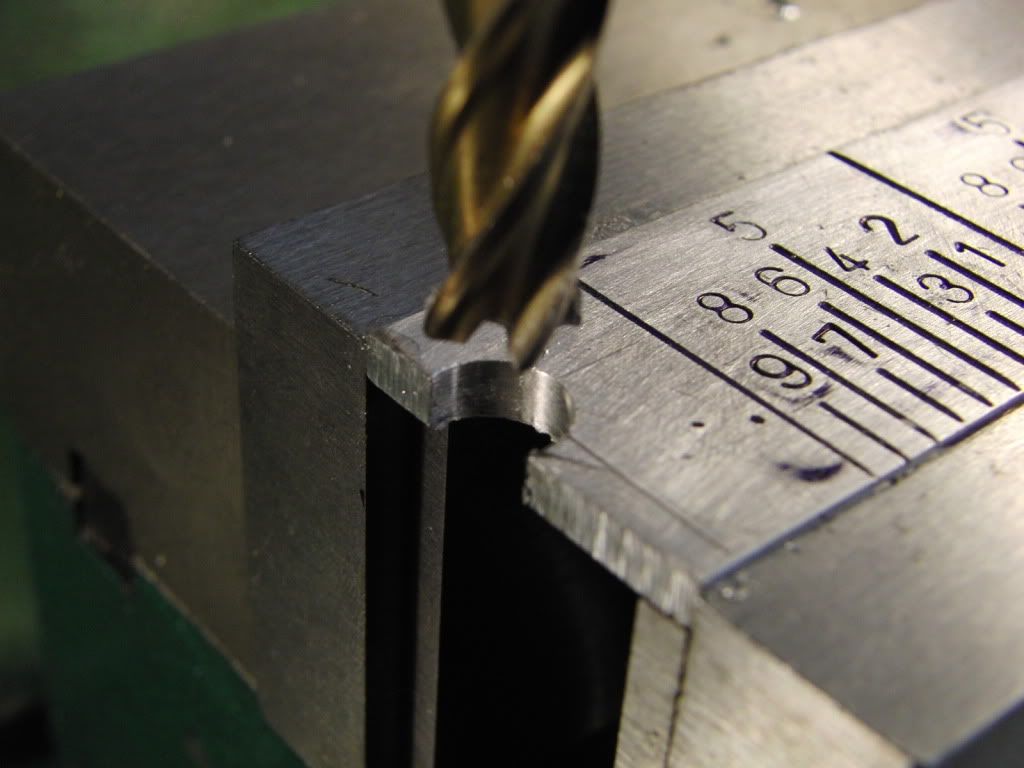
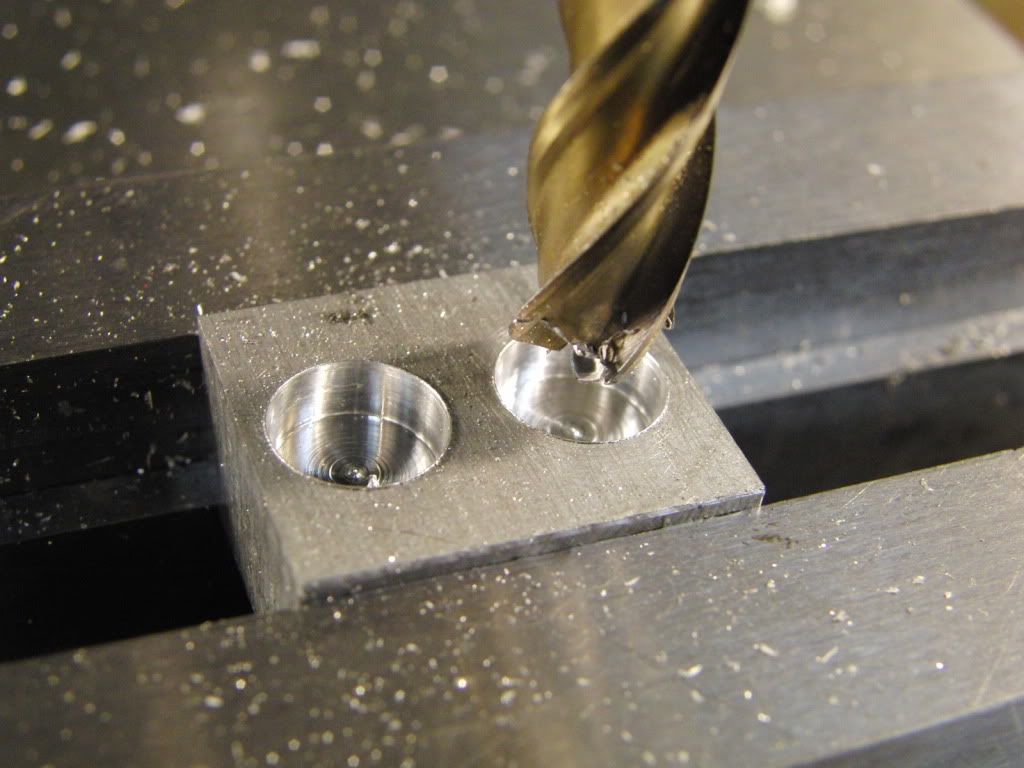
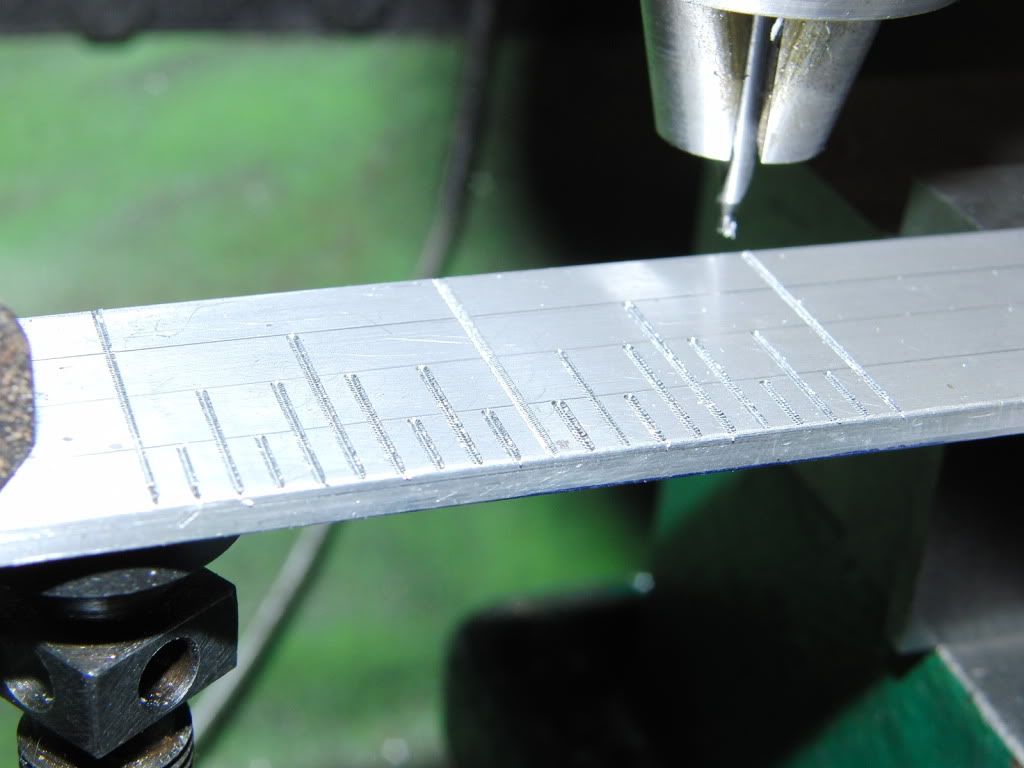
Now its time to make the reference marks on the ruler. I used a #1 center drill, setup to cut about .005" deep.
CIMG0647.jpg


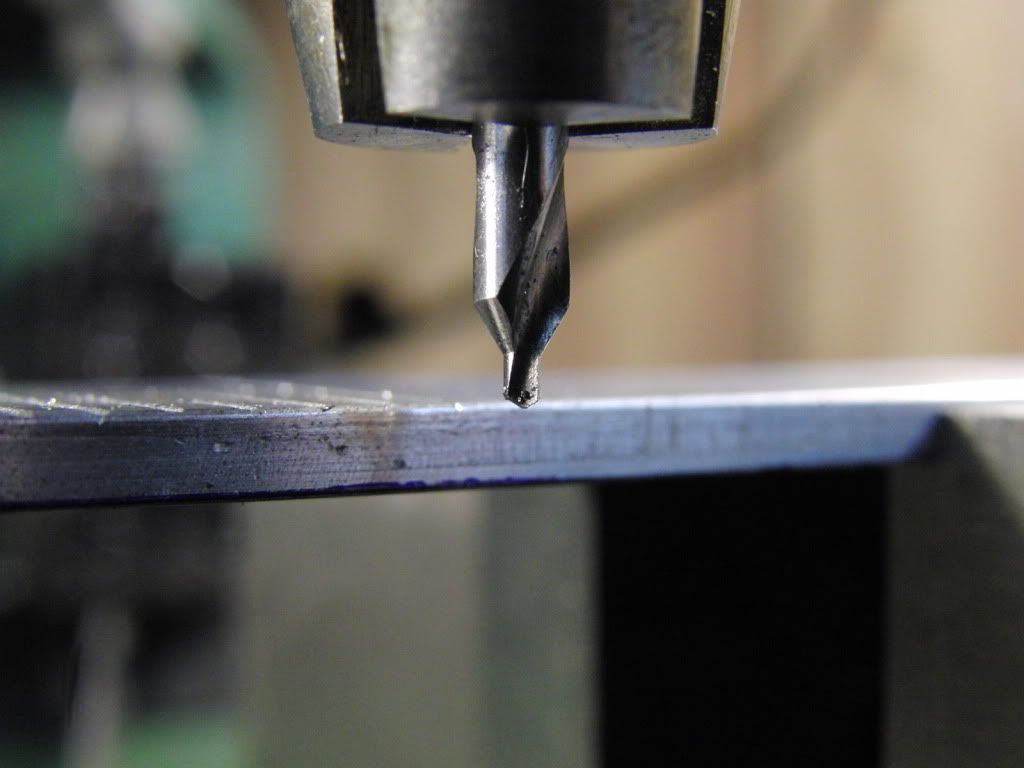
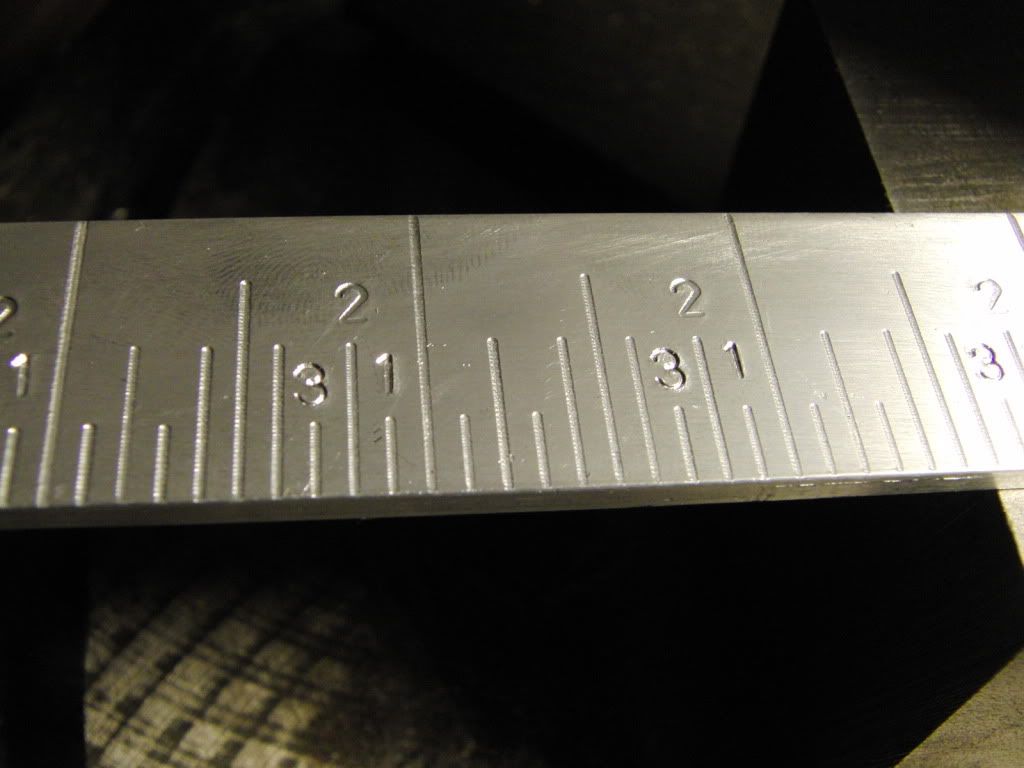
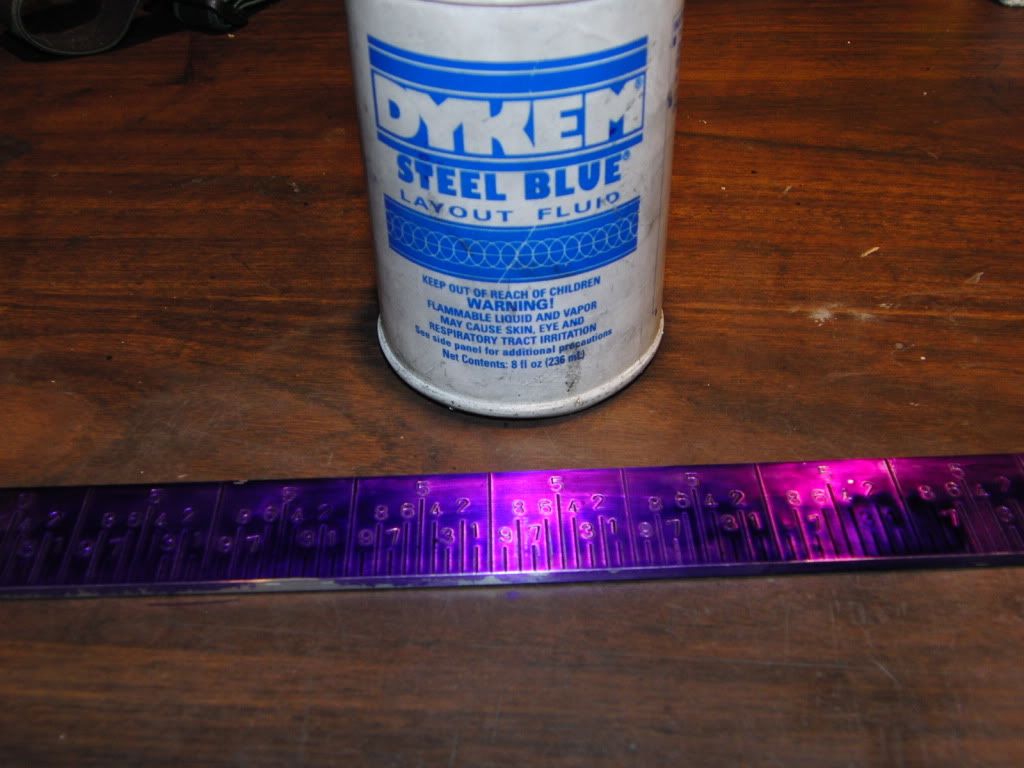
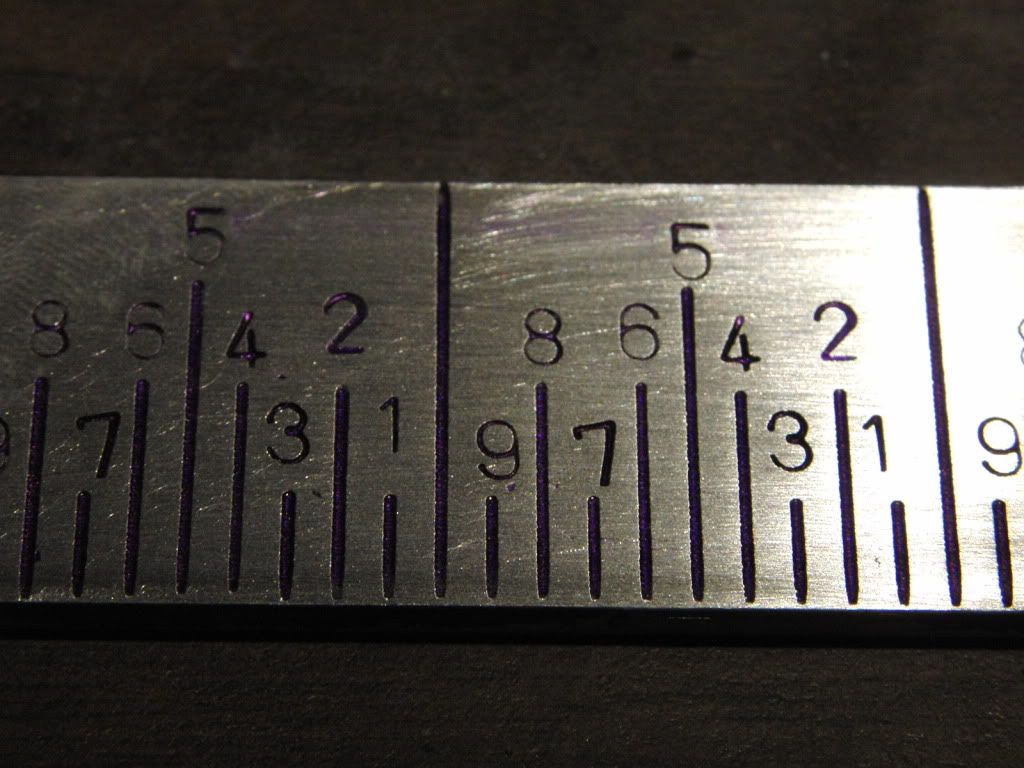
Here are the marks I am making. I marked it out in tenths. Since My table cranks .1" per revolution, This will allow me to know exactly how many revolutions I have made without counting. I staggered them to make room for the number stamps.
CIMG0646.jpg


Now it is time to put all 108 number stamps on it. This was taking to long using my fingers and a hammer so I went to my old drill press. I have heard that you can use a drill press as a light press, so I will give it a go.

Inside the chuck I put a steel rod behind the stamp. This will act as a stop for the stamp so it does not get pushed up into the chuck.
CIMG0651.jpg

CIMG0652.jpg

CIMG0653.jpg


Here are those numbers. I am making it from right to left, this is because I do 80% of my milling in that direction. (one thing I always did not like about my original ruler)
CIMG0655.jpg


Now i took to ruler I just made and painted on some layout fluid (you can use paint if you want, would probably be more durable. This was quick and easy)
CIMG0661.jpg


After a sanding the lines and number "popped"
CIMG0662.jpg


Just need to mill two slots on the ends. This is where I will mount it. I am going to use the table stops to hold it down. This will make it easy to move, or remove.
CIMG0673.jpg


Now I need to make a couple movable reference needles. I am using aluminum for this. I will put magnets in the to hold them to the mill. I am countersinking them with a 5/16 end mill.
CIMG0674.jpg


Here they are with the magnets and needles. (and a couple Friends)
CIMG0677.jpg

CIMG0684.jpg


Here it is installed on my mill. You can see there is two needles. The top needle is stationary, and will move with the ruler. This is to reference a starting point. (if you notice I do not have any inch marks, this is because I usually start in the middle of the ruler and the numbers are irrelevant.) The larger one is the "moving needle" although it stays in one spot, the table moves.
CIMG0685.jpg


And the big picture.
CIMG0690.jpg


This was an incredibly easy project, and only took a couple hours to complete. And very handy if you don't have a DRO.

Kel
 
That's a nice job Kel,and a good idea to use a centre drill,I'll remember that.
Don
 
Nicely done, Kel. A creative solution to a common problem, and some tips I'll remember.

Rudy
 
Good Job Kel !
I like the magnetic pointers too. I did something similar but mine is just printed out and stuck to a piece of aluminum.
Rich
 
That came out really nice, Kel.
The two little 'guys' look like they're listening to the radio in that one pic.

Dean
 
Thanks for the comments Don, Rudy, Sam, Rich, and Dean.

Dean, That's exactly what I thought when I made it, then I did some searching for funny characters in my "Box of Memories" and I found these guys.

Kel
 
Nicely done Kel, and I see that you found my uncle Bob. He had been reported as missing from the home several years ago and no one had seen or heard from him since. :big:

I really like this project and your method of fabrication is top shelf. Did you have the mill running when you were making the graduation lines or merely using the center drill as a scribe to scratch the markings? They seemed to turn out pretty clean and crisp.


BC1
Jim
 
Jim, Thanks for nthe comments. I am glad to help in the locating of your missing family member, I was wondering who he was. :big: :big:

I had the mill on when I was making the markings. I first tried the scribe method, but the center drill would rotate and not make a clean line. The drill point acted like an end mill and I was getting little curly Q's of swarf when cutting. It also insured all the lines are straight and consistent. My first choice was a Dremel bit, but it had too much flex.

Kel
 
Nice job...

Going to keep this in mind once my mill gets delivered.

George
 
That is just slick as all get out Kel.

The idea of using a center drill is pure genius! I'll be remembering that one!
 

Latest posts

Back
Top