how to clean up a commutator ?

Home Model Engine Machinist Forum

Help Support Home Model Engine Machinist Forum:

This site may earn a commission from merchant affiliate links, including eBay, Amazon, and others.

Mo deller

Well-Known Member
Joined
Mar 14, 2009
Messages
212
Reaction score
2
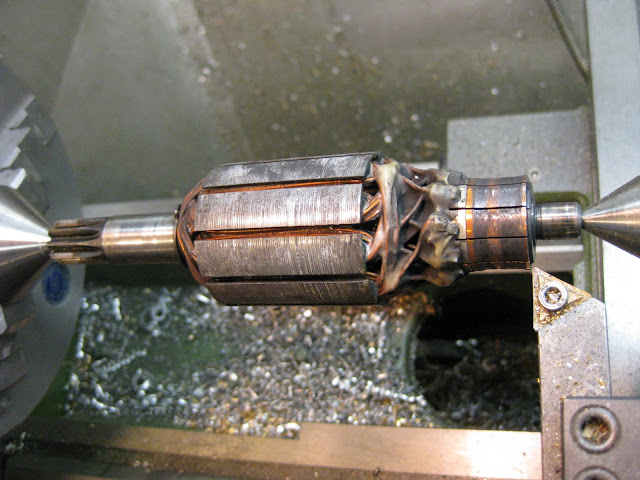
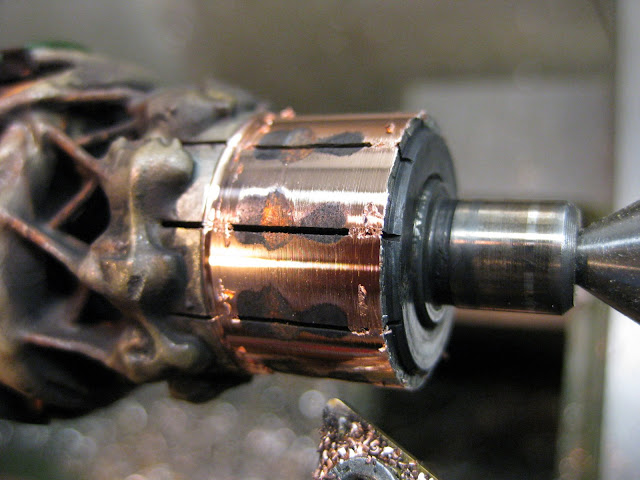
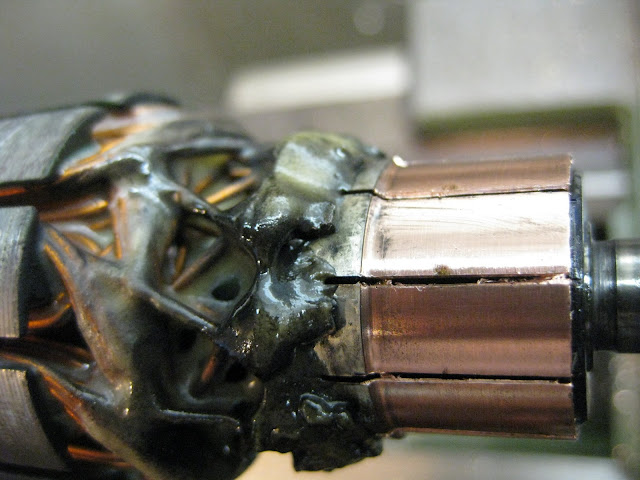
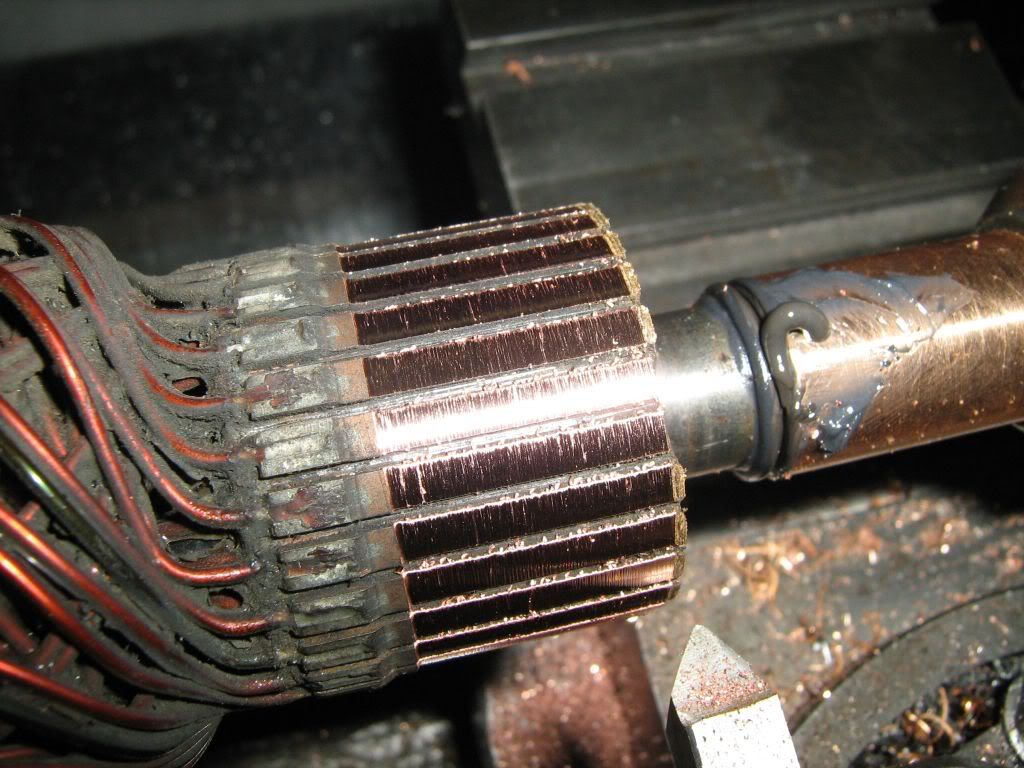
Hi all, my brother has asked me to clean up the commutator on a car dynamo. I have done one before in the dim and distant past when I was young enough not to worry about things and just did them,usually got away with it too ;D Now though I have to think too much and worry alot.
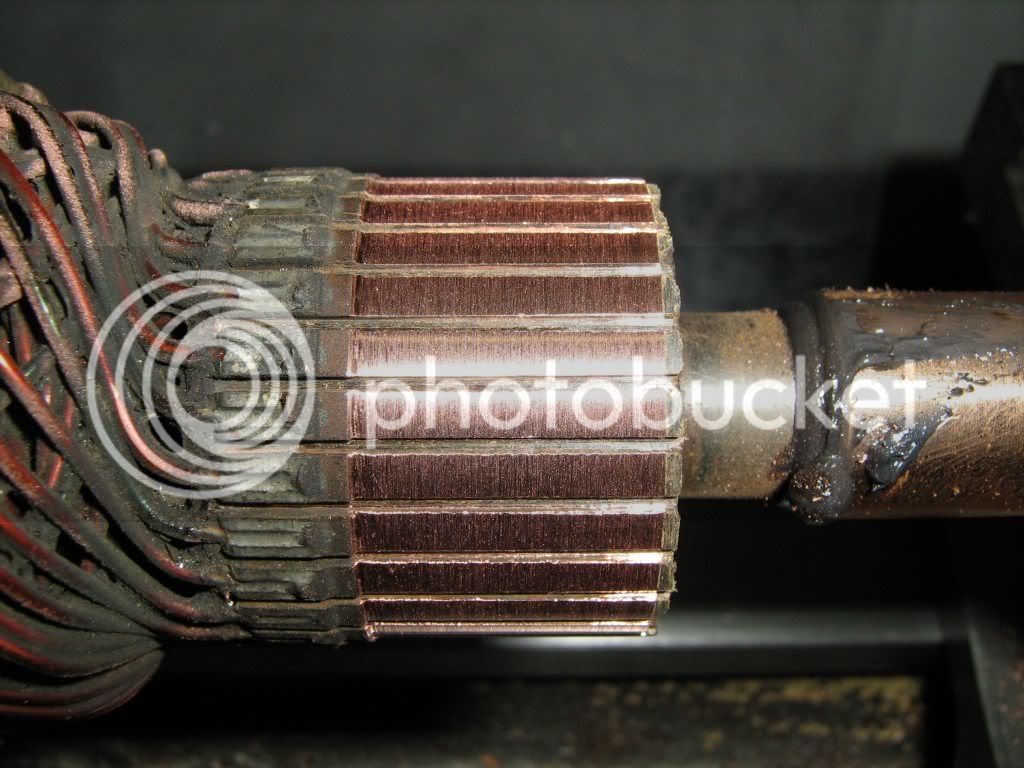
I need some guidance please on the correct way to get this done. The first problem is actually holding it true. I am concerned as it is quite a heavy thing to have hanging out the chuck and it has no centre drilling on the end of the shaft to help.
Also is it best done fast or slow?

Anyone any experience of this?

Thanks
Peter.
 
Look in the the old south bend lathe guide series


Methods for electrical service stations
heavy thing to have hanging out the chuck and it has no center drilling on the end of the shaft to help.
You will either need to center drill the shaft and or hold in a steady rest. You will also need to relieve the mica(Or modern equivalent)

Tin
 
I still own a Jacobs commutator set of chucks. One chuck has a 11/2"x8 thread to screw on the spindle and it holds the drive end of the shaft. The other chuck is a MT2 arbor for the tailstock and it has smooth brass face jaws which holds the comm end loosely enough for it to rotate with lubrication. A cheap substitute for the tailstock chuck is a regular chuck and a piece of brass tubing that fits the OD of the shaft. Snug up the tubing in the chuck and oil the shaft.

Do you also need instruction on turning, undercutting and polishing?
 
Stan said:
A cheap substitute for the tailstock chuck is a regular chuck and a piece of brass tubing that fits the OD of the shaft. Snug up the tubing in the chuck and oil the shaft

Dang, there is just no end to the cool things you learn here!
 
Stan said:
I still own a Jacobs commutator set of chucks. One chuck has a 11/2"x8 thread to screw on the spindle and it holds the drive end of the shaft. The other chuck is a MT2 arbor for the tailstock and it has smooth brass face jaws which holds the comm end loosely enough for it to rotate with lubrication. A cheap substitute for the tailstock chuck is a regular chuck and a piece of brass tubing that fits the OD of the shaft. Snug up the tubing in the chuck and oil the shaft.

Do you also need instruction on turning, undercutting and polishing?

Hello Stan, I need all the help I can get on this one. Having looked at the method of drilling a centre hole in the Drummond stuff I found I only have a travelling steady so was pondering on another way of progressing. Your suggestion of using a chuck and tube is very timely.

Thanks,
Peter
 
black85vette said:
Dang, there is just no end to the cool things you learn here!

I'll second that :bow: .......... it's a nice place to hang out ;)

CC
 
Here is a little book that shows the special chuck.

http://wewilliams.net/docs/1936 - How to True Armatures - Bulletin 2A.pdf

My dad had one of these chucks with the brass jaws and the lock nut. I wish I had it today but it went with that lathe. I am not sure of where to get one today. I used it several times in high school as it was one of my after school jobs (along with being 1st wipe) to rebuild starters and generators.

Kenny
 
1Kenny said:
Here is a little book that shows the special chuck.

http://wewilliams.net/docs/1936 - How to True Armatures - Bulletin 2A.pdf

My dad had one of these chucks with the brass jaws and the lock nut. I wish I had it today but it went with that lathe. I am not sure of where to get one today. I used it several times in high school as it was one of my after school jobs (along with being 1st wipe) to rebuild starters and generators.

Kenny

That's great Kenny. I searched for more detail on that site but couldn't find any.


Thanks
Peter.
 
Did a little searching too. I think it is called a #100 Jacobs chuck. Went on the Jacobs site but it wasn't listed. I am sure if I was to find a used one it would be a must have. Of course if it was at a garage sale I would act dumb and say that I think I could make it work to keep the price down. ;D

Kenny
 
Lots of good tips and addvice there.

I just did my bikes starter motor and happen to have the pics uploaded;

Just skimmed to clean up and then restored the gaps? ??? What is meant by undercutting?

44%20003.jpg


44%20004.jpg


44%20006.jpg


Edit;

As stated below gaps must be cleared of short circuiting burrs. (no final pic)


Kevin,

There are others much more knowledgeable than I am on the subject; but undercutting refers to the gaps in the commutator. Looks like you still have some copper remaining in there that will cause shorting and undercutting will remove that. I just use a piece of hacksaw blade with a hook ground into it to scrape the grooves out.

Kevin
 

Thanks Kevin,

That's what I figured but thought maybe up at the shoulder. I used a hacksaw too but didn't grind a hook, next time I will. ;)

But I did screw a bicycle hook with a ground tip into a 1 1/2 x 48 dowel to clean out my side walk cracks, Worked great! ;D
 
For an undercut, if the teeth on the hacksaw blade are too wide, you can use a disk grinder and make the saw teeth thinner to match the grooves on the commuator. I had a little armature lathe that had a 110 vac motor with an arbor and a small saw blade on it to do undercutting. Dremmel makes a blade that worked on it. The lathe had adjustable bushings for shafts with no centering holes.

100_3008.jpg


Kenny
 
1Kenny said:
Did a little searching too. I think it is called a #100 Jacobs chuck. Went on the Jacobs site but it wasn't listed. I am sure if I was to find a used one it would be a must have. Of course if it was at a garage sale I would act dumb and say that I think I could make it work to keep the price down. ;D

Kenny

I like your thinking ;)

Kustomkb,thanks for the photos.

As I understand it the undercutting refers to taking back the insulation(mica?) to a depth of 1/64 I think read.

Thanks
Peter

 
Re Undercutting: The comm segments are fastened to the hub with some kind of glue which squeezes up between the segments. The glue is harder than copper so as the copper wears, the brushes start to bounce over the joints giving unsatsfactory performance. The glue is lower than the surface on a new comm and when you turn a comm, by the time you get a clean surface you are frequently into the glue. You have to saw out the glue with a blade that resembles a thin hacksaw blade about an inch long which is fitted into an assembly like a turret tail stock. You pull the lever to make the cut, turn to the next groove and repeat. It can be done carefully by had with a hacksaw blade, as mentioned by others, but if you slip, you make a gouge in your newly turned surface.

One final note. Polishing is done with sandpaper, not emery paper which contains conductive particles which will short out the comm. Just use regular woodworkers sandpaper in fine or extra fine (they don't measure grit size in microns like machinists). HTH Stan
 
Had a go at the job today and found that the shaft measured 591 thou and my largest tailstock chuck is 1/2 inch. So I decided to turn down the end of a bit of coppery bar I had to just under 1/2 then reversed it in the chuck and bored it out to be a nice fit on the shaft finishing with some wet and dry paper. I cross drilled a small hole to grease through and set it all up in the lathe. Ran true on the dial gauge so started cutting. Didn't have to take much off and wasn't near the glue. Finished/polished with the finest ordinary paper I had which I would say was around 240. Undercut was just a clean up of the rough edges really. I found that a hacksaw blade was the right thickness and carefully made a few passes in each slot.

First photo shows the last cut completed and the grease on the bearing.
Second is after polish and undercut.

commutator_20090813_4.jpg


commutator_20090813_5.jpg


The photos seem to make it look less smooth than it actually is. Can't remember if a grade paper was suggested anywhere so I'll have to read up again and maybe buy a finer grade.
Thanks for all the help.

Peter.
 

Latest posts

Back
Top