Bernd
Well-Known Member
Have you ever noticed how doing a simple job can turn into a major project. Working on the Wobbler from Elmer's book I finally got to the point of boring out the cylinder. I'm using my Sherline lathe to do the job. I mounted the four jaw chuck, lined up the part and proceed to drill out the hole. When I got the hole big enough I was going to bore it out with a tiny carbide boring bar. The problem is I don't have any way to hold the boring bar in the Sherline. Time to make a holder. I used a piece or 1.25" square aluminum piece the same length as the Sherline tool holder. So, on to the Grizzly 9 X 20 lathe to make the part. Below are a couple of pictures of how I made the tool post holder to hold a boring bar that has 3/8" mounting dia.

This pic shows the 4 jaw that comes with the Grizzly. Not a very useful tool on something small. The chuck is also very awkward to work with.

This pic shows how I get around the problem by using a smaller chuck. The four jaw chuck came from a wood lathe I dragged home on day. I made a stub arbor to mount in the three jaw. Works great for small jobs.

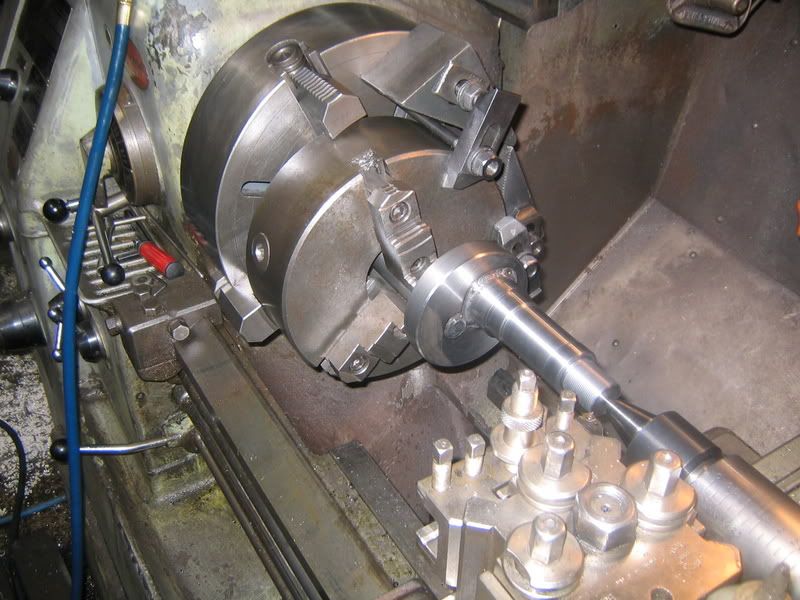
Lining up where the hole is going for the mounting screw. The wiggler bar is one from the pages of The Bedside Reader by Guy Lautard.

I didn't take any pics of drilling out the hole to 3/8" for the bar to go into here. So a quick description of what I did. I used the 3 jaw Sherline chuck to center drill and then progressively drill larger holes in the tool post until I got to the 3/8" drill. Then drilled two holes and tapped 10-24 to clamp the boring bar with. Oh, I also made sure that the tool post was mounted square to the lathe axis.
It's nice to have three lathes. My third is a 10 X 24(?) Logan. Now it's on to finishing the cylinder. While boring out the cylinder I was thinking what John (Bogstandard) said in his book. Make things to fit. Since I'm not set up yet to measure small holes sizes such as what is being used on this engine I will use a plug gage ( a piece of 3/8" drill rod) to get my bore close and then make the piston to fit.
See John, I did learn something from reading your posts.")
Bernd
This pic shows the 4 jaw that comes with the Grizzly. Not a very useful tool on something small. The chuck is also very awkward to work with.
This pic shows how I get around the problem by using a smaller chuck. The four jaw chuck came from a wood lathe I dragged home on day. I made a stub arbor to mount in the three jaw. Works great for small jobs.
Lining up where the hole is going for the mounting screw. The wiggler bar is one from the pages of The Bedside Reader by Guy Lautard.
I didn't take any pics of drilling out the hole to 3/8" for the bar to go into here. So a quick description of what I did. I used the 3 jaw Sherline chuck to center drill and then progressively drill larger holes in the tool post until I got to the 3/8" drill. Then drilled two holes and tapped 10-24 to clamp the boring bar with. Oh, I also made sure that the tool post was mounted square to the lathe axis.
It's nice to have three lathes. My third is a 10 X 24(?) Logan. Now it's on to finishing the cylinder. While boring out the cylinder I was thinking what John (Bogstandard) said in his book. Make things to fit. Since I'm not set up yet to measure small holes sizes such as what is being used on this engine I will use a plug gage ( a piece of 3/8" drill rod) to get my bore close and then make the piston to fit.
See John, I did learn something from reading your posts.
Bernd