• If you have bought, sold or gained information from our Classifieds, please donate to HomeModelEngineMachinist and give back.

    You can become a Supporting Member which comes with a decal or just click here to donate.

Flywheels

Home Model Engine Machinist Forum

Help Support Home Model Engine Machinist Forum:

This site may earn a commission from merchant affiliate links, including eBay, Amazon, and others.

BobWarfield

Well-Known Member
Joined
Dec 27, 2007
Messages
1,151
Reaction score
1
P1010505.JPG


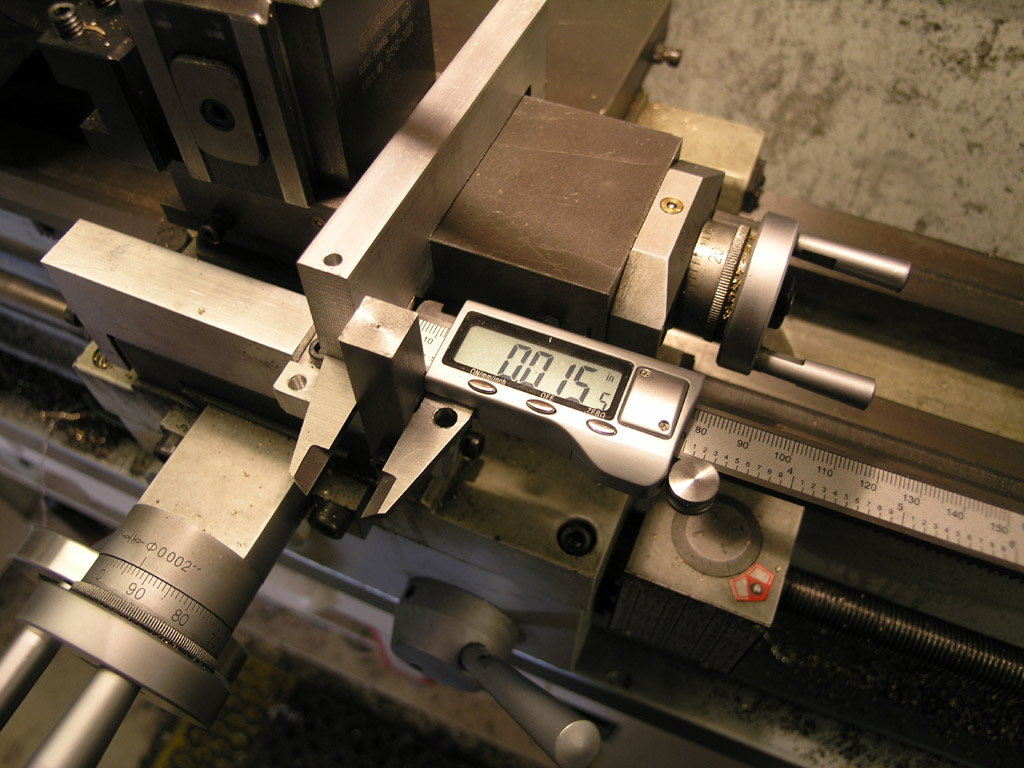
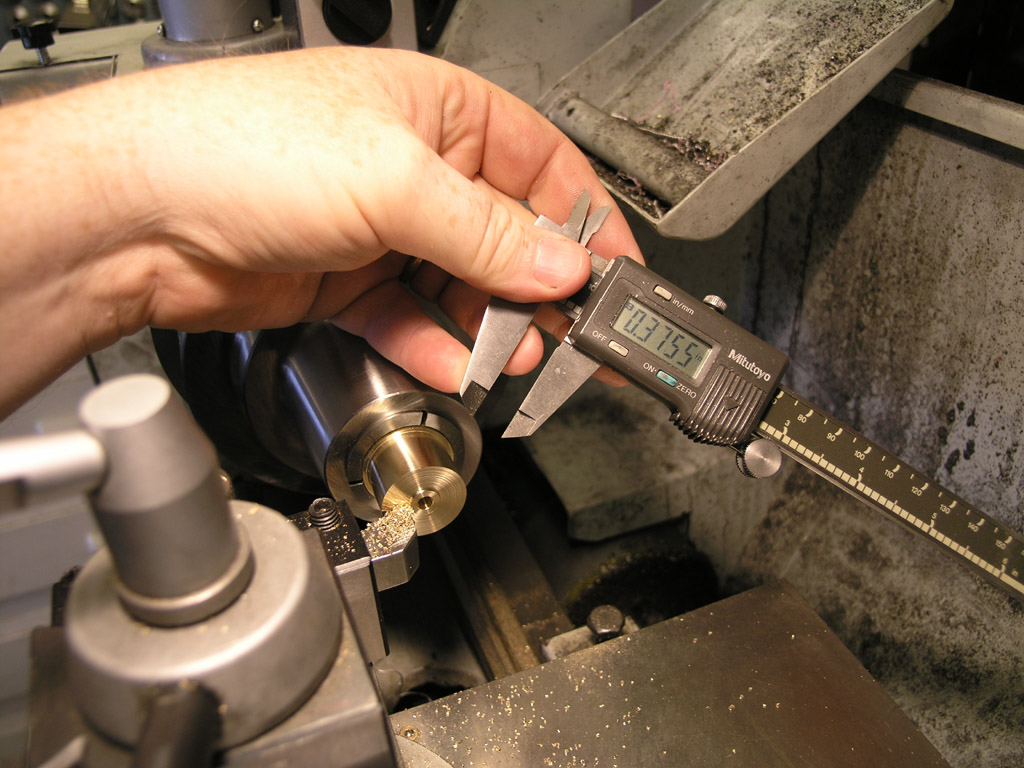
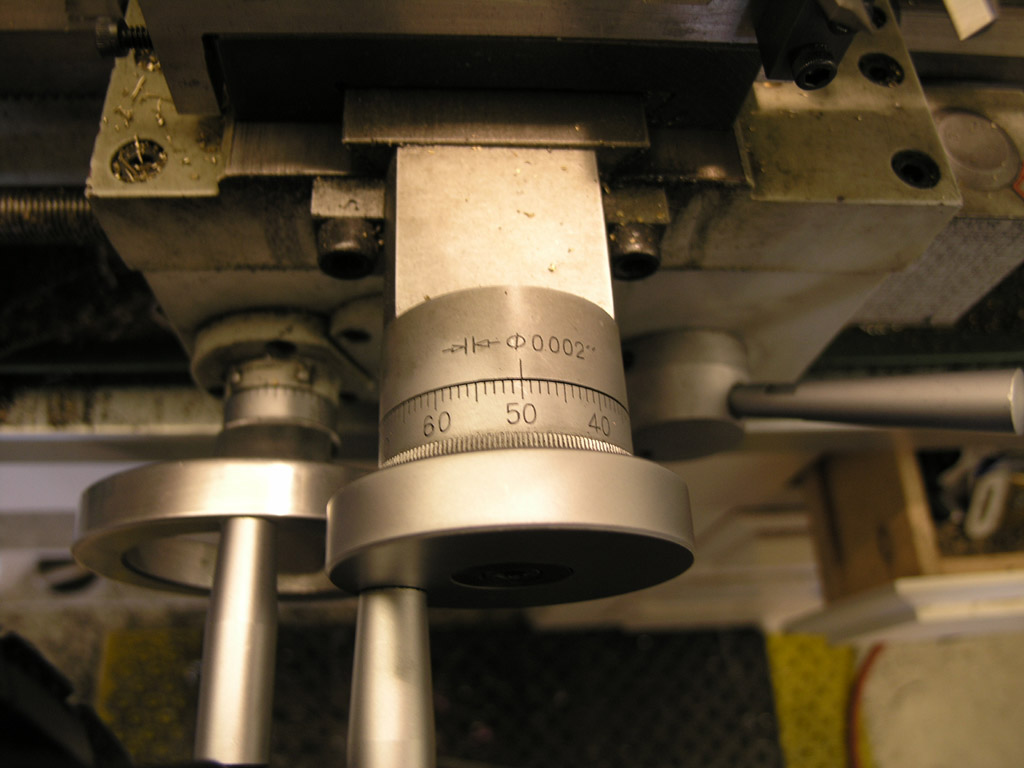
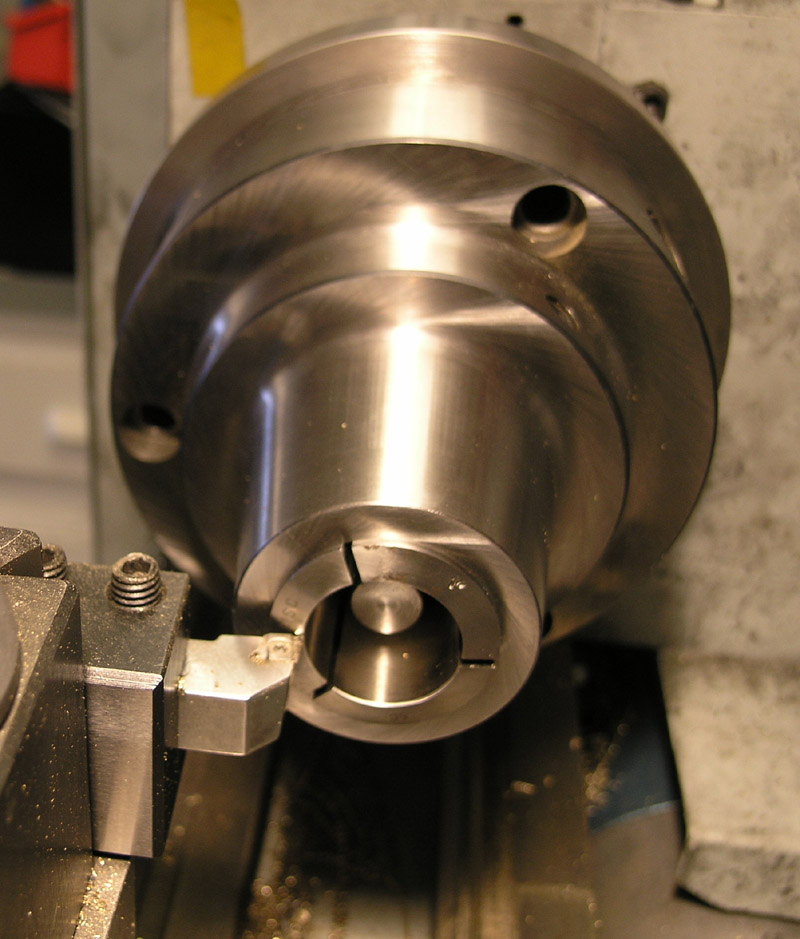
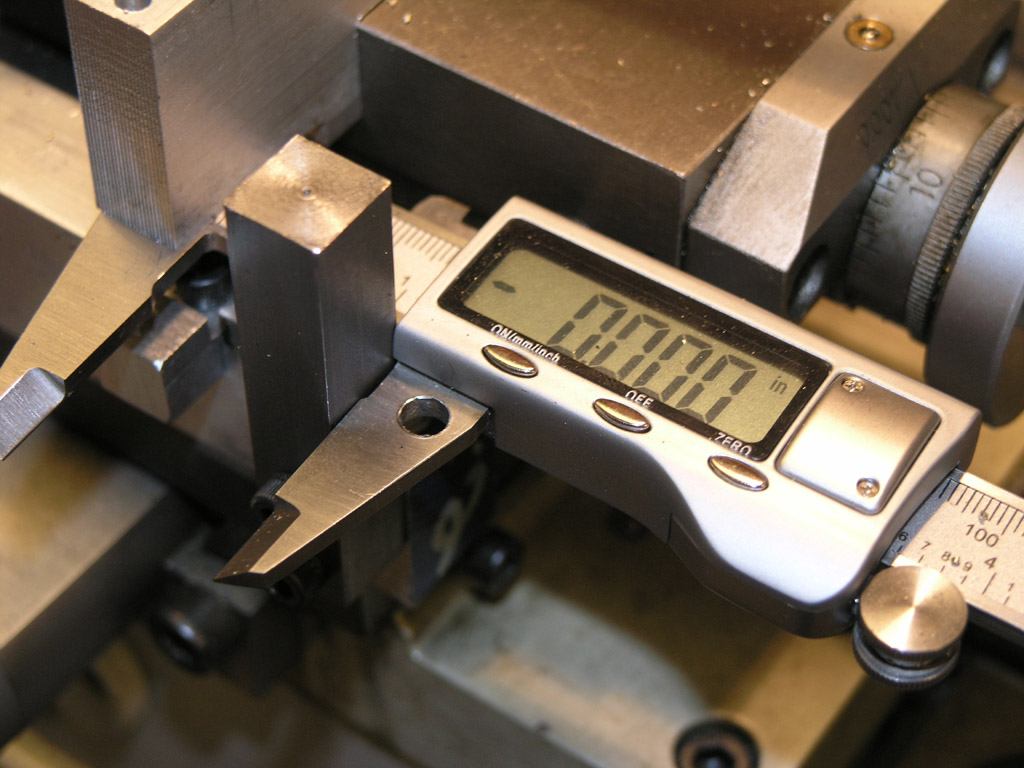
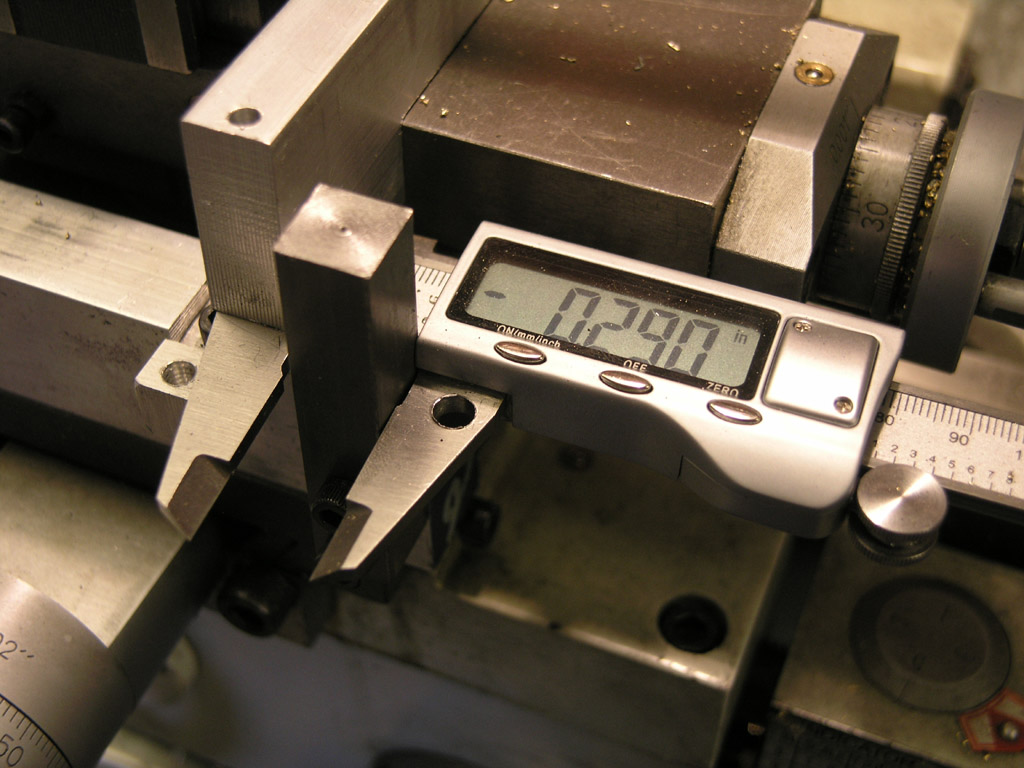
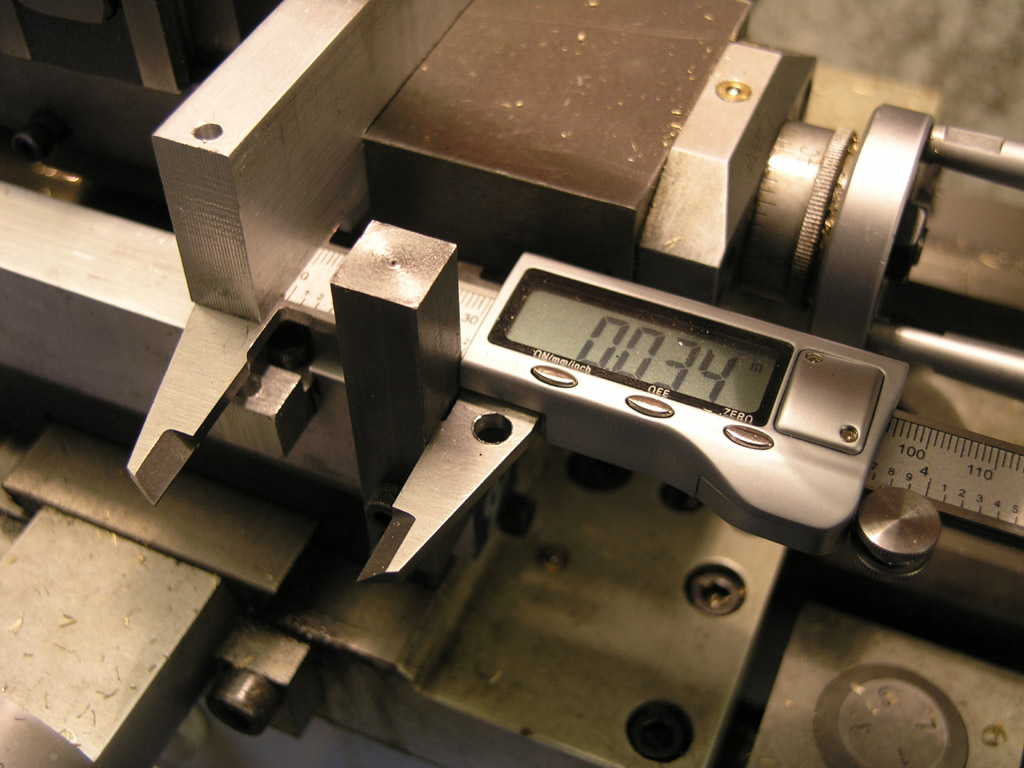
Take your digital calipers and get a rough sense of where you are. I'm shooting for a 1" diameter and my measurements were typically 1.050-1.090 or so. Based on that measurement, I ran the dials until I thought I was within a couple of thou...

P1010506.JPG


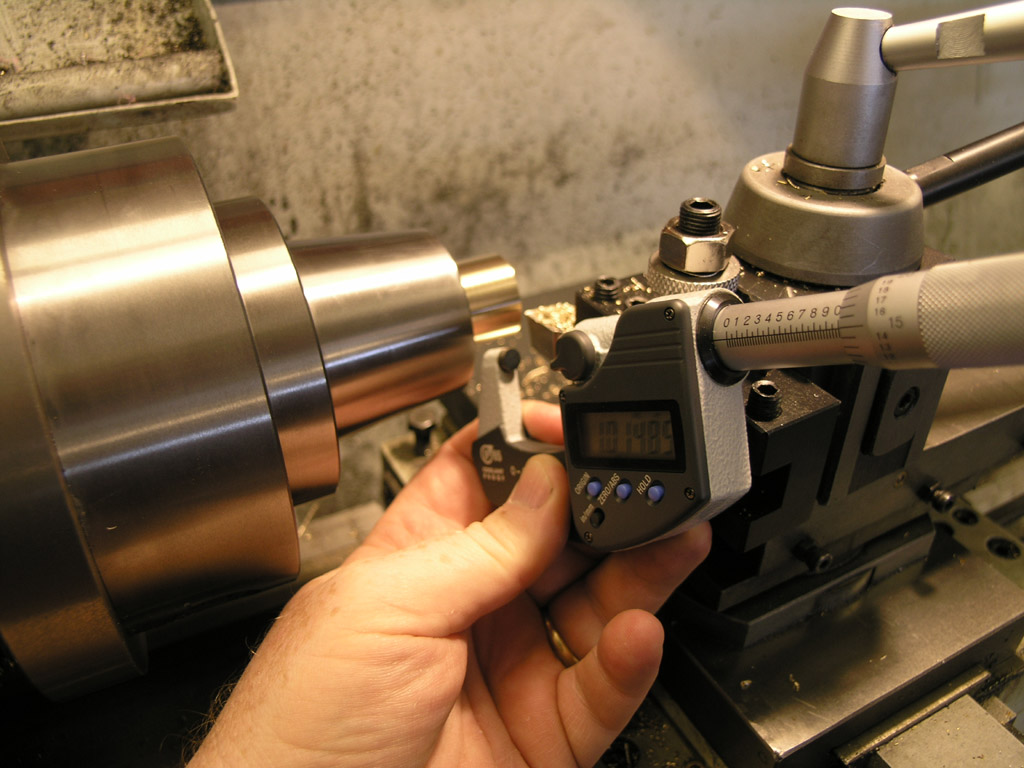
Check the last couple thou with the mic, do the finish pass, and mic again to be sure. A habit that saves me time is when I retract the cross slide, I retract exactly one revolution from wherever I was. That way it's easy to remember how to get back to cutting...

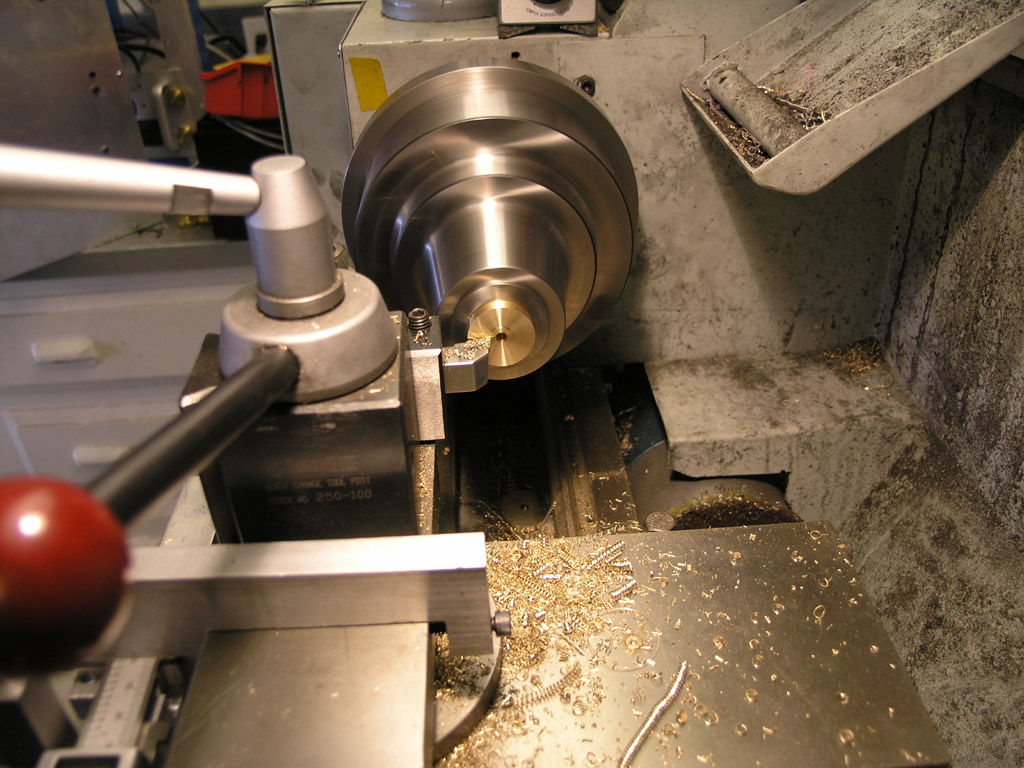
And yes, Virginia, with the sharp inserts I was using, I could take as little as half a thou off this brass.

P1010507.JPG


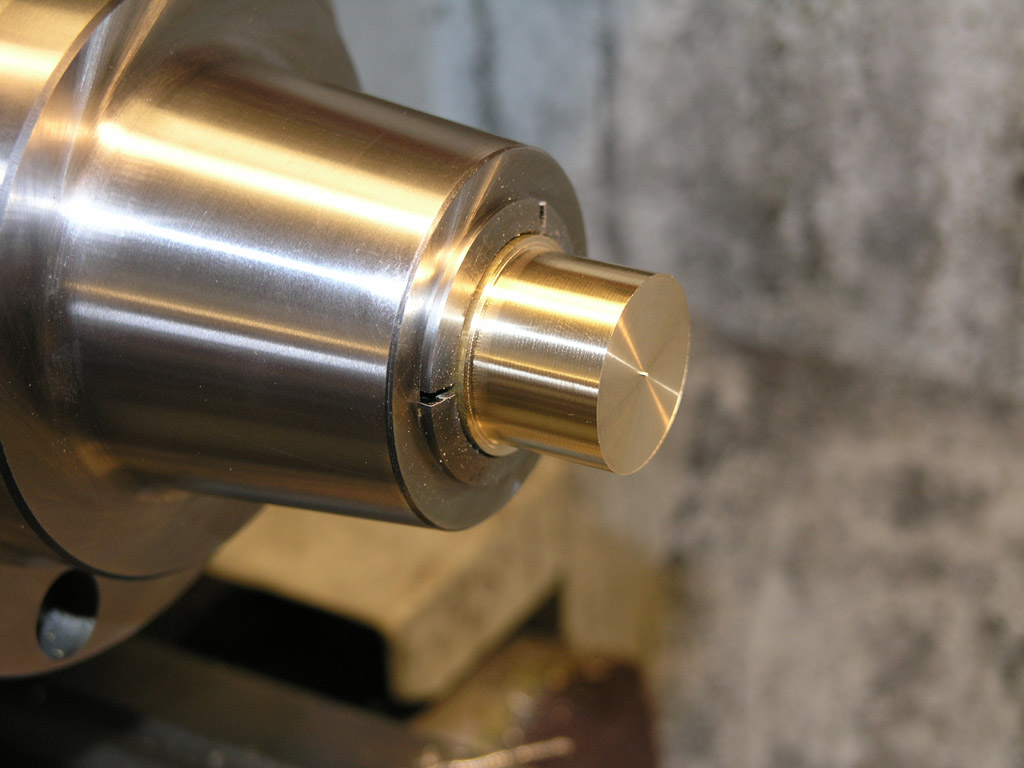
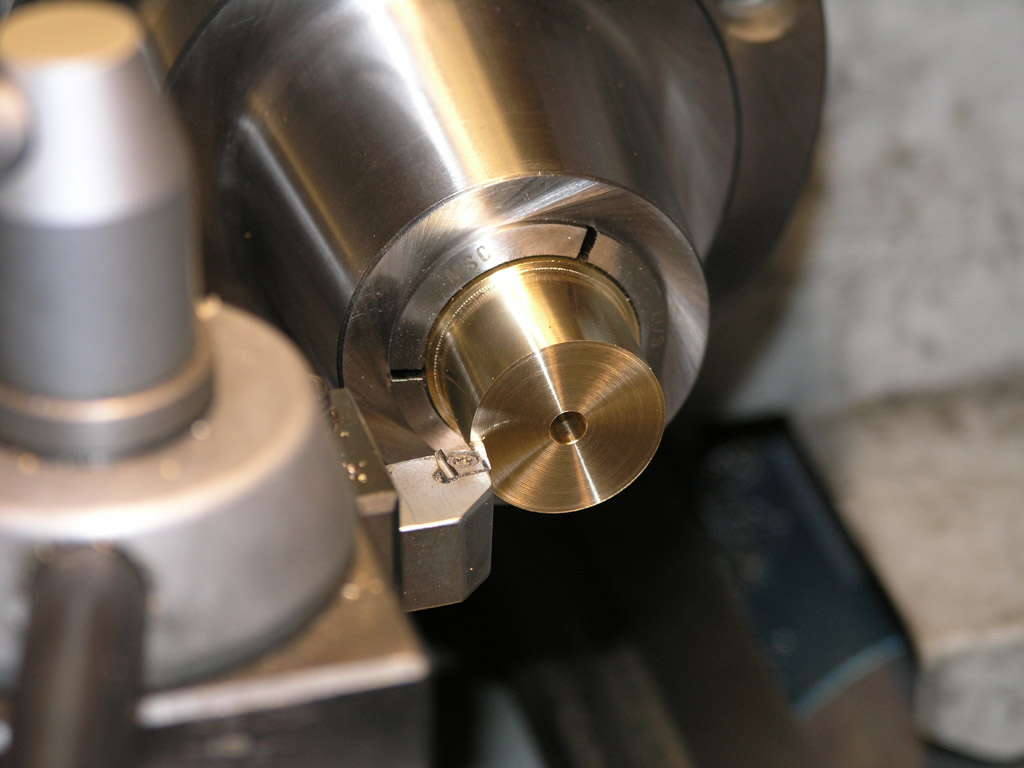
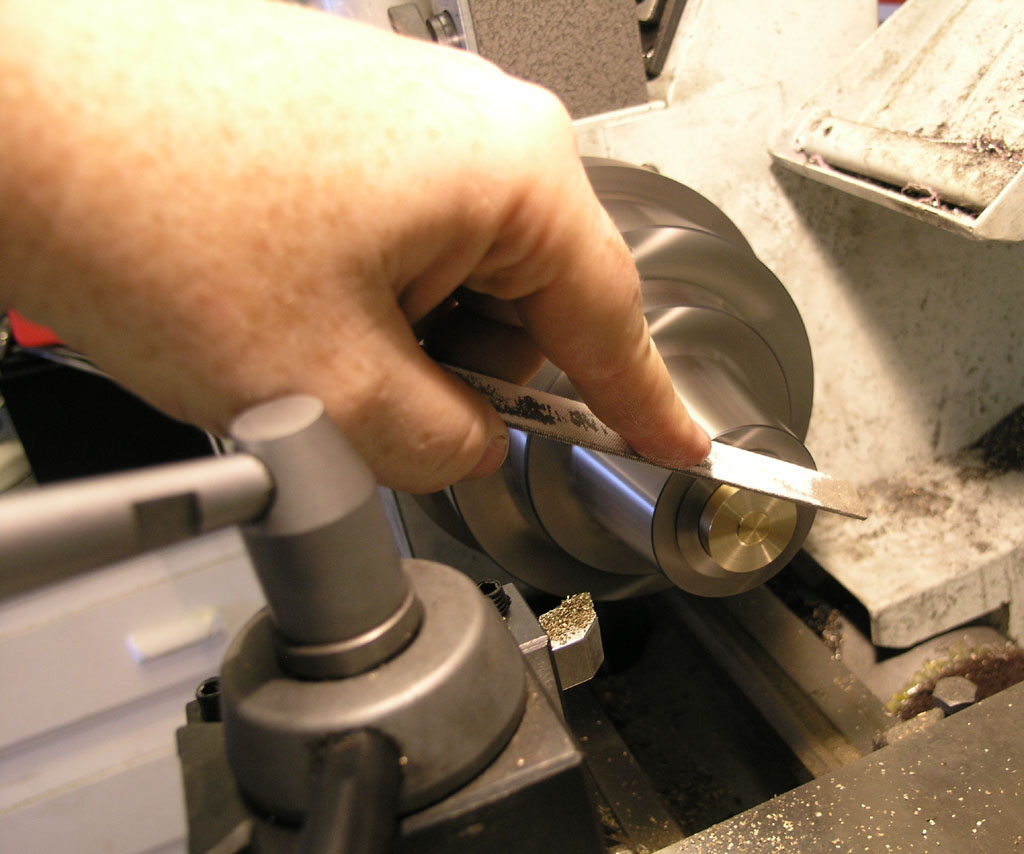
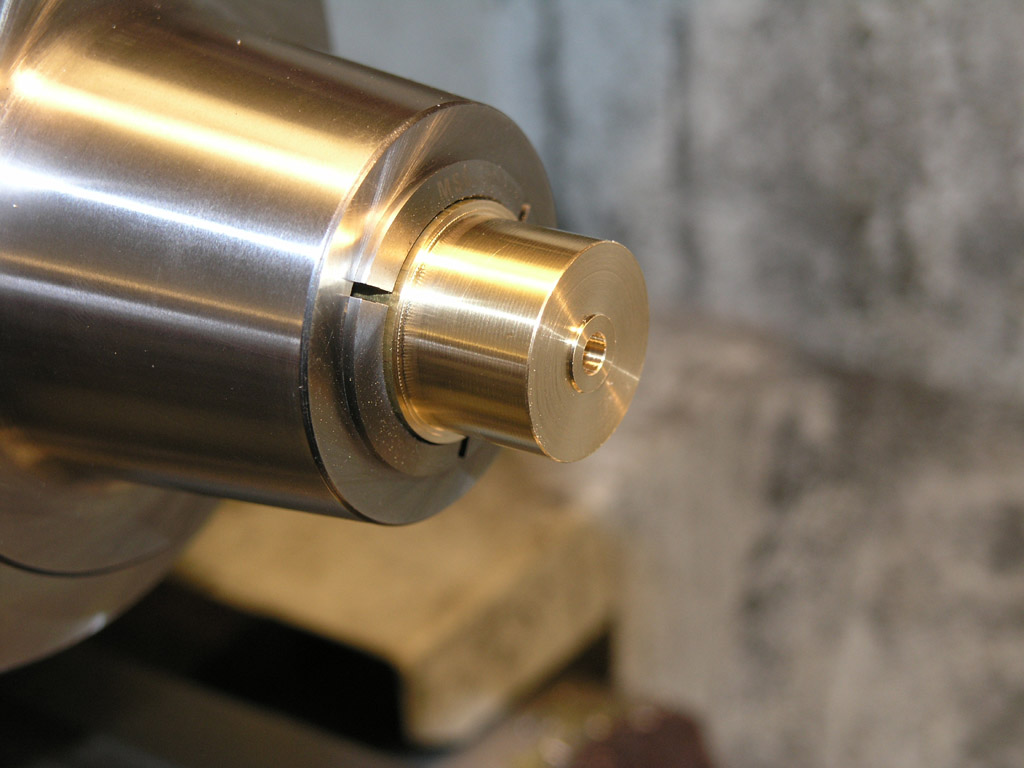
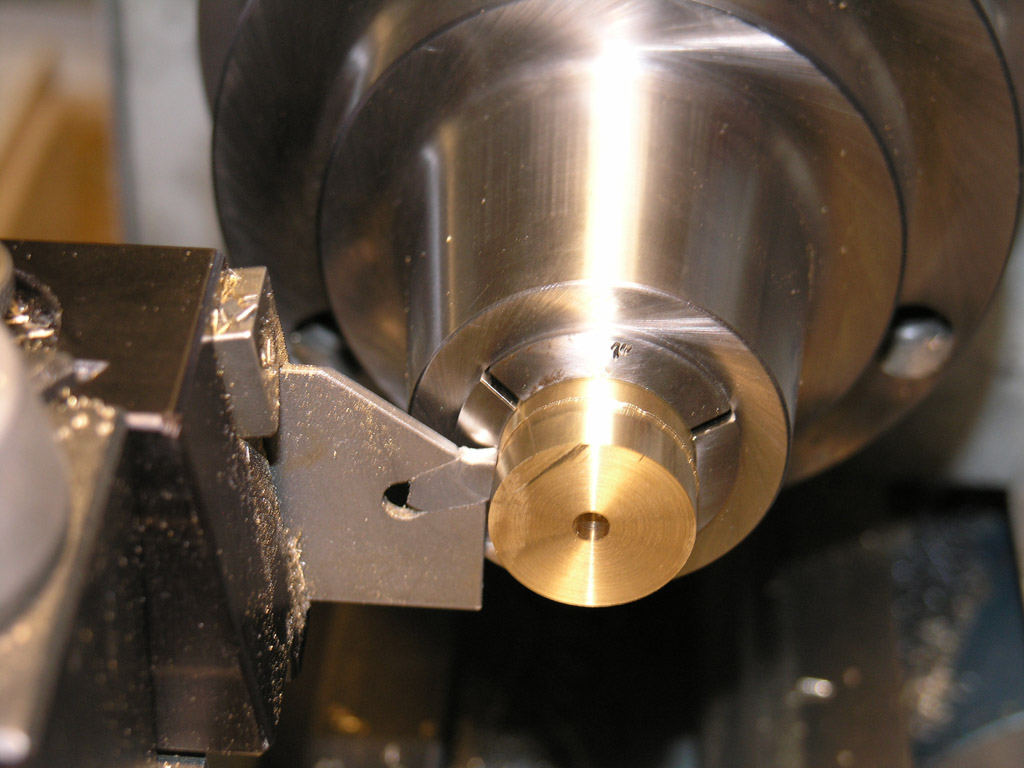
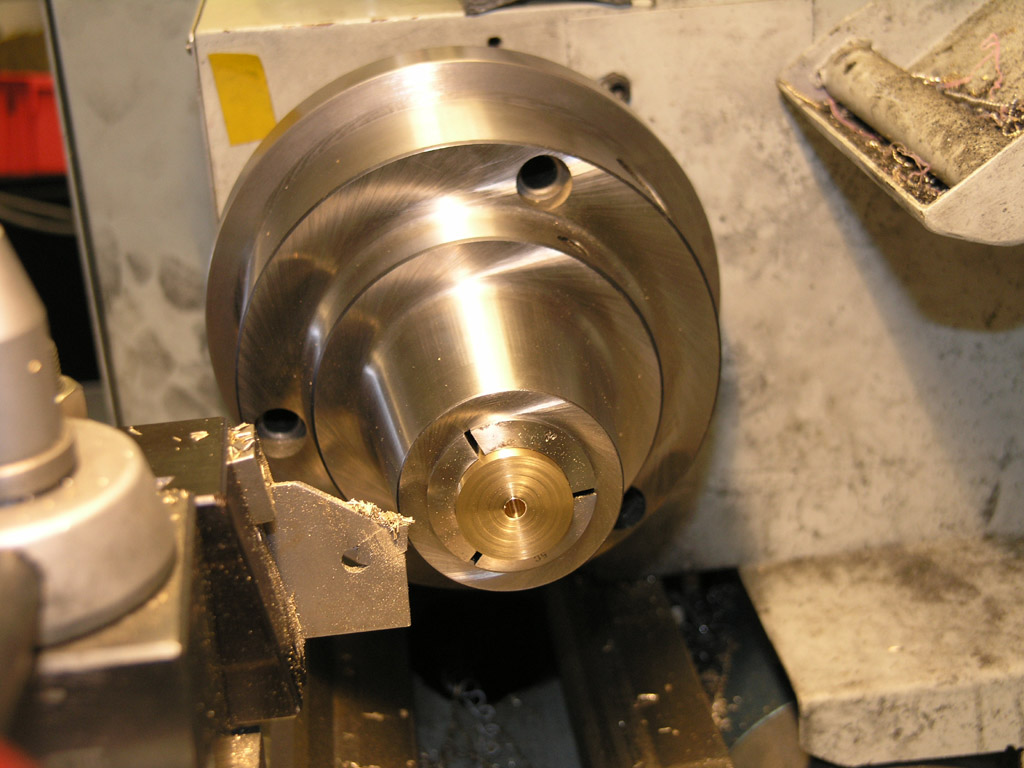
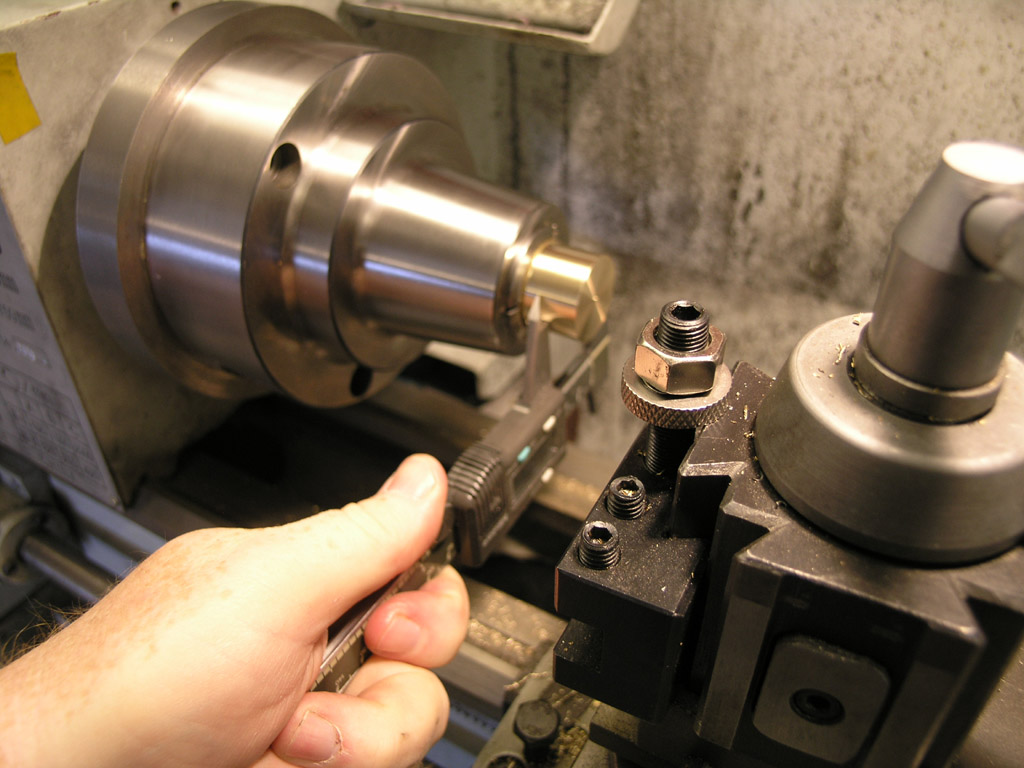
Faced and turned to 1" diameter, +0.003", -0.000". I was aiming slightly for the high side as polish will take off up to a thou based on my experiments.

P1010508.JPG


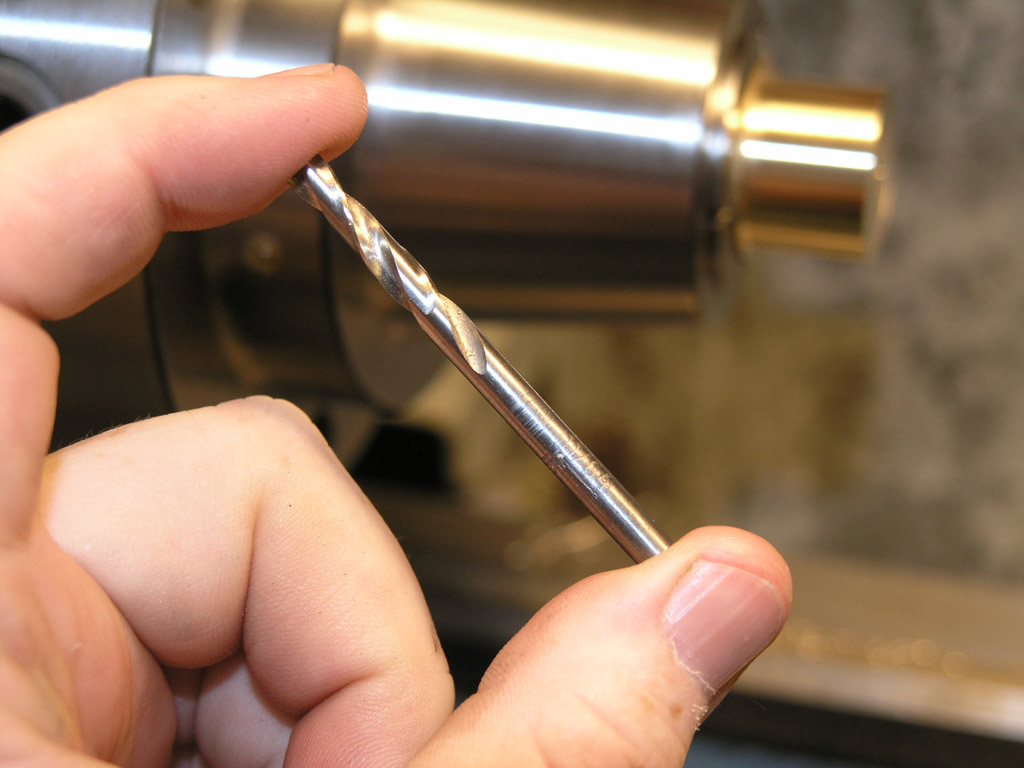
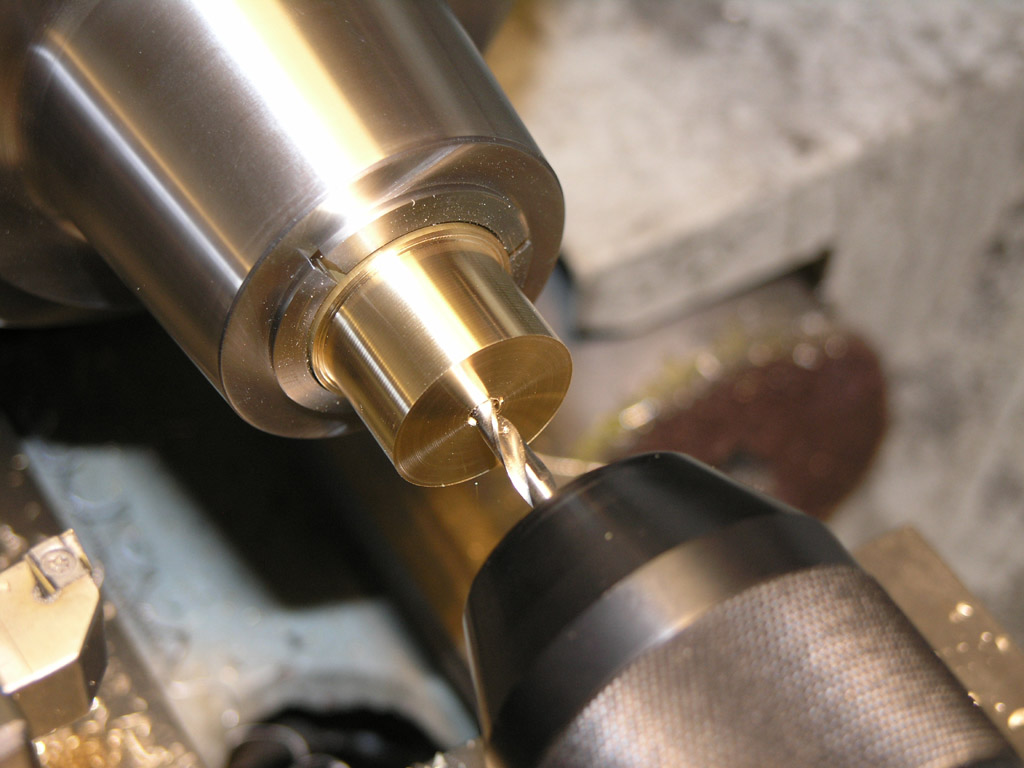
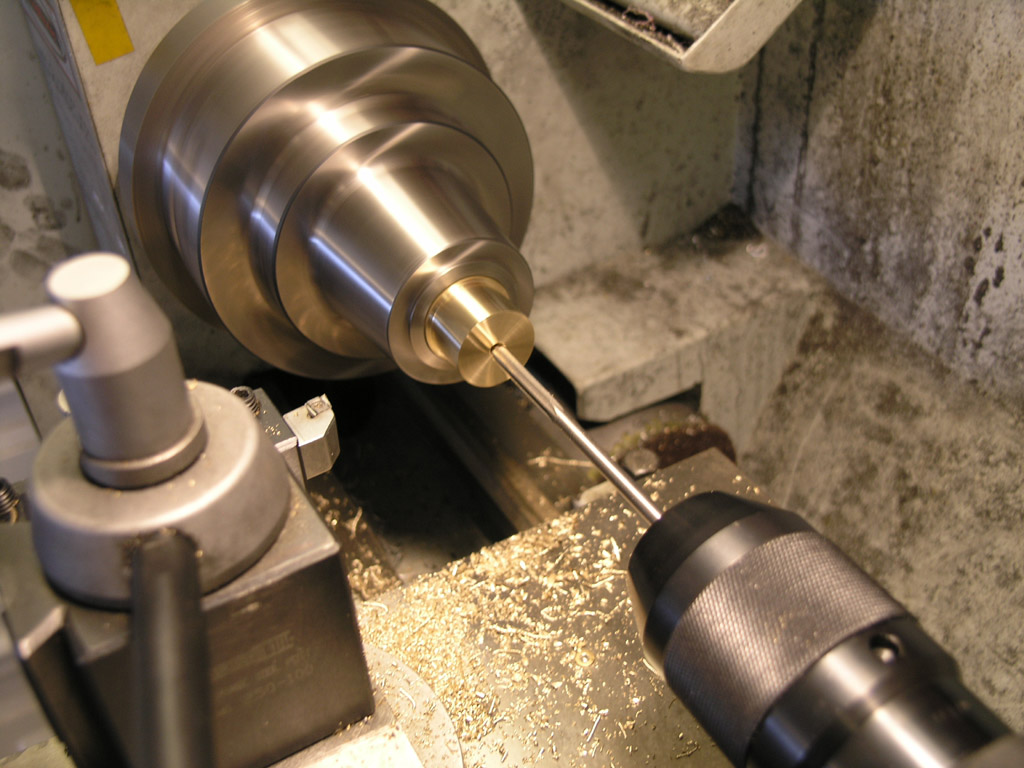
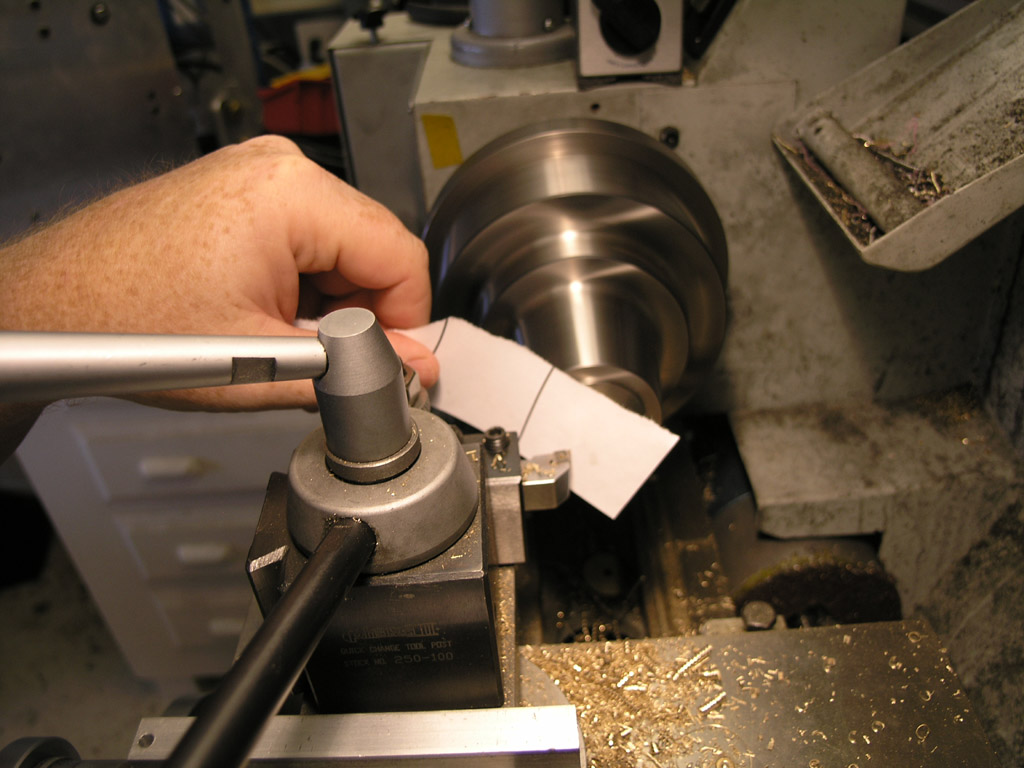
Next I am using a screw machine-length twist drill for the shaft bore. The screw machine length is more rigid than normal jobber length and with a minimal facing nub you can go right in without a center drill, thus saving a step...

<continued>
 
P1010510.JPG


Sure wish I had one of those "sensitive pecking drill attachments" for my tailstock, but I already wasted enough time building tooling for this silly flywheel! ;D

P1010511.JPG


Reamer was next. Having made a tailstock camlock and purchased a nice keyless chuck ($29 from Lathemaster), tailstock work is a real pleasure...

P1010512.JPG


Next up: cutting the shoulder for the hub. This will be a little facing cut that doesn't go all the way to the center. To start, go back and just touch the cutter to the face gently...

P1010513.JPG


Zero your compound DRO. What's that, no compound DRO? :eek:

Well, I made mine just for this project, but I can tell I'll use it a lot! Nothing to mine, just a couple pieces of aluminum milled so I can clamp them to the lathe with a 10-24 bolt. The caliper (my least favorite caliper) is bolted to the top clamp and the jaw bears against the standard on the lower clamp. Pretty simple.

<continued>
 
P1010514.JPG


Pull the cutter back with the cross slide dial and set the depth of cut with the compound. I want a 0.156" shoulder, so I dial that in as best I can on the compound...

P1010515.JPG


The first time through, I stopped a couple of times and checked with the digital calipers to see what the diameter of the hub was...

P1010516.JPG


After that first time, I knew what the cross slide dial should read ("50" for this part). You can tell by looking which revolution to stop at that dial number on. Goes really fast that way!

P1010477.JPG


The last step before removing any part from the collet is a little deburr with a file. The reason is so that when you flip the part around there is no burr to interfere with the accuracy of the collet. Took me quite a while to get in the habit of remembering this after I got the collet chuck going, but now it is a habit.

<Continued>
 
P1010519.JPG


That part is ready to be flipped around...

P1010523.JPG


You want to do all of them on one side before flipping them around to save time changing collets. There's 3 there that I did during the experimentation period that are "custom one offs".

I'll get started on the back sides after dinner! ::)

Cheers,

BW
 
Nice job there Bob.

Your fingers are to clean in those pictures. I think you have some else doing the work and your just posing for the pictures. :big: :big:

Bernd
 
Bernd said:
I think you have some else doing the work and your just posing for the pictures. :big: :big:

Either that or a stunt hand!

Nice documentary series, thank-you.

Al
 
What was that BW? one of these... ?
http://www.homemodelenginemachinist.com/index.php?topic=1835.0

Shameless plug I know but you mentioned this kind of tool!! :big:

This keyless chuck thing is going to have to be investigated... soon as I sell some of my junk... Erm Quality Ebayable merchandise!! ;D

I do like that DRO... I will have to see about that one... Maybe wire in a larger battery? The amount of use it will get those button cells simply won't last!

I can't wait to see these engines completed, Been trying to put all the parts together in my head! (not working too well!! :big:)

I do like shiny lumps of 'precision' brass ;D I also like the collet chuck... but I think That one will really have to wait... Don't think I could take another Chuck issue just yet!! :big:


Ralph.

BobWarfield said:
Sure wish I had one of those "sensitive pecking drill attachments" for my tailstock, but I already wasted enough time building tooling for this silly flywheel! ;D


Reamer was next. Having made a tailstock camlock and purchased a nice keyless chuck ($29 from Lathemaster), tailstock work is a real pleasure...


Zero your compound DRO. What's that, no compound DRO? :eek:

Well, I made mine just for this project, but I can tell I'll use it a lot! Nothing to mine, just a couple pieces of aluminum milled so I can clamp them to the lathe with a 10-24 bolt. The caliper (my least favorite caliper) is bolted to the top clamp and the jaw bears against the standard on the lower clamp. Pretty simple.
 
Thanks gents. Just finished up the "flip" on the flywheels, pix shortly, but the family is dragging me off on an errand.

Meanwhile, no dirty hands is due to the brass. You have to love brass: cuts easily, shiny gold color, satisfying heft, no lubricant required, and hence it is very "clean" to machine. You should've seen my hands working on my cast iron collet chuck backplate!

Unlike many, I love working on cast iron because it machines so well, but it is dirty gritty nasty stuff that requires me to stop and clean things often.

The collet chuck has been a joy. I feel silly that I let it sit in the garage for nearly 2 years. It's become an instant favorite. The chuck itself is not cheap, but I fear the real expense is in the collets. I happened upon a really nice and complete set with a rack for under $200 on eBay, but it was still expensive as my lathe's workholding options go. Having realized how much I like it, I just blew another $100 on eBay to get a 3-jaw and a 4-jaw mini-chuck that will go into the a 5C collet. I can see uses for both in my future. Fortunately, given a cheap spin indexer and a set of collet blocks, I also get to amortize those expensive collets as mill tooling. I am looking forward to my next part, the connecting rod, which will involve carrying part and collet from lathe to mill.

After I get those updated pix PhotoShopped and posted, I'll be on to the polishing stage.

Cheers,

BW

PS Love that sensitive pecking attachment :eek: no doubt about it! Not sure I'll get to do one though. This project has my fire rekindled to finish the CNC conversion on this lathe. It would have been so easy to CNC these little flywheels! I've gotten so everything I do I'm thinking about how I would have done it if the machine was a CNC.
 
BobWarfield said:
PS Love that sensitive pecking attachment :eek: no doubt about it! Not sure I'll get to do one though. This project has my fire rekindled to finish the CNC conversion on this lathe. It would have been so easy to CNC these little flywheels! I've gotten so everything I do I'm thinking about how I would have done it if the machine was a CNC.


Thank you BW, glad you love it ;D (wasn't sure if anyone would when I made the vid?) I had a very warm feeling inside when I completed it :D.
I know this is going to cause some possibly passionately worded answers but.... Do you ever feel like you are missing something when a part is made using CNC? I mean do you get that same feeling of achievement that you do when you manually create the part you require?
I know there must be a sense of achievement in getting the program correct etc(must take quite some figuring out!?!) but is it as good of a feeling? ... Just wondering? ???


Ralph.
 
Time for another overly detailed installment of "This Old Flywheel" with Bob Warfield (Vila was unavailable I'm afraid!). And no, Ralph, while I liked your drilling attachment, I will not be hijacked into a religious debate about CNC and what "feels good." I live in California, so I get enough "feel good" talk outside the machine talk to last a lifetime! :big:

When last we left our hero, Mr Flywheel, he'd been machined on one side, but the back end was a mess. Time to fix that!

We'll start with a collet and collet stop:

P1010524.JPG


The rod inside is adjustable and gives a fixed amount of "stick out" to the part. It is fixed relative to the collet's lip, but not much else because the collet moves in and out along the lathe's axis when you tighten it. We'll have to allow for that to have much success with it!

P1010525.JPG


This is about right. Plenty of material for the collet to hold on to, and the part I need to work on sticks out.

P1010528.JPG


To allow for the fact that the collet moves in and out, I will touch off and zero my DRO on the collet lip as shown here. I left the part out so things would be more clear.

P1010532.JPG


First operation is to part off at a point that is nearly correct. I'm leaving 30-40 thousands of excess. Here I am touching off my Aloris parting blade (carbide for a Carbide King!) on that lip to zero the compound DRO.

<continued>
 
P1010533.JPG


DRO zeroed...

P1010541.JPG


Amount to part off dialed in. How did I know how much? I miked all these little guys, set them down on a grid drawn on paper, and wrote the part length on each one. From there, I subtract 0.6562", the desired length, from the actual to determine how much to remove. I leave the parting allowance of 30-40 thousandths and go to it.

But, it's even easier than that!

P1010541.JPG


We're just parting here, and have 30-40 thou of slop to work from. So, I set the blade position on the first one, locked the carriage, and didn't even bother measuring the rest. I just ran them through lickety split!

With brass I can run my spindle real fast (1000 rpm on this belt setting) and crank the handwheel about as hard and fast as I can comfortably go with one hand. The chips peeled right off and there was minimal chatter noise. Now this feels like a production job! LOL

P1010536.JPG


The result is not gorgeous, but it isn't terrible either. In any event, we'll be cleaning it up with a facing cut soon.

<continued>
 
Here they all are, whacked down to size and nervously awaiting the next operation:

P1010542.JPG


Remember the grid of paper I talked about? Well we're back to it:

P1010543.JPG


Mike each one and write down under the part in its square the length after parting. I love my bought on sale 0-1" Mitutoyo Digimatic Micrometer. Feel is awesome, and the cheezy import stand is handy too!

P1010545.JPG


Back to touching off to zero the DRO. If I don't care, I gently touch the tool to the unmoving part. If I need more accuracy, I touch off with paper. Theory says you go until the paper is grabbed, and then assume you're 0.001" away from the workpiece. I've found that number to vary, and one time it was as much as 0.010" off! If it really really matters, you gotta check your paper! See if they guy in the Tool Crib can give you some of that NIST traceable paper, eh? :-

In this case, I went with 0.001" and the result was tolerable.

Zero off the paper...

P1010546.JPG


Dial in depth of cut on the DRO, or your dials if you have none. BTW, been watching my little compound dial. Pretty sure I have one of those metric screws calibrated in inches. It's just not quite right compared to the DRO. Now I wish I had DRO's on everything!

<continued>
 
P1010544.JPG


Face to length.

After that, zero from that point, set the shoulder (another 0.0156 which I would set until I had 15 and the little flashing 5), turn dial to "50" on the proper revolution, and we've done another flywheel both sides!

Woohoo!

Two major steps left:

1. Drill and tap for set/grub screws. I just ordered 2 spiral flute taps and some 5-40 grub screws. Sure could use a hand tapper, but instead I'll use my piloted tap wrench.

2. Final polish. Got a pretty good idea how I'll be doing this. Been experimenting a bit:

P1010500.JPG


I'll get back on these when my Enco package shows up with the taps. Meanwhile, it's about time to start my experiments on the con rods. There'll be more 5C action for you collet fans there too!

Cheers,

BW
 
Hi all
Not sure if this is ethical but it may be of interest.
ebay item 310066710913 steel flywheels. I have bought
some of these and am sure they will "come in handy sometime".
Seller has two sizes ones listed and smaller and is willing to sell
privately.
I am in no way connected to this seller.
Regards
Paul
 

Latest posts

Back
Top