Combined ball turner and rounding table

Home Model Engine Machinist Forum

Help Support Home Model Engine Machinist Forum:

This site may earn a commission from merchant affiliate links, including eBay, Amazon, and others.

smfr

Project of the Month Winner!!!
Project of the Month Winner
Joined
Oct 29, 2011
Messages
287
Reaction score
2
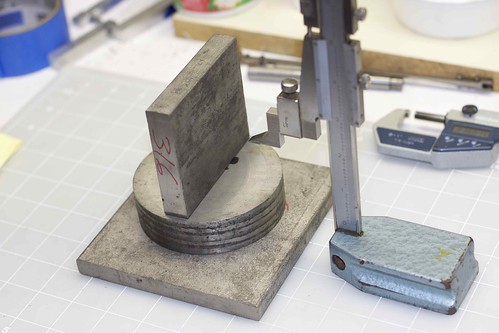
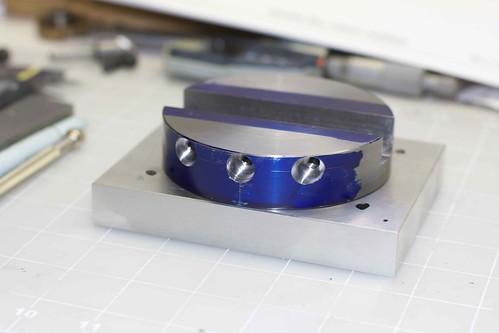
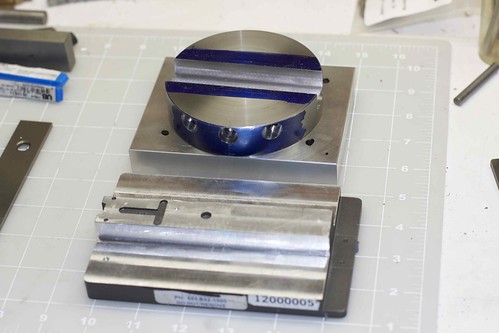
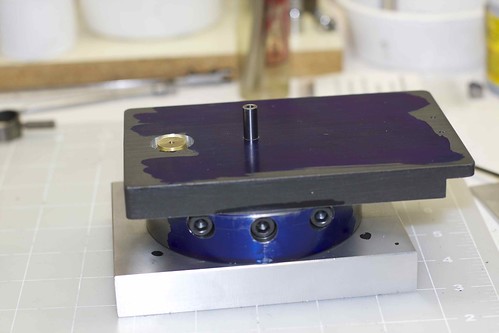
I'm thinking of building a ball turning attachment, and adapting it to also be used as a rounding table. I'd also like it to have end-stops built in.

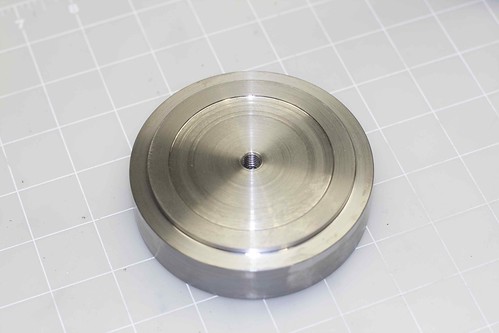
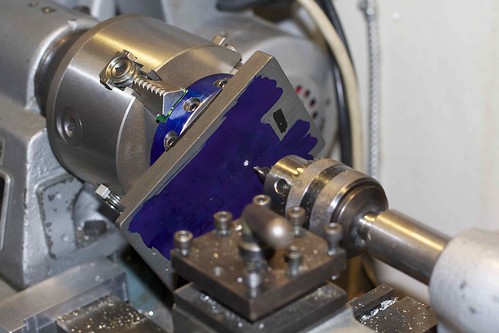
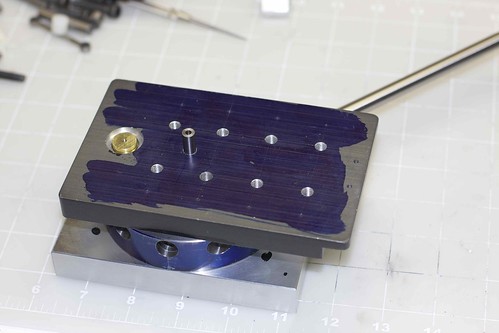
Has anyone built such a thing? I've seen the usual ball turning attachment plans http://www.bedair.org/Ball/ball.html, and started building one. I was thinking that the turning table could just bolt down on top (or even just be held where the toolholder normally goes, if things are accurate enough).

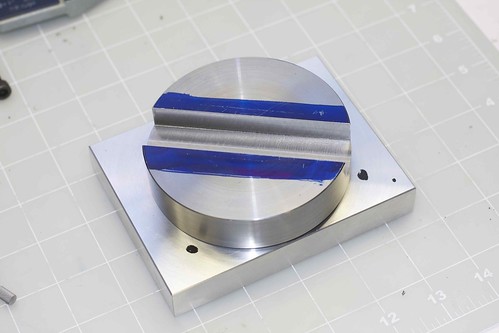
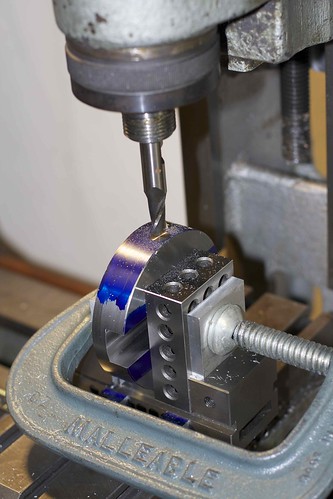
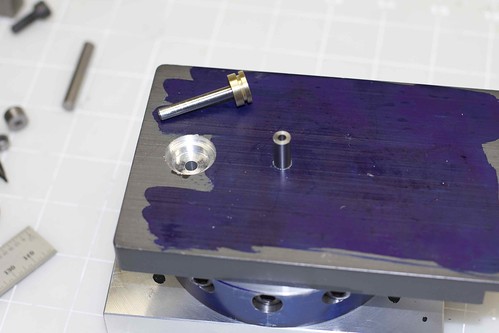
I had (what I thought) was a cunning idea for end stops. I'd make two rings with tabs sticking out which are the same diameter as the main circular piece. These would fit into a groove in the body (obviously there would have to be some removable ring so that they could be put into place). A couple of set screws could be used to bear down on the rings to set them in place, after the user has rotated them so that the tabs are in the right spot. The tabs that stick out would hit a peg that projects from the base.

As long as all this doesn't interfere with the ball-turning bits, I think it would work. Thoughts? Am I crazy? ;D

Simon
 
I like that idea from the French site on adapting a cheap boring head and turning it into a sphere turning device on a lathe.
 
Looking at it from the rotary table side, this is one that I built a number of years ago and use it a lot. It's probably bigger and maybe more robust than you need. This one is a little over 5" in diameter.

[ame=http://www.youtube.com/watch?v=am5774rnjtU&feature=g-upl]http://www.youtube.com/watch?v=am5774rnjtU&feature=g-upl[/ame]

You could make it a little smaller and just clamp a ball turning tool to the rotating table.

Chuck
 
So do I, very nice!

I've been tempted to make a ball-tuning fixture for years, but in the end, I've skipped it because I'll only do something like that (ball turning) once or twice a year, and I've made use of a bit of software I wrote many years ago that calculates coordinates for turning spheres by dividing the sphere into any user-defined number of "slices", and by using a parting tool, a sphere can be roughed out quickly. It's hard to describe properly. Basically, you do a number of partial parting off cuts, and depending upon the spacing between cuts, the sphere can be smoothed out in just a minute or two with a file. It doesn't make perfect spheres, though.

The software also calculates bolt hole circles. If anyone wants it, I'll post it.
 
Oh, I like your rotary table, Chuck.

While lying in bed last night I had a better idea about how to make a captive groove for my set-rings, which is to have the main body in two parts, bolted together, and have the groove formed where the parts join.

My main worry is that the rings won't form a very positive stop, since they could rotate under force, even if clamped down. I guess I could address that by indexing them somehow, and adding a set screw.

I hope to make some progress on this today. Will post pictures if I do.
 
gee wizz chuck thanks for the video, now i have another tool to make ;D :big:

the other chuck

 
Chuck, how are you holding down the rotating part of your table? Is there a bolt with a belleville washer?
 
smfr said:
Chuck, how are you holding down the rotating part of your table? Is there a bolt with a belleville washer?

There is a spigot on the bottom of the table that extends down through the bottom plate. A split collar fits over the bottom of the spigot and clamps with a socket head cap screw. No spring washers, just a very close fit.

See the picture attached...

rotarytable.JPG
 
Oh, that's a neat solution! It makes more sense than having to deal both with a spring washer, and with some kind of nylon insert to prevent the bolt from loosening.

Sorry I had to make you take the base off for the photo :)
 
smfr said:
Oh, that's a neat solution! It makes more sense than having to deal both with a spring washer, and with some kind of nylon insert to prevent the bolt from loosening.

Sorry I had to make you take the base off for the photo :)

No problem, I had forgotten how I did it, and had to satisfy my own curiosity... ???
 
I made mine the lazy way.

I have a boring head with an R8 shank
Bought a straight 3/4 in arbor for the boring head.
I have a Boring Bar Holder with a 3/4" hole to mount on the QCTP.

Change the boring head shank to straight.
Slip through the Boring Bar Holder
Build a cup to grab the other end of the arbor, add a key just because I am paranoid about slipping, add a handle in the cup to rotate the boring bar.

The entire contraption looks flimsy, too overhangy, and just to bulky for a 9x20 lathe, I was not too confident it works.

Trial run was very satisfactory.
Like the fine adjustment offered by the Boring Head.
Like the ability to make as large balls as 3" diameter before running out of travel on the cross slide or on the QCTP holder.
Can also make concave surfaces on the face or on the periphery of the part.
I did not want to invest too much for a tool that is rarely needed.
 
Nice table Chuck. Now my todo list is longer, in a good way.

Lee
 
I've been working on my combined ball turner and rounding table, so thought I'd show some photos of the build.

Raw materials:


I ended up using a piece of Al for the base because it had to be quite a bit thicker.

Base after turning:


Not sure what this steel is, but it machines very nicely. I went for an M8 threaded hole in the middle, which I hope I don't regret. It needs a nylon locknut-type deal in there to stop the bolt from loosening.

Cutting the slot, which was a pain to get square and accurate:


Body and base mostly done:


Squaring it up in the vise (which is a bit small for this):


and milling the flats before drilling and threading the three holes for the locking bolts. The endmill threw the part off-center the first time, hence the addition of the clamp (if in doubt, add clamps ;D):


Phew, holes threaded etc:


OK, so those parts are shared between the ball turner and rounding table. Now I'm going to make the table top out of a random chunk of hi-tech-castoff Al (looks like a blank for a hard drive or something). It's anodized, and that coating is really hard!

After much rough milling, the table top now has a projection that matches the slot in the rotating part:


With the table top fixed to the base via the retaining bolts, the base is centered in the 4-jaw, and a 1/4" hole drilled and reamed to hold the locating pin that indicates the center of the rounding table. This hole doesn't go through to the base.


Another hole is drilled and reamed close to one end of the table, through to the round base. This holds a locating pin, whose job it is to ensure that the rounding table is repeatably located in the base. My pin has a brass "handle" so that it's relatively easy to remove:


This pin is sunk down into the table top. Here are things in place:


Note that the table overhangs more on one side because I expect that the table is most often used to round one end of a part. What remains is to drill and thread the clamping holes on the surface of the table, fix a handle to the rotating base, and work out whether my retaining M8 bolt is going to work.

 
Here it is with some M6 holes tapped in the turning table, and the tommy bar fitted to the base (which I think I'm going to want to be able to attach on the front-right side):


The retaining bolt that holds the rotating part to the base actually worked out OK. I cut a 1/16" groove in the M8 bolt, then cut a 1/16" washer off a nylon bushing from the hardware store which was about 8mm in diameter (with a hole in the middle); kind of like fitting a piston ring. When I screwed in the bolt with this nylon split washer in place, part of the washer sheared off, but that part that remained in the groove provides a nice bit of resistance. I think it'll do the trick. There's a belleville washer under the bolt head for tension.
 
It's finally ready for action:


Here rounding a Stuart Beam link:


I'm quite pleased with the result, but it does need end-stops. I could either make a new base and rig up end stops that hit the handle, or do stops based on rotating rings as I described earlier.
 

Latest posts

Back
Top