All about wax chucks

Home Model Engine Machinist Forum

Help Support Home Model Engine Machinist Forum:

This site may earn a commission from merchant affiliate links, including eBay, Amazon, and others.

Kaleb

Senior Member
Joined
Jan 3, 2010
Messages
272
Reaction score
27
I've decided to borrow this idea from the watchmakers for my Frank Wiggins/Coles S.T. oscillator, so I thought I would give a bit of a walk through. I have gone on what I can glean from the web, so this may not be completely accurate, so here it goes:

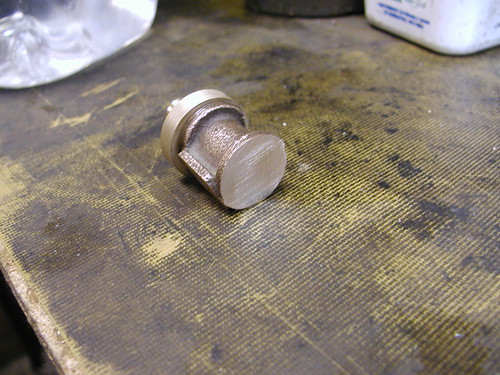
A wax chuck is a workholding fixture commonly used by clock and watchmakers for turning operations. This sketch of mine shows the basic idea:


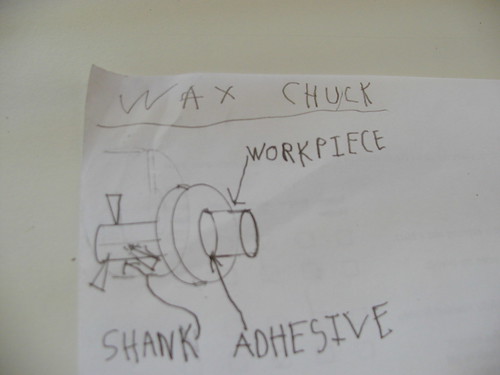
The workpiece is attached to the wax chuck by an adhesive of some description, traditionally wax, but shellac, loctite, superglue and other similar adhesives will apparently work just as well.

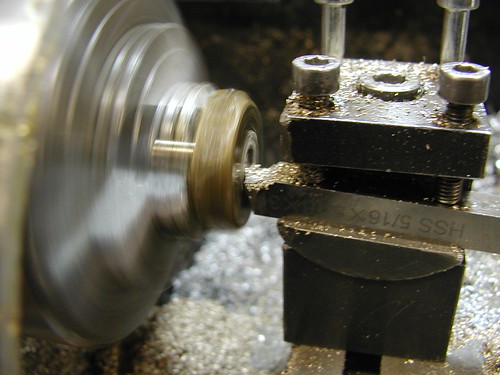
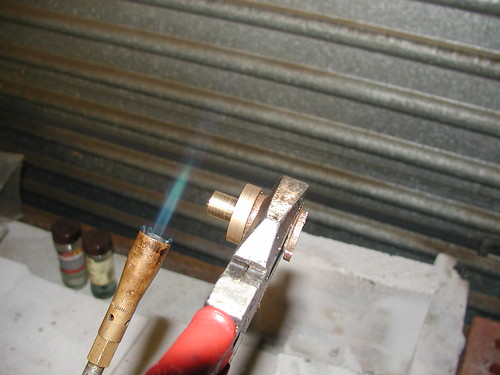
Once the adhesive has set, the wax chuck is mounted in the lathe, and machining operations take place in the usual fashion.

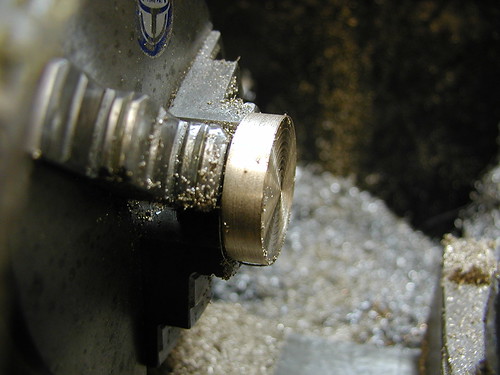
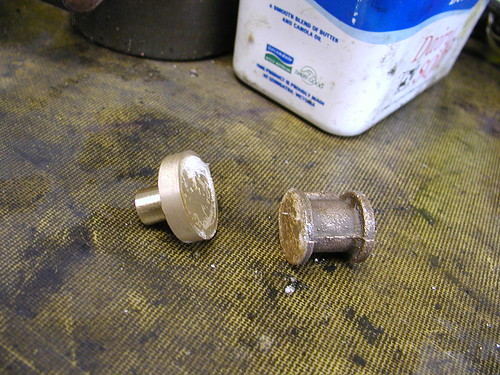
Once machining is complete, the workpiece is seperated from the wax chuck by heating until the adhesive either melts or breaks down.

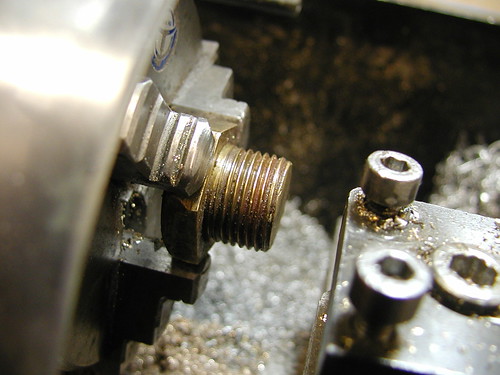
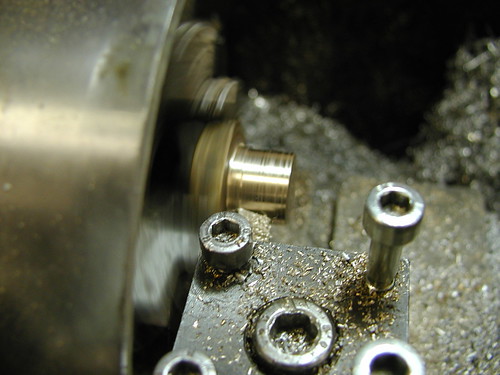
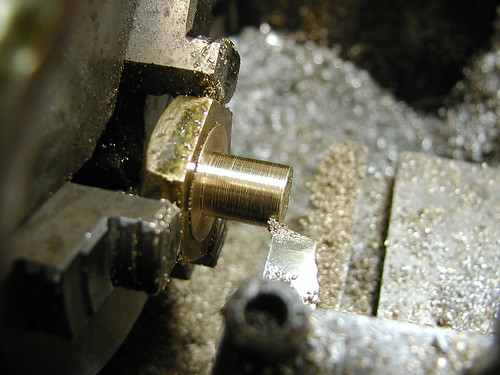
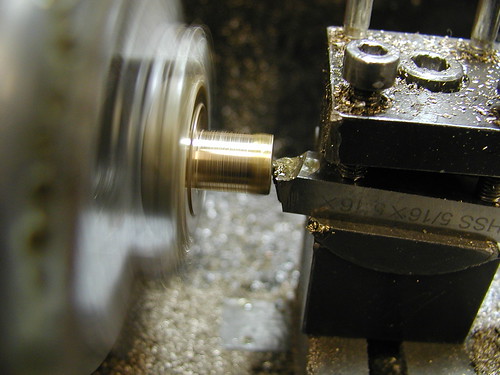
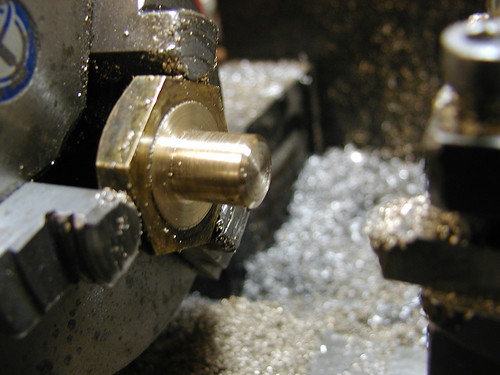
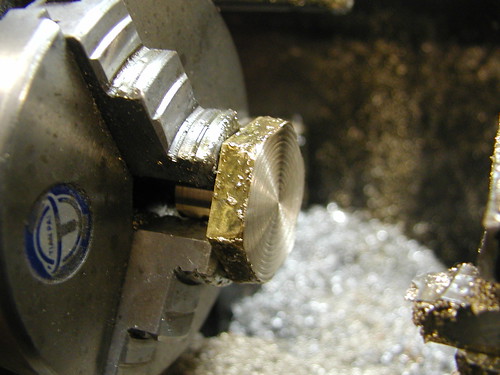
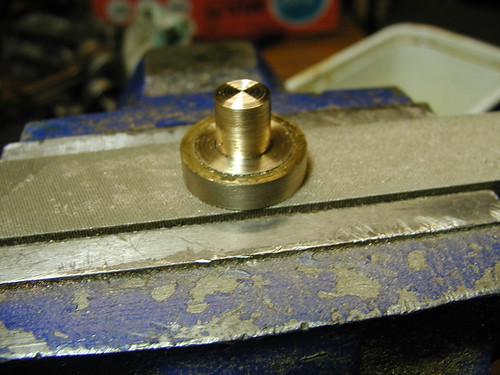
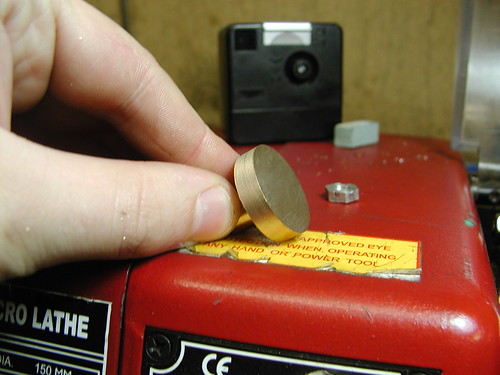
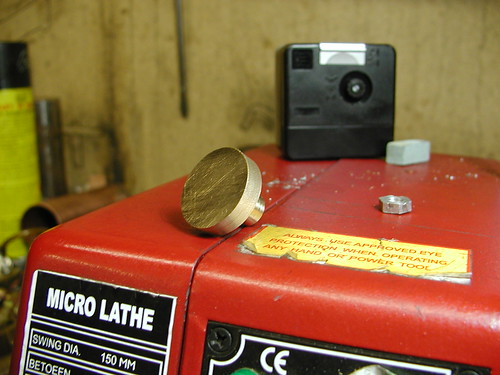
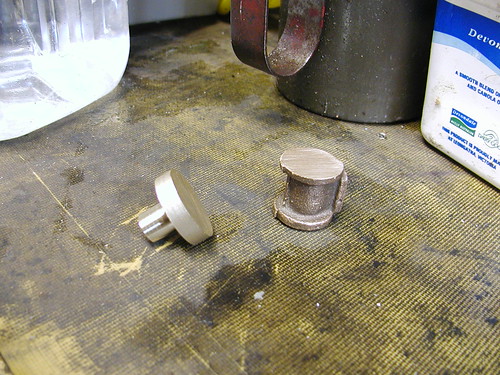
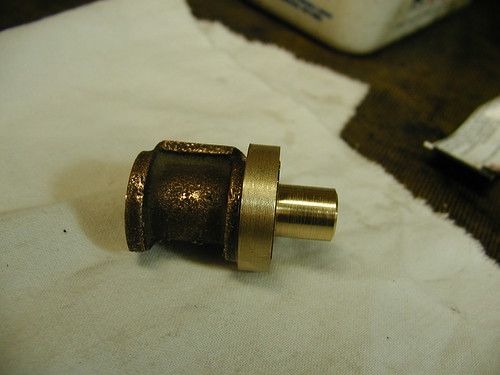
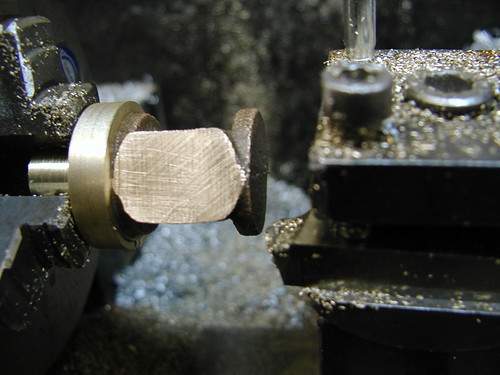
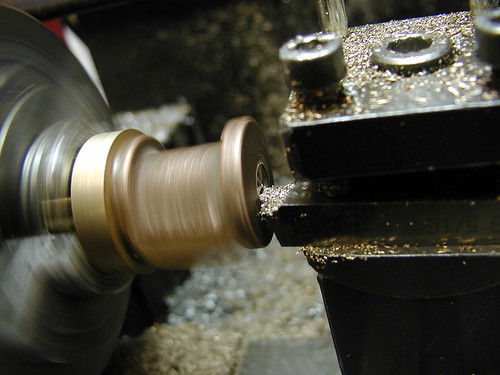
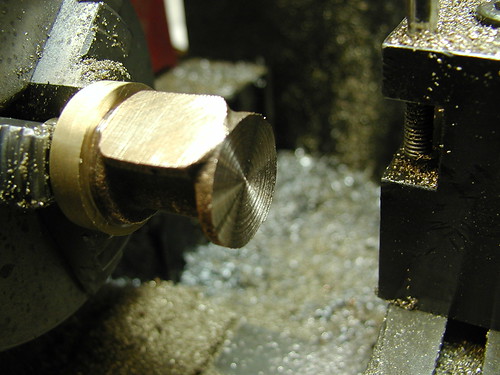
In a watchmaker's lathe, wax chucks are usually attached to an arbor which fits directly into the headstock. They are generally made from brass, and are generally only available off the shelf for tiny watchmaker's lathes. Fortunately, it appears they would be quite simple to make. In the next post, I will walk through the process of making a wax chuck for my Sieg C1 lathe.

Here's a walk-through of using a wax chuck by a clockmaker:
http://www.snclocks.com/TechnicalInformation/Tid-Bits/Tid-Bit-2-Using-a-wax-chuck/4174805_W9qLsx#243895865_h4LDZ
 
Yes this works on the mill as well on flat plates. It's especially useful for thin sheet metal.
 
That all sounds fine on paper, so let's make it!


For my wax chuck, I started off with this 1/2" BSP brass plug I happened to have lying around, but it would be just as easy to start from a piece of round bar.


Turning down the smaller end to make the shank. If you start with round bar of uniform diameter, face the ends first before turning the shank.


We end up with this. The shank diameter doesn't really matter that much, just make sure your shank is thick enough to withstand the stresses that will be placed on it. Otherwise, just make it to whatever diameter suits your needs.


Facing the end of the shank. As I said earlier, do this before turning down the shank if you are working from a uniform piece of round bar.


Facing done.


Next, turn the piece around in the chuck like so.


Facing the holding surface. Although this will make the surface square, there will be tiny ridges left on it that must be removed.


Workpiece after facing. The small bands are those tiny ridges I spoke of earlier.


Turning the outside surface. This is not absolutely essential, but I still recommend doing it.


Turning finished, but we are not quite done yet.


For the wax chuck to be accurate, the holding surface must be as flat as possible. As I said earlier, facing leaves tiny ridges on the surface.

So clamp a fine file in the vice, and move the job over it while pressing down. Do this until you can no longer see any circular bands. This process will remove any ridges and leave a very smooth, flat finish. Don't clamp the job in the vice and file it in the normal way, since this will leave a slight curve.


The finished wax chuck. Notice that there are no bands on the holding surface, they have been removed by the file.

So, that is how you can make a wax chuck suitable for any lathe or mill, you just adapt the dimensions to suit the machine and/or the job at hand. The third and final part to this walk-through will cover the use of this wax chuck to face the end of a cylinder casting.
 
A parallel solution is the glue chuck. In use , your chuck would have some annular grooves cut in it's face to allow some air/water vapor for the Cyano glue to activate.

These hold very well, but can be tricky to disassemble...usually with a torch.

I have read many accounts of true wax chucks, and shellac chucks...but I haven't tried one yet..

Thanks for posting this!


Dave
 
Hi Everyone

This sort of process has been used for a long while in gemstone faceting using stuff called dop wax to hold uncut stones onto the holders called,funnily enough,dops.More information might be gleaned from such sites on the web.

regards steve c
 
So, with the wax chuck finished, we can get to the job at hand.


This cylinder casting must have parallel faces on each end. One face has already been machined and filed smooth, so it is that face that will be stuck to the wax chuck.


Before attaching the workpiece to the wax chuck, clean both mating surfaces with a rag soaked in methylated spirits (denatured alcohol for those in America.) to remove any traces of oil that may stop the adhesive from taking hold.


The workpiece attached to the wax chuck. Superglue was used in this case. Be careful if you use superglue since it also sticks skin together and sets very quickly.


After letting the superglue cure for a while, the whole thing is now clamped by the shank of the wax chuck in the 3 jaw chuck of the lathe. We are now ready to start machining our workpiece.


Facing the end of the cylinder casting. Be careful not to put too much sideways pressure on the workpiece during machining as this could cause it to come off the wax chuck.


Facing complete.


The workpiece still attached to the wax chuck after filing the face.


With machining complete, we now need to remove the workpiece from the wax chuck. Do this by heating the area around the join with a blowtorch until the adhesive comes apart. A few taps may be required to dislodge it completely.


The workpiece seperated from the wax chuck. The white stuff visible is the remaining adhesive. Remove this by rubbing the surface across a file, and the job is done.

So that concludes my walk-through of the wax chuck. I hope it has been helpful to you all.
 
Thanks Kaleb,

I tried this one time, didn't know it was called a wax chuck. I used red loctite (is that 292?) and it didn't cure well enough to hold. I ended up trying again with a recess in the end of the "chuck" part and got away with the workpiece turned to fit into the recess. I still have mixed luck with loctite.

What "Superglue" do you use? I have had varying success with that as well and I suspect it may be that I purchase it locally and the vendors who sell these things don't turn over enough or rotate stock and I'm always buying old product. (Murphy's law of adhesives?)

Thanks Again,

--ShopShoe

 
I use this trick using superglue, but not the ordinary thin runny stuff that goes off in seconds. I buy mine from double-glazing shops, they use it for fixing window trims. It's about as thick as PVA wood glue and takes a while to set but it's a LOT stronger and fills gaps well. I got a spray-tin of activator too for when I want it to cure in seconds, though the slow-curing method is a lot stronger.

You get a huge pot (compared to the little tubes you buy) for about £4. Enough to run a 2mm bead probably 30 to 40 metres.
 
Back
Top