techonehundred
Well-Known Member
- Joined
- Jul 29, 2009
- Messages
- 140
- Reaction score
- 6
I have always wanted a collet chuck for my Lathe. I have finally completed mine and thought I would give the story of a very unexperienced machinist guy and the process getting to the collet chuck. Wanting a collet system for my lathe was difficult to find since the lathe is a MT 4 1/2. I could get an er chuck, but they all seemed to be closed in the back and I wanted a through chuck. The lathe has a 21/4" x 8 threaded spindle, so I decided to make my own chuck and make it an er40 which allows a through hole of 1".
So a few weeks months back I got hold of a piece of scrapbinium that was 3" in diameter and had this crust on it. it was heavier than aluminum and crusty, so it must be cast Iron. So, I took the piece and put in the lathe and proceeded to turn the crust off of it. I was using an HSS bit and it was not cutting it very well. After reading posts here I just knew that this was because cast Iron crust can be very hard, so back to the cabinet and pull out the carbide tool bit and try that. Ah, much better it was cutting right through the crust and did so for about an inch at about .030". Then this very shocking thing happened. The chips coming off of the scrapbinium flashed white like the arc of a welder and burning chips started dropping on the lathe. I quickly stopped the lathe and brushed the chips to the concrete floor with a screwdriver. Once things cooled off and my heart returned to normal, I took that piece out and set it on the shelf and decided to figure out plan b. Here is a picture of my scrapbinium which I have now labeled "leaveitalonium."

After a few days weeks, I decided to bite the bullet and buy a piece of Cast Iron. I ordered a 3" x 6" piece to start. While waiting for the cast Iron to arrive, I machined another piece of metal I had to make a copy of the spindle thread. This turned out very nice and had a nice fit in one of the back plates.

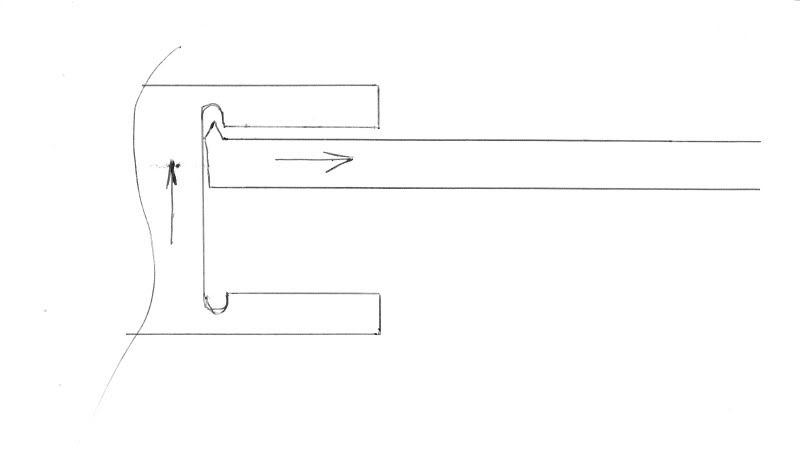
Starting to get some confidence, I received the cast Iron and decided I had bought too much and cut it in half. So I started machining on the cast Iron piece. Everything is going perfect I get it bored to the right diameter and I am ready to cut threads. Then I looked and realized that I am going to have to thread an 8 tpi thread in a blind hole right to the bottom of the hole. I don't think I can stop the lathe that quick. Luckily that night I went to our local club meeting and one of the members had built a crank to hand crank the threads. I can do that. So I get back to the shop and realize that I don't want to take the piece out of the chuck to machine it. So I get this great idea to get a rubber stopper from the hardware store and fit it in the back of the spindle between two washers to make the crank. Hey, it worked. Back in business. so I get all set up for threading. I have a good internal threading tool and I set my compound to 29 degrees. and I start threading. I get it down to size and my spindle pattern will not fit. So I go deeper and it still will not fit. WTF. So I go back look more at threading and it finally becomes obvious. I set my compound to 29 degrees. Just perfect for external threading. The only problem was that this is an internal thread. I set the compound 29 degrees the wrong way!!! :wall: So If anyone needs, I have this great 2 1/4" buttress thread. :") Another part on the shelf of Shame.
Another part on the shelf of Shame.

Do you remember that I cut the CI in half, ok I have another piece and I start again. I also did two things, I upgraded the crank. the first crank using the rubber worked for a one time tool, but deformed the rubber too much and was not usable. So I made a proper crank with an expanding internal metal mandrel. The second thing I did was to get something stiffer for the threads. I had been using a piece of 3/8" HSS ground to do internal threading and I had problems with getting the set screws tight enough and the bit would move. So this time I found a 3/4 boring bar with a 5/16" square hole and used a carbide tipped bit. This made the threading much easier. everything went like clockwork. What a relief to screw the piece on to the spindle. Here is a picture of the crank that I made for the spindle.

Now for the working end of the Collet chuck, here is how I made it. First I purchased a collet and an ER40 nut.

I then cut down the metal to size for the M50 x 1.5 thread and once again used the spindle crank to cut the thread(boy is it easier to cut this shallow thread than it was to cut the 8tpi thread. :big. After this, all that was left was to bore out the angle for the collet. This 8 degrees so that was my starting point. So I mounted a 1/2" drill rod and and centered it on the lathe in my 4 jaw chuck. I then finalized the angle using a Dial test indicator and bored the chuck for the collet. And here is what I have.

Right now I am just using an oil filter wrench to hold the chuck, but will probably make a pin wrench in the future. This works great and I am stoked. Now I need to buy more collets.
I really am not pushing Shars, It was just a calendar with an er chuck on the front and I thought that was an appropriate background.
So a few weeks months back I got hold of a piece of scrapbinium that was 3" in diameter and had this crust on it. it was heavier than aluminum and crusty, so it must be cast Iron. So, I took the piece and put in the lathe and proceeded to turn the crust off of it. I was using an HSS bit and it was not cutting it very well. After reading posts here I just knew that this was because cast Iron crust can be very hard, so back to the cabinet and pull out the carbide tool bit and try that. Ah, much better it was cutting right through the crust and did so for about an inch at about .030". Then this very shocking thing happened. The chips coming off of the scrapbinium flashed white like the arc of a welder and burning chips started dropping on the lathe. I quickly stopped the lathe and brushed the chips to the concrete floor with a screwdriver. Once things cooled off and my heart returned to normal, I took that piece out and set it on the shelf and decided to figure out plan b. Here is a picture of my scrapbinium which I have now labeled "leaveitalonium."
After a few days weeks, I decided to bite the bullet and buy a piece of Cast Iron. I ordered a 3" x 6" piece to start. While waiting for the cast Iron to arrive, I machined another piece of metal I had to make a copy of the spindle thread. This turned out very nice and had a nice fit in one of the back plates.
Starting to get some confidence, I received the cast Iron and decided I had bought too much and cut it in half. So I started machining on the cast Iron piece. Everything is going perfect I get it bored to the right diameter and I am ready to cut threads. Then I looked and realized that I am going to have to thread an 8 tpi thread in a blind hole right to the bottom of the hole. I don't think I can stop the lathe that quick. Luckily that night I went to our local club meeting and one of the members had built a crank to hand crank the threads. I can do that. So I get back to the shop and realize that I don't want to take the piece out of the chuck to machine it. So I get this great idea to get a rubber stopper from the hardware store and fit it in the back of the spindle between two washers to make the crank. Hey, it worked. Back in business. so I get all set up for threading. I have a good internal threading tool and I set my compound to 29 degrees. and I start threading. I get it down to size and my spindle pattern will not fit. So I go deeper and it still will not fit. WTF. So I go back look more at threading and it finally becomes obvious. I set my compound to 29 degrees. Just perfect for external threading. The only problem was that this is an internal thread. I set the compound 29 degrees the wrong way!!! :wall: So If anyone needs, I have this great 2 1/4" buttress thread. :
Another part on the shelf of Shame.
Do you remember that I cut the CI in half, ok I have another piece and I start again. I also did two things, I upgraded the crank. the first crank using the rubber worked for a one time tool, but deformed the rubber too much and was not usable. So I made a proper crank with an expanding internal metal mandrel. The second thing I did was to get something stiffer for the threads. I had been using a piece of 3/8" HSS ground to do internal threading and I had problems with getting the set screws tight enough and the bit would move. So this time I found a 3/4 boring bar with a 5/16" square hole and used a carbide tipped bit. This made the threading much easier. everything went like clockwork. What a relief to screw the piece on to the spindle. Here is a picture of the crank that I made for the spindle.
Now for the working end of the Collet chuck, here is how I made it. First I purchased a collet and an ER40 nut.
I then cut down the metal to size for the M50 x 1.5 thread and once again used the spindle crank to cut the thread(boy is it easier to cut this shallow thread than it was to cut the 8tpi thread. :big
. After this, all that was left was to bore out the angle for the collet. This 8 degrees so that was my starting point. So I mounted a 1/2" drill rod and and centered it on the lathe in my 4 jaw chuck. I then finalized the angle using a Dial test indicator and bored the chuck for the collet. And here is what I have.
Right now I am just using an oil filter wrench to hold the chuck, but will probably make a pin wrench in the future. This works great and I am stoked. Now I need to buy more collets.
I really am not pushing Shars, It was just a calendar with an er chuck on the front and I thought that was an appropriate background.