TB2 build Elmer's #46 Comber - back from the dead

Home Model Engine Machinist Forum

Help Support Home Model Engine Machinist Forum:

This site may earn a commission from merchant affiliate links, including eBay, Amazon, and others.

kvom

Well-Known Member
HMEM Supporting Member
Joined
Jun 4, 2008
Messages
3,284
Reaction score
629
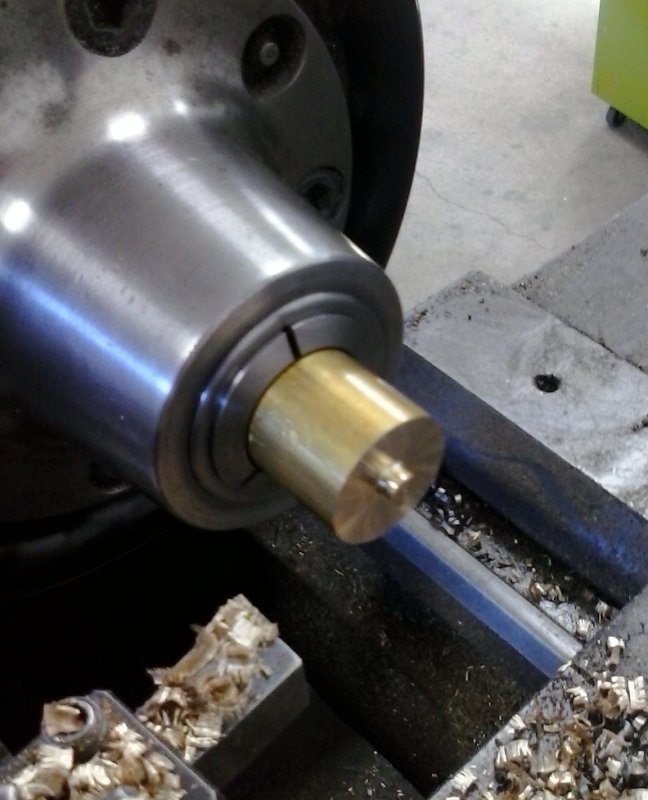
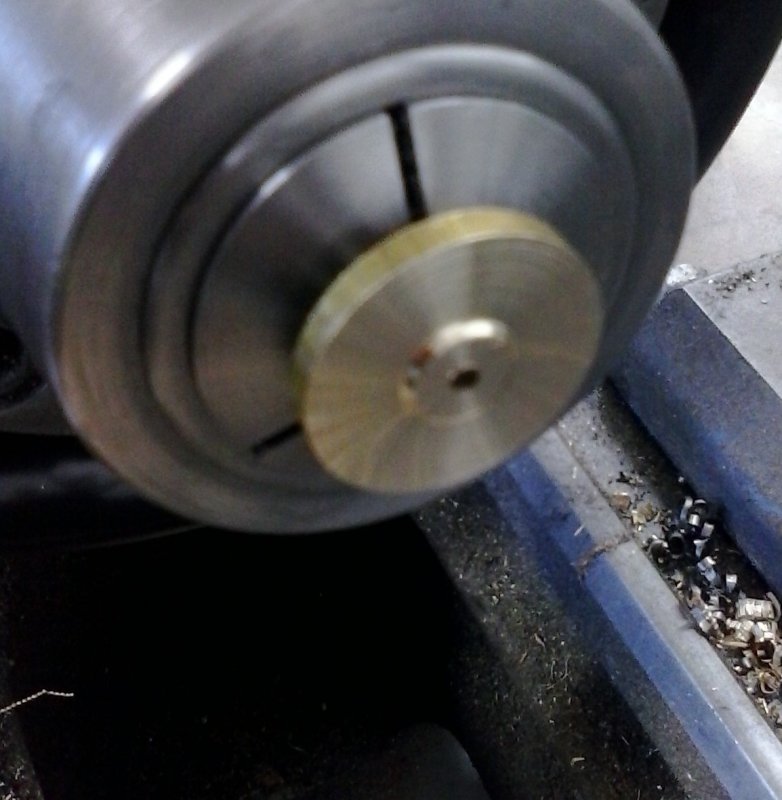
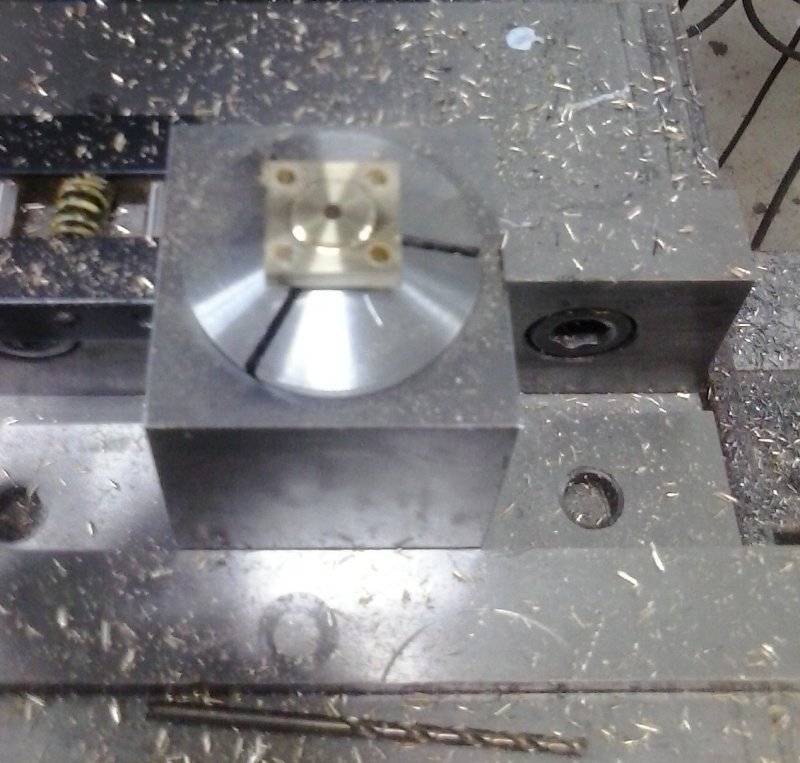
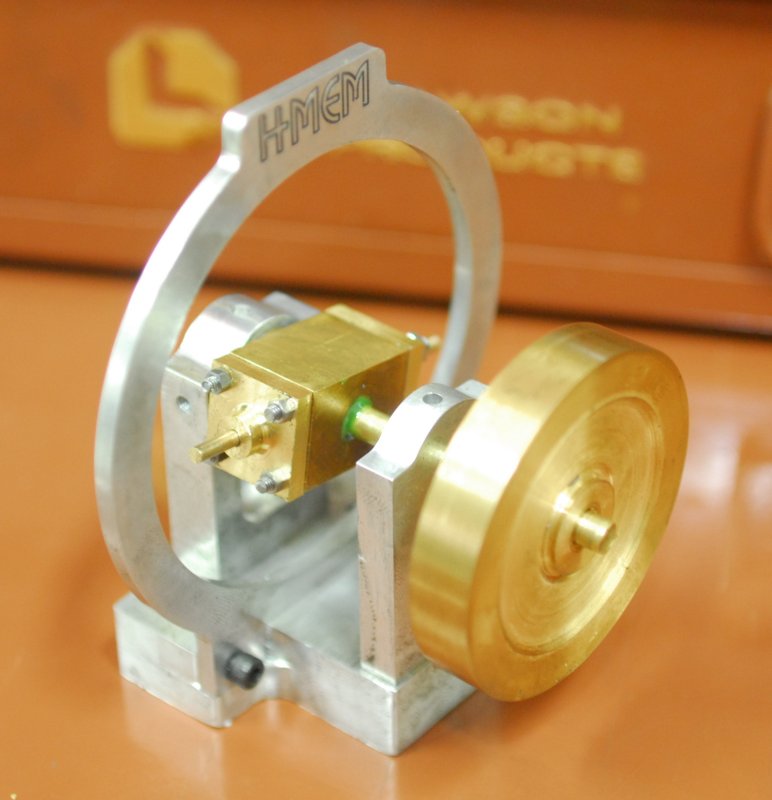
Having gotten the Muncaster engine to the initial run state I have decided to revive my example of the Comber engine, Elmer's #46. The parts have been sitting is a storage drawer in my shop since 2008. One reason I didn't continue is that I didn't get parts from everyone on the team, and as well got interested in other projects. I've been thinking of getting it running for CF, so I have about 2 weeks to make the missing parts and get a runner. Personal challenge!

Taking inventory it appears that the parts I need to make are:

Two heads
Two rollers
Two pins
Air inlet barb

The hard parts are in hand, although attention will need to be paid to fitting, esp. with the bearings.
 
Today's first project was to make the heads/cylinder covers. 1" brass rod in the lathe, face, and turn 1/4" boss.

large.jpg


I did this on both ends of the rod so as not to have to change the lathe tool. Then parted off both enns. Next fasten spigot with a collet and face to form a 3/8" x 1/32 spigot to match the cylinder opening.

large.jpg


Now over to the mill with the collet and collet block to drill mounting holes and trim sides:

large.jpg


Mounted on the cylinder the piston rod slides freely.

large.jpg
 
End of day test assembly. On the original build the flywheel was my part assignment as I was using a school shop. Looks as if it could use some attention.

large.jpg
 
Got everything made and assembled. Assembly takes some dexterity since to get the second fork in place it has to be installed without the roller, and then have the roller, pin, and cotter added.

Engine doesn't yet run. Lots of air leaking out the main bearing hole. I can feel some resistance when turning the cylinder opposite to the run direction, so air is getting into the cylinder. I'll keep playing with it as time allows.
 
I've been playing with trying to get it to run, but so far the best effort has been about 4 rotations with 80psi air.

The engine is very low power and any friction is death. The most obvious problem is the forks around the rollers rubbing on the cam ring sides. I think the slots are a bit narrow; add to that the cam ring being slightly misaligned with the plane of rotation and the difficulty of keeping the slots square with set screws. The piston rod is also slightly too long, and will rub one of the rollers if not adjusted just so.

Tomorrow is my last day to fiddle with it before leaving for CF, but I'll haul it along and fiddle with it if it still doesn't work.
 
Keep at it. Mine runs great on 5 to 10 pounds of pressure with lots of power. Even with some friction about the forks yours should run well also. I would suspect the valving may be off because of the low power.
Gail in NM
 
woohoo1
Congrats. Lots of work finally pays off.
th_wav
Gail in NM
 
Thanks, Gail.

Can't really claim "lots of work" since I just started the missing pieces and assembly a few days ago. But a runner is always satisfying.
 
Sweat equity in getting it running counts!!
Gail in NM
 
At last year's CF and NAMES, the engine never came to life. Since this year CF is dedicated to Elmer's Engines, I made another try. Needs 40 psi, but she turns.

[ame]https://www.youtube.com/watch?v=V5-yRRD0aR4[/ame]
 
Hi K,

I really do love the Elmers engines, they usually work like it says on the tin and can be built by almost anyone.

I notice that on both your vids there is a 'screeching' noise, is this coming from the engine or somewhere else in your shop?

If it is from the engine, it sounds as if there is a slight misalignment problem somewhere that may be causing some drag which requires overcoming by using more pressure.

Nice one!!

John
 
That screech is from a smoke alarm on the ceiling 13' up. Replacing the battery is a PITA, but it's a backup since the alarm is on a power line too. Plus the shop has a second alarm.
 
I took the Comber to Cabin Fever, as Elmer's Engines are a theme of the show. I ran it periodically until it threw a wheel (cotter pin on roller axle came loose). One of the exhibitors at a nearby table had a double size Comber that ran very well at slow speed. I noticed that his forks didn't extend past the edge of the cam, hence less friction. Seemed like a good idea to try, as it also makes assembly easier.

I also decided to do as Gail and use ball bearings as the rollers. Way back in the early days I'd bought a package of such bearings in anticipation of the Kerzel team build that never got underway, and even better managed to find it. The bearings are .25" in diameter, so equal to the roller. Shaft diameter is 1/8" and width is .100": perfect.

I made the first test fork and installed it, at which point I realized that the forks are needed to keep the rollers aligned to the cam. Not sure how the other guy did his, but at least one of the forks needs to extend past the cam edge. So for the second fork I took the old one, drilled the roller axle hole out to 1/8 and used some 1/8 drill rod as an axle. The drill rod is a press fit to the bearing, so no retainer is needed; the fork keeps the bearing centered in the slot and the axle secure. I actually milled down the inside arm of the fork enough so that the cylinders could be squeezed into the cam.

The engine now runs a lot better after firing it up. Previously needed 40 PSI and ran very fast. Now at 20 PSI it can run much slower, probably around 200 RPM.

I measured the valve diameter (.499) and the diameter of the bearing (.505), so the air consumption is pretty easy to understand. To improve this I could remake the bearing with a tighter tolerance, but for now I'm going to let it be. If I decide to go to NAMES by air, I can take it and the Coventry as carryon.
 

Latest posts

Back
Top