


EYE PROTECTION!
Always... but just a reminder. ;D
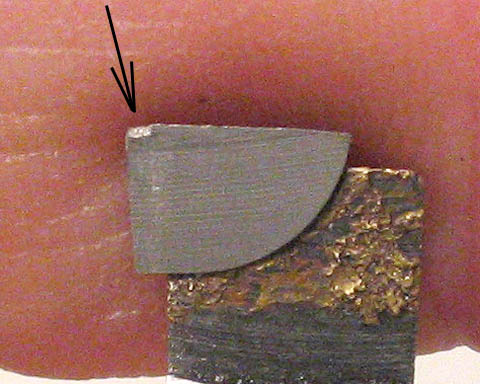
Most of us have probably seen this. Cutting away on something, take too much of a bite, the thing chatters, or,
if you have a small machine, maybe it just stalls, and in pulling the tool out of the cut, you pop off the edge
of the carbide tip.
A couple of the guys asked how I sharpened my brazed carbide boring bits after I'd mentioned it in my current
build thread. There is nothing fancy about this. I don't have a green wheel for my bench grinder, and I
sure don't have a tool room grinder setup for this stuff. This may look like a crude and imprecise way of
doing things. I suppose it is. It also works.
If your tool looks similar to the one in the first picture, I would give sharpening it a shot. When working in
a job shop, I saw (caused..) quite a bit of this type of thing. We just threw them into a bucket and in a slow
time, someone got grinder duty. Sometimes, they will be fractured through like a cracked egg. That kind needs
to be put in the scrap box for some other use. You won't be able to help those at all. If it's just a little
crater popped out of the edge, though, you may be able to salvage it.
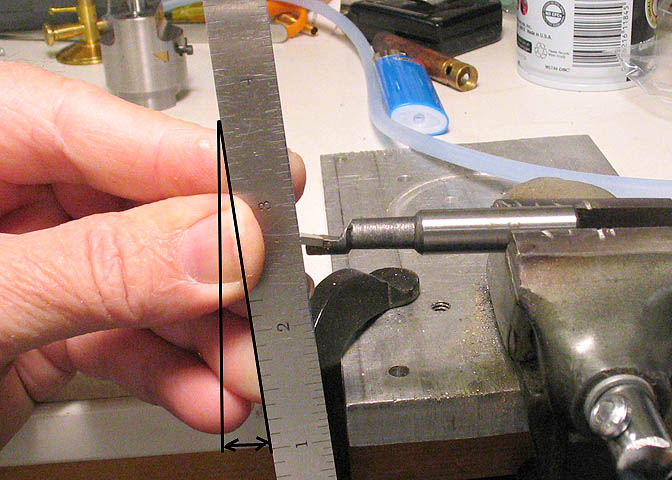
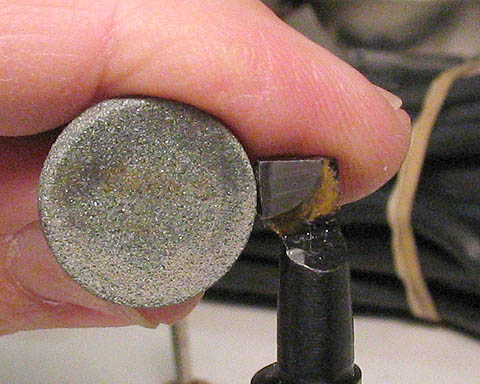
Before you start, take note of the angles on the front and side of the carbide piece. You don't have to be
perfect when you grind it, but it needs to be somewhere close, or you'll be doing this sharpening stuff for
nothing. Measuring a few of the bits I have, they run around 5° front and side. That's for boring bars.
Brazed carbide turning tools seem to have a little less on the end, (facing the work) and a little more
on the side, (facing the chuck). A simple adjustable protractor will get you in the ball park.
Main thing is, just keep it near the original. Don't make any drastic changes to the angles.
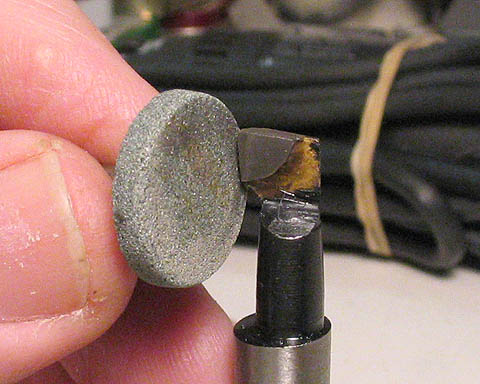
Next step, check for metal that is other than carbide on the end and side of the tool, right under the
carbide bit. You need to grind just a little of that away using a different grinding tool than you will
be using to sharpen the actual carbide. There are a couple of "if's and but's" below.
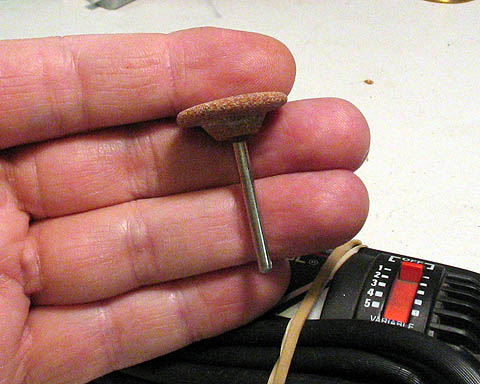
To get rid of that excess, which is usually brazing metal, I use a regular pink wheel in the Dremel tool.
The reason I don't use the same wheel for dressing this stuff down as for sharpening the carbide part is,
the braze metal will plug the wheel you want to use on the carbide. On large green wheels on a bench
grinder, that braze metal doesn't seem to bother them, but the little wheel that will be used for the
sharpening in this demo is so small it could plug fairly quickly.
On some of the better tool bits, the ones made in the States, at least, the brazing job is often much
cleaner than that found on the Chinese bits. Often the carbide tip on those is brazed very close to the
steel tool shank that supports it. In that case, just grind back a tiny bit of the steel, so you can get
to the carbide without fouling your wheel with the steel shank metal. You only need to grind back a few thou.
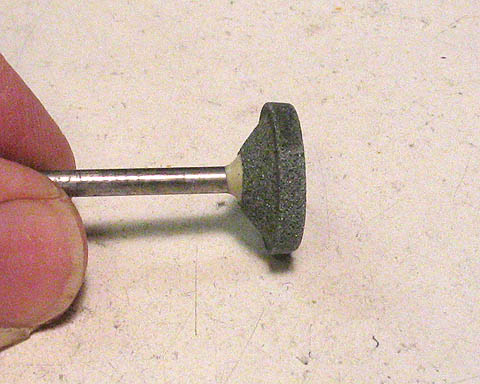
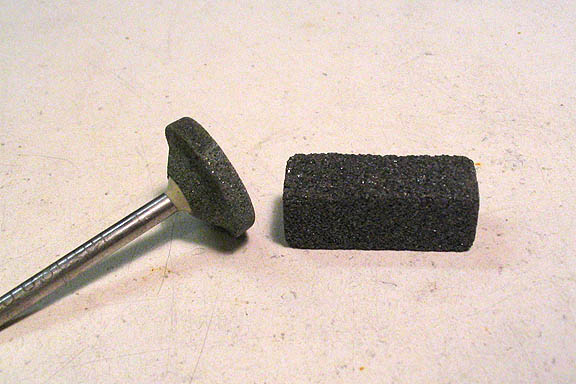
For doing the actual grinding on the carbide tip, use a green wheel. These work well on carbide, and will
cut it without a lot of pressure or wheel plugging.
The wheel in the picture above looks more gray than green, but it's green. Some lighting makes goofy colors.
Use one of these little stones that you can get from Dremel to dress your wheel. After grinding a short time
it will start to turn dark gray, or black. Just a little touch of the dressing stone while the grinding wheel
is spinning will open it up so you can get back to grinding.
I have a larger one of these black dressing stones for my bench grinder. It will probably work okay if that's
what you've got, but I found that the smaller stone from Dremel did a better job on the tiny wheel. The
larger stone is very coarse. Maybe too coarse for the small Dremel green wheel, as it didn't work as well.
I run the stone in the Dremel at setting #2. I don't know how fast that is. Fast enough. The way the stone
is being held against the carbide bit in the picture above is how I do it. It's just done free hand, keeping
the clearance angles in mind. Grind a little, back and forth, then dress the wheel, and grind some more. It
will take a few minutes.
Don't dunk carbide into water like you might with HSS. It will not take well to thermal shock. If it seems
to be getting really hot, just let it cool off. Carbide will take a lot of heat, though, and you probably
won't be able to overheat it with a Dremel. It's made to work red hot. Most of us don't have machines that
have enough horsepower to cut that hot, but it will do it. Your fingers will probably give out holding the
tool shank before you can do any harm to the carbide.
(Note: To dunk, or not to dunk, concerning HSS, is almost a religion in itself. If we want to discuss that,
can we start another thread, please?)
On these tiny Dremel wheels, I don't think you will cause any harm if you find it easier to grind using the
flat end of the wheel. Generally, on a bench grinder, you don't want to grind on the side of the grinding
wheels. In the case of these little things, I don't think you can hurt them.
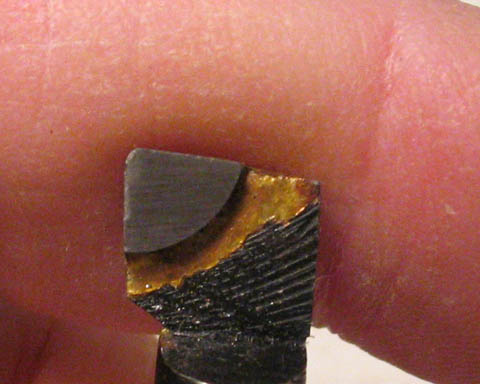
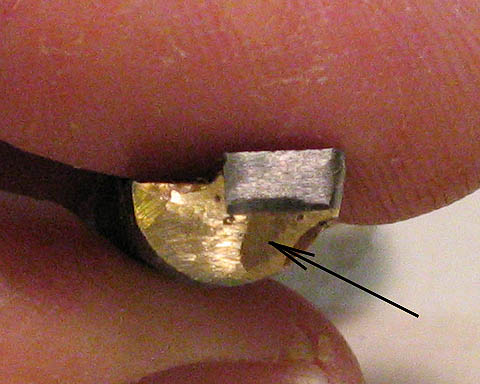
Here's one, just about done. Still just a little to go on the side edge. Keep at it until all the fractured
part of the carbide has been ground away. Use a loupe or magnifying glass to help you see if needed.
Also, have a look at a new tool and notice the corner of the tip. Usually, they will have a fairly small
radius, and the area below that radius will maintain the same relief as beneath the end and side cutting edges.
I sharpened a few of these the other day, and am not quite steady enough to put on that tiny radius, so I
just made it a little bigger. Checking the tools I sharpened to see if they cut okay, the larger radius seemed
to work very well. Went through 3/8" of 1018 CRS without a problem.

To see if I've got a good edge while I'm still at the sharpening stage, I did for the carbide the same as I do
when sharpening HSS bits. Run it over my thumbnail to see if it turns up some of the top of the nail.
That's about it. I used to sharpen carbide tooling in a shop where I worked quite often. We had a large
bench grinder fitted out with green silicon carbide wheels made just for the task.
The little Dremel seemed to take to the job pretty well.
Dean
")