Phase II QCTP Set Up

Home Model Engine Machinist Forum

Help Support Home Model Engine Machinist Forum:

This site may earn a commission from merchant affiliate links, including eBay, Amazon, and others.

rake60

Well-Known Member
Joined
Jul 8, 2007
Messages
4,756
Reaction score
124
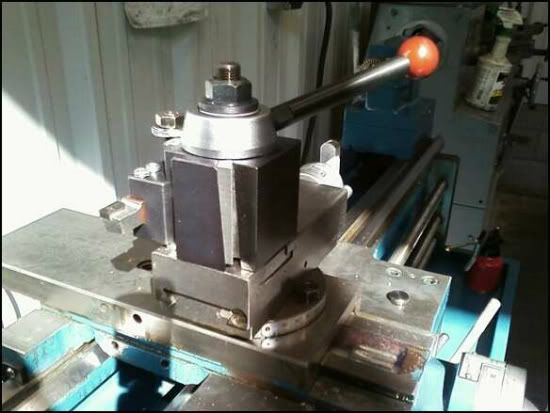
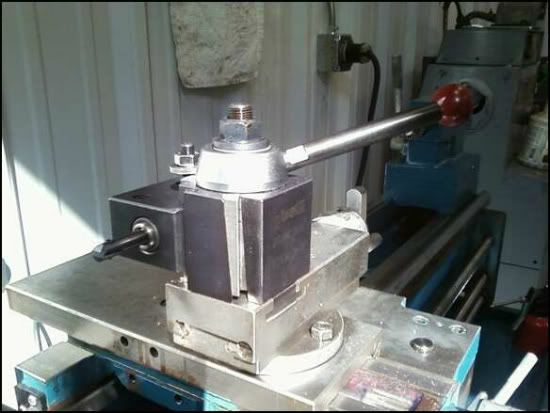
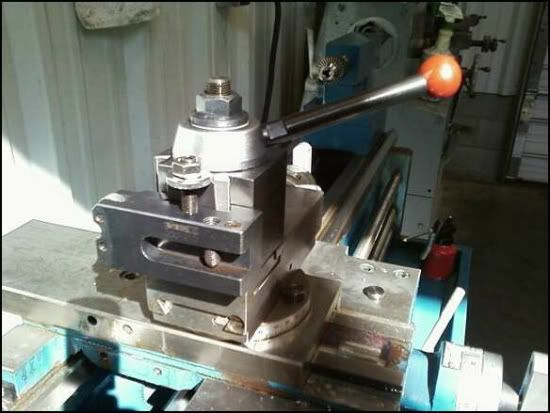
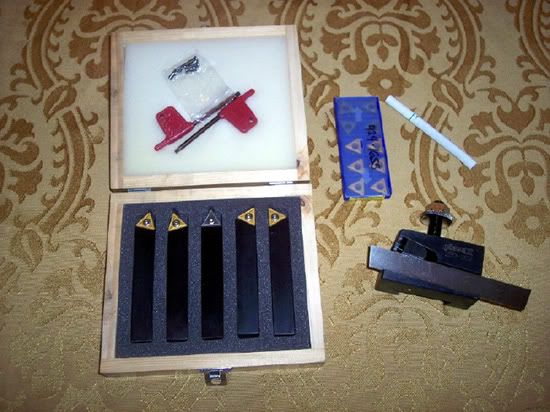
We received the Phase II Model 251-222 QCTP from Enco today.

It look just like this ad photo.

PhaseIIQCTP.jpg


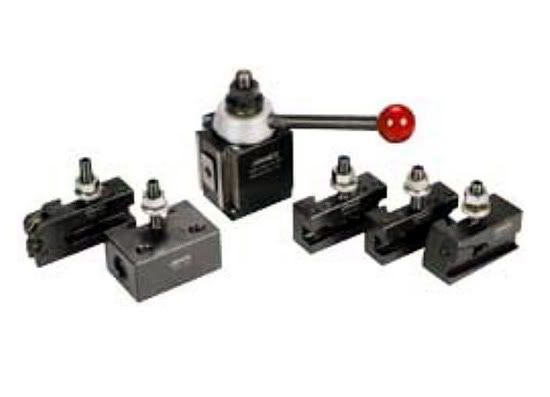
I doubt I'll ever need a knurling tool at work but it's kind of cool that one was included in the set.

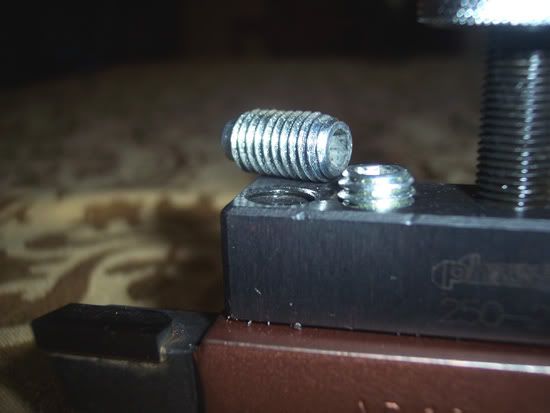
It states on Enco's web page: "Tool Post T-Nut May Require Machining"
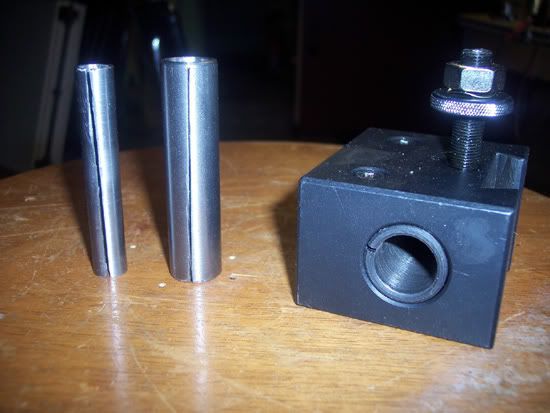
Since this tool post is for a 10 to 15 inch lathe, I expected the T-Nut to be a bit heavy.

It Was!
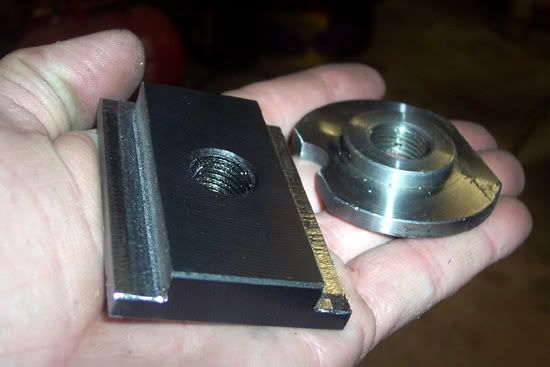
The Phase II T-Nut next to the original 4 way tool post T-Nut.

OriginalT-Nut.jpg


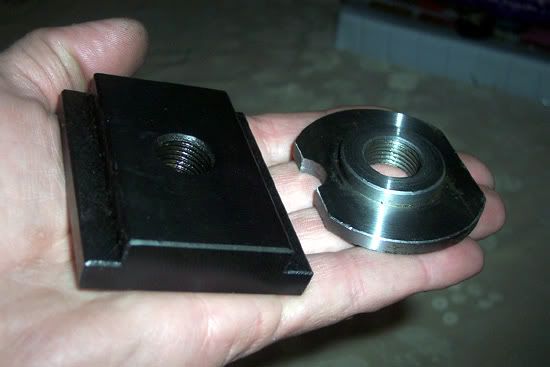
It is .272" too wide and .125" too thick on the bottom.
The top width is .365" too wide.

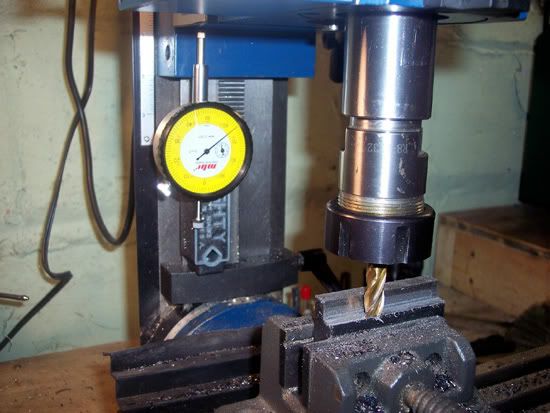
The most capable mill I have access to is my little X2.
I'm thinking this may take awhile.
Actually it didn't take long at all.

An end mill made quick work of bringing the side to width.

T-NutSides.jpg


Then three cuts stepped across the bottom with a small face mill brought that thickness
to size.

T-NutBottom.jpg


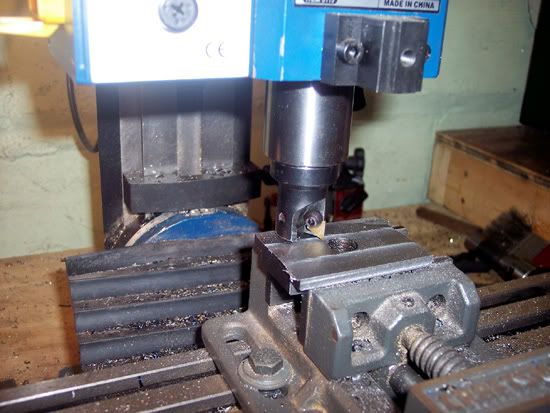
I don't get to use that little face mill too often but it's a great little tool even on an X2!
.050" depth of cut at 1700 RPM and you can crank it across the workpiece as fast as you
want to. (Or until the burns from the hot chips hitting your cranking arm become unbearable.)

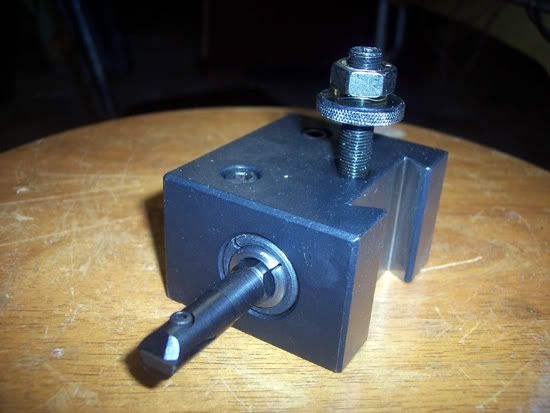
In less than 20 minutes I ended up with this.

T-NutFinished.jpg


I didn't take anything off the top face. It is a little thicker than the original T-Nut but will still
be about .030" below the top surface of the compound. I wanted to leave it as thick as I could.
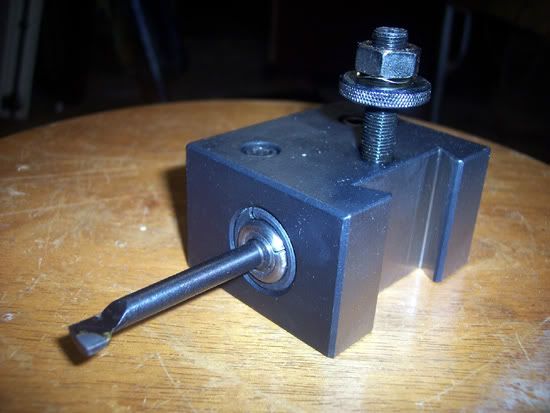
It needs to be cleaned up and deburred a little better but it will fit the machine now.

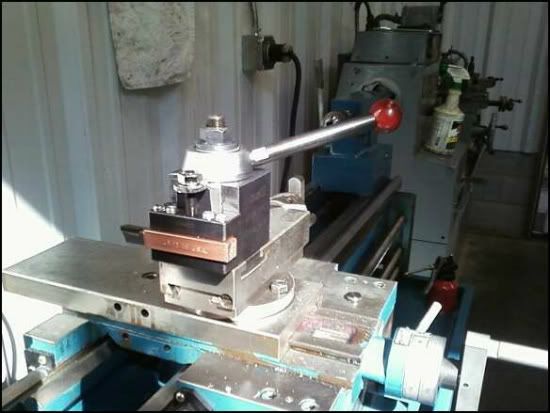
Tomorrow I'll be making split bushing to adapt my 1/2" and 3/8" boring bars to the 3/4" boring
bar holder that came with the QCTP set.

Rick


You may want to replace the set screws on the tool holders. All the ones I have on Chinese holders are poor quality.
 
I second replace the hardware. Get the new ones long enough that if you crack a hex to the o.d.(the import ones WILL crack), it won't be down in the threaded hole. SHCSs are a good rplacement.
Grind or turn the last few threads off of the setscrews at the bottom end. They will mushroom from use, but you want to be able to remove them.
Every time I saw a new toolpost come out of the box,it was time to make a t-nut!
 
I think I'll replace the original hardware with new dog point set screws after reading this.
I didn't bring one of the turning tool holders home with me this weekend.
Does anyone know what size those set screws are?

I did get the boring bar adapter bushings made today.
One 3/4" to 1/2" and one 1/2" to 3/8"

BoringBarBushings.jpg


The 1/2" works great!

Boring1Bushing.jpg


Adding the other bushing to adapt to 3/8" make it a little stiff.

Boring2Bushings.jpg


It takes a little extra pressure on the wedge lock screws to get it to tighten up, but it will work.

Rick


Nice, Rick - a comment on the boring tool sleeves - doesn't the orientation of the slots have to be perpendicular to the internal camming system? In other words, if the slots are lined up and pointing AWAY from the dovetail, it should tighten up a lot easier. At least, that's the way mine works.

The good news with those boring bars - as long as they are snug, they'll work great.
 
One of your tool holders will have a "V" cut along the bottom. That "V" allows a 1/2" round shank boring bar to be mounted in it. CDCO has tool holders that cost less than you would spend buying the material to make your own.
http://www.cdcotools.com/
 
n4zou said:
One of your tool holders will have a "V" cut along the bottom. That "V" allows a 1/2" round shank boring bar to be mounted in it. CDCO has tool holders that cost less than you would spend buying the material to make your own.
http://www.cdcotools.com/

Yes, the one holder is a facing/boring holder. It does have the V-groove at accept a boring bar.
I am trying to make the tooling set up as "plug and play" as possible for the 2nd an 3rd shift guys so
that holder will have a left hand turning tool in it, set on center.

Swede said:
Nice, Rick - a comment on the boring tool sleeves - doesn't the orientation of the slots have to be perpendicular to the internal camming system? In other words, if the slots are lined up and pointing AWAY from the dovetail, it should tighten up a lot easier. At least, that's the way mine works.

The good news with those boring bars - as long as they are snug, they'll work great.

I have never really noticed a big difference caused by the location of the of the slots in an adapter bushing, unless
they are tangent to the wedge locks. If they are straight up or down they will become even stiffer.

I gotta tell you how dumb I am.
I made the 1/2" to 3/8" sleeve first. Cut the slot freehand on the bandsaw. That was just plain STUPID!
The 3/4" to 1/2" adapter was slotted in the mini mill with a 1/16" end mill.
Much safer and a lot quicker.

Rick


The T-nut fits and almost all of the tools have been mounted up and set to center.

PhaseIITurning.jpg


PhaseIIFacing.jpg


PhasIIBoring.jpg


PhaseIIKnurling.jpg


The blades for the parting holder should be here tomorrow evening.

I took a closer look at those locking screws today.
They appear to be made of some sort of powdered metal.

PhaseIISetScrews.jpg


In this BXA Series, the screws are M10 x 1.5 x 20mm long.
The local hardware store doesn't stock anything like that so I guess we'll be ordering
these from McMaster Carr tomorrow.

Rick

 
My success with the Chinese knurling tools has not been impressive. OK on 6061 aluminum, just passable on mild steel.
 
I did try that knurling tool today on 1018 cold roll steel while I was centering it up.
It did a decent job on that material.

I'll get more photos of the results as time allows at work.

Rick
 
American knurling wheels work perfectly on fractional sizes. Chinese knurling wheels work perfectly on metric sizes. To get a perfect knurl on a 1/2" shaft with Chinese knurling wheels you need to remove .002 and check the pattern by lightly pressing the wheels into the shaft and turn the spindle by hand so you get a very light impression. If the pattern looks good then you can start knurling. If not remove another .002 and try again. After you figure out what sizes work for your Chinese knurling wheels you'll know how much to undercut when knurling with your Chinese knurling wheels. Simply turning the shaft to a metric size such as 12mm will usually produce a perfect knurl. Note: Just replacing the Chinese wheels with American wheels will not make your Chinese knurling holder into an American knurling holder! The space between the wheels affect the knurling pattern as well so you would still need to figure out how much to undercut the work for knurling.
 
n4zou said:
American knurling wheels work perfectly on fractional sizes. Chinese knurling wheels work perfectly on metric sizes. To get a perfect knurl on a 1/2" shaft with Chinese knurling wheels you need to remove .002 and check the pattern by lightly pressing the wheels into the shaft and turn the spindle by hand so you get a very light impression. If the pattern looks good then you can start knurling. If not remove another .002 and try again. After you figure out what sizes work for your Chinese knurling wheels you'll know how much to undercut when knurling with your Chinese knurling wheels. Simply turning the shaft to a metric size such as 12mm will usually produce a perfect knurl. Note: Just replacing the Chinese wheels with American wheels will not make your Chinese knurling holder into an American knurling holder! The space between the wheels affect the knurling pattern as well so you would still need to figure out how much to undercut the work for knurling.

I had never heard of that before.
I didn't know that a tool could tell the difference between a metric and imperial size.
I've knurled lots of parts that were not cut to a standard sizes.
That could explain why some would come out better than others.

I received my order from Shars Tool today.

SharsOrder.jpg


A set of indexable turning tool with 5/8" shanks, 10 inserts and two blades for the Phase II parting holder.
The first thing I did was replace those .015" radius inserts with .030" radius inserts.
I did leave the .015" R in the 60° tool for threading or thread chasing.

The turning tools look very good compared to the 3/8" shank set I have for my hobby lathe.

SharsTurningTool.jpg


Nice geometry on the parting blades as well.

SharsPartingBlade.jpg


I'll still break them. but they look good standing still! :D

Rick
 
No matter how many parting blades I shatter it always scares the crap out of me. I guess it's due to the fact I'm close in watching it cut while turning the cross slide handle with one hand and dripping cutting fluid in it with the other.
 
The new M10 dog point setscrews to replace the original tool holder hardware showed up today.
Can you tell the difference?

M10DogPointSetscrews.jpg


The originals look bad to the naked eye.
Take a picture of them, blow it up and they look terrible.

They have all been replaced now.

Rick
 

Latest posts

Back
Top