Fun with a Laser Engraver/Cutter

Home Model Engine Machinist Forum

Help Support Home Model Engine Machinist Forum:

This site may earn a commission from merchant affiliate links, including eBay, Amazon, and others.

GailInNM

Administrator
Staff member
Administrator
Global Moderator
Joined
Feb 17, 2008
Messages
2,326
Reaction score
440
By way of background for this project, every year for the last 20 years or so a group of us with r famil memembers get tgather in the mountains east of Sllt Lake, UT, USA to play trains and have fun. This is known as the Poison Creek Steamup. The leader of this pack and track owner has a 250 foot loopt of outdoor track consisting of 2 loops of Gauge 1 track with one of the loops being dual gauge for Gauge 3 operation. The track is not powered so all locomotives are steam or IC engine powered with the occasional battery and clockwork power thrown in.

The Name Poison Creek comes from the Poison Creek mining area that is nearby and a lot of narrow gauge railroad operation took place aaround the mines.

I have been making steamup pins for this event for many years on my laser engraver. I use laser engraving stock and engrave and cutout the pin fronts out of laser engravers stock. Then the pin back is glued on and they are ready for wear on caps or steamup aprons. Here is a photo of this years pin.

PCBeerBadge2016_zpsf7yo7lj7.jpg


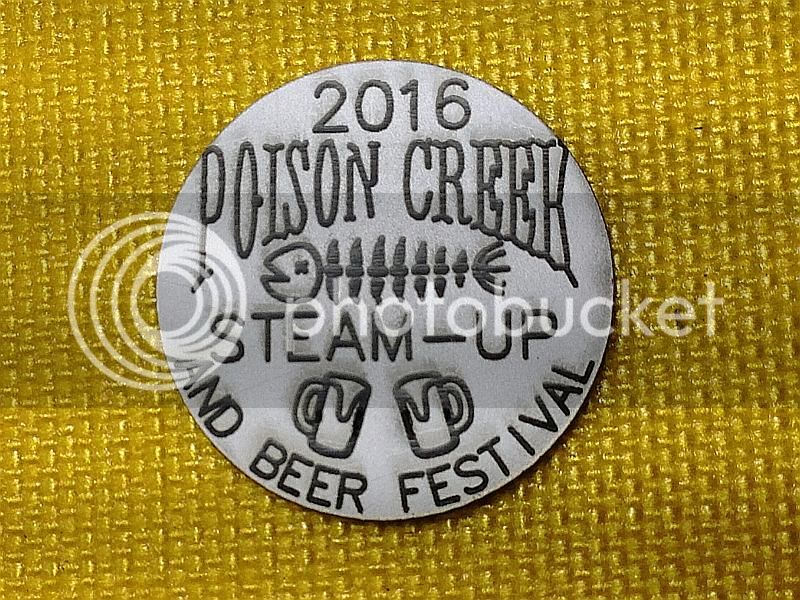
You will note the "AND BEER FESTIVAL" sub script that I added this year. tI has become tradition that anyone driving brings a six pack or case of beer or ale from thier favorite local micro brewery to share with others. As members of this group come from British Columbia to Florida and points in between it makes for a good variety of engineer lubricant. As the event lasts for 4 days officially and a week or more unofficially no one gets drunk as the actual consumption is spread out over a long period of time.

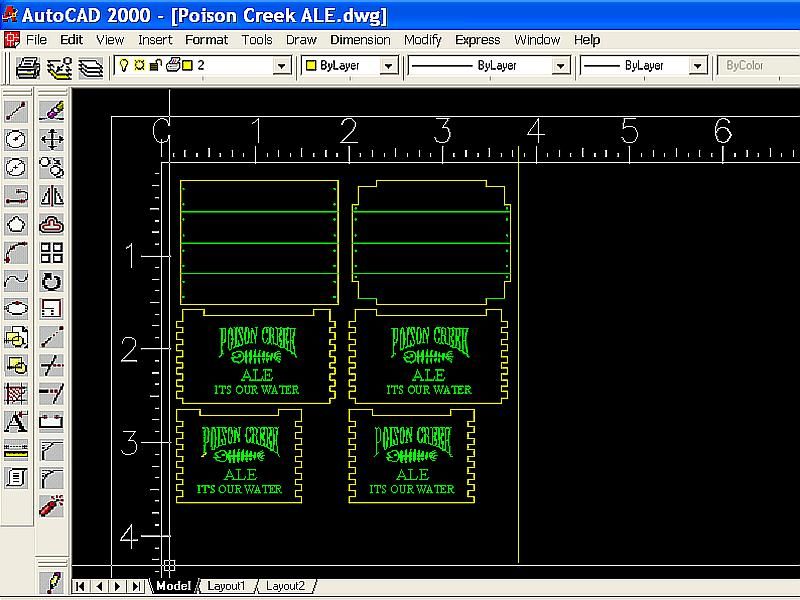
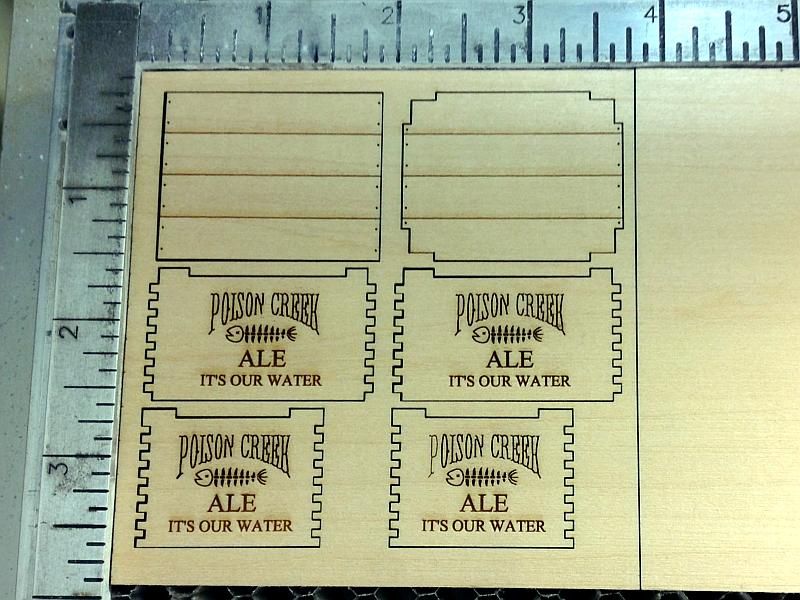
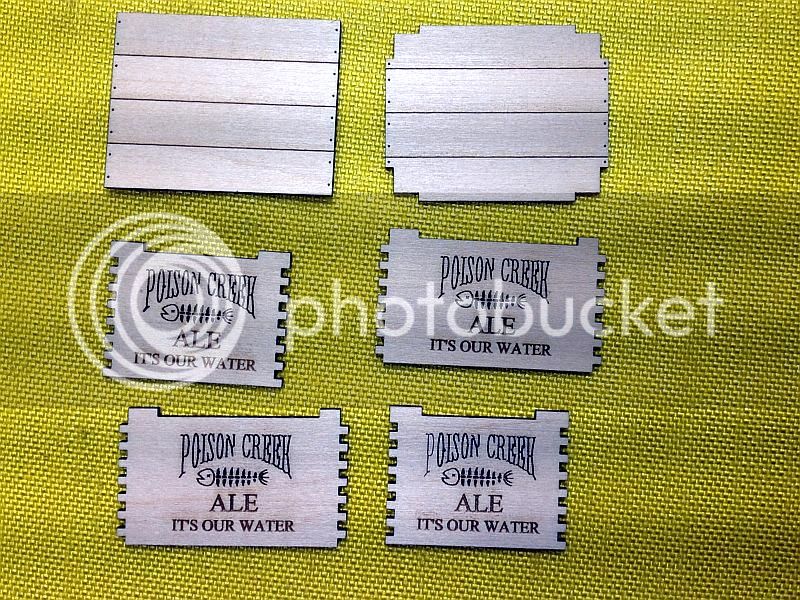
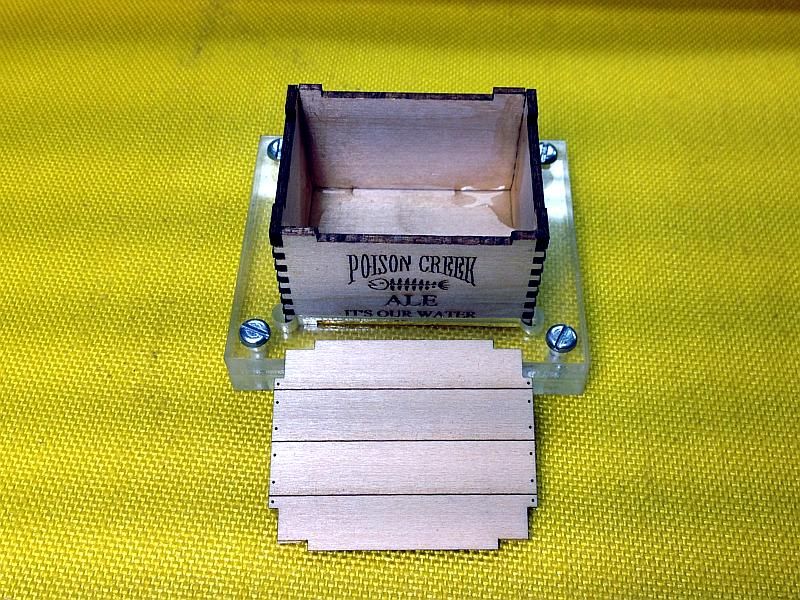
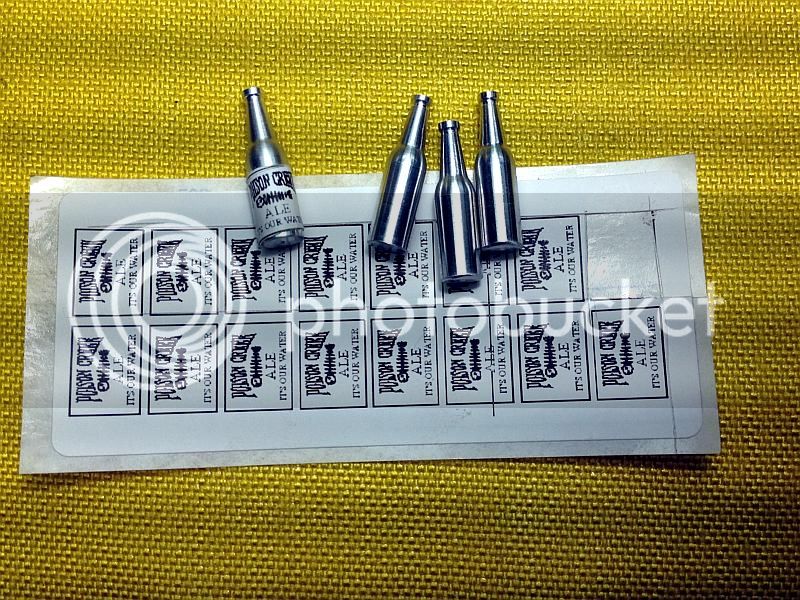
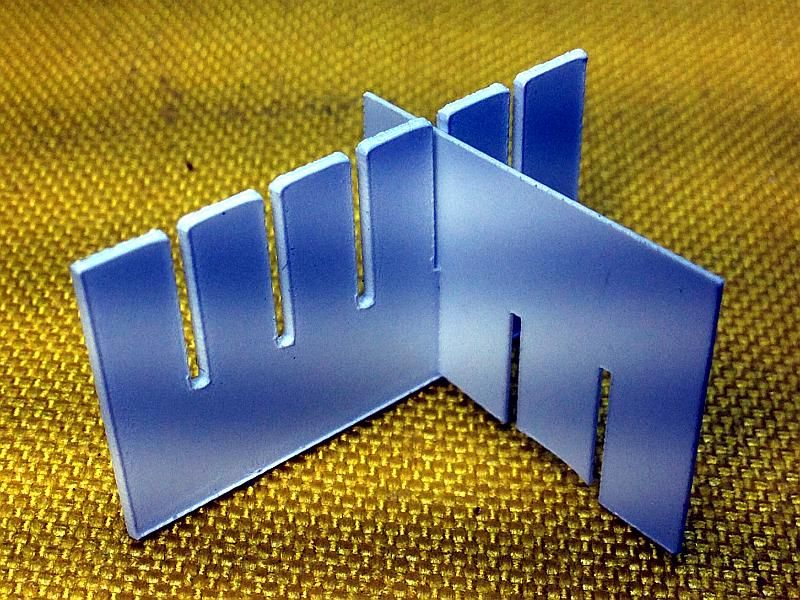
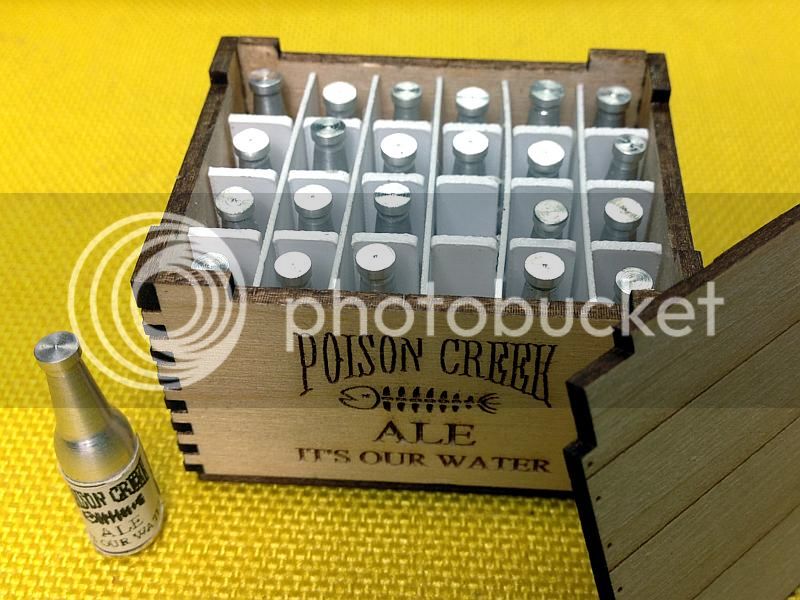
So now we come to the real purpose of this post. What would be a suitable load for our trains. Well crates of beer or ale of course. So on to construction of wooden crates for beverages.
Gail in NM
modify_inline.gif
 
First off is to design the crate. As my engraver is quite old and no 64 bit drivers were ever made for it I run it under a Virtual Machine versiion of 32 bit XP and it is therefor most convenient to do designs for the Laser using ACAD2000 also running with the same virtual machine.

The sesign was laid out to what I wanted the finished si////ze to be and then all the cutting lines were offset by 0.003 inch to compensate tor the 0.006 inch kerf width of the laser. The engraving and cutting paths were placed on separate layers of different colors as the laser power/speed settings are dependent of the color sent to it.

Here is a screen shot of the drawing ready to send to the laser. The Scales are in inches and are on frozen layers of a template in AutoCAD. They are also assigned to layers that are configured to show on the screen but to not plot.

Ale%20Crate%20Dwg_zpscxmxtuq0.jpg
 
First photo shows the parts on the Laser engraver with all the cuts made and engraving done. Time to cut and engrave was about 7 minutes on my 30 watt machine.
Gail in NM

AleCrate-0001_zps0gn6qpjt.jpg


And the parts after lifting out of the laser.
AleCrate-0002_zpsdhujv3ze.jpg
 
As I am making about 40 crates to use as give aways at the steamup, a fixtlure was made to assemble the crates. It is just two piates of 4.5 mm acrylic steet, againg cut out on the laser. I just used the finished crate dimensions for the top plate and the kerf of the laser gave me a 0.006 oversize hole for the crate parts to fit in. The bottom plate has a hole in it to enable the glued up crate to be pushed out. The screw holes in the upper plate were cut toclearance size with the laser and the screw holes on the bottom plate were cut under size for tapping size. The tapped holes were then drilled out to tapping size with a hand drill and tapped 4-40.

AleCrate-0003_zpsqygzxlq7.jpg


modify_inline.gif
 
To assemble the crates, the bottome is dropped into the fixture and the sides and end assemble on top of it. I found it easier to put assemble a side and end end and tack glue them before inserting two such sub assemblies into the fixture. That's mostly because my 3/4+ century old fingers don't work as well as they used to. Withe the sides and ends pressed down on top of the bottom the parts can all be glued from the inside. Thin CA will flow into the joints and cure quickly, but any wood gllue will work fine.
Gail in NM

AleCrate-0004_zpsmgf8dxhw.jpg
 
Now, who wants an empty crate of adult beverages. To fill it up some bottles were made up out of1/4 inch diameter alumnium on the CNC lathe. (Had to get some machinining in as this is a machining forum.) And any respectable bottle needs a label. The labels were printed 16 up on a Brother label maker using the same art work as used for the crate only scaled down. Label size is 3/8 X 1/2 inch and the label maker label size is 1-1/2 X3-1/2 inches. Lable cut out with hobby knife and rolled on. The bottle was cleaned first to make sure the label stuck.
Gail in NM

AleCrate-0005_zpszehgwfkf.jpg
 
Now if the crate is not full, the bottles will all fall down in a jumble, so an egg crate structure was laser cut out of 1/64 and 1/32 styrene to support the bottles. Just slides inside the crate when assembled.
Gail in NM

AleCrate-0006_zpsphr4sg24.jpg


modify_inline.gif
 
And the finished project. Note that the corners on the top are ntoched and the sides and ends project up into these notched. This keeps the top from sliding off and yet is removable. Most of the crates for give away will be empty withe the tops glued on. And the filled crates wil not have labels on them. Extra loose bottles with lables will be available to place in corners of gondola cars where a brakeman might have stashed them or maybe a few on top the coal in a coal bunker where an engineer or fireman might have left them.

Enjoy life and have FUN.
Gail in NM

AleCrate-0007_zpsjeafrvnp.jpg
 
nice work :cool:
what kind of laser cutter do you have
i"m currently looking for one :thumbup:
 
Luc,
My laser is a 30 watt RF excited air cooled metal tube laser that I bought used from an engraving shop 15 years ago when they were upgrading to a 50 watt unit. Branded ACCURIS but made by GCC. Still going strong after many hours of use. With the exception of one mirror there has not been anything but routine care of it. I added a bigger air compressor for air assist cutting and redid the exhaust system to get less odors in the shop.

I have not used any of the current crop of low cost lasers but I understand that they work well with some limitations. The life of the glass tube seems to be about 600 to 1000 hours and the spot size of the focused beam is kind of luck of the drawl for the individual tube varying from 0.006 inch up to 0.009 inch. With a 1-1/2 inch focal length lens 0.005 is the limit in spot size with a CO2 laser and in practice 0.006 is the norm. Also they are water cooled which means a little bit more work when getting ready to use them. But hey are very inexpensive compared to what I paid for mine years ago.
Gail in NM
 
That's my kind of poison. Sounds like a great outing.
 

Latest posts

Back
Top