Fitting belt drive to an X2 mill

Home Model Engine Machinist Forum

Help Support Home Model Engine Machinist Forum:

This site may earn a commission from merchant affiliate links, including eBay, Amazon, and others.

tmuir

Well-Known Member
Joined
Oct 30, 2007
Messages
888
Reaction score
9
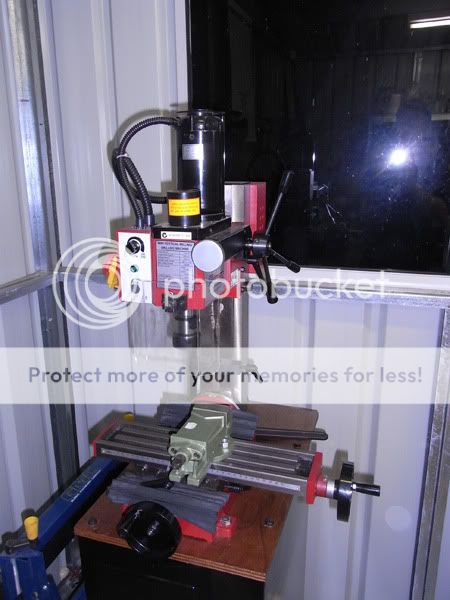
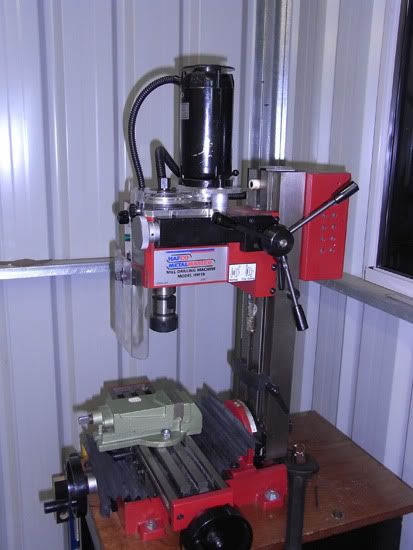
Well actually my mill isn't an X2 it's a Hafco HM-10 but its exactly the same as an X2 mill.

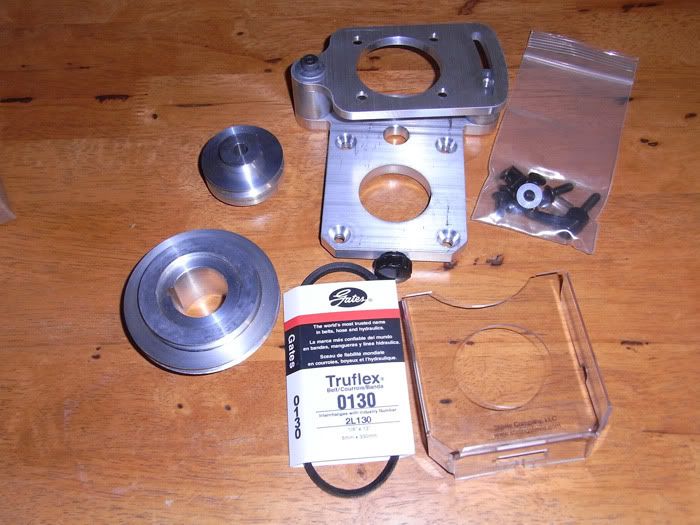
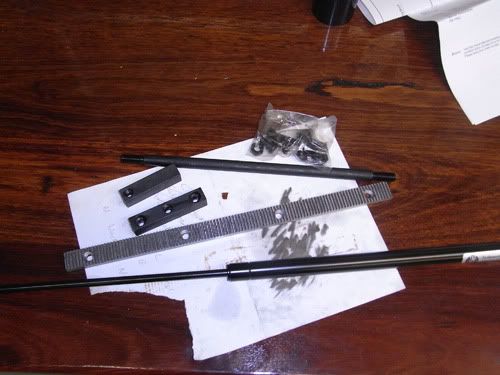
This is the belt drive kit you get from Little Machine Shop

Here are all the parts straight out of the box.
belt_drive1.jpg


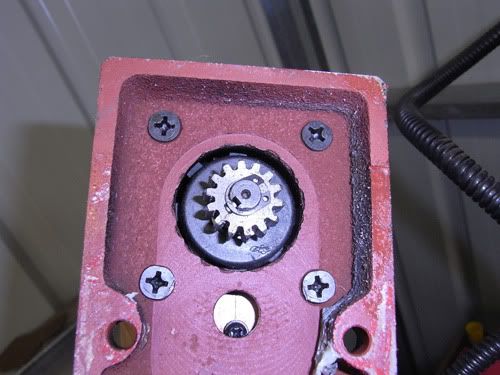
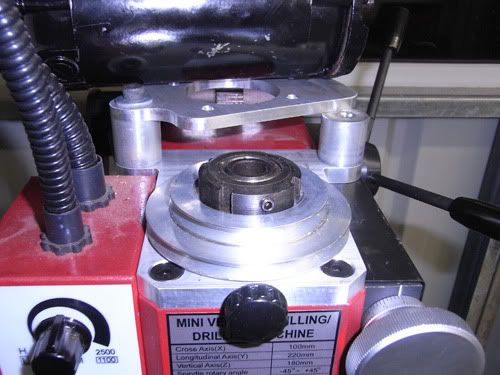
My mill before I touched it.
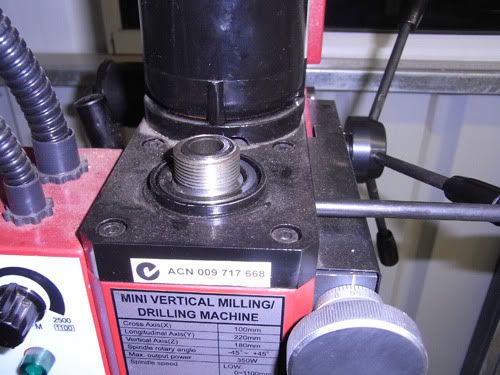
belt_drive2.jpg


Spanner nut removed
belt_drive3.jpg


Screws removed that holds the cast iron plate to the mill
belt_drive4.jpg


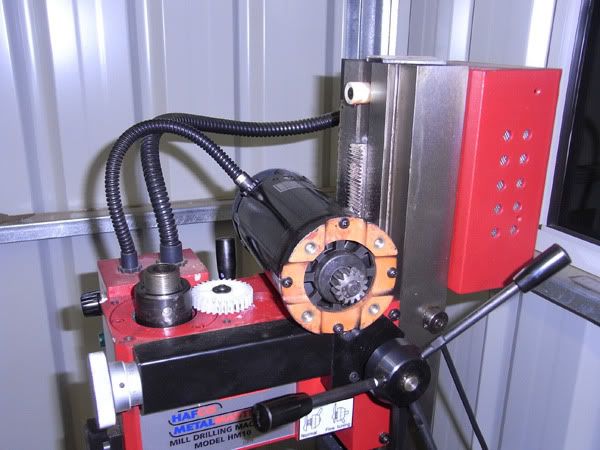
Motor and cast iron plate removed.
belt_drive5.jpg


Next the 4 screws are removed that holds cast iron plate to motor and the plate is set aside.
belt_drive6.jpg


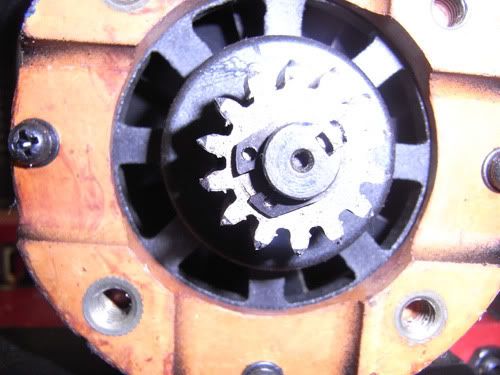
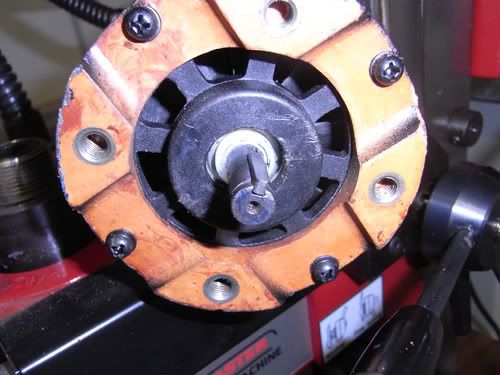
Now the plastic gear is removed and so is it's key as neither are required any more.
belt_drive7.jpg


Next we remove the retaining clip and the the motor gear. This was a tight fit and required levering off.
belt_drive8.jpg


Note the key is still in place as this one is still needed.
belt_drive9.jpg


Next a little plastic sleeve is fitted to the shaft that had the plastic gear on it. This is to just stop it from falling down, if you decide to remove the gears from the gear box this isn't needed.
belt_drive10.jpg


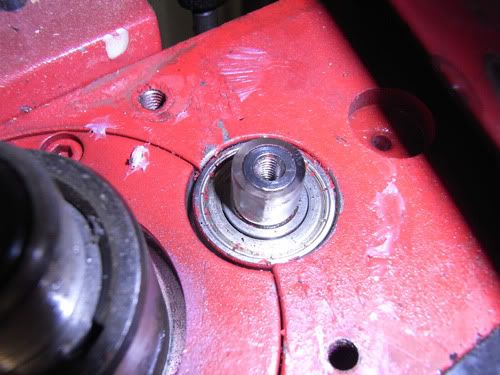
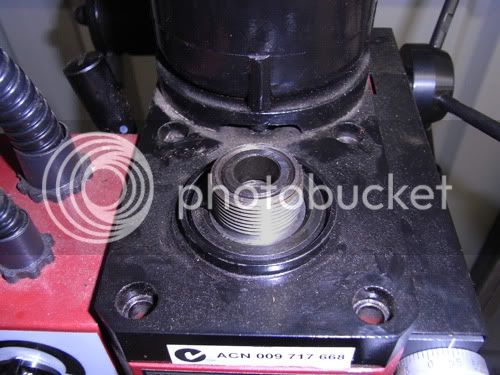
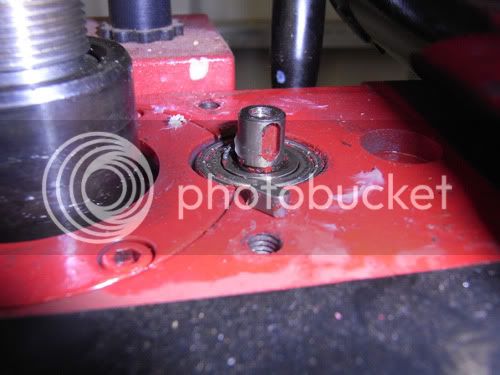
Next the steel spacer sleeve is removed that was under the spanner nut.
This was also a tight fit and took some effort to get off.
belt_drive11.jpg


Thats enough pulling apart, its now time to put it back together.
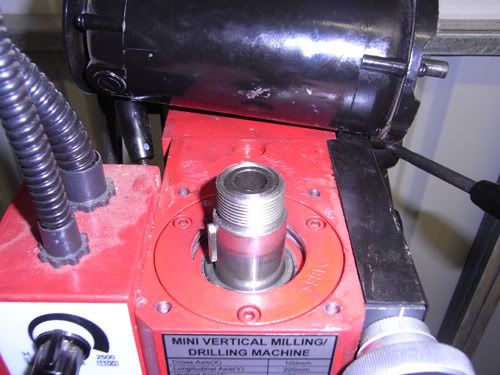
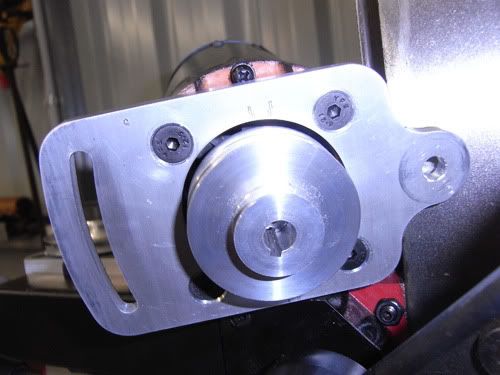
The new base plate is put on the mill and screwed in place.
belt_drive12.jpg


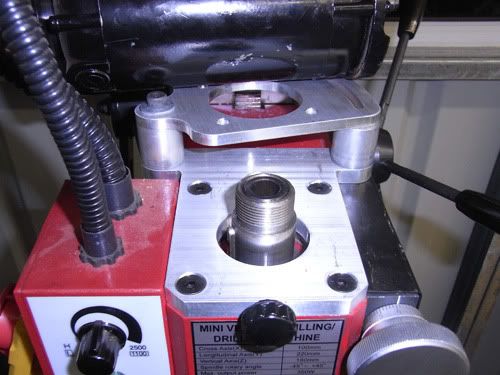
Now the big pulley is fitted.
belt_drive13.jpg


The little pulley to the motor.
belt_drive14.jpg


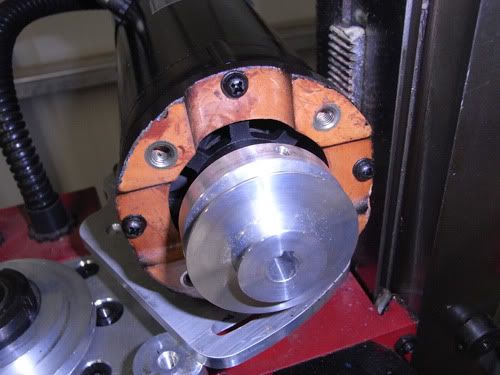
The motor mount to the motor.
Mine has blind screw holes and the screws were about 2mm too long so I just cut and filed them shorter. I then read the next paragraph that said this may happen and if it does just use the old screws. ::)
belt_drive15.jpg


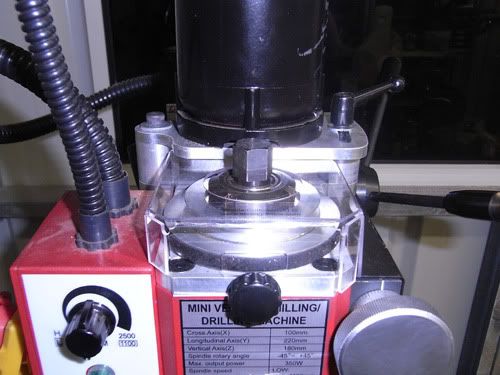
Put the belt in place and fit the motor mount and all done.
belt_drive16.jpg


belt_drive17.jpg


This is one of the rare times when after you finish the job you are allowed to have a small pile of 'spare parts' left over. :big:
belt_drive18.jpg


Job for the next night.
belt_drive19.jpg


I've got to say the instructions were well written, the parts fitted perfectly and it wasn't that hard to do. It took me about an hour and if I hadn't been taking photos and stopping to change the music I was playing in my workshop I could of probably done this in under 30 minutes.

The mill also runs considerably quieter and you leave the gearbox in neutral is you don't remove the lower gears. I'm very happy with this mod.
 
Nice presentation, thanks for sharing. I've got the belt drive conversion on my to-do-soon list, your pictures may push me over the edge. Looking forward to seeing your air lift kit installation also.

Rudy
 
Hey Tmuir,

I just installed the same kit on my X2 and the two pulleys did not match up in height, they were off over 1/8". I lowered the pulley on the motor to align them. Do you have the same situation? Other than that I am quite happy with the conversion.

Bill
 
Thanks tmuir. I expect to travel the same road some day so this is very helpful.
 
Bill S said:
Hey Tmuir,

I just installed the same kit on my X2 and the two pulleys did not match up in height, they were off over 1/8". I lowered the pulley on the motor to align them. Do you have the same situation? Other than that I am quite happy with the conversion.

Bill

I didn't notice they were out of alignment but to be honest I forgot to check I'll have a look at that tonight. If it is as you so its easy to just lower the pulley slightly
 
Okay...I did the conversion.
tmuir, your thread was a great help.

Couple of things...

When I took the motor off, I found one screw just about to fall out and another loose. In putting the thing back together, the one screw that was about to fall out...won't catch hold. I'll have to look later as to the problem. As you noted, the screws that came with the kit are a little long. Maybe I can shorten one and use it...or it may be a retap is needed. (If so...then fooey.)

Instructions say to put the motor on the table. I couldn't. The cable is too short. You can just lay it across the head. Just be careful.

For me...it wasn't the published 15-20 minutes. Closer to 45...but I had several interruptions. Otherwise...pretty easy.

Instructions say to remove the steel sleeve under the spanner nut...but didn't say how. I carefully pried it up with a screwdriver.

Instructions say to try it out with low speed...but they failed to mention to plug the thing back in first. Ha...and no...I didn't try turning it on before I plugged it in...give me a little credit...the merest will do.

As to whether or not it's worth it...I don't really know yet. $130 for a quieter machine. I'd probably say it is if I'd had a gear blow like...Sid's (itowbig).

Speaking of noise...here's some videos...

Before...


After...


I think it's better. I can't remember the setting for the 1st video. The 2nd was at high on low gear.

[EDIT: Bill mentioned the two pulleys not lining up. I had the same problem. Anyone doing this mod should check the lineup.}

So just how serious do you think that 4th screw is?

Now then...perhaps, tmuir, you would consider continuing being the guinea pig? You mentioned in this thread you have the 'air spring kit' that provides more headroom. You said it was the 'job next night'. I have that kit too. Did you do it?
 
I installed the Air Spring Kit on my X2.
Mini%20Mill%20Air%20Spring.jpg

It sure beats the original torsion spring set up.
It isn't sloppy at the the top end and tight at the bottom end.
It is stable at any level in the Z axis.

Rick

 
I have the air spring, its still sitting on my work bench where I left it.
The prospect of tapping the colum and screweing it up has stopped me at the moment. I want to build a basic tap guide first but I just have so many other things I want to do.

I agree the collar under the nut was hard to remove, it gave me a little problem too.
It probably took me around 45 mins to an hour to do but I was stopping to take photos along the way
 
Rick: How much more headroom did you get? Looks like an inch? Headroom was a primary reason for me to do this.

tmuir:

tmuir said:
The prospect of tapping the column and screwing it up has stopped me at the moment.

Same problem for me.
 
Glad its not just me that is afraid of stuffing up my new shiny machine by doing 'improvements' to it. ;D
 
Tmuir, I have the Grizzly version of the mill you have, The torsion system on it sticks.
I modded it and it helped a lot, but not as much as I hoped.
My mill is set up cnc so that sticky problem is really bad especially when plunge cutting.
The computer doesn't care if it is cutting too deep.
anyway, I have a bunch of gas shocks like the one in the picture, how does it mount inside the column?
Here is a pic of the mod

DSC01857.JPG


DSC02009.JPG
 
Krown Kustoms said:
I have a bunch of gas shocks like the one in the picture, how does it mount inside the column?
Here is a pic of the mod

If you go to TheLittleMachineSHop you can download the instructions on how to fit the airshock so that will probably show you what you want to know.
 
The extended Z-axis rack does add 2" of travel.
Mini%20Mill%20Extended%20Rack.jpg

The only hole I needed to drill and tap was for the upper stop, as seen in the
picture of my air spring. It's nothing critical and the cast iron frame is very
easy to tap.

Rick

 
Thanks Rick.

I think what stopped me from proceeding the first time was the tap size. I haven't got it. I'll get one the ext time I place an order for something (and the way it's been going...it'll be soon).

Unless somebody suggests a different thread...but I probably won't have the tap for that either.

 
rake60 said:
It's nothing critical and the cast iron frame is very
easy to tap.

Rick

Thats good to know as I've never worked with cast iron, I've read lots of horror stories of cast iron having a hard skin blunting tools.
 
tmuir said:
Thats good to know as I've never worked with cast iron, I've read lots of horror stories of cast iron having a hard skin blunting tools.

Raw cast iron castings typically do have a hard slag skin on them.
After that has been machined away, cast iron cuts like chalk.
It is still abrasive on tooling but drilling and tapping is very easy.
No cutting fluids are required.


zeeprogrammer said:
Thanks Rick.
I think what stopped me from proceeding the first time was the tap size. I haven't got it. I'll get one the ext time I place an order for something (and the way it's been going...it'll be soon).
Unless somebody suggests a different thread...but I probably won't have the tap for that either.

Zee, Just find a machine screw that will fit through that nylon stop bumper and see if
you have a tap that size on hand. It's nothing fussy, just there to keep you from accidentally
running the head off the top of the column. I have removed the stop a few times to gain an extra
1/2" for projects. If you do happen to go up too far the gibs fall loose and make you talk real mean
to yourself for a bit. Ask me how I know that! ::)

Rick

Rick
 

Latest posts

Back
Top