Boring Cylinder Liners and Barrels

Home Model Engine Machinist Forum

Help Support Home Model Engine Machinist Forum:

This site may earn a commission from merchant affiliate links, including eBay, Amazon, and others.

gmac

Well-Known Member
Joined
Mar 18, 2008
Messages
349
Reaction score
14
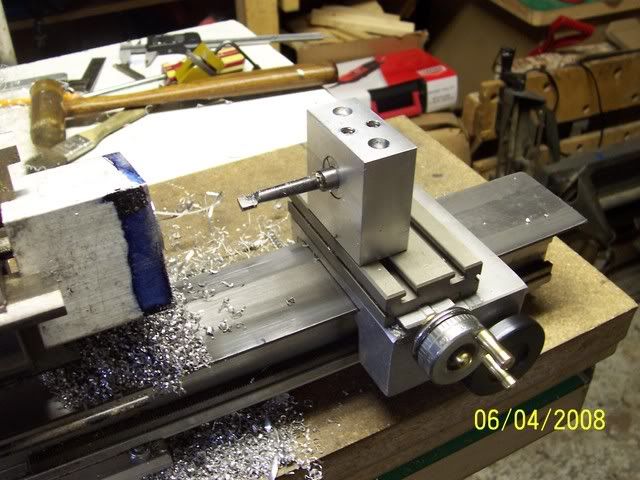
Well I've managed to complete aluminum pistons for two Upshur engines on my Taig lathe using 1/8" and 1/4" HSS boring bits - the 1/8" work was fun, fortunately I only had to bore to a 1/2" depth. I'm limited by the Taig's 1/4" tailstock chuck capacity for the size of the starting hole.
Now comes the challenge - boring cylinder liners (steel) and barrels (0.75" bore and up to 2.25" deep. I've made the decision to avoid the mess of cast iron for now. The HSS bits obviously don't reach so I've been looking at buying brazed carbide tipped boring bars (perhaps the 9 pc set or just the longest one) and at boring bars using square or round tool bits.
Rather than rush off madly to buy tools I may or may not need I thought I'd check in with you guys - what's the best way to accomplish this task on light equipment? I do not have a mill or boring head.
I'm not clear on the practical merits of the carbide boring bars vs the boring bar with round/square bits. My gut reaction is to buy one long carbide tipped boring bar that will get into a 1/4" start hole to handle steel and forget the rest....
Any and all recommendations/comments welcome!
Thanks
Garry
 
Garry

There are 3/8" capacity drill chucks available that will fit the Taig tailstock, this would let you drill a 3/8" starting hole for boring(whick works out fine for the cheap no-name brazed carbide boring tools that I've got.)  I got my 3/8" chuck off of an old B&D drill that was on it's way to that big toolbox in the sky. With these boring bars I have successfully bored 1.25 " in brass, and 1.375" in leaded steel on the Taig lathe. As you are no doubt aware, it WASN'T fast... but it works.

I made a boring bar holder to suit:
100_0852.jpg


Edited to add: Canadian Tire part No 54-5561-6 3/8" chuck with key: $16.79
Cheers, Joe
 
Garry,
Most HSS drill bits have a soft shank so the chuck jaws can clamp better. It is not a problem to turn down the shank on a larger drill bit to fit a smaller chuck. Just run the lathe slow. A screw machine length drill might work better on a light machine as you may run out of room between the tail stock chuck and the workpiece with a jobber length. A 1/2 inch drill bit would work that way. Keep the RPM low and feed light. You only need to turn down about a 3/8 inch length of the shank to grip on. Reduced shank drills with 1/4 inch shank used to be very common, but they have mostly disappeared now, probably because the 3/8 drill chuck has replaced the 1/4 inch chuck that was the standard on light duty portable electric drills.

Use the largest diameter boring bar you can that has the shortest maximum depth of cut that will do the job. With that deep a cut chatter will be a problem if you use a small diameter long boring bar.

If you are going to use steel, use a free machining steel like 12L14. 12L14 works well for cylinders. Many commercial model airplane engines used it. You can use other steels, but it will be harder to get a good finish. That is not a real problem except it will be harder to hone or lap the cylinders as you will have to remove more material.

Gail in NM,USA
 
Gary,

Use "joe d's" idea only with a larger drill. Start out with your 1/4" drill then make a holder like he has for his boring bar for a 3/8" drill, then a 1/2" drill and work your way up to almost the 3/4" bore. Then boring out won't be to big a problem.

You could also use a straight two lipped end mill to bore out the hole also.

Bernd
 
Thanks Joe, Gail and Bernd! A wealth of ideas, well you've got me making more tooling... :big: When do I get to the part where I'm making engines?
Gail - I've got some stock of 12L14 sized for liners but on second thought I may order some sized for a one piece cylinder/liner as an experiment.
Bernd - I'll try a 3/8" holder first since it can hold a 3/8" drill and the cheapo carbide boring tool. I'm not sure how the Taig lathe will react to a 3/4" drill bit.
Joe - I'll hit the yard sale tour for old hand drills and upsize the chuck on the Taig. Thanks for the photo. PS - I've lived in Montreal on a few occasions - Laval in the 50's, Longueil in the 70's.

I now have my homework for the weekend - thanks again for the assist everyone.

Cheers & Merci
Garry
 
Garry,
I have used both cast iron, and 12L14 for cylinders and liners with excellent results in the past, but I recently started using 1020 drawn over mandrel (DOM) steel tubing for cylinder liners (and cylinders). It is a big time saver because it is available in many ID, OD, and wall thicknesses. Because this material is cold drawn over a mandrel, the diameters and surface finishes are quite uniform and smooth. Usually, the ID is good enough for finish honing if you can find a suitable size and wall thickness. Nominal ID's and OD's are readily available. Most on line metal suppliers carry this steel tubing.
Jeff
 
gmac said:
I'm not sure how the Taig lathe will react to a 3/4" drill bit.
Joe - I'll hit the yard sale tour for old hand drills and upsize the chuck on the Taig. Thanks for the photo. PS - I've lived in Montreal on a few occasions - Laval in the 50's, Longueil in the 70's.

Garry

I've used a 1/2" bit (with a reduced 3/8" shank, which fits the chuck...) in both brass and aluminum on the Taig without any problem.

As to Laval and Longueuil, if you've not been back in the last ten years or so, you won't recognize either one, sub-urban sprawl at it's best. Never realized we needed so many malls all with the same stores....

Cheers, a la prochaine, Joe
 
Boring is anything but boring!
(Please excuse the pun. :D)

Single point threading is the toughest machining task to master.
Boring is a very close second. Especially on a hobby scale!
After the initial drilled hole you need to use the heaviest boring bar
that will reach the whole way through the bore... or not...

If you have a boring bar set use the heaviest bar in the set that
will reach 1/3 of that depth and rough the bore to that depth to -.010"
Then use the next bar that is just as heavy but will reach 2/3 the depth
to rough the mid section of the bore to -.010"
NOW put the long bar in and rough the last 1/3 of the bore to -.010"
Take a spring cut to remove the blend steps. If you still see steps take
another spring cut. This can become redundant but keep taking spring
cuts until the steps are gone. Now you start to sneak up on the finish
bore size. .002" per side at a time with each cut being followed by a
spring cut. If the first cut chatters speed the spindle up a notch.
If the second cut chatters slow the spindle down two notches.

The material is going to tell you what it wants. You just have to be
aware of what it's trying to say.

The book can't tell you what will work every time with your machine.
The material can!

Rick
 

Latest posts

Back
Top