


ninefinger
Well-Known Member
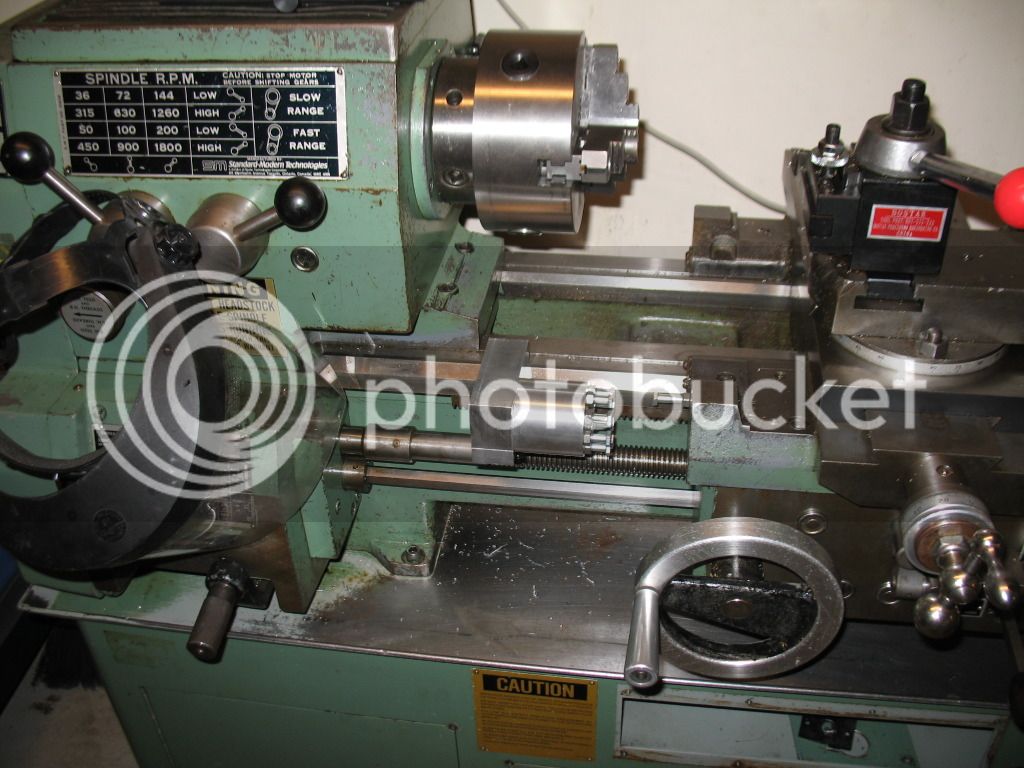
I decided that I would either build a few aids, buy a DRO or go full on CNC to help me produce the cylinders for my radial engine build. I started with option 1 so here it is - a carriage stop with 8 positions. That should help me get some even fin spacing on the cylinders - 16 fins per cylinder so I just need to reset the stop once to complete a set of fins - that's the plan anyways!
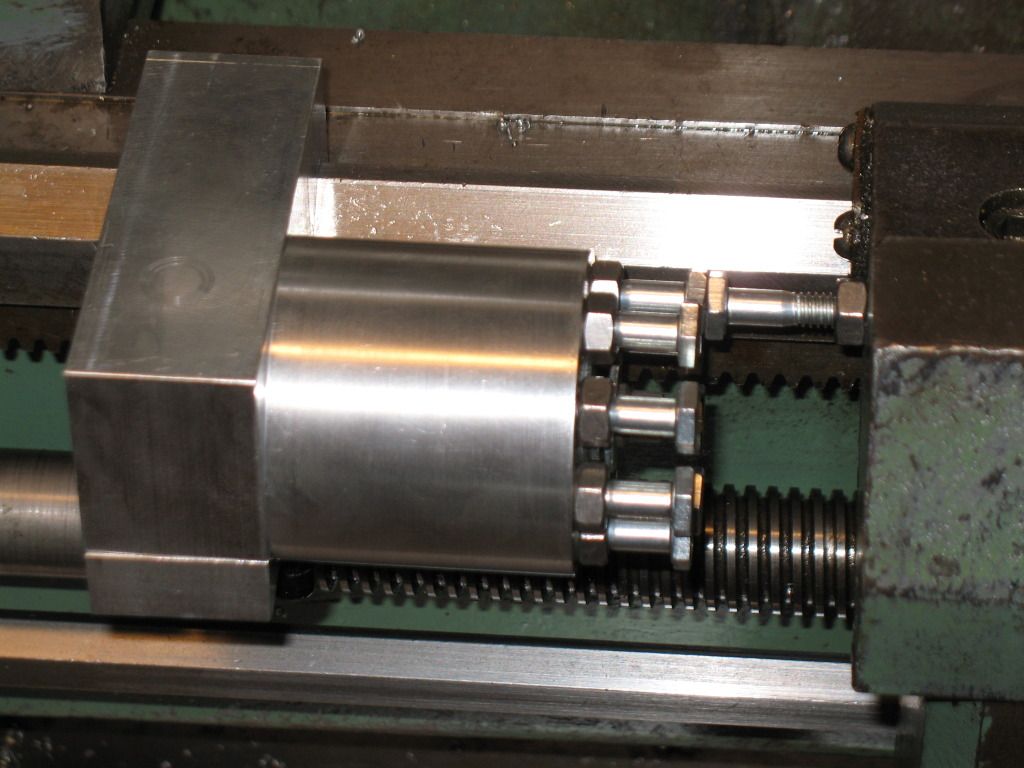
Here is a closer shot showing the screw on the carriage - it may get replaced with a fancier set of spacers to help with the other parts that are length sensitive but have more than 8 "features"...we'll see
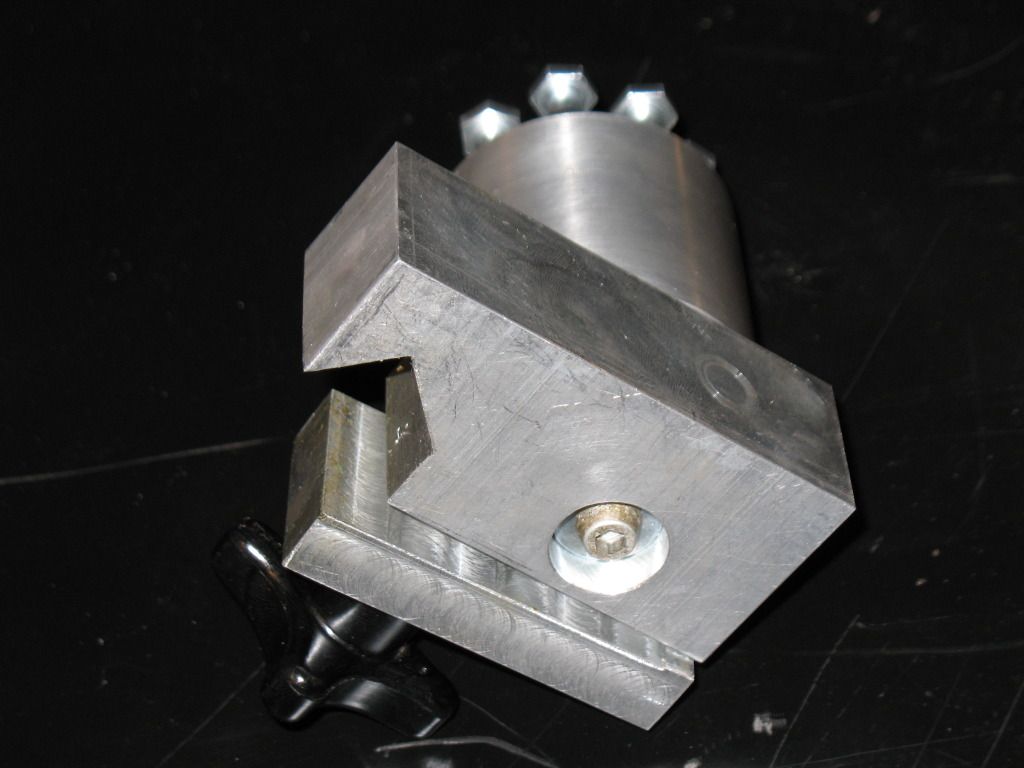
Here is a back end shot. I recessed the holding screw so that I can take the whole thing and set it on a surface plate to set the different stops using a height gauge (need to buy one of those..).
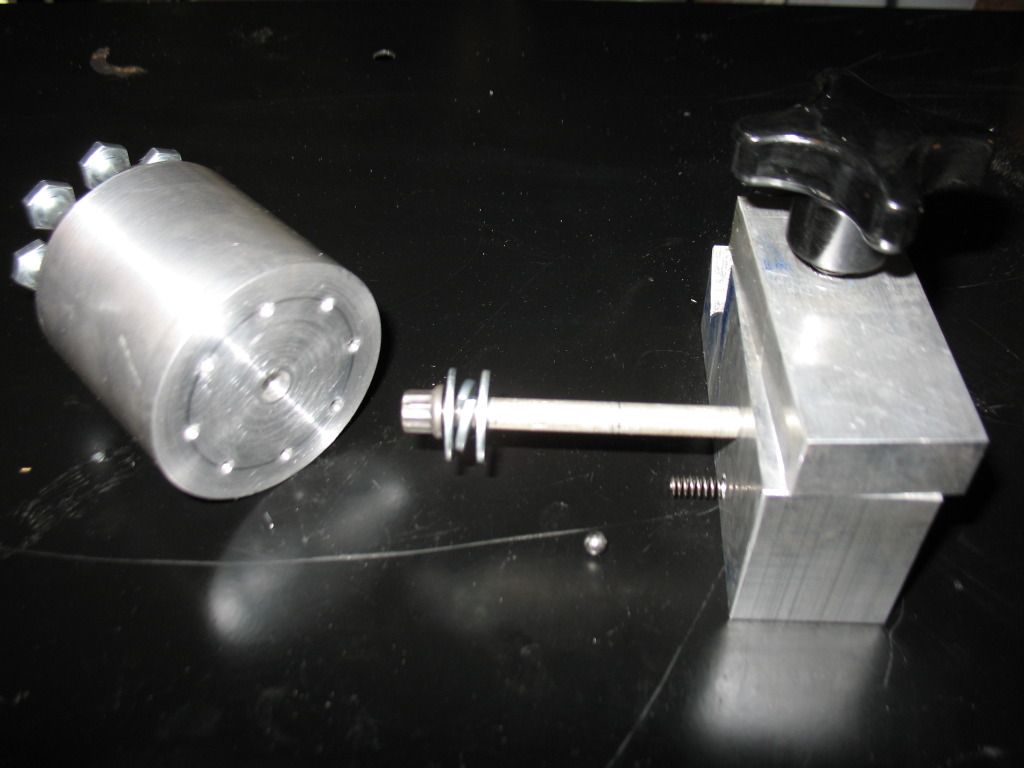
Lastly a shot showing my basic indexing method of a spring and ball bearing. It doesn't really need to index but it helps a bit. I also wanted to use a belleville washer to keep it tight to the mounting block but I don't have any so a split lock washer between 2 plain washers does the job of applying spring tension.
I have yet to try it out in anger - I hope it does the job as well after all the effort I put into it...")
Also - I'll probably number the different positions so I can keep track of where I am.
Mike
Here is a closer shot showing the screw on the carriage - it may get replaced with a fancier set of spacers to help with the other parts that are length sensitive but have more than 8 "features"...we'll see
Here is a back end shot. I recessed the holding screw so that I can take the whole thing and set it on a surface plate to set the different stops using a height gauge (need to buy one of those..).
Lastly a shot showing my basic indexing method of a spring and ball bearing. It doesn't really need to index but it helps a bit. I also wanted to use a belleville washer to keep it tight to the mounting block but I don't have any so a split lock washer between 2 plain washers does the job of applying spring tension.
I have yet to try it out in anger - I hope it does the job as well after all the effort I put into it...
Also - I'll probably number the different positions so I can keep track of where I am.
Mike