Building a Grade Crossing

Home Model Engine Machinist Forum

Help Support Home Model Engine Machinist Forum:

This site may earn a commission from merchant affiliate links, including eBay, Amazon, and others.

jack.39

Well-Known Member
Joined
Dec 28, 2009
Messages
115
Reaction score
6
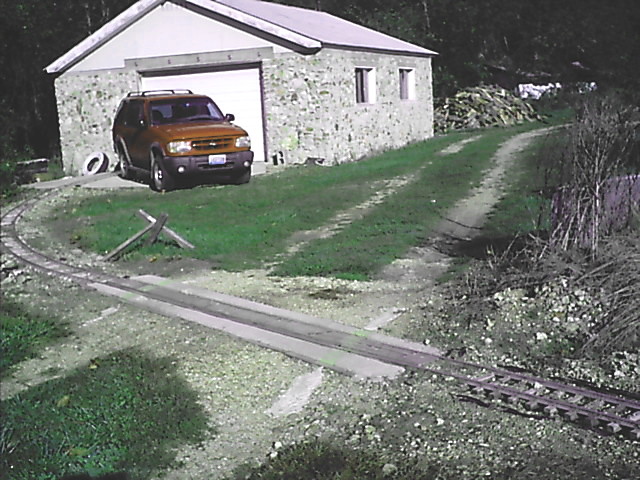
A neighbor uses an access to his house which passes by my shop, across our property. The access road lies between my shop and track layout, so the track spur laid from the main layout to the shop must cross the access road. A crossing capable of heavy truck passage was needed as he expects to have ready-mix concrete trucks come up to his property.

My "scrounged" 2X8 and other timbers allowed the forming of a crossing 9 feet wide, and I figgered it would need to be at least 2 feet in width the other direction, since the track crossing it would be 7-1/2" gauge.

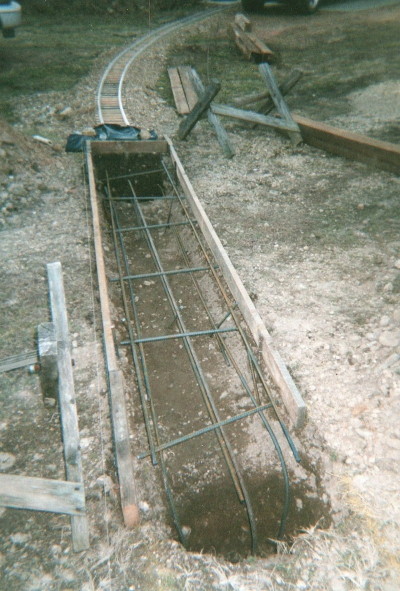
The pic below shows the trench we dug, with 2 fairly deep holes, one at either end. 1/2" reinforcing steel bar was layed such that it curved downward at the ends of the crossing, down into the 2 holes. The part between was also "laced" with rebar, as can be seen below. The pic was taken early, before the entire complement of iron was set in the trench; it wound up with about a 6X6 inch "mesh" of it. I further figgered, since the shallower area between the 2 holes did not extend deep enough to avoid "frost-heave", but the holes did, this would give some assurance against the thinner part cracking. Evidently, the idea was sound, as the finished crossing has witnessed about 4 winters now without degradation.

img14813.jpg


This shot shows the completed crossing, with the track laid through it, a 2X6 "shot" to the concrete between the rails, to carry vehicular weight without exposing the rail itself to but very little loading. The top of the "slab" while still wet concrete had a slightly-narrowed 2X10 (1-1/2" thick) pressed down into it until flush with the top surface. This formed the channel which, after set-up and removal of the 2X10, left a "groove" in which to mount the rails. Suppose we'll need to meet some regulatory criterion and place signals and cross-arms here? ;)

Not very sophisticated, I admit, but it has held up so far. Thanks fer lookin'! jack
woodpi11.jpg
 
Jack;

Now you need one of these for your crossing. Can't remember where I saw it but likely Iowa or Kansas on one of our trips. I had heard about it so we made a side trip to go have a look and I think it is one of the last of the old time pendulum type crossing warning lights in which ever state it was in.

crossing.JPG
 
Jack,

I am truly amazed with the work that you have done.

How long did it take to build your railroad.

What is your cost per mile?

I look forward to your posts.

Sam
 
black85vette said:
Jack;

Now you need one of these for your crossing. Can't remember where I saw it but likely Iowa or Kansas on one of our trips. I had heard about it so we made a side trip to go have a look and I think it is one of the last of the old time pendulum type crossing warning lights in which ever state it was in.

You won;t believe, just yesterday I mentioned to my wife about a token "crossing warning post", and described the pendumul jub. There were a few of them around Chicagoland while I was growing up, but not many! I loved 'em as a kid, really caught your attention!

Thanks so much for digging up the pic of one! I would not know where to look! jack
 
SAM in LA said:
Jack,

I am truly amazed with the work that you have done.

How long did it take to build your railroad.

What is your cost per mile?

I look forward to your posts.

Sam

Sam, I truly appreciate the kind words! I started on the locomotive in 2002. Laying of the track, about 750 feet of it (1500' of rail) was done entirely by hand, with no grading of any kind done. A neighbor graciously dug some loads of gravel out of our creekbed with his front-end loader, piled it at my worksite, and I shovelled and wheelbarrowed the gravel all around the layout, spread it, raked, and put down track pre-fastened to wooden ties in 10-foot sections on top of the gravel ballast.; I then tamped by using a waist-high piece of 2X4, hit with my heaviest rubber mallet.

There are approximately 7,200 ties, each held in place by 4 screws driven into them. The rail, aluminum 1" high, was made for me by an extrusion company in Fort Scott, Kansas. I bought 2,000 feet of it @ $ 0.92 per foot, hauled it home in my pickup. The wood for the ties was "scrounged", no cost beyond electric power to cut them all to size & shape with my tablesaw. I guess the trackage took maybe 3 months to put down.

For prospective builders: I cut strips of 3-mil black plastic and placed it on the ground beneath the gravel ballast, to prevent weed growth. It never occurred to me that the gravel dug from a creek bottom, would be full of seeds! So weeds proceeded to grow everywhere in the right-of-way! This is a common talk forum subject concerning model RR building, I learned. The plastic was a waste of time, effort, & money, IMO. jack
 
#4 bar 6"oc 12"?? thick, i dont think youll have any problems with the trucks. for future reference on something like that the long bars are what really gives you the strength you need the cross bars are mainly to keep the others in place while your pouring. any plans for expanding the layout? you dont seem to be lacking any enthusiasm, i think you need a tressle that would be an interesting project for next summer. hows the weather south of the big river?, its pretty dang cold up here.
 
When I was 9 years old one of my school buddy's father was a railroad engineer.
His Dad built a small scale railway in their back yard. It went for quite a ways up and
down the grades of the property. The engine was powered by a pull start Briggs and
Stratton deal. I derailed that train more than once by not throttling down enough on
the descending grades. My buddy and I weren't strong enough to put it back on the
tracks at that age. Randy would say, "Go tell my Dad the train is off the track,
and I DIDN'T DO IT!"
:D Randy's Dad would come down and put the put the
train back on the track. Then he'd walk the track with me to show me where and
when to throttle down on the descents and where to start throttling up for the mild
upgrades. 20 minutes later Randy would be saying, "Go tell my Dad the train is off
the track, and I DIDN'T DO IT!"
:D

The good old days!

Rick
 
hammers-n-nails said:
#4 bar 6"oc 12"?? thick, i dont think youll have any problems with the trucks. for future reference on something like that the long bars are what really gives you the strength you need the cross bars are mainly to keep the others in place while your pouring. any plans for expanding the layout? you dont seem to be lacking any enthusiasm, i think you need a tressle that would be an interesting project for next summer. hows the weather south of the big river?, its pretty dang cold up here.


Been getting down close to zero every morning for a week. With no back-up means, woodstove heat only, we spend a fair amount of time catering to stoves! This cold, 2 in the house, big Timberline and a cookstove. Yesterday power went out, 4 hours, what a zinger! In my shop, I have a "barrel stove, 55 gal. steel drum with the cast iron door/stack kit from Norther Tool.

A trestle across our creek would be ideal! The unpredictability of that creek's flooding degree, and direction, makes that a shaky proposition. So, you like reinforced concrete, too, eh? :-X
 
hope you have pleanty of wood stocked up. power outage at the worst possible time?,one of the many joys of living in the country. yeah the small creeks are bad about that, a tressle would be a poor choice. stay warm.
 

Latest posts

Back
Top