Building a twin cylinder inline i.c. engine.

Home Model Engine Machinist Forum

Help Support Home Model Engine Machinist Forum:

This site may earn a commission from merchant affiliate links, including eBay, Amazon, and others.
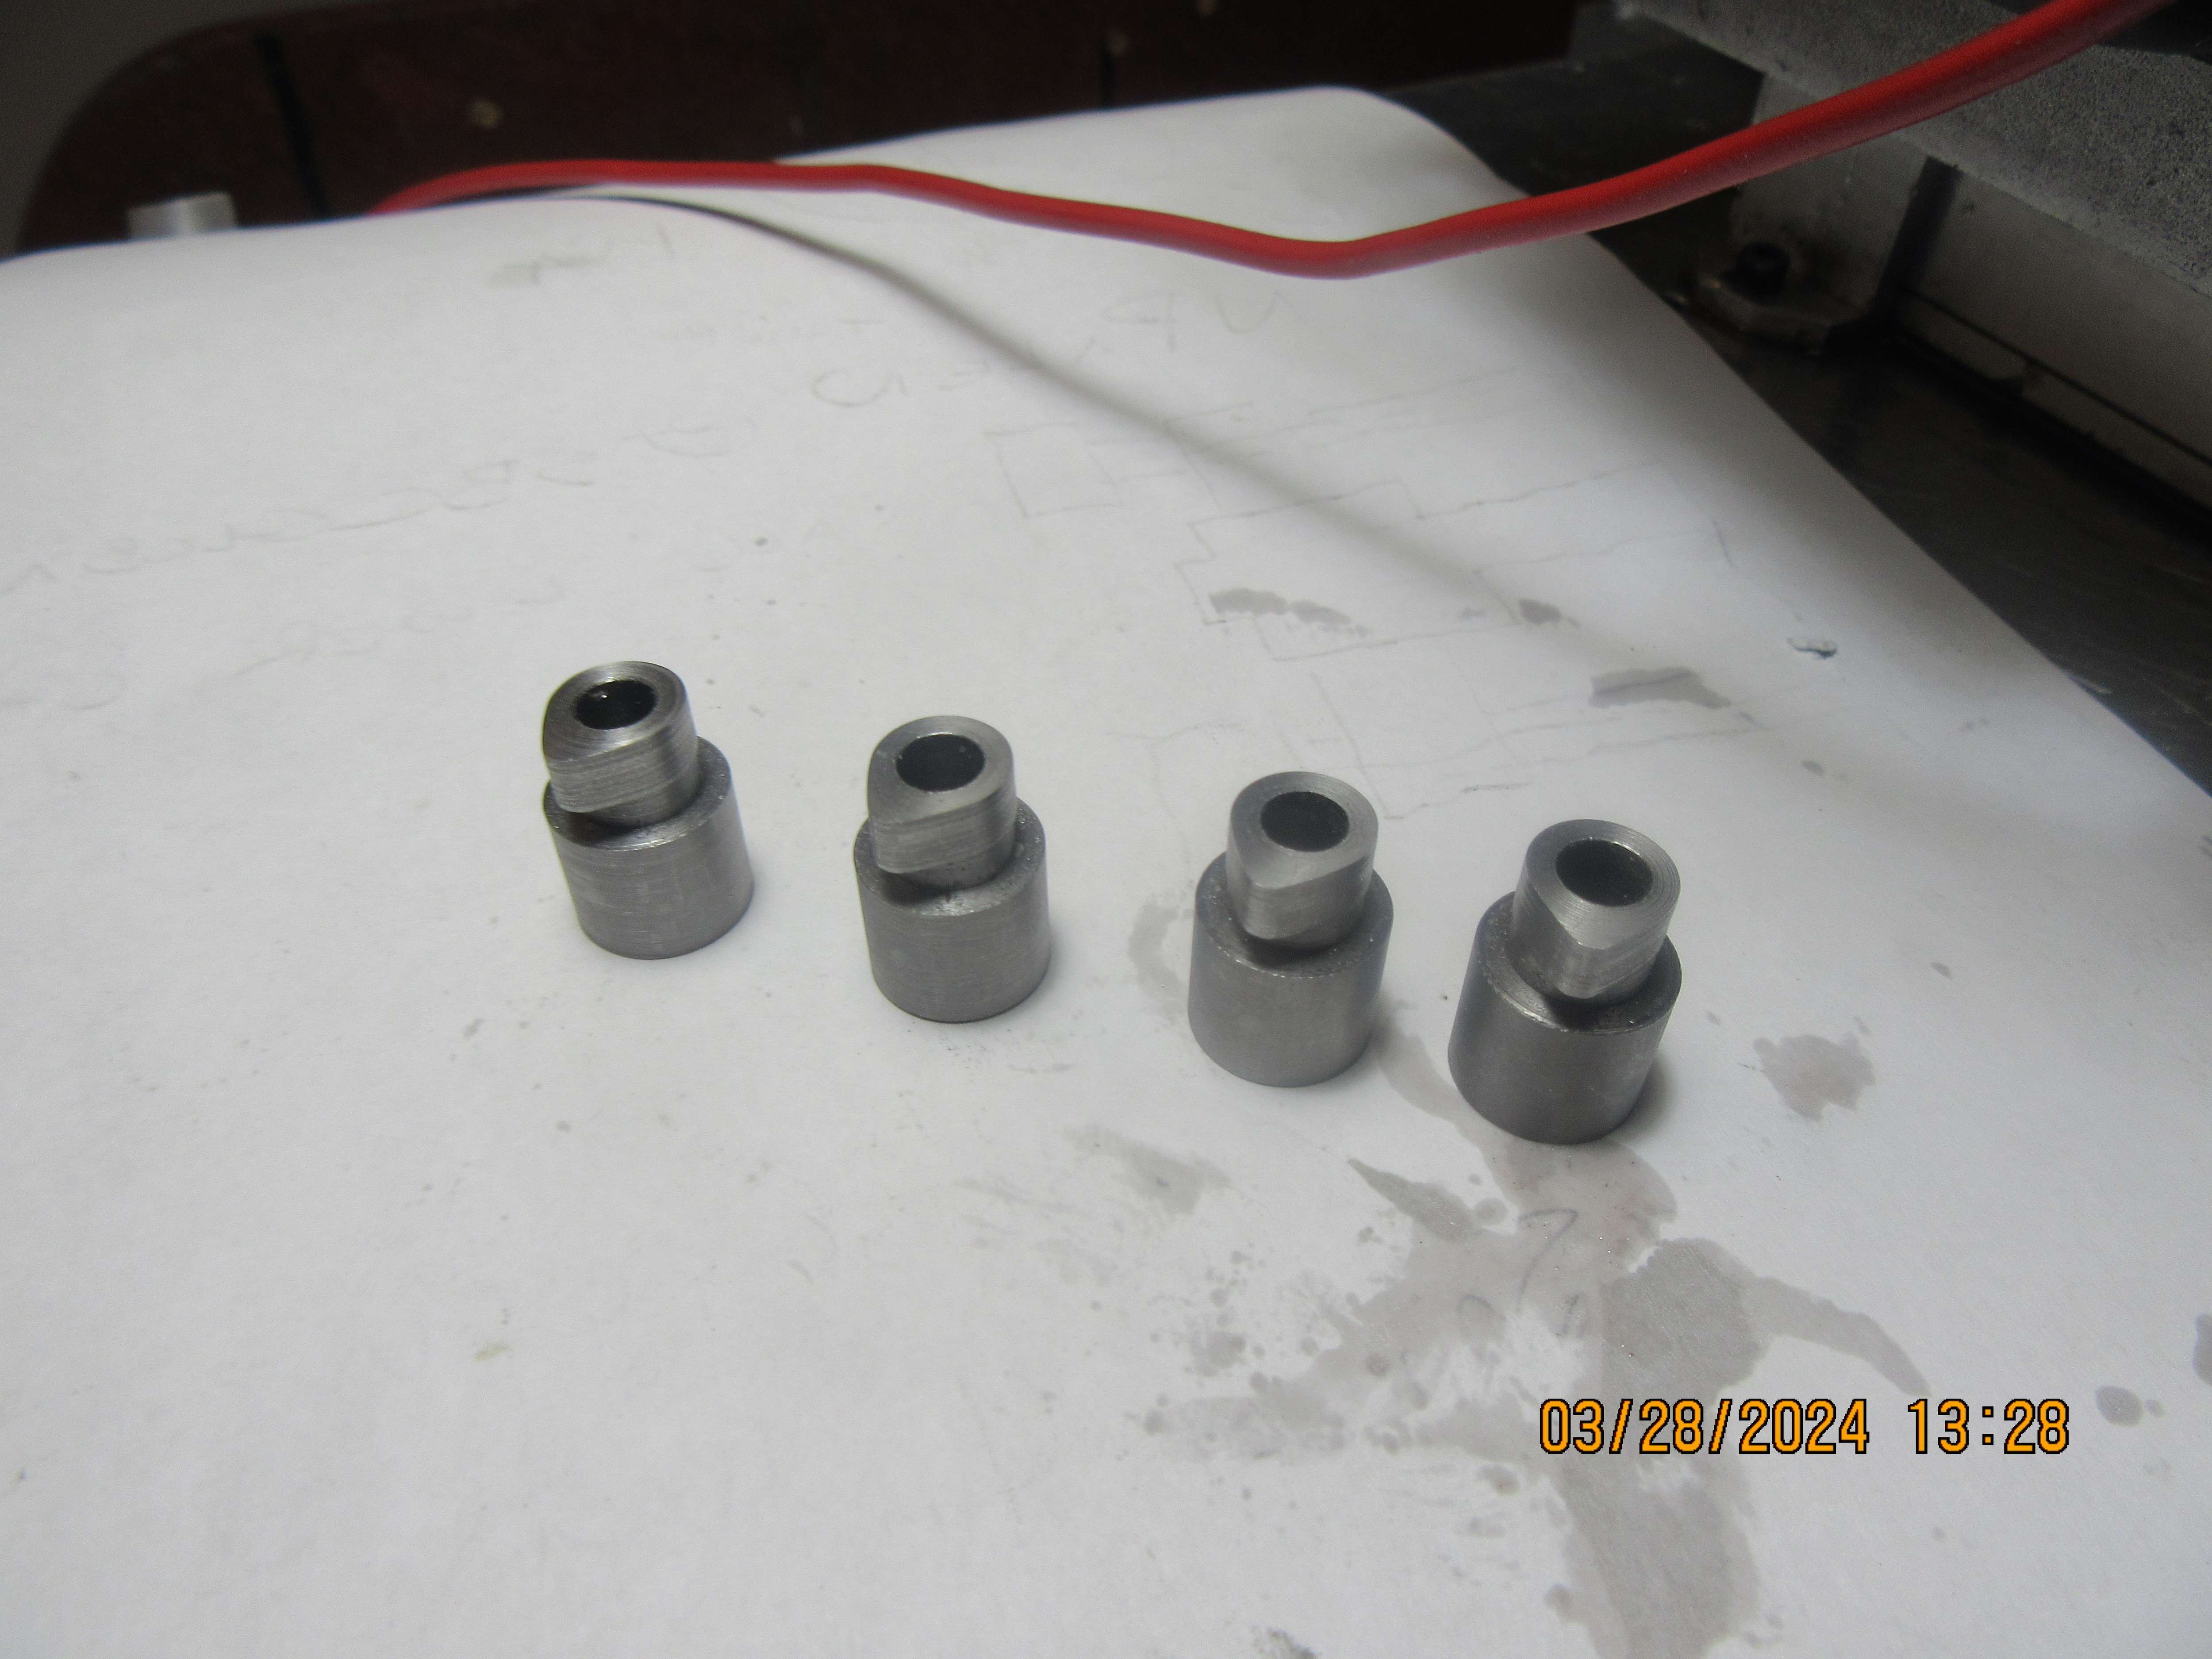
A big Thank You going out to Nelson from Kansas. Nelson has a tabletop cnc machine and used it to make four cams for me which DO have the flank radius machined into them. I will drill and tap the set screw holes and harden the cams myself. For all the people out there who said that a tabletop cnc machine is not capable of machining metal, these certainly look good to me. If I don't use them on this current engine, they will be used in a future engine.---Brian
FY24FE.jpg
 
What happened to the ones you already made with rounded flanks that you decided to swap out for the flat flank ones?
 
The ones I made are in a jar and will get used in a future engine. George Britnel says that the curved flank isn't really necessary on these small engines and I trust that he is correct.---Brian
 
Last edited:
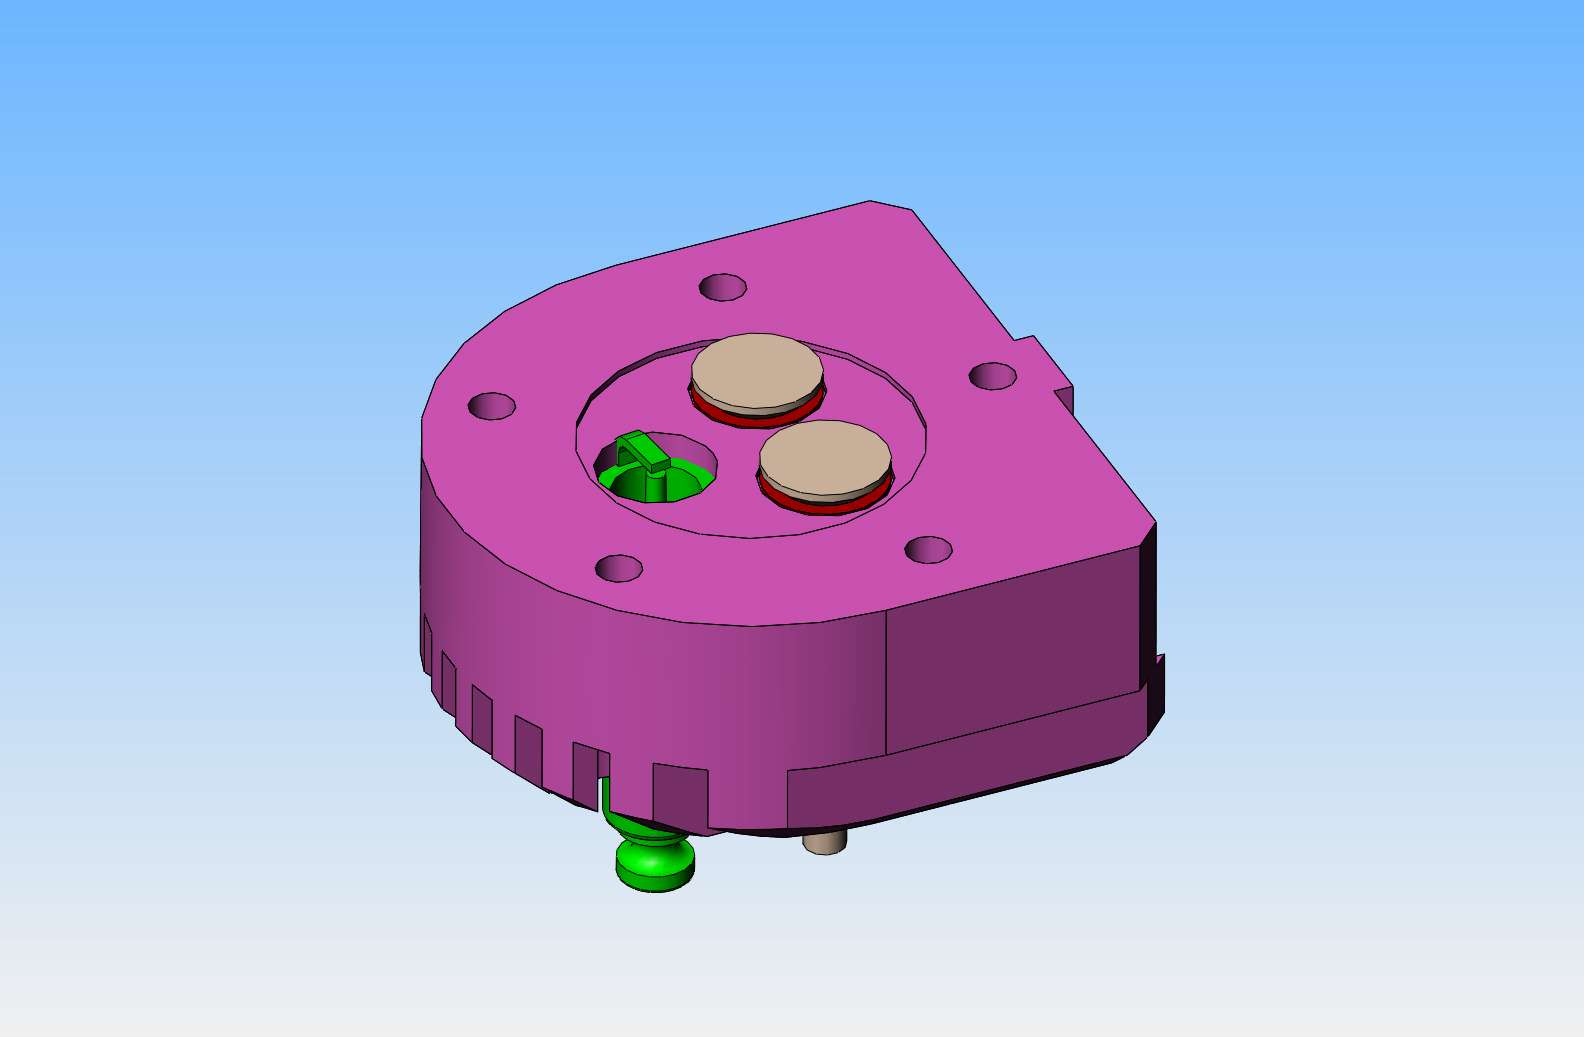
Today I'm down in the bat cave trying to figure out why I can't get this engine to fire. It won't fire with the double ended coil in place, so this afternoon I hooked up one of my normal single lead coils thru the ignition points to one of my cylinders, and although it brings up a great spark when the plug is laying out on the table top, the engine still won't fire. There is one more area which I can think of, and that is that the tip of the sparkplug does not extend far enough into the combustion chamber to light off the air/fuel mixture in the cylinder. The attached model shows exactly what I'm talking about. I don't really want to deepen the sparkplug counterbore on my cylinder heads, because if that doesn't fix the issue, there is no way to replace the material I have machined away to let the sparkplug extend farther into the combustion chamber. I do have a couple of sparkplugs with the same thread, only much longer than that on the current plugs. I may machine a couple of brass spacers which will let me extend the tip of the long thread sparkplugs to extend about 1/8" farther into the combustion chamber.
QYFRwx.jpg
 
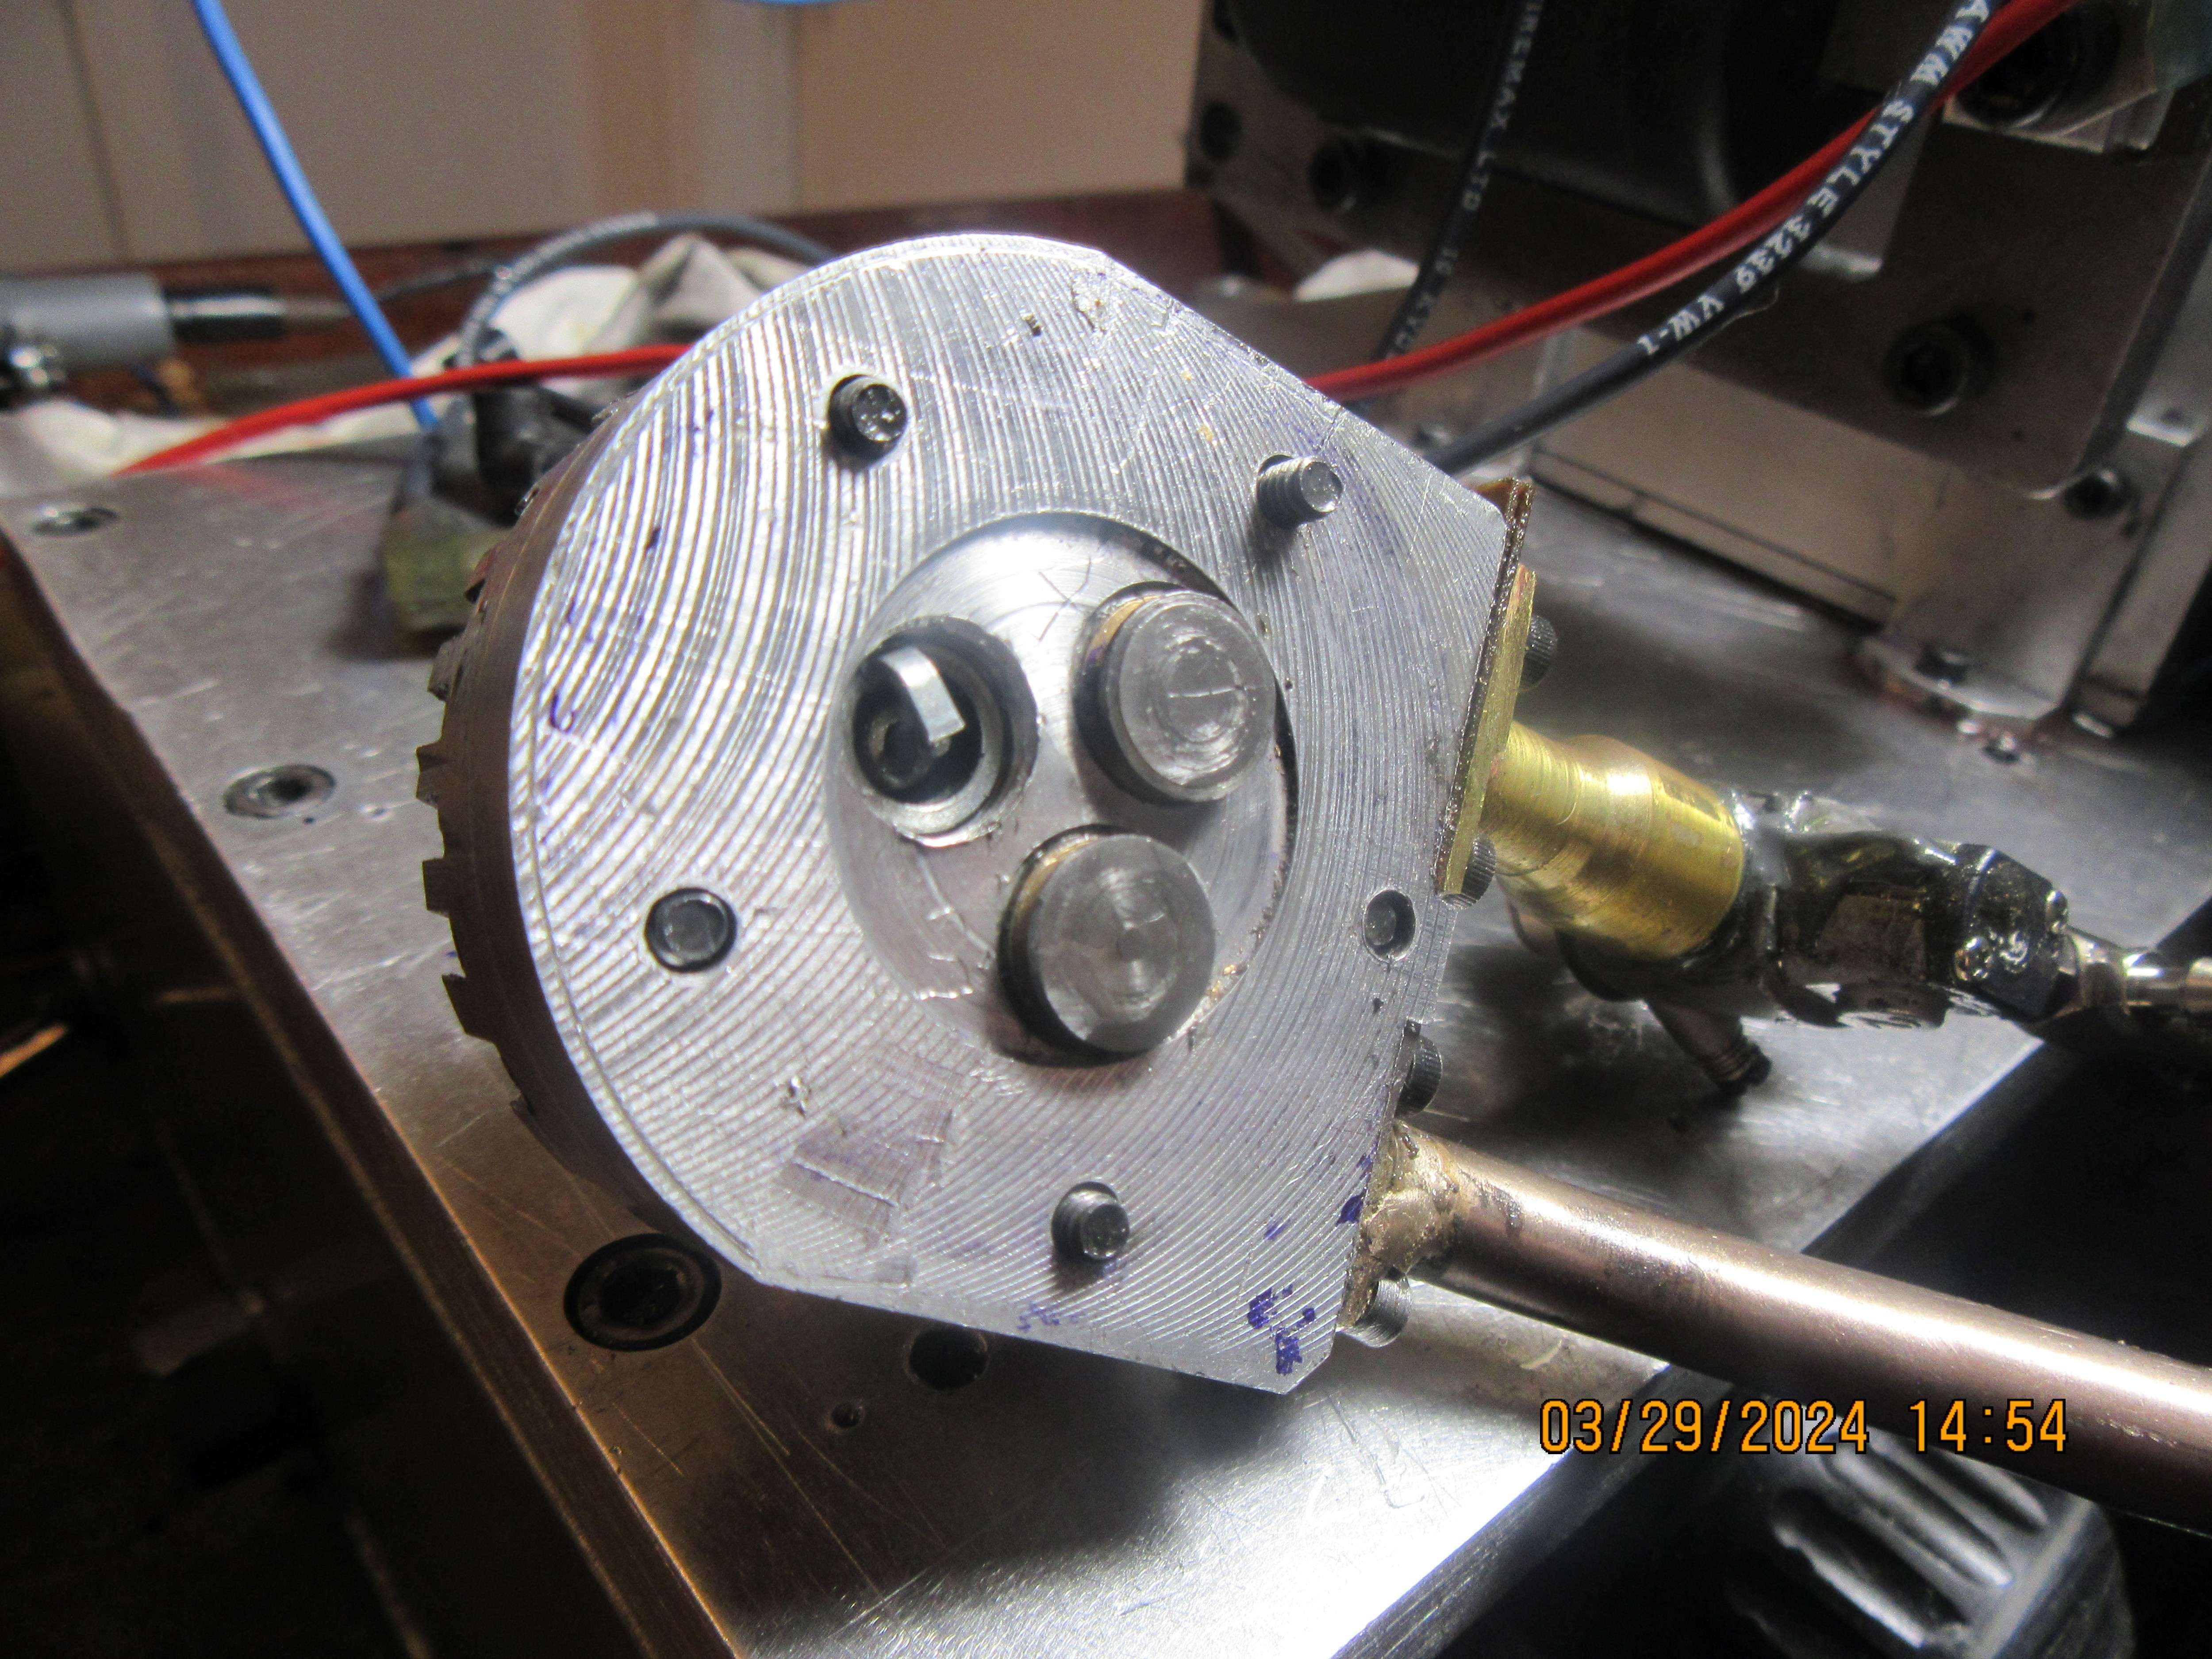
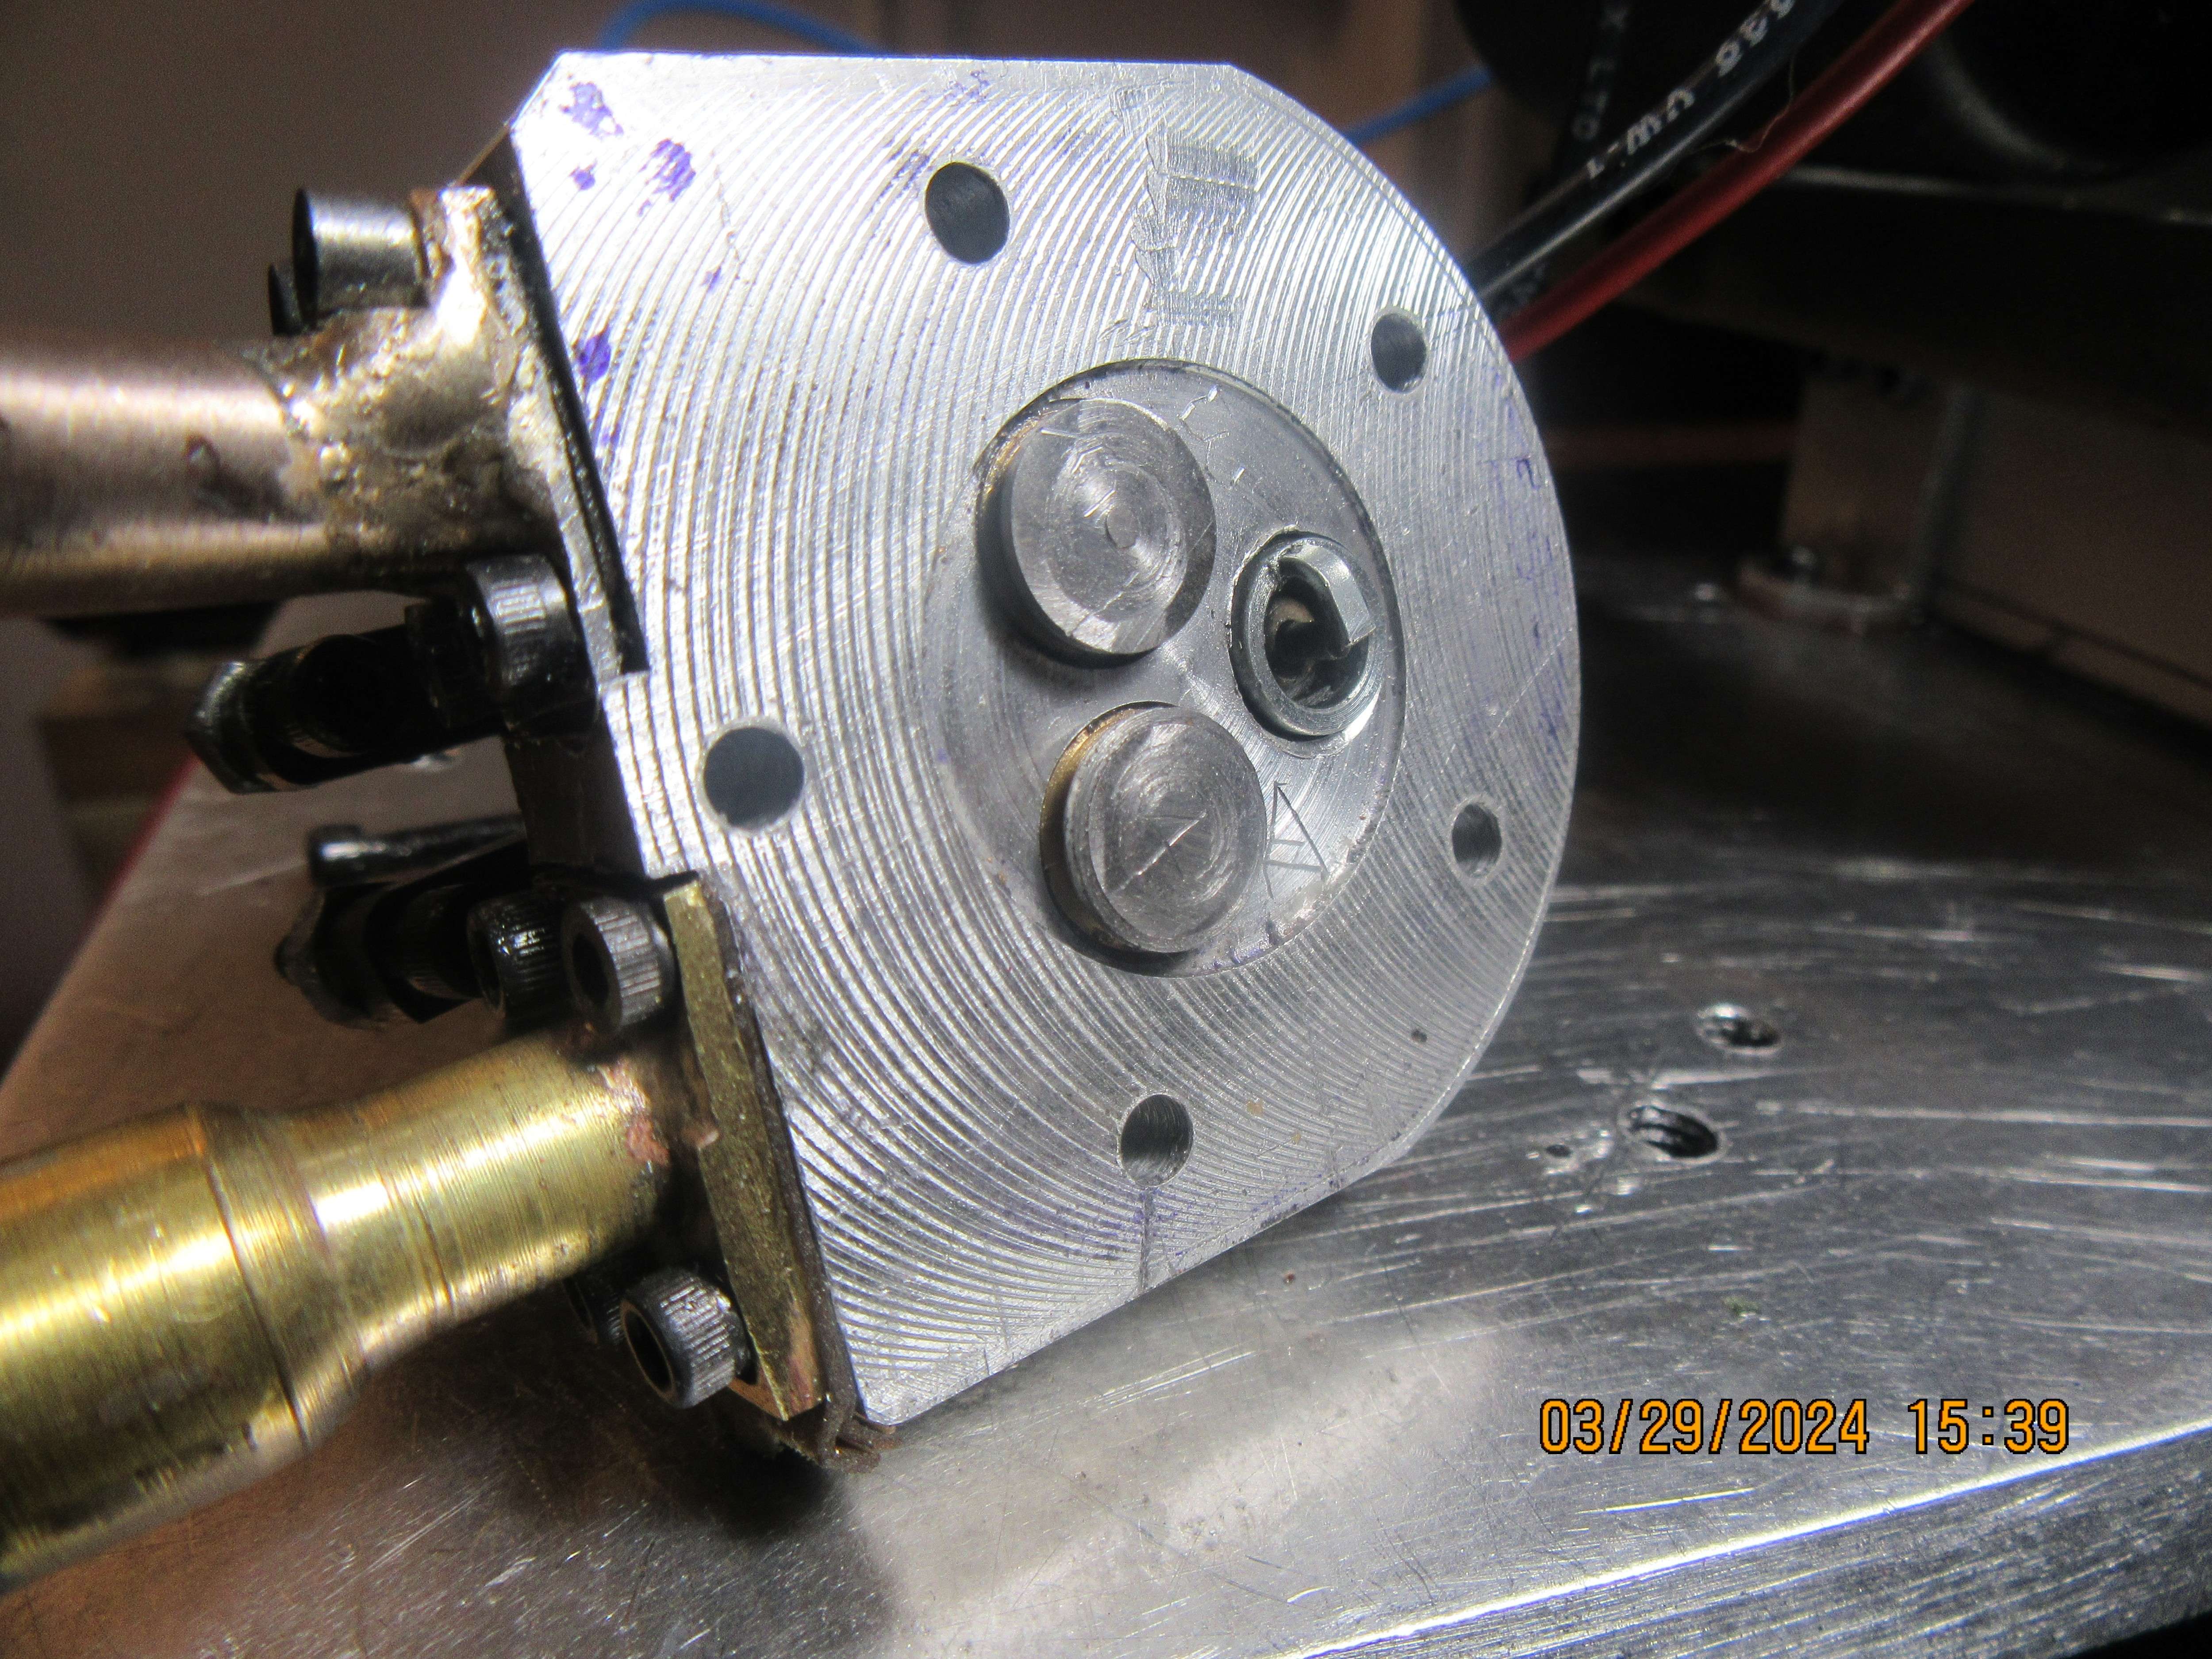
A picture is worth a thousand words---or a dozen solid models. Before doing anything hasty, I pulled one of the cylinder heads off just to make sure it matched my solid model, and it does. (It was supposed to). It shows that I can deepen the sparkplug counterbore be about 0.100" and still have full threads in the cylinder head to engage the sparkplug threads.
oOMpMY.jpg
 
If the picture you just posted is where your sparkplug is now I'd be very surprised if .100 deeper makes any difference. In my younger days I had an old car that burned oil and it had what were called nonfoulers on the plugs. These were spacers which moved the plugs 3/8" or so out of the combustion chamber and it ran fine. Good luck
 
Does not need to move, I've built engines where the plug is in a completely separate chamber maybe 1" from the head.

Check your head is sealing to the cylinder, those machining marks look deep.

All that brass swarf in the head recess won't help with your valves sealing if that gets onto the seats.
 
Okay, you were right. Deepening the sparkplug counterbores didn't make any difference. Next step?--Well, when I put those spacer plates in between the cylinders and the crankcase, it was a "just in case" move. Everything in the combustion chamber clears all right unless one of my cam segments comes loose from the camshaft and rotates into a position where the piston is fully up and a valve is fully open. Then it may "crash". However---an engine with this much work into it that won't run isn't much good to me either. It's going to be a horrible job removing those spacers from under the cylinders, because it calls for almost complete disassembly of the engine to do it.--Then again, I don't have that much going on in my life, so that is probably what I will do next.---Brian
 
My two cents is either something is mechanically wrong like reversed intake and exhaust valve timing or the head isn't sealing to the cylinder as Jasonb suggests. The finish is rough and before making changes based on a guess you might try smoothing it a bit.
 
Does not need to move, I've built engines where the plug is in a completely separate chamber maybe 1" from the head.

Check your head is sealing to the cylinder, those machining marks look deep.

All that brass swarf in the head recess won't help with your valves sealing if that gets onto the seats.
I said it once before, but nothing seems to have changed.
Hi Brian!
You have to compare that surface to a full-size motor's surface - You have to make its surface at least as good as the full-size motor's.
Clean engine parts like a full-size engine repairman has been doing - (With the company, parts, the engine is always clean.)
That is the Right way to make and assemble an engine - regardless of the size of the engine !
 
The pushrods have a slight bend near the top to clear the heads of the manifold bolts. This does not impair the operation of the pushrods. The engine is not firing at all now. The ignition timing is correct, and a sparkplug laid out on the engine deck fires quite happily as the crankshaft is being rotated. The valve timing appears to be correct. The fuel is Naptha gas, same as I use in all of my engines. I have a few more diagnostic tricks to do today to see what is wrong.
Hi Brian !. Check the timing of the second cylinder Placet the first on TDC with the inlet cam just opening the valve, Turn crankshaft 1 turn and the second cylinder the inlet valve should be just opening Timing right. Now check the plug gap setting that it is not too wide say 15 to 20 thou gap. Start with fresh fuel.
Try some unleaded motor fuel. Spin the engine over with plugs removed do you have compression on both cylinders. Your problem is in one of those areas Best on good Easter wishes. John
 
I got the conrod finished today on the engine I'm working on which gave me a chance of a quick play. This is another simple bump test that shows the engine is making compression and you can feel the pressure with your finger so no need for comp testers or ballons. Give it a try one cylinder at a time by removing the other's spark plug and report back

Points to note

No piston ring fitted yet
No Head gasket
No seal of exhaust valve cage into cylinder
No valve springs, just gravity. Infact while uploading the video I noticed I had them the wrong way round so not even sitting on the seats they were lapped into.
No plug or top cover, just fingers blocking those holes.

Plenty of rebound bounce on what is a low compression engine and a good squeak as finger pressure is eased.

 
The reason that I have to disassemble the entire engine to remove the spacers below the cylinders is that the piston and rings can not be inserted into the cylinder from the bottom. The piston and rings can only be inserted into the cylinders from the top side of the cylinder. My piston ring grooves are 0.058" deep. The actual cross section of the ring is 0.070". that means that in an uncompressed state the rings actually stick out 0.012" from the side of the piston. I have tapered sleeves that allow me to insert the piston and rings from the top side of the cylinder. The internal taper on the sleeve compress the ring as the piston is being forced down into the cylinder. The cylinder bore is 1.00" and the stroke is 0.944".
 
While you are at it put a small chamfer on the bottom inner edge of the cylinder so you can just push the piston with it's ring into the bore, just needs a little wiggle and light hand pressure. It also helps prevent damage to the o ring.

Yet another feature left of the "known running design" that all adds up to the problems you are now facing. Many engine designs have this chamfer for that reason be it CI rings or O rings.

I'm a metric O ring man these days and for this sort of size engine use a 2.4mm section ring into a 2.3mm deep groove so in old money that is 4 thou compression which is similar to what Mike says or a bit less if taken as a percentage.
 
Engine has been disassembled and the 0.125" spacers under the cylinders are removed. One cylinder, rod, and piston and head have been reassembled. This tied up an afternoon, and a couple of hours tomorrow will see everything back together. The engine still turns thru a complete 360 degrees but the valve gets very close to the piston at one point in the cycle. However, "a miss is as good as a mile" so I think it will be alright. This does boost the engine compression by a good amount, but I hope that is going to work in my favor.
 
In review, let's see what I have done here. I used Malcolm Stride's Bobcat engine as a design layout. Did I build Malcolm's engine?--No. My stroke is different. My bore is different. My ignition is different. My carburation is different. My main engine block is different. However, it is the same overall layout as Malcolm used. I had problems sourcing a coil with dual outputs, so I "borrowed" a double output coil from a project I built a few years ago. I had originally used a single carburetor with an intake manifold that spanned between two cylinders, but I had problems getting it to seal properly against both cylinders, so I replaced it with two separate intake manifolds and switched up to two separate carburetors. The engine wouldn't run with the original curved flank cams that I had machined, so I switched over to straight faced cams. George Britnel, who in my estimation is THE Engine God, has said that on these small engines, the cams don't really need curved flanks, so I remade the cams with straight flanks. When I originally designed this engine, I knew that the valves would interfere with the pistons if the engine "jumped Time" --A valve would hit the piston at top dead center. So---I machined a 1/8" thick spacer to set between the cylinders and the crankcase to avoid that collision. This did ensure that there was no collision between piston and valve, but it also lowered the engine compression considerably and I couldn't get the engine to fire. Yesterday, I removed the spacers from under the cylinders, and although the piston does get very close to the valve, it doesn't touch them during a full engine revolution. So---This engine is a prototype. No one has ever built this engine before. Do prototype engines ever run as soon as they are finished-----very rarely. Some do, but the majority of them don't---not without a lot of design tweaking and mechanical changes. Today it has been three months since I began the design of this engine. Am I tired of working on it?---Yes. will I keep tweaking the design until it runs?--Well yes, I certainly hope so.-----Brian
 
In review, let's see what I have done here. I used Malcolm Stride's Bobcat engine as a design layout. Did I build Malcolm's engine?--No. My stroke is different. My bore is different. My ignition is different. My carburation is different. My main engine block is different. However, it is the same overall layout as Malcolm used.
Put those thoughts or similar thoughts out of your head - Focus on the main problem, and You will make the engine run.
 
Hi Brian,
You have to believe in what you did; to believe it s right! There must be some glitch, but you will overrun it. Take it systematically. Start running motor with only one cylinder, preferably the one giving signs of life. Replace ignition with one known to work (just to be sure it is not a contributor). Check (visually/mentally) the sequence of 4 strokes on your motor, hand-rotating slowly crankshaft and following all assemblies timing and on/off points. Hand-check compression resistance and its/and spark position in cycle to match intended timing.
Belt-connect your engine with a 1/2-1kw electrical motor (you should target -I think - 1.5-2 x idle speed) and try to run it several minutes (oil filled, maybe with gas also and ignition on). Sometimes rings do not properly seal from the beginning. When, finally, want to start it, use some starter-fluid spray in admission (maybe clean ad dry sparkplug before).
I'm really hooked on hearing this engine running!
P.S. I am really aware about the experience distance between us, but sometimes everybody looses trust in his own powers and needs support!
 
Last edited:

Latest posts

Back
Top