What Are You Working On Today?

Home Model Engine Machinist Forum

Help Support Home Model Engine Machinist Forum:

This site may earn a commission from merchant affiliate links, including eBay, Amazon, and others.

rake60

Well-Known Member
Joined
Jul 8, 2007
Messages
4,756
Reaction score
124
How about some in-progress pictures?
We're all working at something.

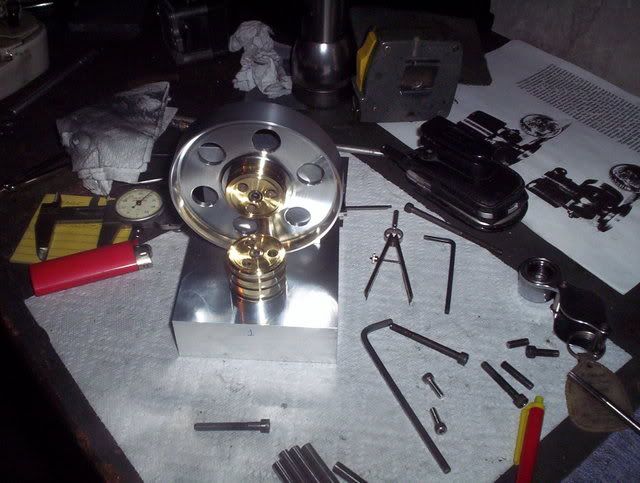
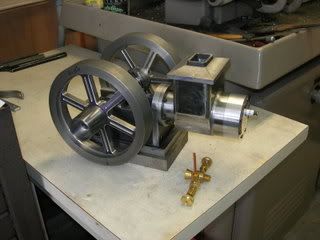
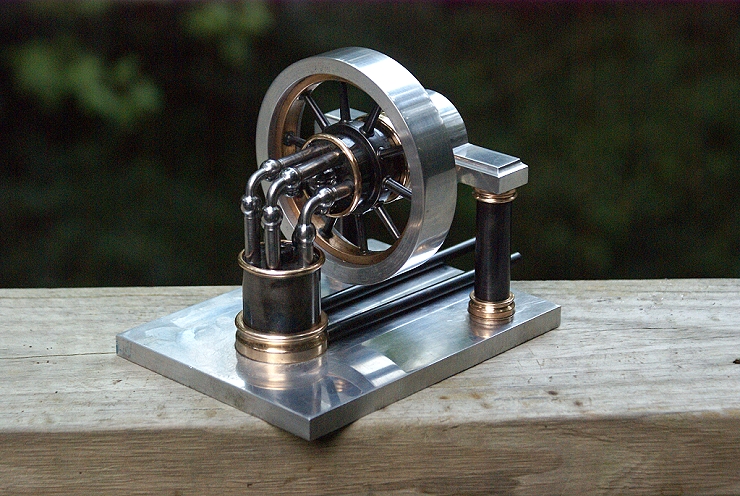
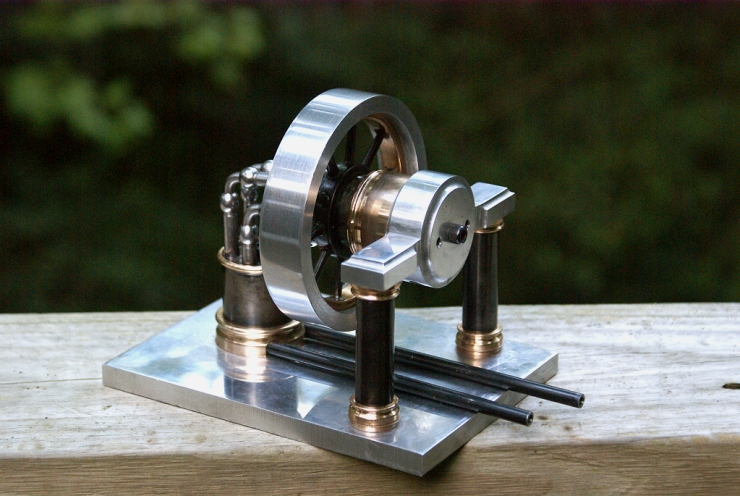
My current project is a horizontal mill engine.
It's almost done.
MillEnginePartsFinished.jpg

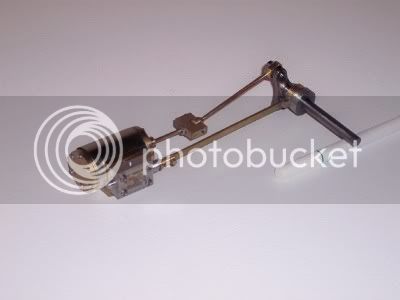
OK, so it still needs a flywheel, base and the entire support structure,
but that's "almost" to me. :?

What are you working on?
Rick
 
Hi Rick

My current project is a side lever steam engine

DX330021.jpg


Overall Lenght = 99 mm
Height = 94 mm
Width = 56 mm
 
I hate to admit it but I am fixing a broken spatula from my womans job, Its her favorite for flipping eggs,pancakes and stuff on the grill.

I welded a piece of stainless to it and am making a new wood handle to go around the stainless.

Anything to keep the woman happy. 8)
 
Absolutely nothing, taking a break for a couple of days.
Manhandling that frame took too much out of my arm.
Ask again next week.

John
 
Been working on an Elbow engine. I am not very fast but this is a lot of fun. Trying to decide what to do with the column so it doesn't look so bulky.

100_3049.jpg
 
Kenny that Elbow Engine is looking great!
I keep looking at mine and thinking of ways I could make a better running
model. Then I remember....... Well I'm not ready to go back THERE
again just yet! That engine was a nightmare for me. Maybe I was just
rushing it a bit too much.

All of the projects are looking good!
Best of luck on all of them.
 
09-02-2007010.jpg


Well this is my latest project
from Home shop Machinist N/D 2005 by Walter Yeman.

base is 5" dia Teak that I got out of the trash at the local marinia

it is missing a Navy flag that I have not picked up yet.

George
 
Hi Kenny,
The elbow engine is lookin' good, if you look at my elbow engine build you will see what I did to get around the upright problem, you can remove about 50% of the material. I was going to make it with just a small base and two thick walled tubes going to the top bearing, giving it a bit of a 'suspended' look, maybe for the next one.

Just finished a small commision for a chap in Australia, who is building a steam powered paddle boat model.
Lots of hours work here, hand blending radii and removing all machining marks and still keeping within fine tolerances with square edges. The holes in the coupling flanges are all tapped 10BA and had to be perfectly square and fully interchangeable. This one is going to cost.
aussiebits.jpg


John
 
Today was spent wrestling with the Elbow. We declared it a draw abnout an hour ago. This little devil is going to be a worthy adversary as I try to get ot all aligned. I've still got to add a pair of airlines to the upper valve body so that I can continue to tweak things into position.

Sadly, I might have to go back a step or 3 and rework the cylinders to add a bit of length. I've possibly underestimated the requirement after moving from the 5/16 in to the 7/16 in. radius, but it's not certain just yet. Not a huge deal, as I'm pretty sure I can salvage the flywheel work if I have to rework things.

I can get a fair turn by hand but it appears that turning by hand does not really let the cylinders match their rotation like they do under running conditions, causing some binding.

We've entered the frustrating phase for the moment, but it's still a lot of fun.

This is where things are with the project right now:

elbow-test-fit-3.jpg


elbow-test-fit-4.jpg
 
Cedge

Maybe it doesn't run yet but it has STYLE.

Keep the pictures coming.

Hal
 
Thanks Hal. Now all I have to do is beat it into submission...LOL I think I'm close, but having tossed out the drawings almost from the beginning, it's going to be trial and error until I can determine out if the current fight is due to some of the the changes I made along the way. Like the old undertaker said... "remains to be seen".

Steve
 
Cedge

Your choice of components, complement each other very well.

What is the "black" metal or what metal did you use and what did you do to color it?

And another question while I'm at it.

How did you make your pistons/rods with the balls in the middle.

Hal
 
Hal
I made the cylinders from scrap yard steel and then applied gun blue to them. It's an easy way to attractively finish iron, although few people use it much these days outside of the firearms community.

The balls were made with a ball cutting tool that I recently made. There are a number of sites where you can see how they are made. Make one is a fun project with the added bonus of being able to create balls of any size up to about 2 inches in diameter. Mine can be seen in the "Tools" area of this site.

I cheated a bit on these. I wanted to conserve my drill rod so rather than turn them from solid 3/8 rod, I made the pistons from 1/4 inch and then drilled a 1/4 inch hole in a piece of 3/8 and turned the balls. When the cutter cut through to the drilled hole, the balls separated and were ready to slip onto the 1/4 rod. From there the rods were bent for use as shown in the plans. Doing it this way saved a lot of wasted metal and tedious cutting.

Steve
 
Steve that is one impressive looking Elbow Engine!

The "frustrating phase" on my simple version was enough for me.

I'm sure you will get it running soon.
Keep us updated.

Rick
 
Thanks Rick
I'm not letting it see me sweat just yet. As i recall from th elast time I messed with one, the elbow behaves totally different when air is applied, so the fact that I can turn the engine by hand has me hoping for the best. I think it's close, but I won't know until the air lines are finished. That project is 75% done at the moment and should make a bit more progress in the morning.

Steve
 
Well today i took a break from the 2 inch agricultural in the boiler build and worked on my Fowler. drew up the wheel jigs and started making the spokes only 60 odd to go.
Tomorow im machining the cylinder studs for the other engine and may even do some real work.

cheers Kevin
 
Frustration Phase continues.... I can get the little Elbow to turn under it's own power, only to stop before making a full revolution. It appears one particular piston is at fault, but I can find no reason for it to stop the action. I'm scratching my head and studying things at the moment.

I've checked and rechecked it forsquareness, checked it to make sure it isn't striking the base and checked it for length, diameter and nothing obvious has shown itself yet. I've tried the offending piston in several cylinders and it simply isn't happy in any of them. I'll probably make another piston set to replace the one that is causing problems, but I'm not yet sure what changes to make.

I've enjoyed this build tremendously , but the test and adjustment part has become a real bear...LOL

Steve
 
Steve, mine acts the same as yours. It will spin easly by hand and I even pressed the flywheel up to spinning sanding drum and run it at about 3400 rpm. But when the air is applyed to the thing it wants to just set there. It will try to turn and even once ran for about 5 revs. I think it is leaking too much air. Now it's called My "Rachifrach" engine. :oops:
Mel
 
Mel
I can feel your pain ol' buddy....LOL. I've hand turned this little bugger enough to have totally worn it in by now. Whatever is bothering it can't be too serious, but it's got me flummaxed for the moment. I can hand turn it both directions, but there is still a slight point of resistance that just doesn't want to go away. :roll: I'm thinking of naming it "Censored" since its current name is not for the gentle ears of polite company. :shock:

Steve
 
Back
Top