Update on my Wobbler Engine

Home Model Engine Machinist Forum

Help Support Home Model Engine Machinist Forum:

This site may earn a commission from merchant affiliate links, including eBay, Amazon, and others.

Bernd

Well-Known Member
Joined
Jan 14, 2008
Messages
952
Reaction score
4
Location
South of Rochester, New York
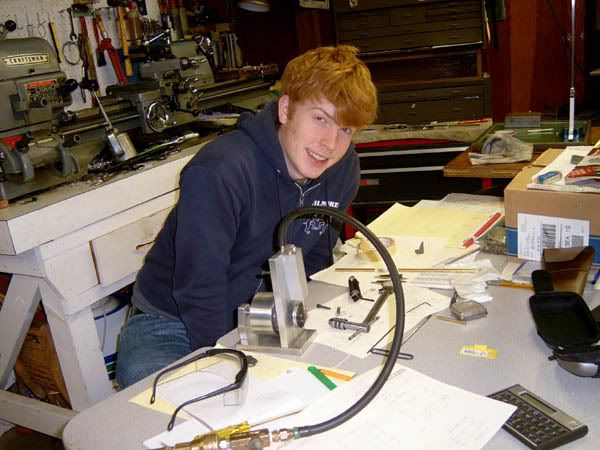
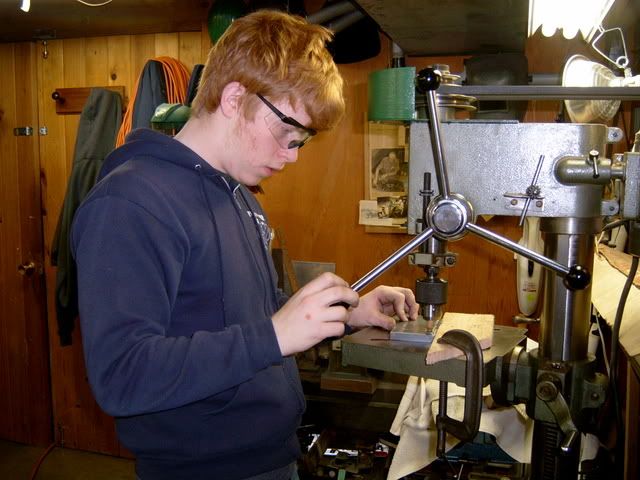
I finally got some bronze rod to make the bearings for the Wobbler that I'm building. I'm also documenting the build on my web site at The Model Engine Shop.

I've posted a couple of pics below of the progress so you don't have to go to the my site if you don't want to.

wobbler.jpg

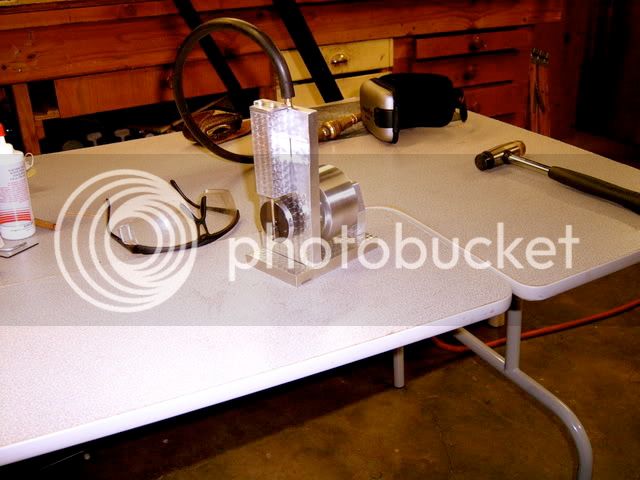
The bronze bushing is sitting above the hole it is to go into. I tried a bit of free hand engine turning using an ink eraser. Didn't turn out to bad.

wobbler1.jpg

Here's the frame assembled onto the base. Next will be the crank and crank pin.

This only one of two that I'm building. As I go I'm making two parts so I'll wind up with two engines.

When I reamed the hole in the bushing I used automatic transmission fluid as lube. Seemed to work pretty darn good.

Bernd
 
Hi Bernd:

Nice looking jeweling on the engine frame. It really adds some "bling" for no investment but a bit of time and skill.

I use Cratex stick abrasive, available from the usual suspects (Mc-Carr, Enco, etc.) It comes in 6" sticks and numerous sizes and grits. For larger panel like aircraft and hot rod firewalls, I use stainless end brushes.

For a few more ideas on jeweling (engine turning), Brownells has a pretty good layout on the topic as it pertains to gunsmithing. I need to build a copy of their stick holder one of these days.
 
Bernd... Looking good. I like the detail work (yes DETAIL! I hate the word BLING) on the base and frame. Keep it coming

Eric
 
Bernd,

Nice piece of work.

Be careful of the engine turning though, it is very contagious. It will spread like wildfire thoughout your collection, and even onto tooling if you can't get it under control.

John
 
Having not much of a clue! I am intrigued to see what a wobbler is ( I know, do your research you newbie!!)
I'm sure I will have seen one running but have never stored the name etc... mental flawings! ???

Really glad I read this posting.. always wondered how you put that 'styled' (my preferred word! ;D ) finish on.

Just one question... If I haven't made myself look too dumb yet! (probably won't matter then!)
Why turning it with an eraser? ??? am I missing something (loaded question... stand back and wait for the sarcasm!)

I will watch with interest... and a pen and paper!! ;)

Ralph.

P.S. could you add a size reference to your next pics please?
 
Divided He ad said:
...
Just one question... If I haven't made myself look too dumb yet! (probably won't matter then!)
Why turning it with an eraser? ??? am I missing something (loaded question... stand back and wait for the sarcasm!)

...

Because the eraser is nicely round (cylindrical) and the right size - soft and has just about the right 'give' and the soft rubber is slightly abrasive for it's more normal function as a pencil eraser.

But, perhaps more like Everest "because it's there"
 
Thanks for all the nice comments. Much appreciated.

Rog, Nice info for further perusal. I once came across a website were they showed some really nice work, wish I'd saved it. As Bog's said, it can be addictive.

Bog's, Ya I know. I've done a bit of it on other stuff, and your right it does spread. :)

Divided, basically a wobbler means that the cylinder oscillates back and forth on a pivot point or wobbles. ;)
The style of finish is called "engine turning". It's also called by a few other names that I don't recall right now. There are many patterns that you can do. The bigger the pattern the more creative you can get.
You can use almost anything to make the pattern. I just happened to have an ink eraser. It works better because it has a bit of abrasive in it. I could have used a wooden dowel with a bit of grit and done the same thing. Hope this has answered some of your questions.

Some asked for a reference size. The frame is 2.25" (57.25mm) long and stands 1.196" (30.38mm) tall with the base attached. I'll have to remember to put a scale in the pic next time. :D

Bernd

P.S. I found the web site with the engine turning. http://www.fpmmetals.com/index.php
Some really fantastic works.


D-H: My son designed and built a wobbler for his class at college. He wanted it to stand out so he "engine turned" it with a 3/8" dowel in the drill press. We glued a piece of leather to the end and used valve grinding compound as the abrasive. He made the engine double acting to get a little more power but he also could have increased it even more with a larger bore at the expense of using a little more air.
src="http://i237.photobucket.com/albums/ff33/parkerdjte/S3500143-1.jpg" border="0" alt="Eric's engine"></a>

S3500137.jpg

They were to design a engine to use the materials supplied and he built it at home on weekends because of the limited machines verses students conflicts.
S3500143-1.jpg

don
 
Thank you very much for the info, more things I never knew!! so much to learn so little room in my head!! :big:

Don, you can tell your son from me he is very lucky to have a dad who is talented and able to show him such skills :) ( good hair colour too ;) )


Seriously both thank you.... expect to see this new (to me) skill arriving on my projects ;D

Ralph.
 
Don,

Tell your son "Nice job on the "engine turning" or "jewleing", as it's called for the gun folk. They are nice and straight. Hard to do freehand. Did he use some kind of jig to hold the parts?

Bernd
 
Bernd: Thanks for the kind comments. Eric used a board "C" clamped to the table as a guide for each line and moved it back for each successive line. Side by side was done by eye.
S3500138.jpg

don
 
Don,

I kind of figured that's what he used, just wanted to make sure. It's nice to know a son has hand eye coordination for making things instead of play on an x-box. 8)

Tell him to keep up the nice work.

Bernd

 
Nice work ! Great to see one of the younger generation enthused about a machining project !!
 
Well I finally got a bit more done on my Wobbler steam engine. You'd figure with only 12 parts it would be done by now, sheeeeesh. :p Below are a couple of pics. Two different angles.

pic29.jpg

pic30.jpg


To read about the build you can go to my web site here to view the pics and write up.

http://www.kingstonemodeleng.com/EngineShop/Wobbler/wobbler.htm

Warning to dial up. Picture intensive.

Enjoy.

Bernd
 
Hey Bernd---you and I are building the same engine!!! I have mine posted on this forum also. Yours is looking very good. Brian Rupnow
 
Brian Rupnow said:
Hey Bernd---you and I are building the same engine!!! I have mine posted on this forum also. Yours is looking very good. Brian Rupnow

Thanks Brian. Haven't touched anything in the shop in the last couple of weeks. Many other things to do.

Bernd
 
Well here it is September and I finally got the second Wobbler engine done. That would be the one with the holes in the flywheel. I had good intentions on documenting the building part but like anything else I seem to do I didn't get enough pics of the final parts. I did finish my web page on it. It can be seen here at : http://www.kingstonemodeleng.com/EngineShop/Wobbler/wobbler.htm

So what's next? Well I've been contemplating building Bog's twin cylinder launch engine or Jan Gunnarson's V-4 wobbler engine. I want to build an engine for a steam boat. Of course that means I'll also need a boiler. At present I have two boilers in mind. One is Jan's boiler that goes along with the V-4. The other will be a vertical fire tube boiler made from steal.

Right now I'm leanng toward building the V-4 since I have the materials for it already. Both are laid out with metric dimensions which I will need to convert. 8)

Regards,
Bernd
 
Wonderful engine turning, I admire your patience - tried it once on a bit of my grinding jig, (the bit you can't see), it was such a disaster I gave up in disgust having been chased round the shop by bits of wood, emery paper and large drops of oil obscuring my vision.

To you and your son :bow: :bow: :bow:
 

Latest posts

Back
Top