Tiny I.C. Engine

Home Model Engine Machinist Forum

Help Support Home Model Engine Machinist Forum:

This site may earn a commission from merchant affiliate links, including eBay, Amazon, and others.
I just looked at the downloads. It looks like I made a real mess of things. They are all separate downloads and some do not have titles.
I was hoping to download enough prints so anyone who wanted could get started on their build while I finished the rest of the prints. Maybe it is best to remove the one that got loaded and wait until they are all completed. May take awhile.
It also appears that once I upload them I have no way to manage them. ??? ??? ???

View attachment Tiny 10 Valve Cutter -- rev B.pdf

View attachment Tiny 11 Valve -- rev B.pdf

View attachment Tiny 12 Spark Plug -- rev B.pdf

View attachment Tiny 13 Spark Plug Asm -- rev B.pdf
 

Cool Engine Arv. Well done!

Thanks for sharing your designs.
 
Arv,
The way I handle them is to make them attachments to a message. This is done under the "additional options" at the bottom of your post while you are typing it. You can add up to 4 items there and there is a size limit on the file size. If you edit the post later, you can delete an attachment and then upload a new one. As I update drawings that is what I do. Works better for me than putting them in the files section. If you want to see how that works, the Lobo Pup Twin drawings are in PDF format attached to the first two posts in the thread at:
http://www.homemodelenginemachinist.com/index.php?topic=5872.0
Gail in NM
 
Quickj said:
Doc,
The show in LeSueur, MN is the LeSueur Pioneer Power Show, This year it will be held August 27-29 2010. LeSueur is about 60 miles Southwest of Minneapolis, so quite a haul from JamesTown, N.D. Here is a link to their website,

http://www.pioneerpowershow.com/

They do have a separate building called "Miniatureland" for the Model engine builders, and every year there are 12-20 in attendance.

I attended maybe 8 shows last year from Winfield Kansas to Rollag, MN and I think I ran into Arv at half of them.

Jim

Thanks Jim!
 
Arv, that's just amazing how small the engine is :bow:.

It may well be the smallest four-stroker, that i've seen running :eek:.
 
Gail, I think that is exactly what I was looking for. I have all the prints drawn but many of them have been altered so I can get certain dimensions that I need. I have a DRO on the mill and work from center point in all directions now & then. I will review & correct them so that others can use them. If I can post them like you have done, then when everyone is satisfied that all the necessary information is there, I can upload a complete file.

Thank you so much Gail. I think I have mentioned it before but I am much more comfortable with a Bridgeport than I am with a computer.

Right now it is cocktail hour for us oldtimers. Will post prints tomorrow.


View attachment Tiny 14 Spray Bar -- rev B.pdf

View attachment Tiny 15 Needle Asm -- rev B.pdf

View attachment Tiny 16 Mixer Body -- rev B.pdf

View attachment Tiny 17 Stand Off -- rev B.pdf
 
Hope that helps, Arv.
Please understand that my motives are purely selfish. It's a great engine and I want to see the drawings.
Gail in NM
 
Arv,

I agree, can't wait to see the drawings. Thanks for sharing

Nick
 
Thanks to Gail, I am going to try to provide enough photos and prints to build the Tiny I.C. engine. The first PDF file is a series of written notes that may or may not help you. I'm sure many of you have your own way of attacking a project and this is just one way.

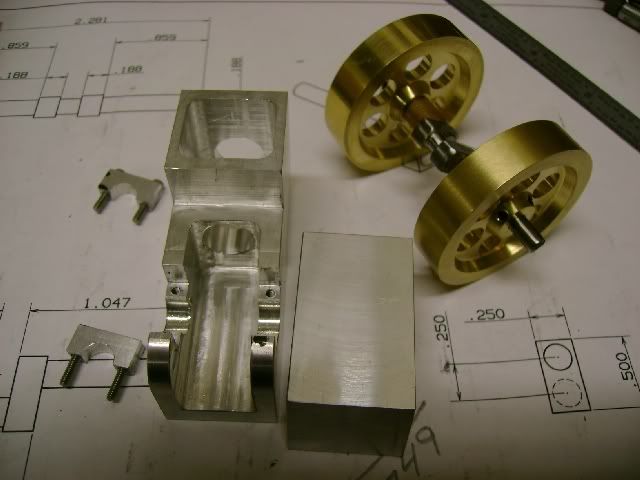
The first part is the frame. It is a fairly easy part to build and once it is done, you get the feeling you are well on your way.
TinyFrame.jpg


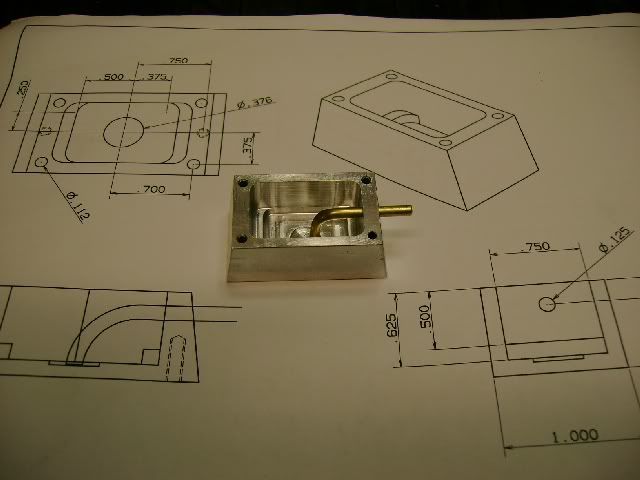
Next is the combination base and gas tank.
TinyGasTank.jpg


The next part would be the cylinder. I have had good luck following the procedure for putting the cylinder sleeve into the hopper frame on several engines that I have built. It even works better on the larger bore sizes.


View attachment Tiny 18 Rocker Arm -- rev B.pdf

View attachment Tiny 19 Linkage -- rev B.pdf

View attachment Tiny 20 Cam Follower -- rev B.pdf
 
Nice drawings, Arv. Thm: Thm:
Thanks for posting them.
Gail in NM
 
Well I've got a few more prints and notes available.

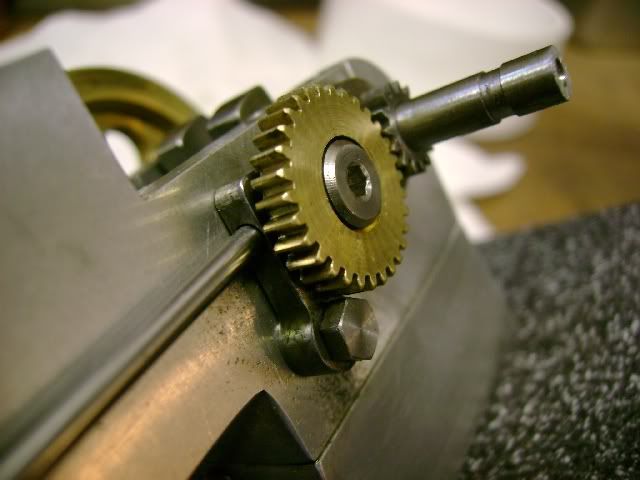
You might want to tackle the gears next. I suggest this in case you have to make or purchase any tools to get the job done.

The whole size and c-bore in the larger gear is up to your discretion. I happened to have some little shoulder screws on hand so I made the gear to fit. You may have to make your shoulder screw if you have none available.
Gears.jpg


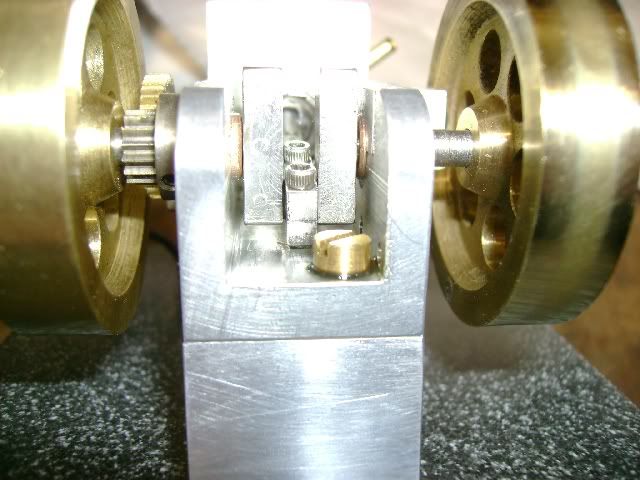
The connecting rod is a little different than most because of the space available on this small engine. I made a horizontal clamp instead of a vertical one to reduce the size under the crank.
ConRodClearance.jpg


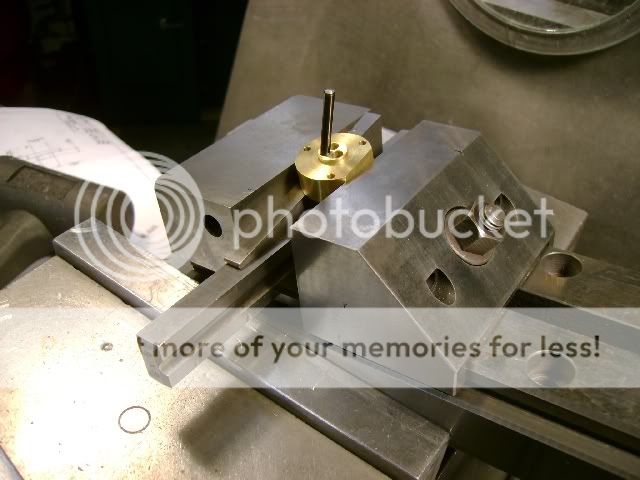
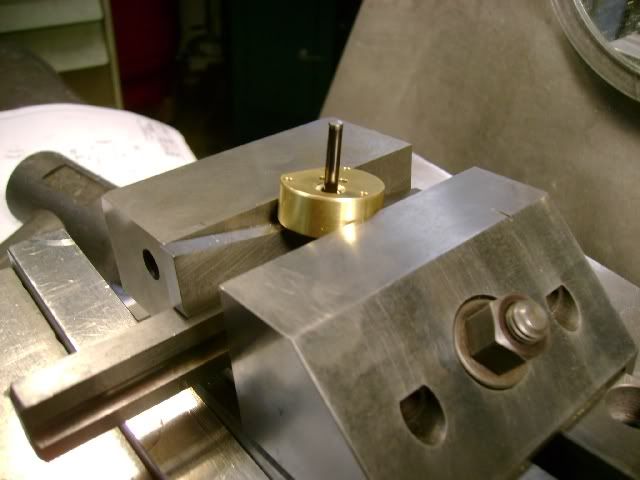
The head is probably the most difficult part on the engine. There is a lot to crowd into a small area.

There are a couple of set ups that are difficult to explain in words so I'll show some photos.

Set up for locating & drilling the spark plug hole.
HeadInside.jpg


Set up for locating, spot facing, drilling & tapping the spark plug hole.
HeadOutside.jpg


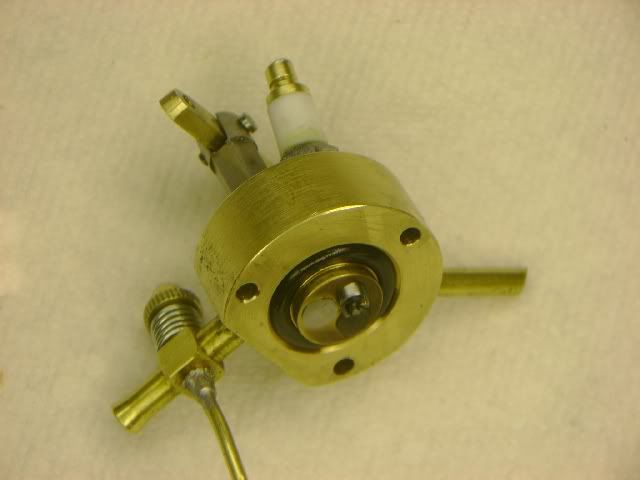
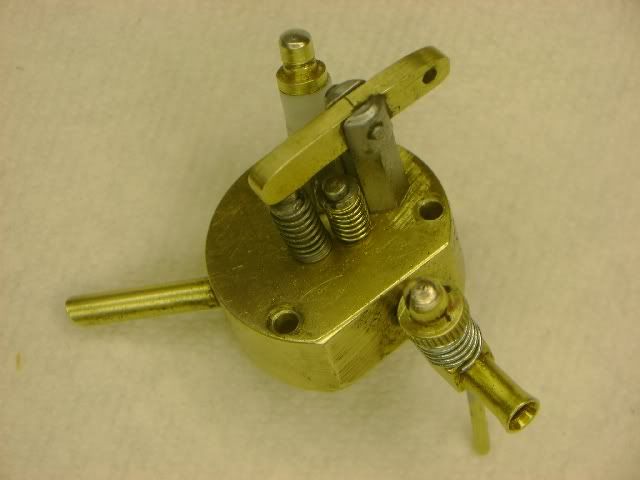
This is what you should end up with.
HeadAsmIn.jpg


HeadAsmOut.jpg


SideViewB-0001.jpg
 
Arv, hey thanks a million for taking the time to put these drawings together for us. That is a delightful engine and perhaps I may undertake its construction one of these days. Beautiful workmanship you've done there, I am a bit surprised at the big end cap configuration but at that size it seems to be adequate enough for its purpose. Not sure I would have ever thought of that, thanks again for sharing the ride.

BC1
Jim
 
Thanks Arv for the video and posting the plans :).

What fuel is it that you are using?
 
Thank you for your interest in this project. I hope the prints and notes are providing enough information for your build.

I am using Coleman Camping Gas with a little bit of Marvel Mystery Oil added for lubrication. I'm hoping the oil will reduce the wear on the o-ring
 
I was attempting to scan and load some more prints and the scanner software "took a crap". I'll have to see if I can find the disc that came with the scanner. It has been several years since I loaded the software on this PC.
 
OK, found the old disk and reloaded the software for the scanner. Hopefully it will last long enough to complete this project.

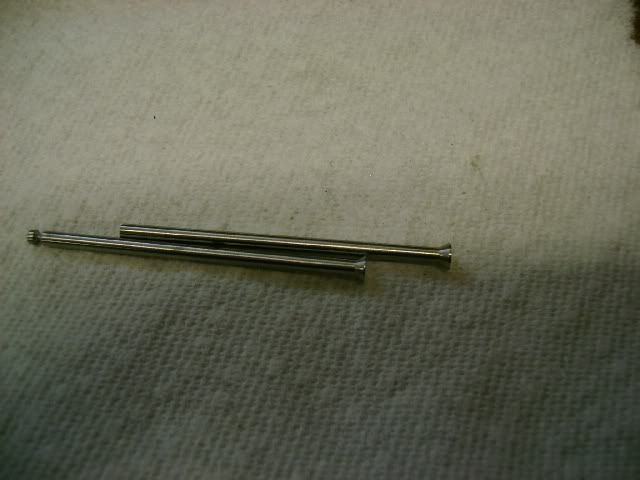
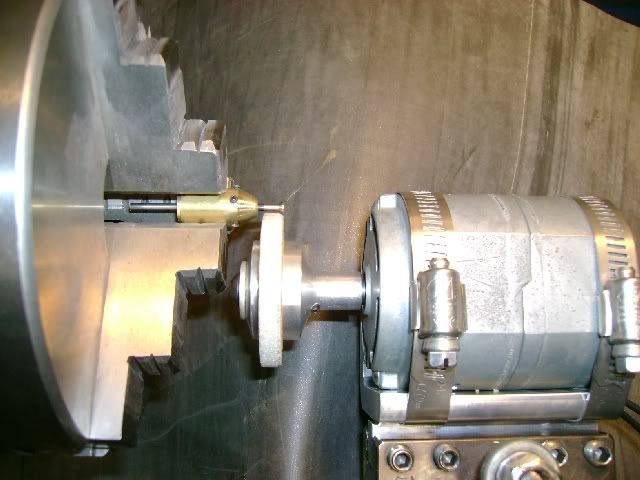
These valves are probably as small as you will have to make for any engine. I cheated a little and used some hardened punch pins that we used to use for core pins in plastic molds. They have a 3/32 shank and a 60 degrees swaged head. The head had slight seams on the taper so I had to grind a smooth surface with my simulated tool post grinder. Also had to grind a groove for the retainer as they are too hard to drill cross holes in them.
You will probably be making your valves from scratch using drill rod.

ValveblanksA.jpg


Grinder002A.jpg


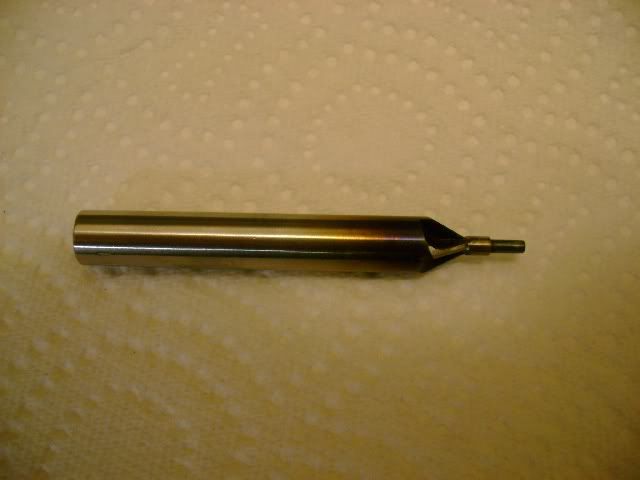
While I had the compound set up at 30 degrees, I machined the valve seat cutter out of drill rod.
This insured that I had the same angle on the valves and valve seat. George Britnell's post is a very good guide for making valve seat cutters.

ValveseatcutterA.jpg


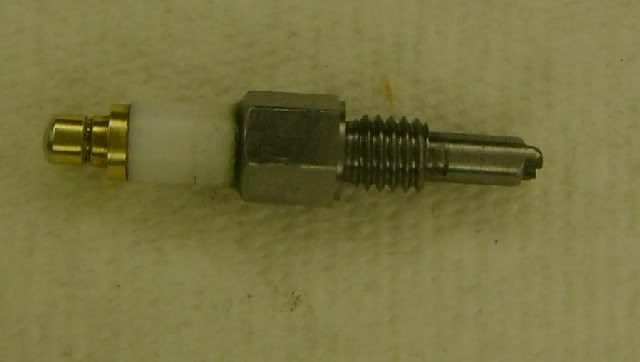
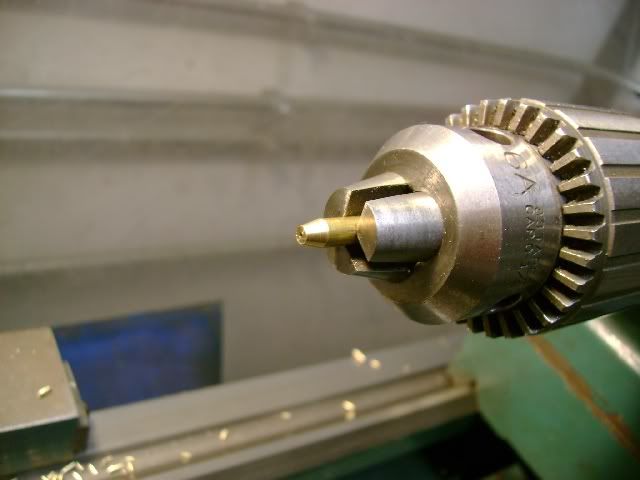
Next is the spark plug. I was always intimidated at the thought of making a small spark plug, but after following some of the post on HMEM by more experienced builder than me, I decided to give it a try. It actually wasn't that bad.

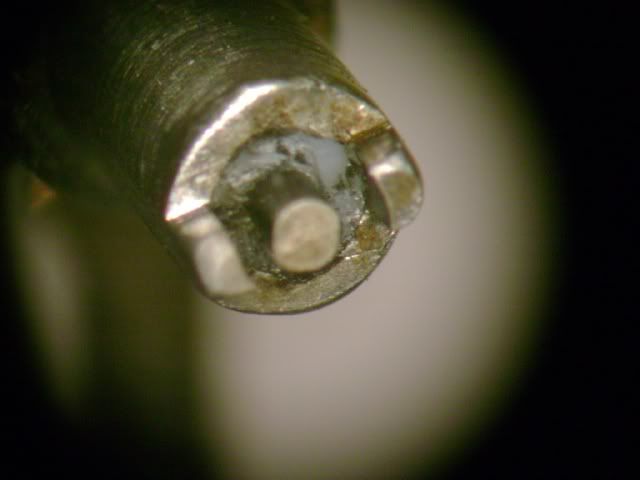
I used 1/4 hex stock for the body, Teflon for the insulator, & .032 music wire for the electrode.
Because of the cylinder size I was very restricted to the spark plug size. I chose to use a 10-32 thread and then neck the rest of the body down to 1/8.

SparkPlugA.jpg


Machining the Teflon with that small dia is kind of difficult. I decided to start by turning a dia. Down to 1/4" and drilling a .032 hole through it. Next I machine the brass ferrule & soldered a piece of music wire in it. By pressing the music wire into the Teflon it help stiffen the Teflon.
To provide additional support for machining I drilled a .032 hole in the center of a piece of 3/16 brass rod. I then held the brass rod in the tail stock chuck. There was about .10 length of music wire sticking out of the Teflon that would stick into the brass rod and support the assembly, just like turning between center.

TinyelectrodesupportA.jpg


After turning the body and the insulator the pieces can be pressed together. The smaller .079 dia Teflon should just be a nice slip fit in the body. If it is too tight, it will just bunch up in the body.

Lastly is machining the overall length and finishing the electrode end. I machined about 1/32 off each side on the end of the spark plug down to the dia of the electrode. There is some Teflon left that you will have to remove with a knife. Final result is a surface gap spark plug.

SparkElectrode.jpg
 
Thanks for the update Arv. I really appreciate the effort. It is such a nice engine and a nice write up that you are doing.

I have been saving the files to a local folder as you upload them. Makes it easier to view and review.

I have noticed that although you discuss some of the parts in the notes the drawings for them have not been posted. It appears that you have not uploaded drawings 4,5,7 and 10. If this is intentional just ignore me as I am not trying to bug you about it.

Gail in NM
 
This engine is ideal for those of us that like to work small but I am sure it will hit the hearts of all. I have downloaded the posted drawings so far and I am guessing there are more on the way, right? 8) Can't wait!!!!!!
 
Geeeez Gail, that's strange, I got all the prints, don't know why you don't. ??? :big: :big: :big:

All kidding aside, thanks so much for catching that. My mind and my hands don't always work together. Being the notes included these parts I will just add them to this post.

Yes Greg, there are more prints coming. Once everything is uploaded and some of you have time to review and comment on the prints, I will upload the entire package in one PDF file. That will make it easier for everyone.

Again Gail, thanks for all the help. I couldn't have posted any of this without your instructions. Keep an eye on me until this is done.
 

Latest posts

Back
Top