


Harold Lee
Well-Known Member
- Joined
- Apr 23, 2008
- Messages
- 236
- Reaction score
- 2
After completing my Topsy Turvy engine last month I wanted to build something that was relatively simple and would still be somewhat of a challenge. Since I am a huge fan of both Phillip Duclos and Rudy Kouhoupt in their designs I decided upon the Pioneer Engine designed by Rudy Kouhoupt. This engine is a bit unusual in that it is is a two cycle, non compression engine. The intake and exhaust valves run directly off the crankshaft. The timing of the engine is as follows. The intake timing is from 6 degrees ATDC to 78 degrees. At 79 degrees the ignition points open and the ignition/power stroke is from 79 ATDC to 179 degrees. The exhaust cycle is from 180 to 360 degrees.
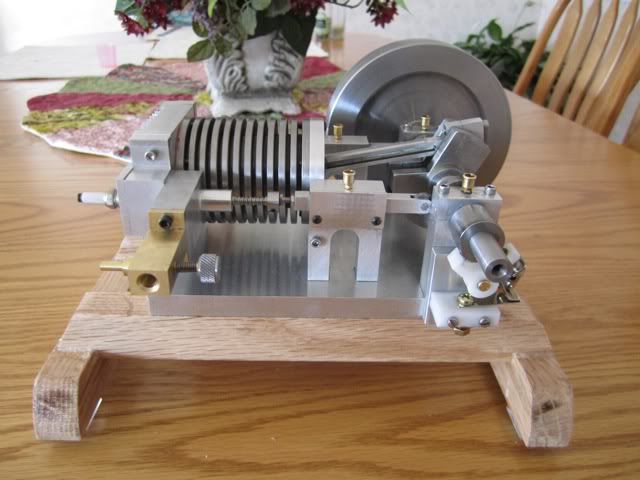
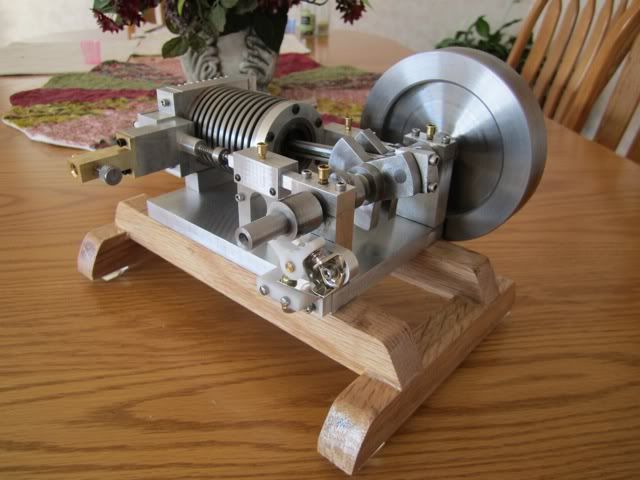
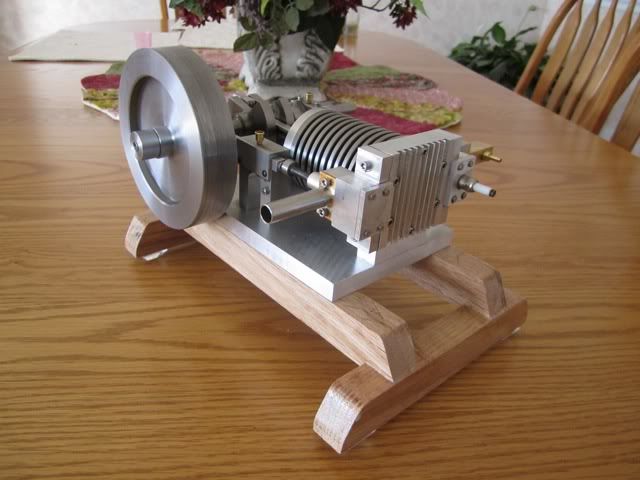
Here are a series of pictures of the completed engine.
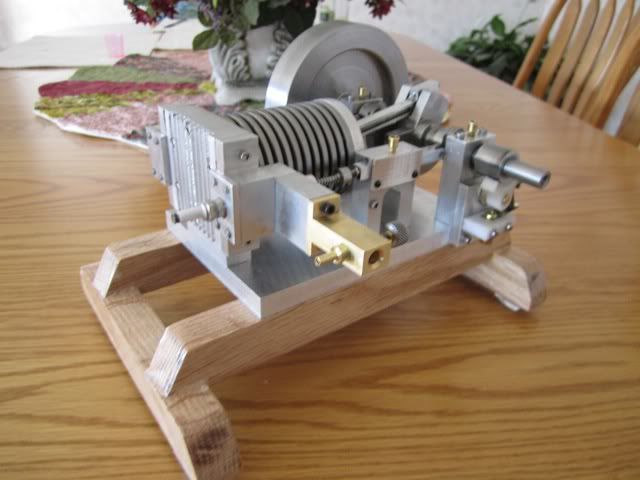
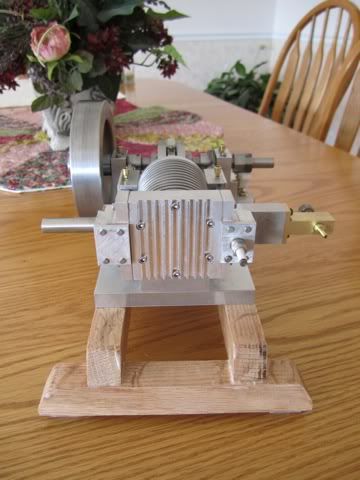
This was Rudy's final engine design before he died in 2004 and in my opinion was different than any other engines/designs that he had done. Rudy had an artistic flair to him and his engines were always very aesthetically pleasing as well as very functional. I believe this was a functional proof of concept engine in that he was trying to develop a concept and this engine was like an engineering prototype and as such had a few shortcomings. Since it fired on every revolution, it ran hot enough to produce a burn if the head was touched. I found that after 5 - 10 minutes of running I would have to put a fan in place to cool it. When I was building the engine I noticed he made a one inch spacer between the intake valve body and the carburettor. I did not originally put this on the engine and quickly realized the engine would vapor lock after a short run. The two gaskets between the spacer block ( as can be seen in the next picture) also acts as a thermal barrier and should be used instead of a silicon based gasket material.
Also there was no provision or mention of upper cylinder lubrication in the construction detail. I mixed in a few drops of 2 cycle oil to the Coleman fuel to provide this lubrication. Due to the very close timing required, the cams have a very fast lift and I found that if the valve springs were not strong enough, they would tend to float and the engine would run very rough. Additionally, I found it a bit fussy to get running since the intake cycle was very short and it could be flooded very easily. That being said it was a very sweet running engine once it was warmed up and the mixture was correctly adjusted, it was enjoyable to watch...
I will post a video of it running later today...
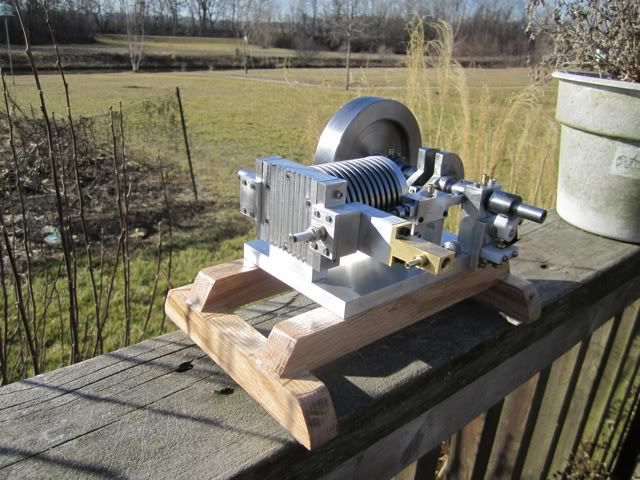
Here are a series of pictures of the completed engine.
This was Rudy's final engine design before he died in 2004 and in my opinion was different than any other engines/designs that he had done. Rudy had an artistic flair to him and his engines were always very aesthetically pleasing as well as very functional. I believe this was a functional proof of concept engine in that he was trying to develop a concept and this engine was like an engineering prototype and as such had a few shortcomings. Since it fired on every revolution, it ran hot enough to produce a burn if the head was touched. I found that after 5 - 10 minutes of running I would have to put a fan in place to cool it. When I was building the engine I noticed he made a one inch spacer between the intake valve body and the carburettor. I did not originally put this on the engine and quickly realized the engine would vapor lock after a short run. The two gaskets between the spacer block ( as can be seen in the next picture) also acts as a thermal barrier and should be used instead of a silicon based gasket material.
Also there was no provision or mention of upper cylinder lubrication in the construction detail. I mixed in a few drops of 2 cycle oil to the Coleman fuel to provide this lubrication. Due to the very close timing required, the cams have a very fast lift and I found that if the valve springs were not strong enough, they would tend to float and the engine would run very rough. Additionally, I found it a bit fussy to get running since the intake cycle was very short and it could be flooded very easily. That being said it was a very sweet running engine once it was warmed up and the mixture was correctly adjusted, it was enjoyable to watch...
I will post a video of it running later today...
 runner Harold. Very Nice. Sounds a lot like the JD model 'D' we used to have, just chugging along. Did you encounter anything "fiddly" or a PIA during the build sequence? I also am a fan of Rudy and Phil D's work but do not as yet own any of their published books. I assume this engine was covered in one of them. Great job and thanks for sharing with us.