TB3 cams

Home Model Engine Machinist Forum

Help Support Home Model Engine Machinist Forum:

This site may earn a commission from merchant affiliate links, including eBay, Amazon, and others.

Metal Mickey

Well-Known Member
Joined
Jul 5, 2008
Messages
612
Reaction score
6
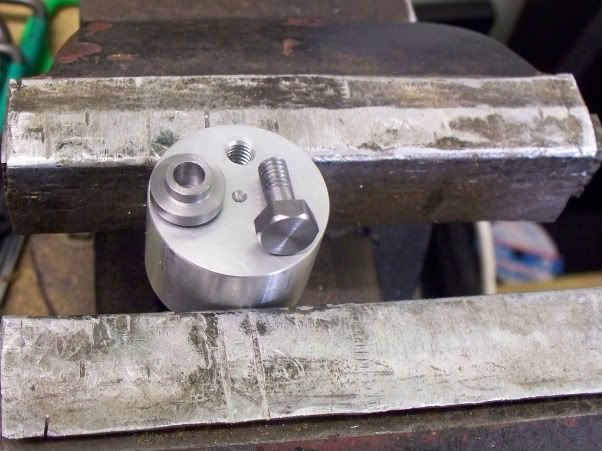
Well I started to set up the procedures for cutting the cams today. To keep the post short I have a more detailed description on my blog or website http:www.mikes-models.com/blog or http:www.mikes-models.com/ however suffice to say I made the first practice blank OK and down to size. The turning fixture was simple enough and cutting the first cuts to get the minimum diameter also seemed to work.

hitnmisscam20092008010-1.jpg


hitnmisscam20092008015-1.jpg


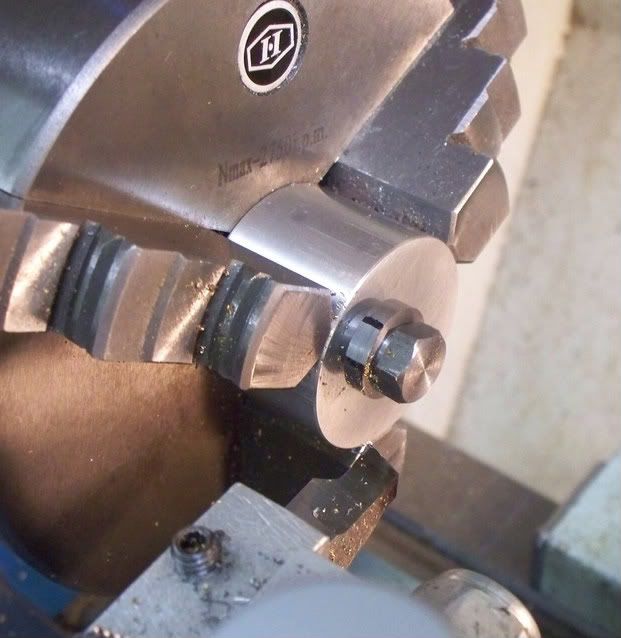
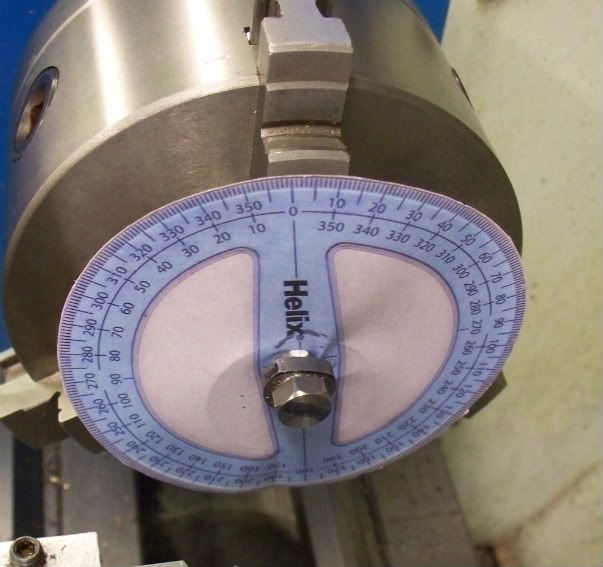
However I mucked up when it cam to moving it around as per instructions of between 5 and 10deg. I moved the fixture instead of the cam! :'( However after a little recovery and further thought on how to manage the turning of between 5 and 10 degree I hit upon the idea of photocopying a 360 degree protractor I have. With a little white correction fluid on the cam and a light scribe mark, the position of the cam in relation to the chart should be OK. Tomorrow time will tell!

hitnmisscam20092008036-1.jpg


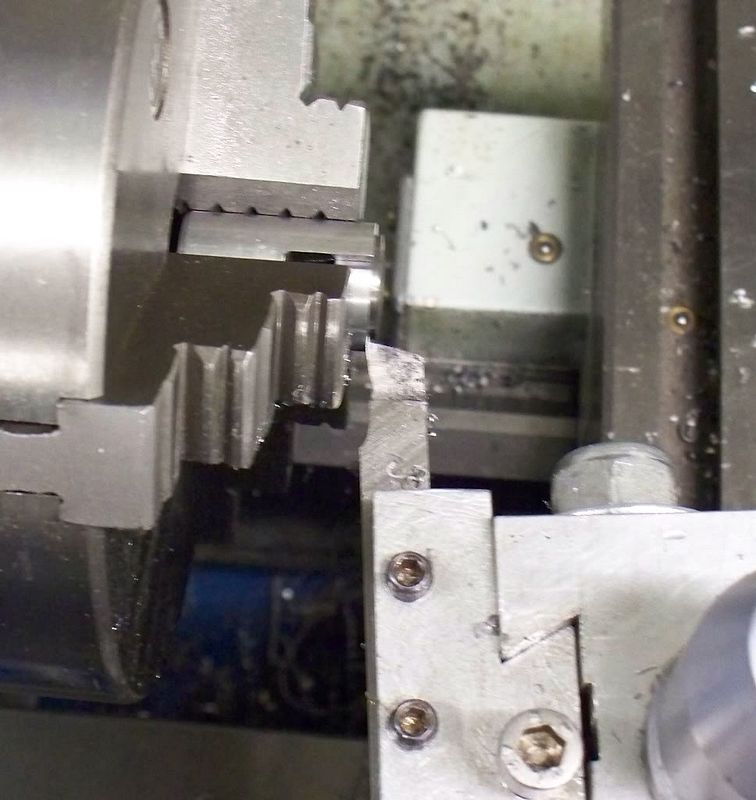
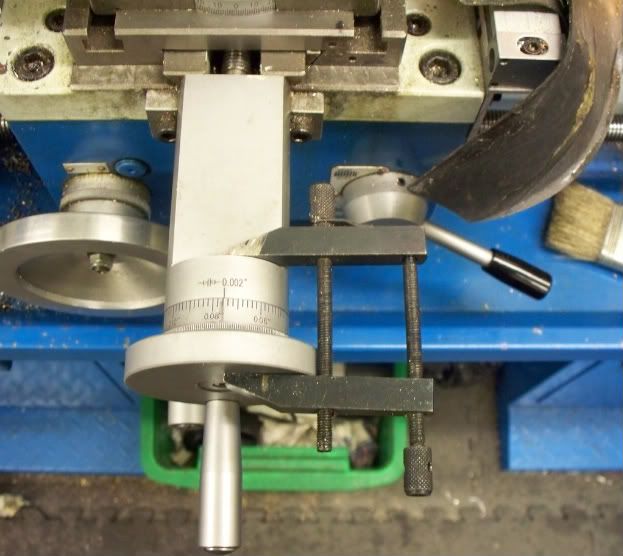
However one question if you can help. The turning of the cams requires the cross slide to be secured at the correct position. I have looked on my cross slide but do not see an obvious method. So I have improvised as in the photo below. Is this the best way, or am I missing something?

hitnmisscam20092008019-1.jpg


Can you tighten down on the gibs? That should lock it up pretty good.
Of course, you'll have to readjust them when you're done.
 
the method you are using to lock the top slide looks good to me, or tighten one of the gib key adjustment screws (as mentioned by ksouers)

the method you chose to turn the cams is very simple and it works well, i have used this method on most of the engines i have built.

glad you decided to join in on the fun ;D

chuck

 
I thought about the gibs but don't really want to disturb them as the machine is relatively new and runs nice. I may not get the adjustment back exactly the same.
 
Mike,

There are usually at least three gib screws. Just tighten up on the centre one, doesn't need any more, then dead easy to readjust when you are finished.
Actually some people drill another gib screw threaded hole, towards the centre, and fit it with an extended screw with a 'tweak' handle on it, just for such a job. You then don't lose any adjustment at all.

John
 
Mike,

Like John said...I keep meaning to make a handle for that center gib screw.

It would keep me from looking for the allen wrench..

Dave
 
Thanks for the advice. I will go with the new centre drill solution as I like the tweak handle! Many thanks for the advice. It will be acted upon.

Thanks Mike.
 
Well I finally have returned home on Sunday last. Since then I have been building up my workshop sessions gradually. Whilst I was away I thought it would be nice to make a couple of little 'wobbler' engines from plans in the American magazine, Model Engine Builder ttp://www.modelenginebuilder.com/. These are going to be Christmas presents so they won't go on my website until after Christmas in case they are seen by the recipients! I am starting a new thread on here though showing the builds.

The reason I started on these little engines was to get back into turning 'things' before the accurate work on the cams restarted. Today I continued to make the blanks and hope to finish the cams in the next two weeks. (delayed a little now as I have started on the two little engines!).

So the picture below shows the state of play of the team build 3 cams as of today. The cam already made is a practice one and not the finished article.

wobblerengines003.jpg


Well I have part completed the 15 (plus a spare) cam blanks. The next stage is to turn the cam to 0.140" thickness with the 40 thou ridge. To clean up this second side I have made a holding fixture which allows me to turn the blanks cleanly and to the same dimensions.(second photo).

fowlerandcams15112008019.jpg


By fixing the position of the cross slide I can reset the position of the fixture at the end of the topslides travel.

fowlerandcams15112008020.jpg


So the next phase tomorrow will be to get the blanks finished ready for cutting the cam profile.

What happens when I have finished the 15? Do I post them to one place or each individual team 3 member?
 
Metal Mickey said:
What happens when I have finished the 15? Do I post them to one place or each individual team 3 member?

Powderkeg will doing up a mailing list for everyone. You will be mailing several individually and 1 as a set.

Eric
 

Latest posts

Back
Top