TB2 - Cylinder Shaft-2

Home Model Engine Machinist Forum

Help Support Home Model Engine Machinist Forum:

This site may earn a commission from merchant affiliate links, including eBay, Amazon, and others.

kustomkb

Project of the Month Winner!!!
Project of the Month Winner
Joined
Dec 14, 2007
Messages
1,181
Reaction score
31
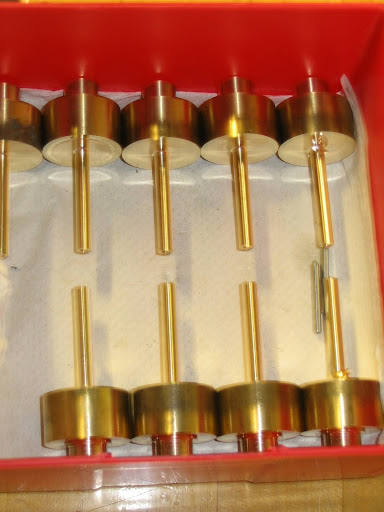
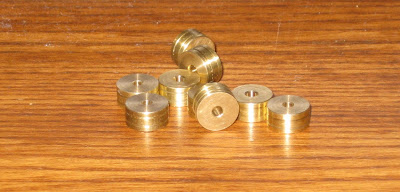
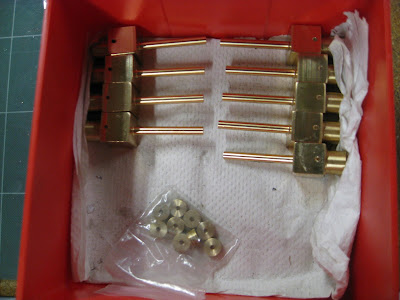
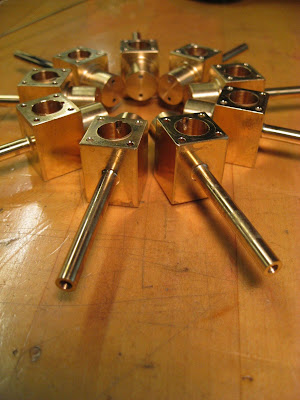
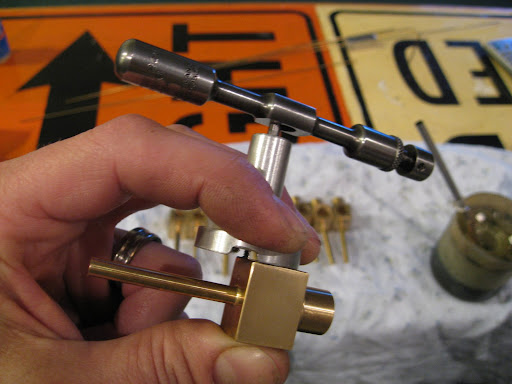
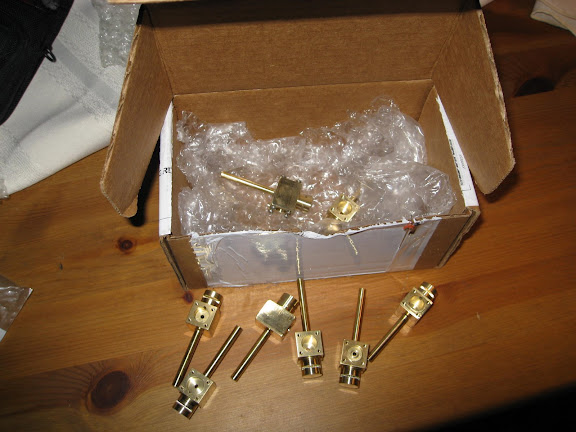
Got a chance to cut up our material today. Hopefully I'll only need the one spare. ;D
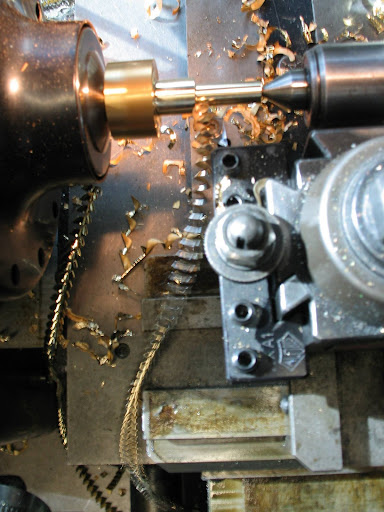
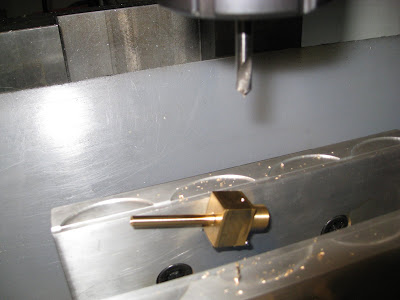
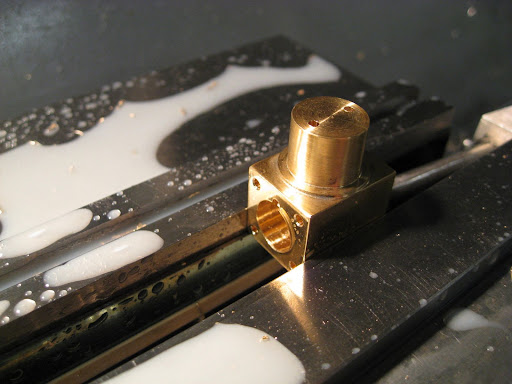
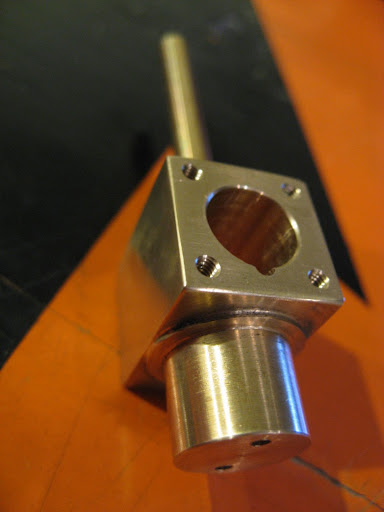
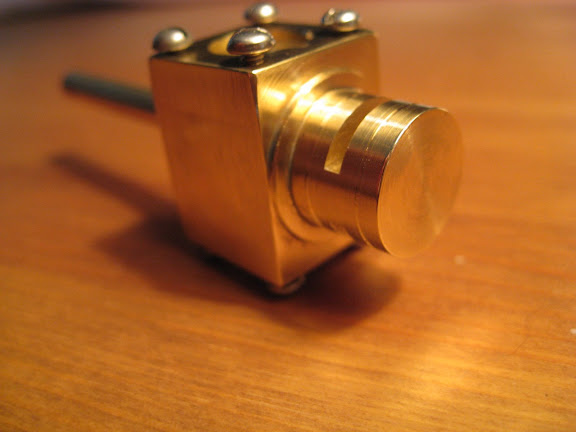
I thought I would turn the half inch journal first, then the 3/16 shaft dia. And then square it vertically in the collet block.

-Kevin.
<a href="http://picasaweb.google.ca/kustomkb/Coomber/photo#5236421455041519218"><img src="http://lh4.ggpht.com/kustomkb/SKuBkdH73nI/AAAAAAAAAGI/kFvVw6fpBxU/s400/IMG_2137.jpg" /></a>

<a href="http://picasaweb.google.ca/kustomkb/Coomber/photo#5236421481407478402"><img src="http://lh3.ggpht.com/kustomkb/SKuBl_WEeoI/AAAAAAAAAGQ/L9rC1-ppbKY/s400/IMG_2141.jpg" /></a>

 
Good start there, Kev.

It's going to be interesting to see the two different approaches to building this component.


Thanks Kev.

I was playing with some sketches to make the angle fixture you described here;

http://www.ksouers.com/shop/shop/tn_angle_15_1.jpg[/img]]http://www.homemodelenginemachinist.com/index.php?topic=2390.0


Then thought of using pins located in the soft jaw of the vise to set the angle like something that I saw in a magazine.
Anyways, we'll see how it goes..

Turned the half and five eighths journal today;

http://video.google.ca/videoplay?docid=6373285722178947814&hl=en-CA

<a href="http://picasaweb.google.ca/kustomkb/Coomber02/photo#5236779232712747650"><img src="http://lh4.ggpht.com/kustomkb/SKzG92z8aoI/AAAAAAAAAG0/j7kRHH0KnQs/s400/coomber 001.jpg" /></a>

Cheers.

 
Nice video! You sure do move fast!!!!

Interesting position for the camera, makes it look like the headstock is moving.

Can't wait to see the next installment. This is going to be interesting.
 
ksouers said:
Interesting position for the camera, makes it look like the headstock is moving.

Actually if you watch very carefully you'll see the whole background move too. Neat idea, instead of moving the tool post, why not move everything else. A whole new machining concept. :big: :big: :big:

Bernd
 
Looking good Kevin. Things are starting to come together.
Gail in NM,USA
 
Thanks all,

I roughed out the 3/16 shaft dia. with 4 passes from 1.125 to .200

Hopefully tomorrow I can get the finish pass and shoulder turned.


1.jpg
1a.jpg


3.jpg
6.jpg
 
Hey Kev, those a looking good.

Now comes the fun part, all those itty bitty holes ;D
 
Thanks guys, Yeah, thats a lot of 2-56's comming up.

Cracked off a few pistons today, Left them a little large so everyone could fit them to their own cylinders,
Then with a few left to do I says to meself; "you clown, you are the guy making the cylinders!"
Wanted to try an external honing or lapping set-up like Maryak recently showed us anyways...

whistle%20006.jpg


Cheers,

Kevin.
 
I drilled the angled holes today;

I drilled and installed 1/8 pins in a soft jaw to locate the piece at the correct angle;

coomber%20op%205%20002.jpg
coomber%20op%205%20004.jpg


coomber%20op%205%20010.jpg
cylinder1.jpg


Then drilled away!

http://video.google.com/videoplay?docid=-3061904143805936400&hl=en http://video.google.com/videoplay?docid=-2603323957241871816&hl=en

cylinder2.jpg
coomber%20op%205%20006.jpg


Just 99 more holes to drill, 72 holes to tap, 9 bores to lap, 18 slots to mill and 18 holes to plug. And we're ready to ship. ;D

Would a big box store carry 1/16 brass brazing rods? probably need to find a welding supply outfit eh?

Till next time,

Kevin.

PS, in the first vid you can see I have a ring on, major no-no around machinery. :-[
 
Now that was an interesting solution to the angle problem! :bow:

I couldn't find any 1/16 inch at the box store, didn't want to wait for an order. So I just drilled the front holes 1/8 inch and plugged and soldered. Just made a shallow hole, just deep enough to reach the slot. When I slotted them you could see the small hole on one side and smooth were the plug is.

Course, I had to face the front side again :mad:
 
Thanks, and for the tip, 1/8 might be the way to go, I left .010 on the face to skim after installation hoping to make the pins invisible, we'll see how it goes,
 
I've got the holes drilled;

Flooring%20003.jpg
Flooring%20020.jpg


And I found 1/16 brass at the local hobby shop and made a jig to cut the plugs to length;

Flooring%20024.jpg


I can see the finish line now :) just the holes to plug, slots and tapping to do.
 
Lookin' good, Kev.

Are you planning to solder the plugs in or just press-fit?
 
Thanks Kev,

Just had a relaxing morning tapping some holes on the couch with a coffee and the local news;

tap%20holes%20001.jpg
tap%20holes%20010.jpg

tap%20holes%20009.jpg


Then I installed the plugs with a drop of crazy-glue. I slid one plug in without glue to check the fit, and went too deep and couldnt get it out with 80 psi shop air. Had to get a thin wire to bend around to push it out. After facing and slot milling those pins aint gonna go nowhere.

My spare has come in handy; dropped it after finish turning (.005 shaft runout), polishing;(shot out of my hand), pin test fit;(as above); :p

few slots and we're shippin' them out!


Got the plugs in, face skimmed, slots milled;

coomber%20slots%20007.jpg
coomber%20slots%20008.jpg


coomber%20slots%20009.jpg
coomber%20slots%20010.jpg


All ready to ship! sorry about the slotted screws, (all I had in my stash)

Cheers,

Kevin.

 
Back
Top