Stuart No. 4 build

Home Model Engine Machinist Forum

Help Support Home Model Engine Machinist Forum:

This site may earn a commission from merchant affiliate links, including eBay, Amazon, and others.
Whatever gets it done is the right way! Well done! :bow:


Nice setup.

Dave
 
Andrew: the lathe/mill is an Emco Maximat "Standard" (1961/62):


It's actually a mix of two machines (I swapped in the less worn bed).

It's great for a combo machine (all I have room for), but it's a real pain that the table is so narrow. It makes setups really tricky sometimes, and I can't even fit a decent vise on the table (like a D30).

Simon
 
Thank Simon!
Looks like a great combo machine.
And it looks to be in near perfect condition too!!

You do great work on those machines!
Keep it coming!

Andrew
 
Hey Simon!

I'd like to second Andrew's comments. You have come a long way for a "new guy". You prep and execute like a pro.

Well done!

Dave

 
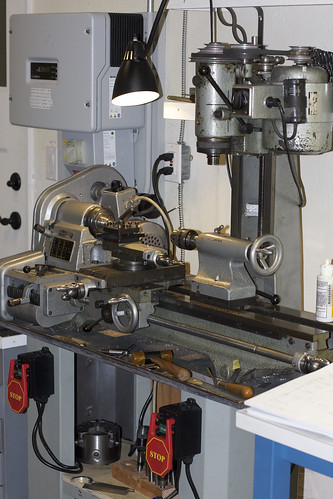
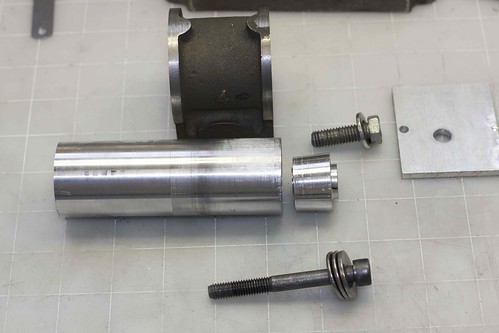
Did some work on the cylinder today, and in the process, discovered an error in my machining of the standard :mad:

When I bought this casting set, it came with a photocopy of the original plans (dated 8-12-53). Since parts of those were dark and hard to read, I bought a new set of plans from Stuart Models, which, of course, go with the more modern castings. Well, it turns out that some parts have changed!

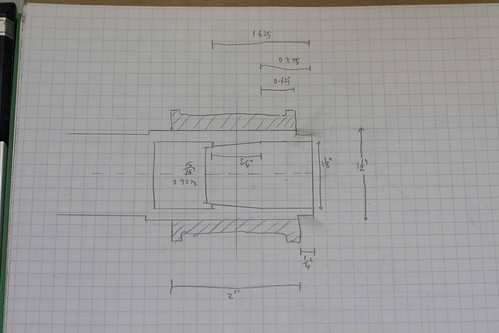
The 1953 cylinder is 2" long, whereas the modern one is 2 1/8" long. The 1953 cylinder flanges have a 2 3/8" diameter, and the modern one is 2 9/32", etc.

What this means is that my cylinder is too long, and the top flange on the standard is a bit small. Nothing I can't make up for, but annoying nonetheless :-\

Anyway, on with the build. I'll work from the old plans from now on!

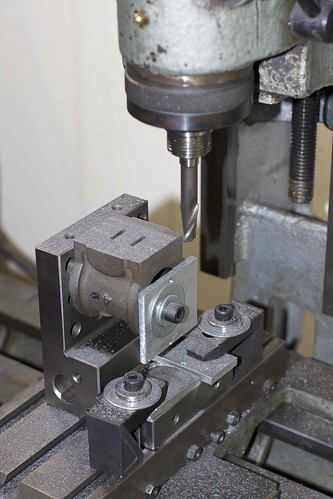
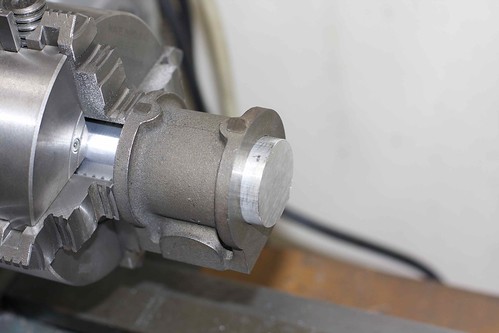
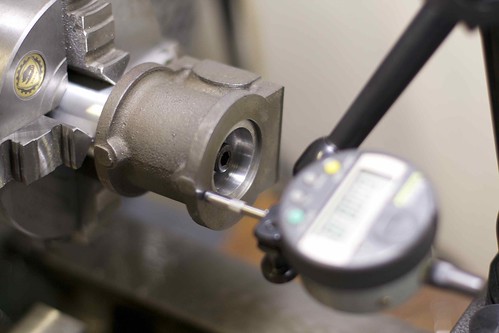
The cylinder was chucked up in the 4-draw, and the non-critical top surface faced off. Then I flipped it around, taking care to seat it so that the ends would be parallel, and faced the bottom end, taking it close to what I thought was the correct length ;) [Not enough care taken, apparently; the ends aren't parallel, but the bottom end is perpendicular with the bore, which is what matters.]

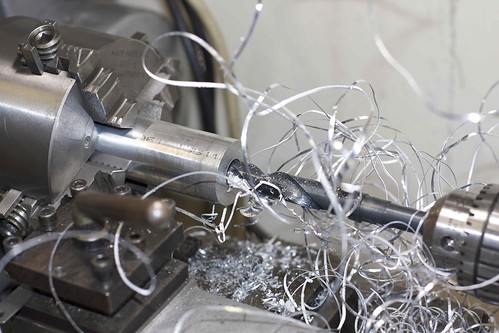
Without removing it from the chuck, I then did the bore with a boring bar with carbide insert. I was trying to hit about 1.498", but I think I ended up with the tool just rubbing when I was trying to take the final few cuts. Still being undersize, I went to remove another thou, and the tool then started taking off material again, resulting in a bigger cut than I wanted. It ended up around 1.499" before lapping:


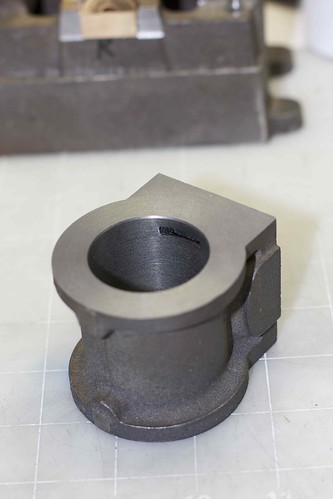
Not a great finish or diameter, but not too bad.

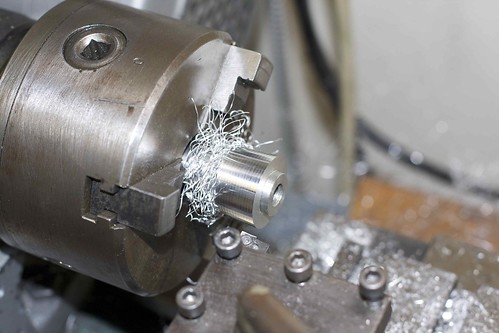
I'd earlier splashed out on an expending brass lap for this build, so then spent some time lapping the cylinder with 3 grades of diamond paste:


The cylinder is held by hand and gentled moved to and fro, so the lap extends about half way out on each side, trying to avoid making a bell-mouthed bore. After perhaps 45 minutes of lapping, and 3 grades of paste, the result is reasonable:


and measures about 1.502".

I think to get a really smooth finish I'd have to go to about 1.505", and it would take forever with a lap. Maybe a cylinder hone would be better for this? I would also worry when going much larger about whether the piston rings will still fit OK. I think I'll leave it as-is for now.

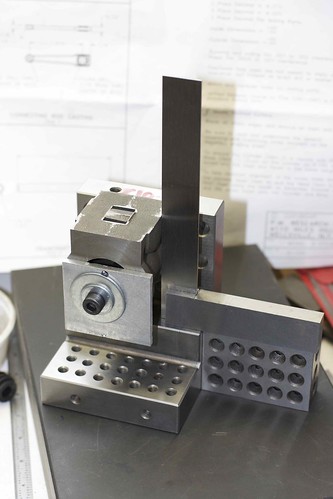
So, because of my plan mix-up, I need to take 1/16" off each end of the cylinder. I'm going to have to be really careful to keep the bottom face perpendicular to the bore, so I'm thinking of making an arbor, and using that to trim the ends. Hey, at least that lets me correct the non-parallel ends :)

 
I also cleaned up the port face today. First I set up the cylinder on a nice angle plate that I got recently, with the base of the cylinder against the plate, so that the face is parallel with the bore:


Not ideal workholding with with just one bolt, but it worked fine. I'm using the square to set the rotation correctly.

I also left a bit of cylinder bore peeking out so that I can pass a small bar though that and through a hole in the plate, which lets me pick up the top of the bore with a height gauge. I can then use that to scribe a line so I know how much to take off the face.

Over on the mill, I used a older end mill to get through the crust, then a sharper one to take it down to final level:


That was it for today.

Now the plans call for the cylinder flange diameter to be reduced to 2 3/8", and they should flow nicely in to the inlet and exhaust port faces. I guess I'll trim up the flanges using a rounding table, but blending with the faces is going to be tricky! Also, the ports in the casting are already a bit oversize, so I'm not sure how to account for that in cutting the exhaust port.

It's too bad that the top of the standard is 3/32" undersize because of my earlier boo-boo with the plans, but I don't think I want to reduce the cylinder and cylinder cover diameters to match. Or do i?
 
smfr,

If you need to take the cylinder flange down and you want to maintain squareness to the bore, make up an expanding mandrel or a tapered mandrel and pass it through the bore and set up between centers.

Then you can face both sides if you like.

Nice looking bore from here! :bow:

Dave

 
hi simon :)

as others have said "looking good" 8)

one word about the lapping, it was explained to me that one should not use diamond paste as diamonds are for ever.
meaning that the diamond grit can and will get embedded into the cylinder wall and can cut into the piston/rings as the piston travels back and forth.i would guess that very good cleaning of the bore would prevent this from happening. :shrug:
i am not an expert by any means but that is what i was told and i am sure some one on here will know for sure.

keep up the good work and i look forward to the next progress report.

chuck
 
As long as the lap is softer than the item to be lapped, the diamond will bed into the softer lap and not the cylinder. I think with a brass lap and a cast iron cylinder your fine smfr.


Having said that, make sure you clean the bore well when your done!

Dave
 
Looking good Simon, keep the input coming. I like it when you point out the mistakes its more learning on my part. I have just purchase the same lap you were using, are they any good? I have not used mind yet but a I was planning on using them on a bronze cylinder, but reading what Dave said I don't think it is a good idea now.
Have not seen any photos on the boring of the pillar block bearings,have you done them yet?
 
Don,

You could try a soft aluminum lap and some silicon carbide lapping paste. Like Clover.


Dave
 
Thanks Dave that is what I had intended to do after what you had posted. That is what I used on my last engine. I learned something here that I never realized thanks to you. I have only built three steam engine the one in my profile was my second.

Don
 
Hi Don

I haven't done the bearings yet. Rather than bore, I was planning to drill and ream them, although that requires that I make the crankshaft spot-on ;D

I'm waiting for the reamer to arrive, so I haven't tackled that yet.

Simon
 
Simon

Thanks for your well explained build log. I assume you bought the brass lap from the UK. Could you tell me from where please?

Vince
 
Simon

Thanks all the same. For some reason I assumed you were in the UK. I can't seem to manage to find something like that in the UK.

Vince
 
It's looking very good Simon.

I'd like to concur with Chuck re the diamond paste and lapping. I've done quite abit of lapping using normal abrasive - silicon carbide etc and have various grades of diamond too. The information I have always been guided by using diamond is that diamond paste will bed into 'soft - ie unhardened metal - and conventional cleaning - ie solvents - can leave traces which will wear a piston/ring if fitted. If it is used then using an ultra sonic cleaner is the recognised way of ensuring all traces of diamond are removed.

Re your comment on honing - unless you have access to a honing machine honing using the sprung loaded two or the three stone brake cylinder hones will certainly improve the finish but will take a long time to remove even a couple of thou with the attendant possibilty of bell mouthing the bore.
Personally if the finish is acceptably smooth I would make the piston to fit the bore - about 2 thou down on diameter - and if the engine is not to be worked hard on steam just use square section PTFE packing as a ring. Unlike an O ring this will create it's own seal with fairly open tolerance. I have had very good results using this method, superb piston seal and compression with minimal friction and great longevity but whilst I have run them on semi dry steam mainly they have only run on air ;)

Hope that's of help - Ramon
 
Simon ,so far your works looks nice as always.
For Lapping I have used a product called Timesaver Lapping Compound according to the label it's "guaranteed not to imbed in metals" , and "guaranteed not to continue to cut" . I bought the yellow label stuff and it states "for soft metals only". Jeff
 
Today I made an expanding arbor to use for trimming the cylinder casting down (I made it too long after reading the modern plans, which are different from the older ones).

This was my plan for the arbor:


There's a tapered section of the bore, to take a tapered plug that would push out the sides. The drawing doesn't show it, but I had an M8 bolt going down the middle, which I could clamp down.

Luckily I had a bit of 1.5" Al stock lying around, but I only had to skim it before the cylinder slipped on. I wish I'd had a bit more to remove:


Once the outside diameter was close, I started on the bore. Time to get out the big drills :)


After drilling to 7/8", I used a boring bar to do the rest of the bore, leaving material for the taper. It was a pain to get behind that shoulder, and a lot messier inside than in the diagram. Oh well, no-one will see it ::)

Lastly I set my compound to about 7°, and did the tapered section. I then removed the chuck, with the workpiece still in place:


Then I put in the 3-jaw and do the plug. Here I'm cutting the tapered plug to the same taper as the arbor:


The plug was a bit of scrap that was already tapped 3/8", which was fortuitous; I drilled it out to 17/64" for clearance for an M8 bolt, but that left enough of the 3/8" thread that I could screw in a 3/8" bolt to pull the plug out of the arbor. Here are the final bits:


I was expecting to have to cut slits, but actually it expanded just enough to hold the cylinder without them. So, finally, I could slip on the cylinder, tighten it up, and work on the cylinder. I checked the previously "good" end to see how far out it was, and saw less than half a thou wobble on the end.


I don't think it was that good after I'd done one end and flipped the cylinder around; I suspect that not being able to skim more off the arbor allowed the cylinder to sit slightly askew. I'll be careful to find the "best" end, and make that the one that attaches to the standard, since being perpendicular to the bore is what matters.
 
Back
Top