Starting Mini-Lathe Mods

Home Model Engine Machinist Forum

Help Support Home Model Engine Machinist Forum:

This site may earn a commission from merchant affiliate links, including eBay, Amazon, and others.
Chuck, that is a fine collection of mods to the (former) 7x10.

Nice work. Almost wish I had not got rid of the 7x I had (almost :))
 
Thanks for sharing/showing your tool post mod Chuck, it's brilliant! The design is so simple.

Buying a quick change post has been on my ever growing list of new bits for the workshop, but making one (and I've got the right sized chunks of aluminium lying around) will be much more fun and satisfying.

You've inspired me!

James.

 
Sorry I missed all this Chuck. Looks like a great job and a useful lathe!

Dave
 
Thanks, Dave. Even though I have a good Logan, 11.5" lathe with lots of attachments, this mini is my goto lathe for small parts when I need accuracy. With my version of the set-tru chuck, I have less than .001" runout and the diamond tool bit is easy to sharpen and a joy to use. If I ever have to downsize my shop, the min-lathe is the one I'll take with me. Need to work on that tailstock, however. I'm completely disatisfied with the base, too small.

Chuck
 
steamer said:
What's the plan? New base?

Dave

Yeah, I've been noodling around the idea of a new base. But I haven't gotten serious about it yet.
 
Yeah, I've been noodling around the idea of a new base. But I haven't gotten serious about it yet.

Well when you decide to make a new tail stock, make 2 and send one to me ;D I have never been happy with the tail stock on my 7x12. In fact, imo, it is the weakest part of the whole package. I agree with what so many of the guys have said here, that with some mods a mini-lathe can really be a great little machine. But my tailstock has always seemed to me to be a little iffy on repeatable centering accuracy (did that make any sense?) and the adjustment for it is a nightmare.

Does anyone know of a good way to really spruce up the tailstock on a mini, or is there an aftermarket avaliable for sale?

Chris
 
Chuck and Chris,

This is the mod I did to my tailstock.

Tailstock1.jpg


Tailstock2.jpg


It helps to make it less wobbly, but there was a taper in the thickness of the bed and I had to use an inverted flycutter on my mill to cure it.

The first mod I did was to the cross slide handle, the capscrew was catching my knuckles so I fitted a modified csk screw. The fixed handle was too short so I made a rotating PVC one.

Handle.jpg


Ian

 
Not to bring up an old post...but I'm making one now !! Question is how deep did you make the bracket cut? How much did you take off the gib> Looks like you made them so they are even with each other...is that correct ?? Thanx again... V 45


I'm getting along pretty well with my tapered gib upgrade. I'll post the last picture first so you can see what I'm trying to get to.

737d0183.jpg


The clamps are made from 1/2 x 3/4 inch aluminum 4 inches long. The next picture shows me milling out the side where the brass gib will fit. I've lifted one end of the clamp and propped it up with a 1/16" thick piece of aluminum to create the angle. Should be somewhere around 1 degree, although the exact angle isn't critical. Here you see the first pass removing .050".

29d28e43.jpg


In the next picture, I've finished the clamp and am using it as a base to hold the brass gib while I mill it. By using the clamp as the base, I am ensuring that the gib taper will exactly match the clamp taper. Note that I've removed the 1/16" piece of aluminum and mounted the clamp in the vise with the base flat.

97edada8.jpg


Despite my initial misgivings, I have to say that so far this project has been a piece of cake.

Chuck
 
I believe the depth of the goove on the clamp is a little under .25" on the deep end. The gib is .25" on the thick end and probably around .14 on the thin end. If you start with .25" thick gib material, you want to make the groove something less than .25" so the gib will contact the bottom of the way before it's pushed all the way into clamp.

Chuck
 
Chuck, are you still happy with your tool post? Would you change anything on it, I'm thinking of scaleing it up some. I do like the look of it very much. Thank-you!
Mike.
 
Chuck, are you still happy with your tool post? Would you change anything on it, I'm thinking of scaleing it up some. I do like the look of it very much. Thank-you!
Mike.

Yes, I still use it most of the time. I just made a new, general purpose holder to hold 1/2" square tool bits and other accessories.

Nothing I would really change. The 1" diameter post seems plenty rigid. I think I will change the tool holder clamping screws to recessed socket head cap screws. Less stuff sticking out and the 1/4" hex head bolts I'm currently using are crap. The heads are so thin it's hard to get a purchase on them with a wrench. I also just bought a bunch of wave washers so I can now set up the height adjustment nuts properly. I'm going to post some follow-up pictures of changes and additions I've made since my last post here.

Chuck
 
Fascinating! I have a mini lathe with many mods as well, but I think all of them are different mods to yours!

The next one is to marry up a 0.4kW 3-phase motor and inverter. I already have a layshaft fitted, but I want to upgrade to a poly-v belt at the same time.

Neil
 
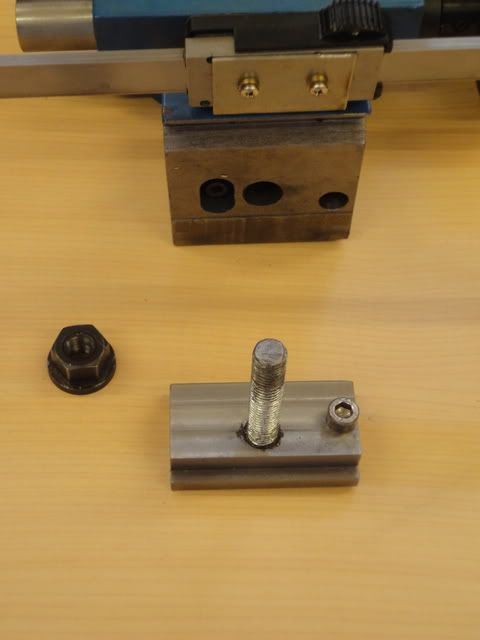
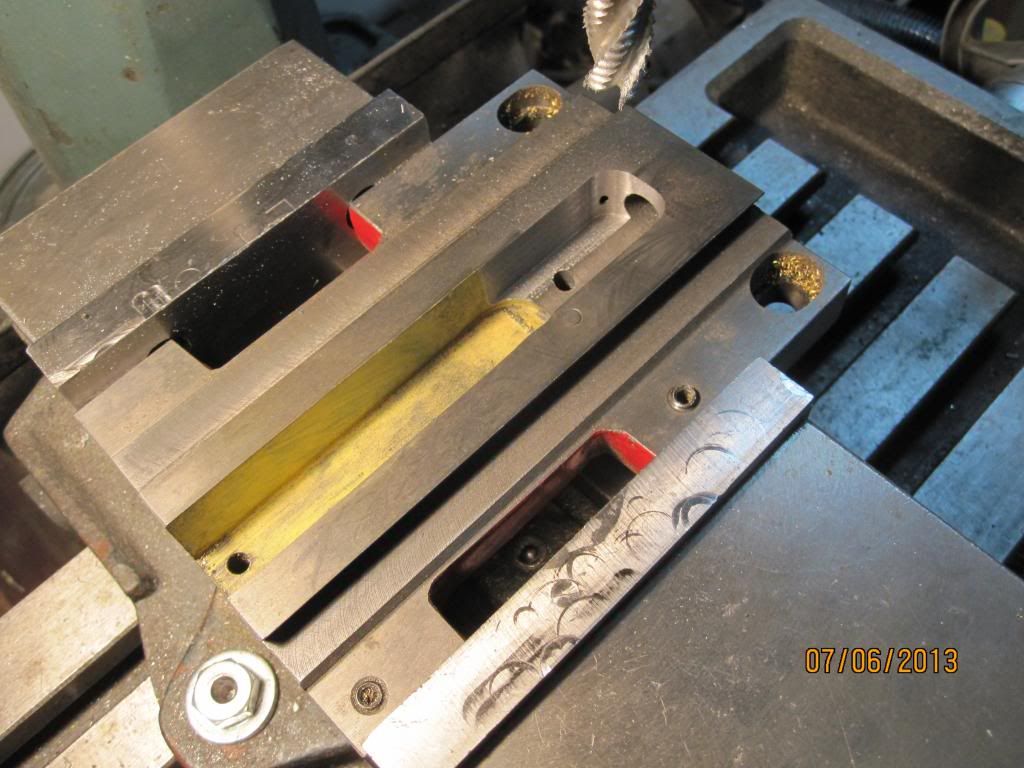
I got inspired this morning to do some more work on the minilathe. When I did the original mods some time ago I had added a spacer on the cross slide screw to allow me to move the toolpost further out from center. This worked to a degree, but the outward movement was still limited by length of the channel in which the cross slide nut travelled. So, I took it all apart this morning and cut out another 1.25" which has added another inch of outward travel.

IMG_2855_zpsfd3bf094.jpg


I used a 1/2" roughing end mill for the task. Now the lathe is all back together and ready to work.

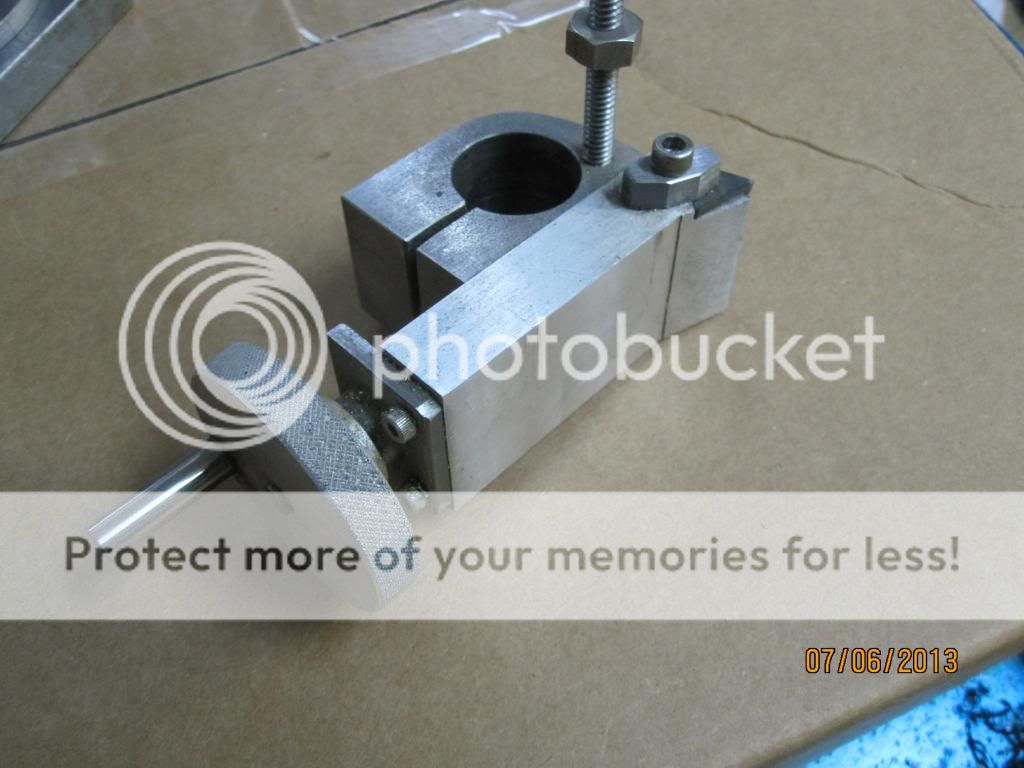
Here are the attachments I have for the lathe at this time. There is some repetition from earlier posts.

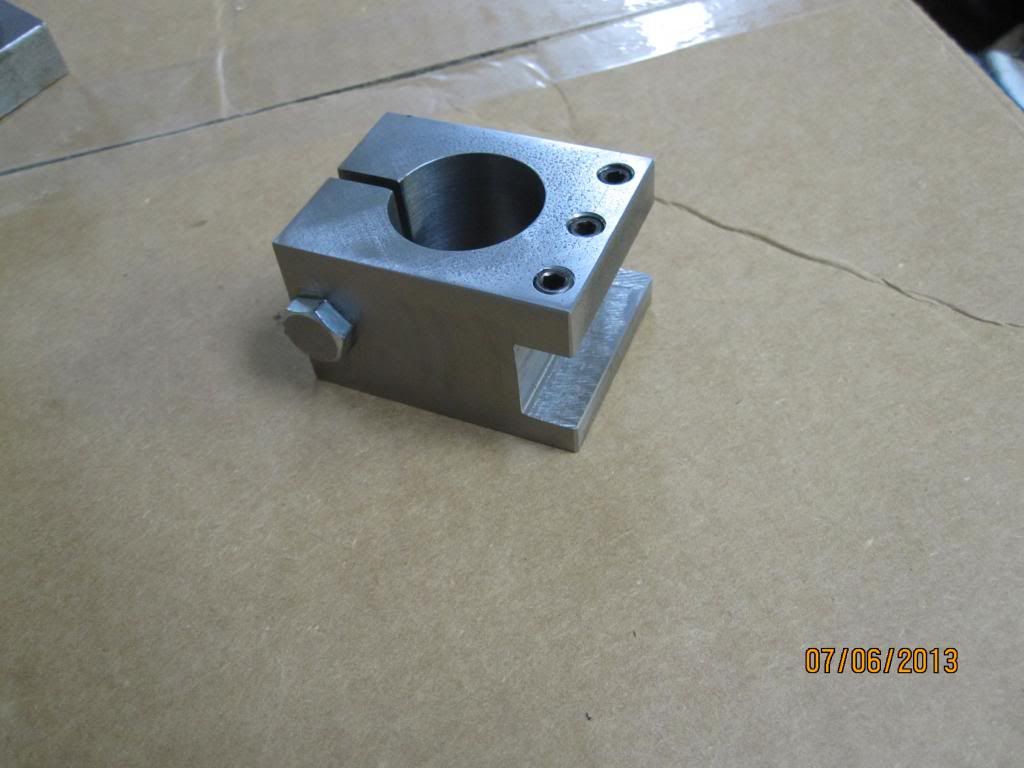
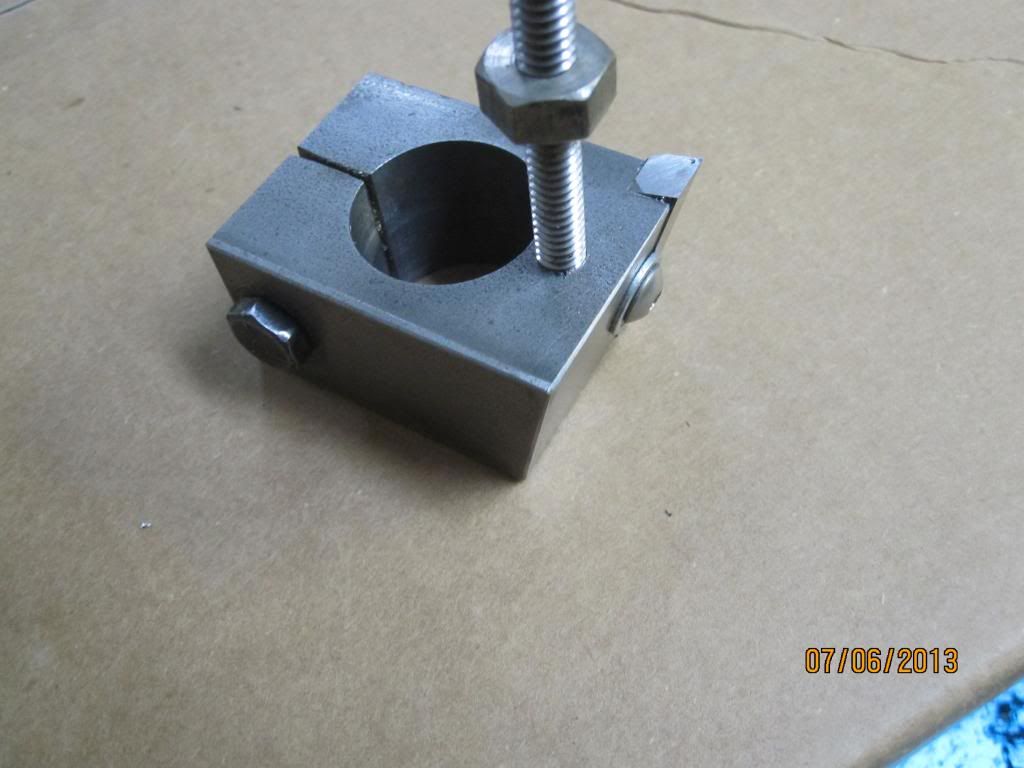
First is the 1/2" too holder. I need to replace the set screws with socket head cap screws...

IMG_2856_zps7fc7f391.jpg


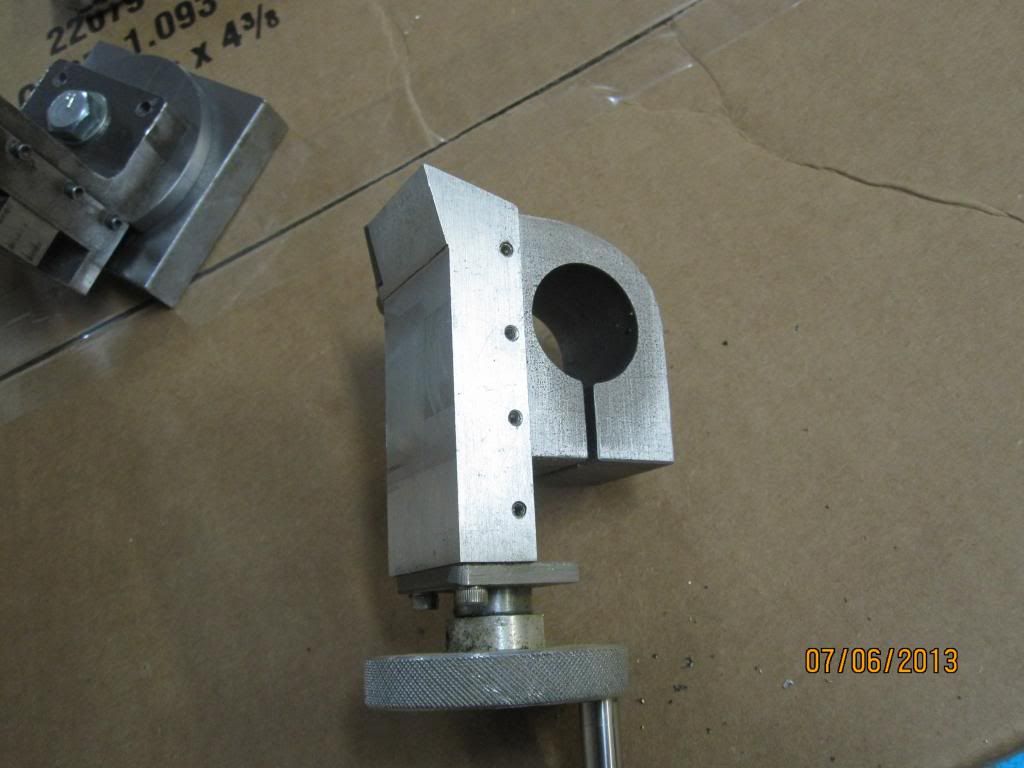
And here is the diamond or tangential tool holder I made.

IMG_2857_zps92d17054.jpg


This is the compound I made which takes carbide insert and fits on my quick change tool post.

IMG_2858_zps8c6fea5a.jpg


It occurred to me today that I could simply cut a shelf and dill and tap a clamping screw holder on the other side to hold a second carbide insert and I would have a reversible compound. Think that 's going to be next on my list.

IMG_2859_zpse2a4298f.jpg


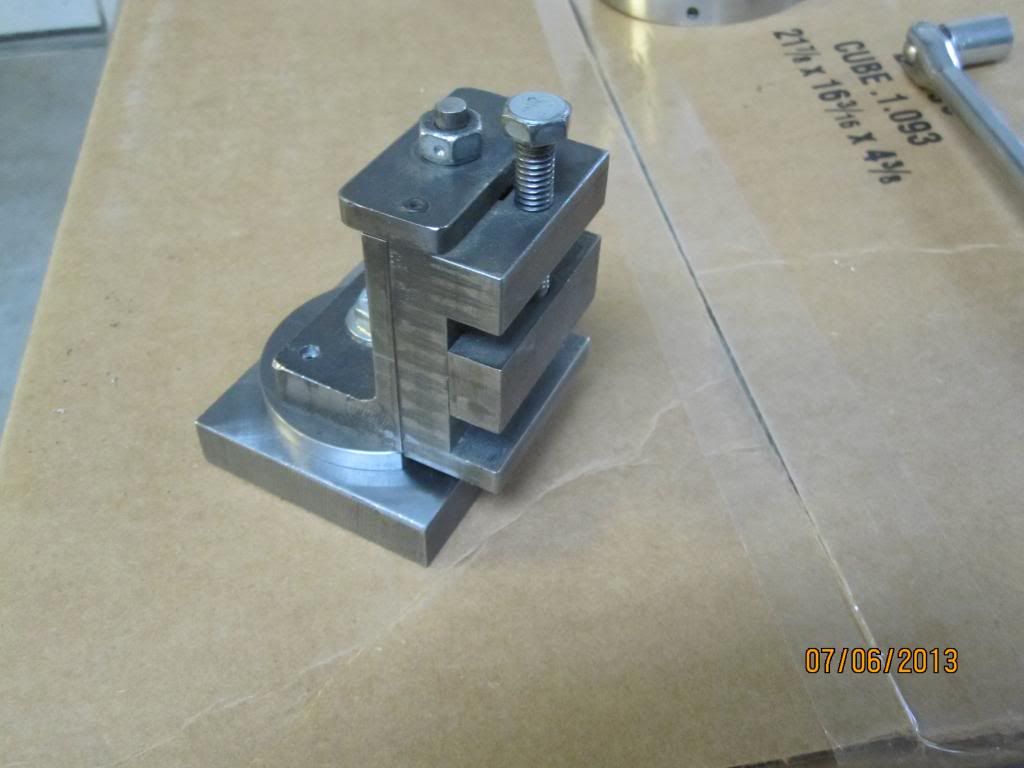
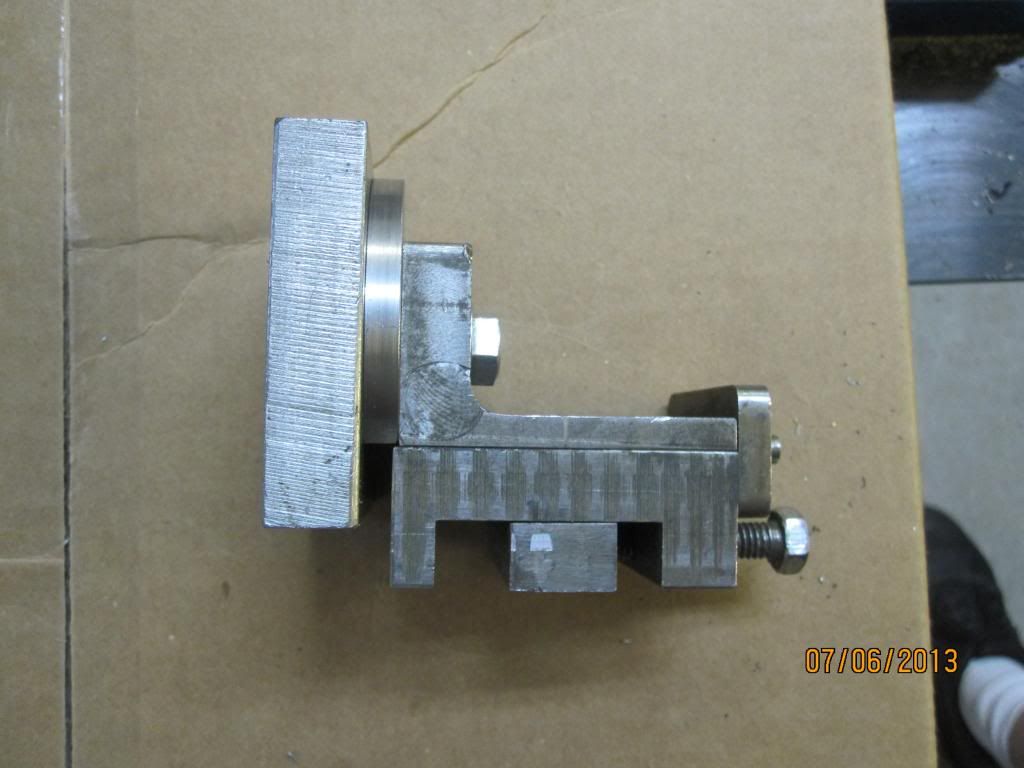
This is a small milling attachmet I had made a number of years ago for my Logan lathe Here I've made some modifications so it fits on the cross slide of my mini lathe. Mount this does require removing my QCTP since this mounts directly on the cross slide.

IMG_2860_zps2143369c.jpg


IMG_2861_zps044af80d.jpg


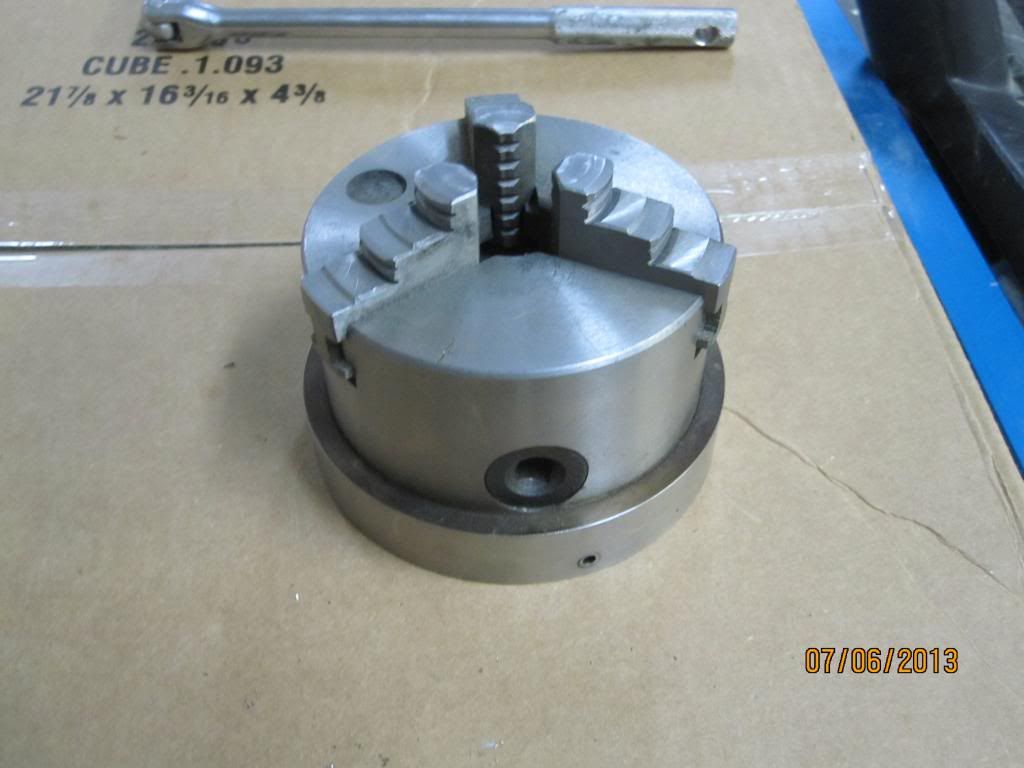
This is a 4", 3 jaw chuck I can mount on the lathe. The steel ring with set screws around the back of the chuck let's me adjust run out to near zero.

IMG_2864_zps01b4a6b7.jpg


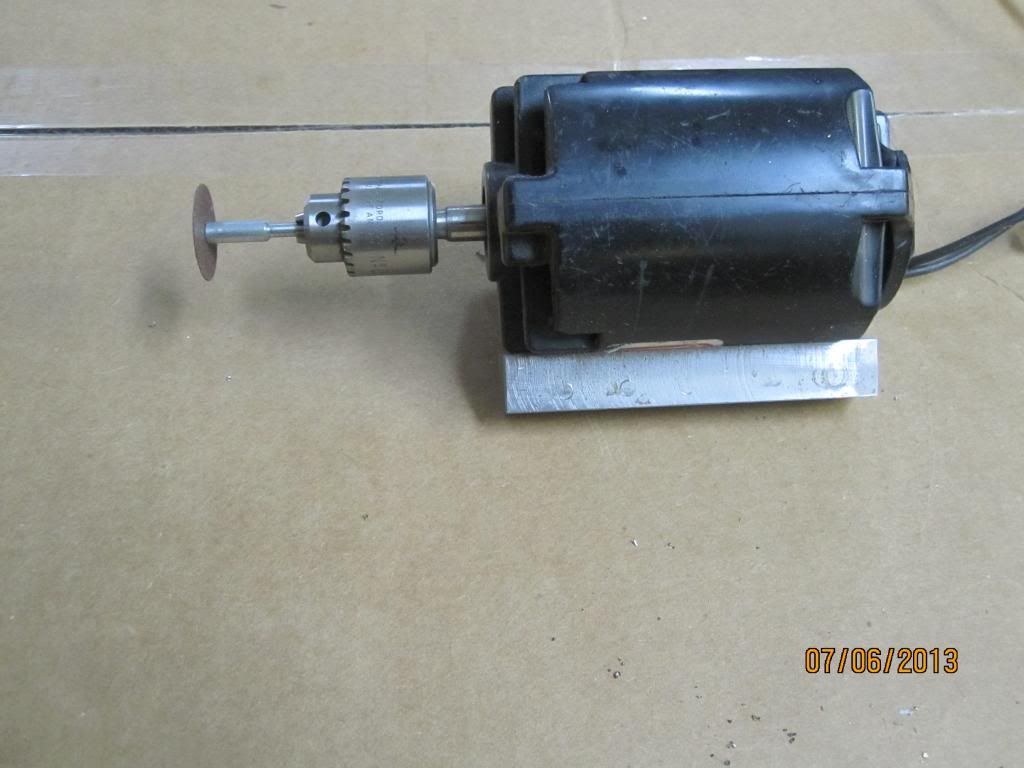
And this is a small, 25,000 RPM AC/DC motor with a Jacops #0 chuck mounted on it. I can use it to drill small holes and mount various dremel bits for grind, cutting, etc. I use a variac to vary the speed on it.

IMG_2865_zps4f39de25.jpg


The motor is an Ameteck vacuum cleaner power head motor. Despite the fact that it has a plastic housing, it's powerful and has a ball bearing race on the working end with a bronze sleeve bearing on the back end. These are available on Ebay for pretty reasonable cost...

http://www.ebay.com/itm/Rainbow-Vacuum-D3C-D4C-SE-Motor-Power-Nozzle-Head-/121059461556?hash=item1c2fb4c9b4

Chuck
 
Last edited:
Chuck--Perhaps its too late, but a word to the wise about the socket head clamping screws---They fill up with crap!!! Then you can't get the wrench into them without having something sharp and pointy to dig the small chips out of the sockets. Its not a real big deal, but I was just looking at your recent posts and thought I would mention it.----Brian
 
Chuck--Perhaps its too late, but a word to the wise about the socket head clamping screws---They fill up with crap!!! Then you can't get the wrench into them without having something sharp and pointy to dig the small chips out of the sockets. Its not a real big deal, but I was just looking at your recent posts and thought I would mention it.----Brian

Good point, Brian. However, These will be sitting horizontally, away from the lathe spindle, so I don't think there will be as much of a problem.

Thx...
Chuck
 
Hi Chuck,

I might copy your milling out of the slot.

A less spectacular but useful bit of extra travel for those unwilling or unable to mill can be gotten by shaping the end of the nut so it fits the curved end of the slot. About 1/2" to be found that way.

Neil
 
I've had lathe back together and in use for a couple of weeks now. The extra out travel on the carriage is really useful.

Chuck
 

Latest posts

Back
Top