


- Joined
- Oct 28, 2009
- Messages
- 58
- Reaction score
- 36
It has been about six months since I set this project aside for the sake of travel and other fun diversions. I had a fabulous time in New Zealand, followed with trips to Death Valley, the Sierras, and the ancient native American ruins in Arizona, Utah and New Mexico. It's time to get back to work. Here are the photos from making the crankshaft.
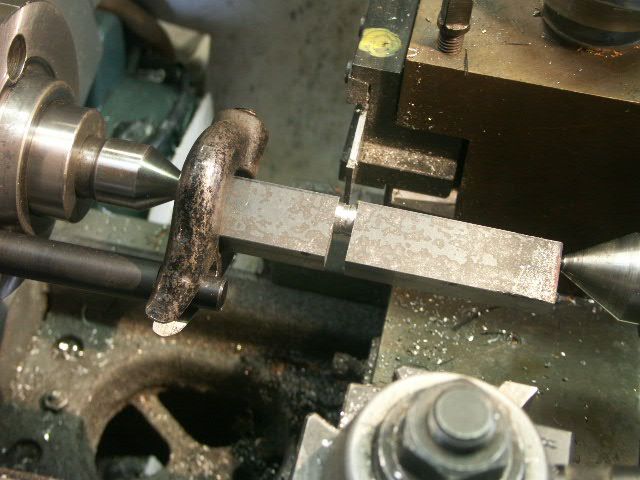
Turning the crank was easier than I had expected. I did most of the turning with my partoff blade.

I supported the webs with a snug fitting piece of steel, and then using CA glue to hold it in place. A little heat from a propane torch made it easy to remove.
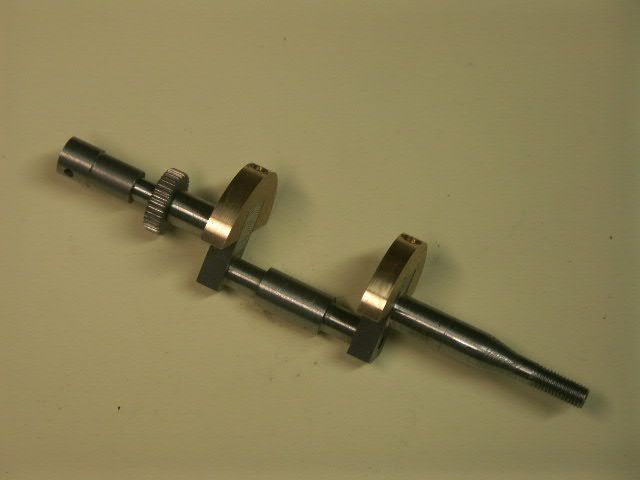
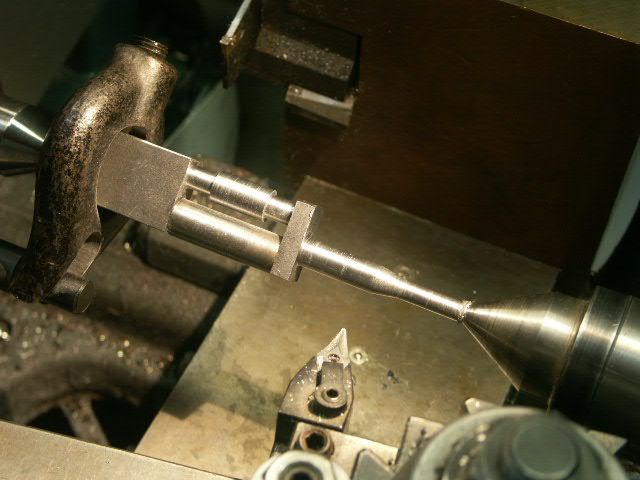
The crank is essentially finished. Once again, I encountered a lot of errors on my version of the drawings, which called for the crankshaft to be longer one way than it is the other. I hope I picked the right numbers to use. Other photos on this site show crankshafts with OD threads on each end, but my drawings call for an OD thread on one end and an ID thread on the other. I'm assuming the others are made to a more recent revision.
Bob

Turning the crank was easier than I had expected. I did most of the turning with my partoff blade.


I supported the webs with a snug fitting piece of steel, and then using CA glue to hold it in place. A little heat from a propane torch made it easy to remove.

The crank is essentially finished. Once again, I encountered a lot of errors on my version of the drawings, which called for the crankshaft to be longer one way than it is the other. I hope I picked the right numbers to use. Other photos on this site show crankshafts with OD threads on each end, but my drawings call for an OD thread on one end and an ID thread on the other. I'm assuming the others are made to a more recent revision.
Bob


") Actually, the offset fixture made it pretty easy, and it was only mildly tedious to remove it from the lathe to rotate the camshaft every 5 degrees after every pass. Cutting the first lobe took about an hour, but the last one took only 30 minutes.
Actually, the offset fixture made it pretty easy, and it was only mildly tedious to remove it from the lathe to rotate the camshaft every 5 degrees after every pass. Cutting the first lobe took about an hour, but the last one took only 30 minutes.
