Seig SX3 quill stop

Home Model Engine Machinist Forum

Help Support Home Model Engine Machinist Forum:

This site may earn a commission from merchant affiliate links, including eBay, Amazon, and others.

Cedge

Well-Known Member
Joined
Jul 12, 2007
Messages
1,730
Reaction score
29
Sorry for the abrupt removal of the original post, but I decided to modify the design before it created an obvious but unforeseen problem.

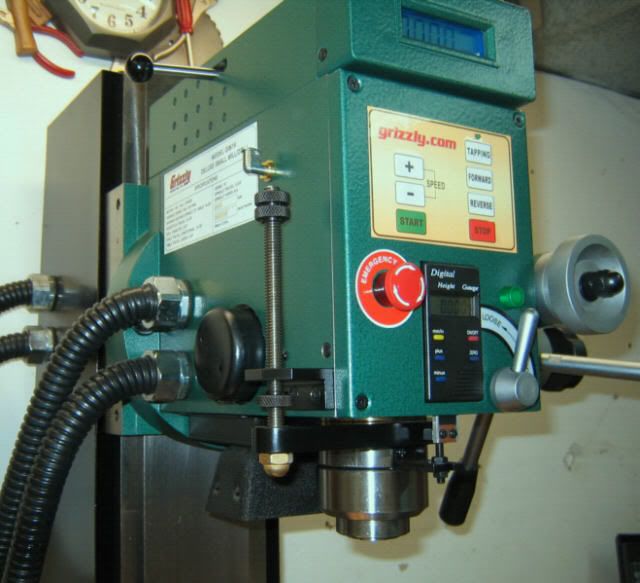
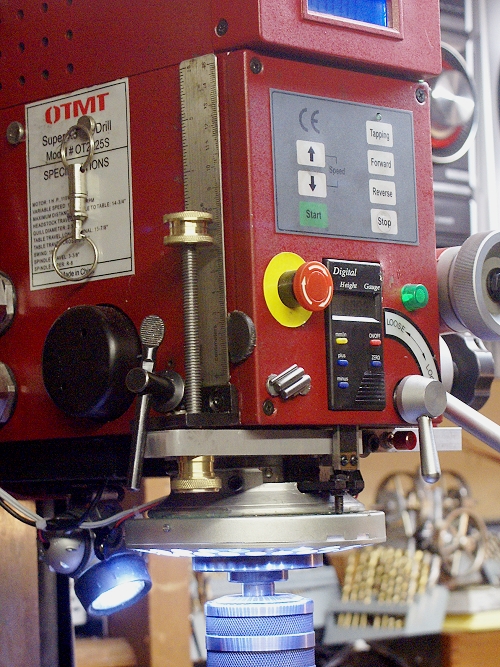
The SX3 has become my favorite machine to use these days and I'm always looking for ways to make it more usable. There have been a couple of times when a quill stop would have been very useful, but having fitted the quill with an LED light, there wasn't much room left for one.

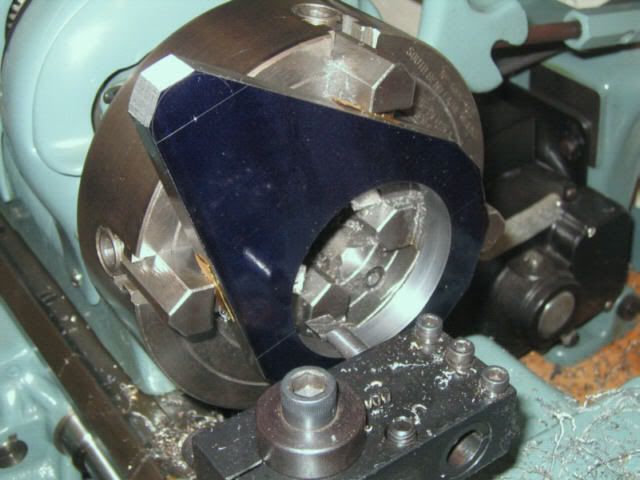
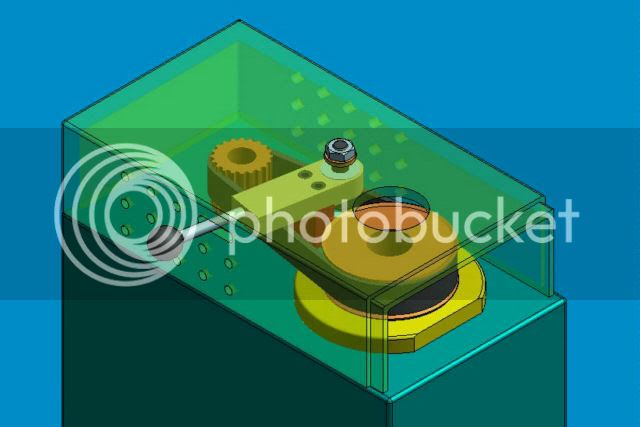
My first "prototype" used the DRO mount, which fit nicely, but came with the danger of breaking a couple of screws off in the quill. Not wanting that sort of heartache, I went back to the drawing board last night and made up a whole new mount that clamps solidly onto the quill. The adjustable stop uses the bracket that once served to mount the useless OEM safety shield. It was in the perfect spot and already had a hole right where needed.

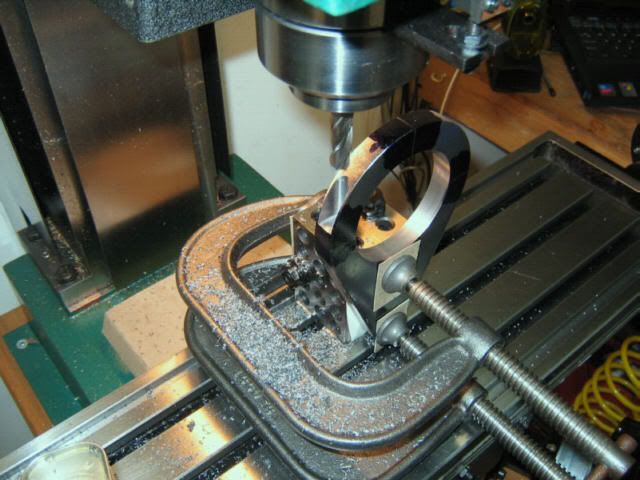
Once the bracket was in place, the threaded stop was as simple as adding a piece of 5/16 threaded rod and turning off a threesome of knurled brass finger nuts. The 3 nuts gave me my first chance to use the tapping feature on the mill. One word.... Shhhhwwweeeeeeeeeeeetttt!!! I'll be using that thing a LOT more in the future.

While I was back at it today, I slipped over to Radio Shack to pick up a replacement switch for the mill's flying saucer lamp. There, they had a small 4.5 volt wall wart transformer which is now installed and will hopefully put an end to the little devil's never ending appetite for expensive AA batteries. This mod also let me get rid of the battery case and clean up the whole front of the mill, giving me back the 5/16 inch of quill travel I'd originally sacrificed to mount it.

I've tested the stop and it works as planned. Now if I can just remember to run the nuts back up after each use....(yeah... I forgot them the very first time it was used)

Steve

quill-stop.jpg


Eric
I'd have had it up sooner, but some Dilbert posted just as I hit the save button....(grin) Who the heck posts to an empty thread, anyway?....LOL
 
Cedge said:
Eric
I'd have had it up sooner, but some Dilbert posted just as I hit the save button....(grin) Who the heck posts to an empty thread, anyway?....LOL

Gotta be fast to beat me :bow: Couldn't resist the tease!

Eric
 
Holy cr@p Steve... I just saw the picture. Is that a custom DRO in your mill head? That's not stock is it?

Eric
 
Eric
The Z scale is stock on the SX3 models. I've got mine wired to the remote display, which was a royal pain the the backside. The cover had to be bent to let it accept the plug or the cover pushed it out of the scale.

It wouldn't be a huge project to add it to the X3, if one wanted to do it.

Steve
 
Cedge said:
Eric
The Z scale is stock on the SX3 models. I've got mine wired to the remote display, which was a royal pain the the backside. The cover had to be bent to let it accept the plug or the cover pushed it out of the scale.

It wouldn't be a huge project to add it to the X3, if one wanted to do it.

Steve

Ahhh. I wouldn't put it past you if that was your mod.

Had to postpone my SX3 purchase for a long while. Got laid off again so what little extra money I have is going to convert the X2 to CNC.

Eric
 
Nice job on the depth stop, Steve!
thumbup.gif
We know that great minds think alike ;), because I did the same thing with my SX3. The digital depth readout is very nice, but like you say, sometimes you need a positive stop.

Here's how mine turned out (I've got the Grizzly version of the SX3):

DPCD481.jpg


I used the same mounting holes for the stationary bracket as you did, but I mounted it upside down to give room for a "return stop". (Believe it or not, this comes in handy more often than you would think.)

I bored the hole for the quill using the 4-jaw chuck on the lathe:

GR59381.jpg


I clamped the part in the mill vise to mill the slots for the clamp screws, but I ran out of headroom! ??? No sweat -- I improvised by bolting a pair of 1-2-3 blocks to the bed and clamping the part to one side:

GR51481.jpg


It works very well, actually repeating within a thousandth or so.

Paula

(PS - also note the quill lubricator and spindle lock)
 
Brass_Machine sorry to hear you got laid off hope all goes well and good luck and happy holidays things have to get better. I am sucking canal water myself and think every day what to do differant to turn things around.
 
Paula
Very nice work you've done there. Definitely the GMTA effect. I'm curious about the Quill lock. I've been toying with the same idea, but hadn't clicked to invading the cover as you've done. It makes sense now that i see it, since the spline would still be accessible as it descends. I'd love to see photos of how you approached it.

My stop should be able to do the upward stop, although I didn't consider it at the time i made it. Just a matter of a 3rd nut, from what is shown in your photos.

Impressed...
Steve
 
Paula, in your photo of the 4 jaw boring set up, how did it start out?

What I mean is that I can see 2 jaws holding on the outside and 2 jaws reversed holding on the inside.

My question. How do you get to the point where you can do that? What I mean is, there would have been no hole to grip until you had bored it!

Everyone says there is no such thing as a supid question. Please keep chanting that as you read this.

Rgds


Paula,
That's some nice mods to the SX3. You should start a shop thread and show us around all your toys ;D


Kevin
 
Thanks, Steve!

Cedge said:
I'm curious about the Quill lock. I've been toying with the same idea... I'd love to see photos of how you approached it.

Sure thing. As I'm sure you figured out, it's just a tooth attached to a spring-loaded lever, which engages in the the spindle pulley:

RELEASED.jpg


I did a post about this mod over on the PM forum a while back, with pictures, etc. Here's a link to the post:

http://www.practicalmachinist.com/vb/showpost.php?p=852491&postcount=52

And here's a link to the thread containing the post (for context):

http://www.practicalmachinist.com/vb/showthread.php?t=151670

Let me know if you have any questions. I'm sure it would be an easy project for you. I also have dimensioned drawings I could email you, if you're interested. (I sent a set to one of the South Bend Forum members, and he reported success with the modification.)

Just remember that this is not a brake -- the spindle needs to be at a full stop before pulling the lever.

Paula
 
miker said:
Paula, in your photo of the 4 jaw boring set up, how did it start out?

What I mean is that I can see 2 jaws holding on the outside and 2 jaws reversed holding on the inside.

My question. How do you get to the point where you can do that? What I mean is, there would have been no hole to grip until you had bored it!

A reasonable question, Miker...

The picture is a bit deceiving. All four jaws are on the outside of the part -- it's just that you can only see the lower two jaws through the bored hole. You're actually seeing the second step of these two jaws, while the outer steps are hidden.

As far as making the hole, I started with scribed lines and a punch mark. I chucked a center-finder in the tailstock (pointy end out) to center the part in the 4-jaw, drilled in several steps to 1", and then bored out the rest.

Paula
 
ksouers said:
That's some nice mods to the SX3. You should start a shop thread and show us around all your toys ;D

Thanks, Kevin. I'm seriously thinking about starting a thread on the SX3 modifications I've done. Right now I'm adding a clutch to easily disengage the power feed from the X-axis screw. Time seems to be the most scarce commidity... ;D

Paula
 
Paula, thanks for clearing that up for me.

Now I can see where you have left a little room for the boring tool to go through without contacting the jaws.

Rgds
 
Nice job on the depth stop, Steve!
thumbup.gif
We know that great minds think alike ;), because I did the same thing with my SX3. The digital depth readout is very nice, but like you say, sometimes you need a positive stop.

Here's how mine turned out (I've got the Grizzly version of the SX3):

DPCD481.jpg


I used the same mounting holes for the stationary bracket as you did, but I mounted it upside down to give room for a "return stop". (Believe it or not, this comes in handy more often than you would think.)

I bored the hole for the quill using the 4-jaw chuck on the lathe:

GR59381.jpg


I clamped the part in the mill vise to mill the slots for the clamp screws, but I ran out of headroom! ??? No sweat -- I improvised by bolting a pair of 1-2-3 blocks to the bed and clamping the part to one side:

GR51481.jpg


It works very well, actually repeating within a thousandth or so.

Paula

(PS - also note the quill lubricator and spindle lock)
Are drawings of this quill stop available anywhere?
 
Nice job on the depth stop, Steve!
thumbup.gif
We know that great minds think alike ;), because I did the same thing with my SX3. The digital depth readout is very nice, but like you say, sometimes you need a positive stop.

Here's how mine turned out (I've got the Grizzly version of the SX3):

DPCD481.jpg


I used the same mounting holes for the stationary bracket as you did, but I mounted it upside down to give room for a "return stop". (Believe it or not, this comes in handy more often than you would think.)

I bored the hole for the quill using the 4-jaw chuck on the lathe:

GR59381.jpg


I clamped the part in the mill vise to mill the slots for the clamp screws, but I ran out of headroom! ??? No sweat -- I improvised by bolting a pair of 1-2-3 blocks to the bed and clamping the part to one side:

GR51481.jpg


It works very well, actually repeating within a thousandth or so.

Paula

(PS - also note the quill lubricator and spindle lock)

I think I have may have asked you this before, but if you sent me anything I have misplaced it!

Did you have any plans for this? I could make it from your images perhaps (which are pretty clear) but find it easier to work from a plan :)

Regards

Chris
 

Latest posts

Back
Top