Scratch-built Stirling

Home Model Engine Machinist Forum

Help Support Home Model Engine Machinist Forum:

This site may earn a commission from merchant affiliate links, including eBay, Amazon, and others.
Sam, thanks for checking in. I don't think I'm ready to have cooling fins cut in me just yet ::)

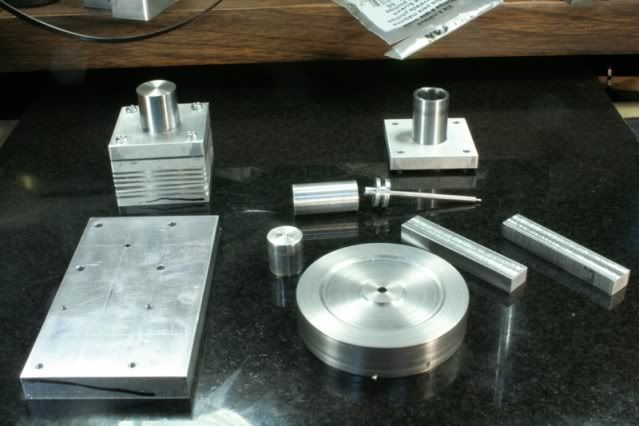
Thanks for the heads-up, Gail. I'm not satisfied with the current parts, so I may remake them. The displacer cylinder is nice and smooth, put the power cylinder seems to have a rough spot in it I didn't find till I made the piston. So, it looks like some lapping and a remake of the piston anyway.

I have a line on some graphite that is currently in someone else's hands, but it's been tagged for rocket engine nozzles. If I end up making some of the nozzles then I'll have a piece.

Until then, do you think 12L14 for the power piston will be OK? This engine is being built with learning in mind, so I'm open to any and all suggestions. My only limit is the materials on hand at the moment.
 
I've been following along from the loft Kevin, but its looking good so far. 12L14 will be fine for the power cylinder but if at all possible wait for the graphite for the piston. Its light weight, thermal stability, and self lubricating properties are ideal if not mandatory on sterlings. I am worried that a 12L14 piston working in a 12L14 cylinder will require some lubrication even if well fitted and lapped, but the lubrication itself will tend to gum up with heat and without it there is the risk of galling. Keep up the nice work.

Bill
 
Kevin,
I have to agree with Bill that 12L14 for both the piston and cylinder is not a good idea.

I would use either graphite or cast iron for the piston.

Gail in NM
 
Brass piston with powdered graphite as a lubricant should work in a steel cylinder.
 
Things are looking good, Kevin.
If you want to try some graphite for the piston, Jerry Howell has piston sized pieces for about $2.
http://www.model-engine-plans.com/partskits/miscsupplies/index.htm

I don't think it would hurt to try other materials, but different for piston and cylinder may be best. CI would be next choice if you don't want to go the graphite route.
Like you say, it's experimental. You can try different pistons to see what works best for you.

The aluminum will work fine in the displacer since it has relatively large clearance with the cyl walls.

Dean
 
Thanks Bill and Gail. I figured the steel piston was a non-starter but had to ask. I was taught to always use dissimilar materials for moving surfaces, that rule has worked well through the years.

Stan, thanks. See below...

Thanks for the link, Dean. I have the graphite available, I just have to get my hands on it. The chunk is a rough 2x2x24, I only need a small piece of it. For the Terry Coss plans I have he calls out aluminum for the piston and bronze for the cylinder. I went rooting around the scrap bin and have a piece of brass big enough for the cylinder, so that is an option as well.

Deanofid said:
Like you say, it's experimental. You can try different pistons to see what works best for you.

Yep, it's all about having fun and learning ;D
Life is pretty boring when things just go well right out of the box all the time.

 
Nice work Kevin,

For my stirling I used chromium steel for the cylinder and cast iron for the piston. I lubricate it and have no problems with gumming up, oil can generally withstand a lot of heat.

On my flame gulper I used cast iron for both cylinder and piston, I also use oil to lubericate that. I tried aluminium pistons but as people mentioned the differential expansion caused it to bind up solid.

I would try and stick to the same material if I were you, then you know they are going to expand at the same rate. As already said, cast iron would probably be better than steel though due to its lubricating properties.

Good luck,

Nick
 
Thanks Nick. I guess I'll have to scrounge up some cast iron at some point.

I'm going to try the aluminum piston first, and snag a piece of that graphite. Next up would be the brass cylinder. By that time the budget should be back in line and I can put together a decent materials order.

I've ordered a new 3 phase driver for the mill, arriving tomorrow, so I'm going to have to make due with what I have on hand for the next several weeks. I'm afraid the driver has blown my hobby budget for awhile.


Thanks for all the suggestions everyone. That should keep me busy for some time to come.
 
FWIW, one of my best running Stirlings has an aluminum piston running in a 1018 cylinder. I wouldn't recommend the arrangement for an LTD but it can be made to work in engines with a good temperature differential.
 
Thanks for the confirmation, Marv. I'd been hoping you'd jump in here with a critique, or at least point out an obvious flaw when it shows up.

No, this is not an LTD, though I do plan to use an alky burner instead of propane. That should cut down the BTUs some. My hope is the alky burner will be a more consistent energy source throughout the trials.
 
All my non-LTD Stirlings run on alcohol lamps. I use the stuff sold in quart cans in the paint aisle in the home supply big-box stores. Sometimes it's labeled as shellac thinner.

If you build your own alcohol lamp, don't forget to put a vent hole in the filler cap. DAMHIKT. (Set the table on fire at one exhibition.)
 
Thanks for the heads-up, Marv. I'll be sure to vent it.

It was nice and cool this morning so I headed out to the shop to knock some things off the to-do list.

First up, the replacement VFD for the mill arrived Thursday so it was time to get that hooked up and programmed. Everything went according to plan there, it works perfectly.

st_lock_ring1.jpg


Now I was ready for some engine parts. I needed to make the retainer rings that hold the cylinders down. These were cut from the same piece of stock as the cold end of the displacer cylinder. Real simple, just bore out the center to clear the hot cap, bore out a relief to catch the rim, then part it off. I couldn’t get the parting tool deep enough so ended up finishing the cut on the band saw then clean up the face on the mill. I needed two of these.

st_base.jpg
.

This started out to be the bulkhead the cylinders are attached to. But the more I thought about it it’s too short. It doesn’t leave enough room between the cylinders for any mounting hardware. Not a loss though, it’ll work perfect for the base. It’s 2 inch by 3/8 aluminum cut 3.5 inches long then squared and faced with a flycutter.

st_plug.jpg


I also got started on the plug for the displacer. I still don’t have a rod, I thought I had a piece of 3/32 stainless laying around but can’t find it at the moment so the plug hasn’t been drilled yet.

st_happy_family.jpg


So all the pieces made so far. I have a piece of 3mm stainless (in pic) that is a fall back if I don’t find the 3/32. Or I could just run up to the hobby shop and get another piece.

st_mockup1.jpg


And of course, I just couldn’t resist doing a mock up. I need to think about that bulkhead some more to see what kind room I need.

Thanks for stopping by.
 
Moving along pretty fast for having to think all this stuff up, Kevin.
Thanks for the assembly shot. Clears up a few things for me.

Dean
 
Thanks Dean. Yeah, I am pretty much flying by the seat of my pants, with one eye closed. And an eye patch over the other. Though I've been thinking about this off and on for 20 years I hadn't thought any of it far enough through to have a clear idea of how I was going to attack the details. I think things are going well so far for being fast and loose.
 
Some good news.

Because of the holiday and visitors I won't get any shop time today, but I did manage to steal about an hour this morning before the world comes to life. I rechecked my numbers and went back to mocking up the parts, it looks like I can use the bulkhead has planned with a minor modification. The original plan was to use two 3/8 inch stanchions but there is room for only one, however I can use 1/2 inch material. It should be strong enough.

Also, I've slowly scrapping out an old printer. I salvaged four 3/32 inch stainless pins that should be long enough to use.

Yeah, sometimes you just get lucky.
 
That must be a very old printer with 3/32" components. All the computer related hardware that I have taken apart has had metric sized parts. The quality of the shafts is so good I will buy a couple of metric sized reamers to make use of them.
 
Stan,
I was quite surprised to find they were an inch dimension. I first measured them with my digital caliper set to metric, when that didn't come out even I switched it to inch, then mic'd them. I absolutely expected metric sizes.

I don't know how old it is but I got several stainless rods, dozens of springs, a couple belts and four (!) motors. Not to mention all the plastic gears I can handle. I was hoping to get some ball bearings, but that didn't happen.
 
I got nearly a full day in the shop today. I didn’t think I’d gotten much done until I started putting together the items for pictures.

Most of the time was spent drilling and tapping holes. 27 holes drilled in 4 parts, 12 holes tapped in two parts. All the holes are either tapped or clearance drilled 4-40, except where they aren't ;D

st_slot.jpg


The bulkhead was drilled and tapped to mount the retainer for the power cylinder and clearance drilled for the cold end of the displacer. The displacer side was drilled #42 in the center for the displacer rod. The cold end of the displacer cylinder was drilled and tapped both ends. Then a 3/16 end mill was used to drill into the cold side .150 and a slot milled. The bulkhead will be drilled through the end near the viewer in this picture to the slot, then tapped and plugged.

st_family2.jpg


It turned out to be a rather productive day. The flywheel is finished, 2.250 in 1018 steel. The plug for the displacer piston was finished, the piston still needs to be assembled. The rods were cut and brought to size and the bearing standards were rough cut.

st_mockup2.jpg


And everything roughly in it’s final position. It's awful silvery, I need to figure out how to fit some brass in there somewhere ::)

Thanks for dropping in.
 
A day in the shop, and it shows, Kevin. There's a point where all of a sudden, bang! It looks
like a whole bunch got done at a whack. I think you're there, and it's looking promising!

Dean
 
Back
Top