Rotary table

Home Model Engine Machinist Forum

Help Support Home Model Engine Machinist Forum:

This site may earn a commission from merchant affiliate links, including eBay, Amazon, and others.
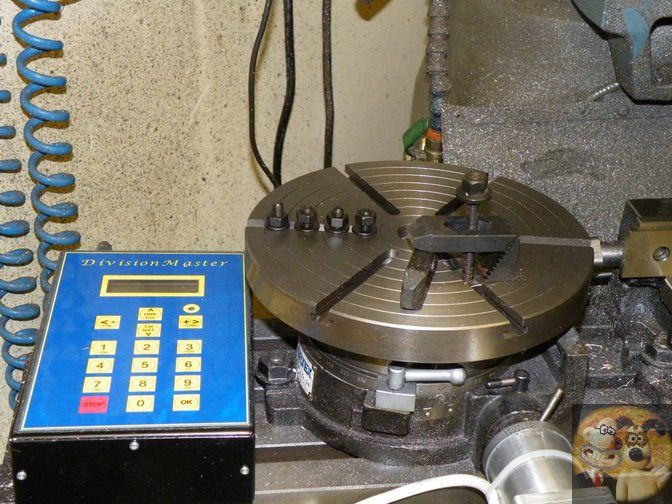
Speaking of dividing head, I thought it might be a neat accessory to have an ER collet on the end for quick round stock setups. I cant recall the thread, maybe 1.5x8 tpi? Has anyone made such an adapter?

I suspect that you missed the import of my reply. So might I apologise and try again?

Mine is the standard Myford nose which takes Number 2 Morse taper tooling. Again, it not only takes the Myford chucks but also the Myford face plates and catch plate( 4 in all) and the ER25 collets but these are not particular accurate as John points out but the considerably better Imperial Myford ones.

So this goes on the mill drill as a Dividing head but also as a rotary table but can be moved to serve as a replacement to my cheap £100 and not too nasty Clarkson tool and cutter grinder but at a pinch goes on the bigger Myford lathe.

If the scene is allowed to develop, I have a 3 Jaw chuck which peppered with locating holes to use a detent on either lathe- thus using both the two vertical slides but I thought it nice to add a 4 jaw self centring Myford 'type' chuck to widen the scope of my little simple workshop.

However, with limited space and limited time and funds, I have three Potts mills to go on the various tools. One takes 8mm collets. The Potts, there are 3 varieties are ancient items which date back to Sparey and Westbury.

Confession is good for the soul and I am simply unable to get my head around things like Arduino, Raspberry Pie( except to eat) and these silly things like 'handies' and Eye Pads and whatever.

Are you a bit clearer now? It may be that bit 'Heath Robinson' but works.

Norman
 
Thanks Norman. In my case, the DH is the only item in my shop with that 1.5x8 thread (or whatever it is). I don't have any other chucks or tooling that matches that. My lathe chucks are D1-4. Thus far I have only used the DH between centers, but I'd like the ability to (rapidly) grip round stock for indexing. I do have an ER40 collet set & that's where the inspiration came from to marry the two.

..kind of this idea but no back plate of course
http://www.arceurotrade.co.uk/Catalogue/Collets/ER-Lathe-Collet-Chucks/ER40-Lathe-Collet-Chucks

Johns procedure of first turning a sacrificial male threaded arbor stub in the lathe (mimicking the DH nose thread) then screw on the ER accessory blank before cutting the collet taper & threads ensures better concentric accuracy than my much more convoluted plan of using adjusting set screws like how SetTrue chucks are dialed in.
 
Thanks Peter. No way am I trying to unduly influence you but GHT in Workshop Techniques did some thing similar with his excellent small dividing head. Being equally pedantic, I made mine to suit the Myford 'theme' to suit me. He's worth a read!

Unfortunately, I'm still trying to sort out family finances after the loss of my wife but I stumbled on a couple of oddities. The first was a 'Bevel-Box Angle sensor' which is fairly inexpensive and I thought would do tool angles but the second was incredibly cheap and is called a 'Strait-Line Laser Level 120' and made out of plastic.

For those who have reasons for not going to exotic stuff, they, they certainly are worth considering. Obviously, I must leave it there and get back into the dreary realms of finance, tax and survival.

Meantime, success in your endeavours

Norman
 
Norman; thanks for this bit of history. I have my copy of Workshop Techniques at my desk and always wondered what role Bennett played in the book. There is a lot of knowledge in that paper backed book.


Arguably, the best book is actually two. The classic English model engineer George H. Thomas wrote and described his workshop tools in Model Engineer. Actually, it was the late Professor Dennis Chaddock, designer of the Quorn tool and cutter grinder encouraged GHT to do this. If you add 'Ned' Westbury, Tom Walshaw writing as Tubal Cain and Kenneth Cleeve Hart writing as Martin Cleeve, one has a pretty heady mixture of talent. When Thomas died, Neil Hemingway of Hemmingwaykits encouraged Dr Bill Bennett - a fellow student with my late wife to complete the intended books.

These became the Model Engineers Workshop Manual and Workshop Techniques. The latter embodies the earlier Universal Pillar Tool book and Dividing and Graduating.

So George starts with a basic little rotary table which hadn't any of these complicated ball bearings and even degrees around its perimeter to perhaps the most sophisticated dividing head which contained not one worm wheel but two to do ANY configuration.
To mention the construction of division plates, Thomas describes how he drilled his with a pair of dividers but goes on to described what can be achieved with a division plate with ONE hole.
Reading GHT books is a good way to answer the questions "do I need one of these" or " what is it for".
Somewhere, under a heap of rusting metal- my workshop roof came off- are my Quorn and assorted GHT 'goodies' Nearer and probably just as inaccessible is the knowledge of how I tried to copy the 'Words and music'

There you have it

Norman


Sorry to hear about the workshop, that really has to suck, especially with all the other challenges you are dealing with.
 
Dr W.A Bennett BDS( Dunelm)? Actually Bill is a retired dentist and one of the last of the Durhams- Durham University in Newcastle upon Tyne. My late wife graduated at the same.

We were with Bill when they got their 50 year Reunion in.

Quite a few got the model engineering bug- probably in part from senior consultants who made a lot of their own tools.

I suspect that Bill was connected through his contact with Neil Hemingway who seems to have been either a beneficiary or even executor of George. N H certainly had all of GHT's stuff. I recall Bill being persuaded to complete Model Engineer's Workshop Manual . GHT was originally too ill. GHT, however, published the Universal Pillar Tool book along with Dividing and Graduating- all of which had been articles in Model Engineer earlier. I tried with Jim Early to do the same with 'Martin Cleeve's' articles lest they also became lost. Jim and I ran into copyright issues. Unfortunately, I digress. I hope that it gives a little more insight.

As far as my own problems- workshop wise, it is really of little consequence in the overall situation but I must thank you for your kind words.

Regards

Norman
 
Guys I have been reading through all of these post, and their accompany links. One big thing I have learned is, I have a lot to learn. This is all great information. At the moment I'm leaning towards the 6" Vertex, and it's accessories. But I'm going to continual to study up before I make a final decision.
 
This attached PDF file should help in setting up and using an RT. Unfortunately, it is for the high precision type as sold by LMS and Arc Euro, which has a different wormwheel ratio that the Vertex type. but it does give a lot of useful information.

Hope it helps

John

Hi John,

Thanks for sharing the info on RT Usage. I DIY a carbon copy of the 4'' LMS
RT from Taig Tool Projects. Very useful tool when building steam/petrol engines. Now in Southern Thailand which is very much cheaper than Singapore food and hotel room wise.Hotel WiFi excellent.
 
Last edited:
This attached PDF file should help in setting up and using an RT. Unfortunately, it is for the high precision type as sold by LMS and Arc Euro, which has a different wormwheel ratio that the Vertex type. but it does give a lot of useful information.

Hope it helps

John

John, I have read through the link you posted. Did so when I was considering the RT from LMS. Your statement then raised more questions. Is the LMS, RT better quality then the Vertex, and what role does the ratio play? 72-1 LMS as to 90-1 with the Vertex. Also looking at the 6" Vertex I cannot find any mention of the center to center distance of the two hole that may be used for mounting in the Vertical position. Is there something I'm missing?

hv8large[1].jpg


Diagram[1].jpg
 
C,

There are many varied ratios in both RT's and DH's, in fact, if you can work out how to get the degrees, minutes and seconds ranges sorted onto a turning handle to give you accurate rotations, then you could use almost any ratio that you want, but you will find that the most popular (as far as I know) is the 90:1 that Vertex use, purely because it must be one of the easiest to arrange the handle settings around.

Now you come to the sticking point with most of the cast RT's like the Vertex.

Because we all have different pitches between our table slots, you will most probably, unless you are very lucky, find you can only get one T-nut and bolt fitted for mounting upright as the other bolt slot just won't line up with the other slots on your table. No big problem though, just use a normal clamp to hold that side down. I actually machined my second slot on my Vertex RT into a longer one so that I could use 2 T-nuts and bolts.
That is one of the advantages of the LMS & AE RT's, just machine up a couple of small hold down clamps and you are in business.

Like these.

http://www.arceurotrade.co.uk/Catalogue/Workholding/Clamping-Sets/Hold-down-Clamps

I still have a 4" LMS RT and a BSO DHead to convert to stepper, and a very large vice that I need to make up some T-nut clamps for, but once done, they don't need doing again.

Do bear in mind though, for the T-nuts, only use good quality materials or actually buy some as I have done for my new vice. I have seen table slots ripped out because someone thought they could get away with inferior items or even hex headed bolts that don't quite fit right.

John
 
Also looking at the 6" Vertex I cannot find any mention of the center to center distance of the two hole that may be used for mounting in the Vertical position. Is there something I'm missing?

You will be OK with the 6" Vertex on your mill. I managed to fit it on my SX3 mill which has a narrower table than yours but I had to lengthen the slots so I can bolt it to the narrower pitched T slots on my mill when the RT is on its side (eg. to use the tail stock). To do this, I mounted the RT via an angle plate to the milling table and being Cast Iron, the base was very easy to machine. I think this mod to use the larger RT is worthwhile as the 4" table is very restrictive in my view due to the much smaller working area.

Mounting it with the table facing upwards under the spindle was not an issue.

Rod, Thanks for that info. Unless I get very lucky, I figured I'd have to do as you did. Any ideal what the center to center dimensions were before you machined them?
 
Rod, Thanks for that info. Unless I get very lucky, I figured I'd have to do as you did. Any ideal what the center to center dimensions were before you machined them?

I have no idea, but I think I only needed about 5mm taken off each slot to get a fit. This does not need to be accurate so if you have trouble holding the table and getting it all true before you start, near enough will be good enough.

I may have documented the mod in my Shed thread but I can't remember.... Look here. http://www.homemodelenginemachinist.com/showthread.php?t=19885
 
I mentioned earlier on in this post about how I can very easily convert my 6" RT into a 9" one without having the size and weight limitations of the larger RT.

I have actually found the picture that I was looking for.

9%20inch%20table_zpskspp1ceq.jpg


Because I use interchangeable tooling based around a Myford spindle nose, I just bought a cheap 9" faceplate and screwed it onto my 6" RT.
Ideal for those largish jobs that overhang the normal RT table. Plus it has 6 T-slots instead of the normal 4, as mine has, some only have 3.

John
 
C,


Do bear in mind though, for the T-nuts, only use good quality materials or actually buy some as I have done for my new vice. I have seen table slots ripped out because someone thought they could get away with inferior items or even hex headed bolts that don't quite fit right.

John

Ah! The intentional Myford 'compromise 'in using too small a tee slot and then, as John says, a further compromise. BANG!
 
  • Like
Reactions: gus
Norman,
I am very fastidious when it comes to clamping down into a T-slot, in fact I would class it as obsessive.

For every different size of T-slot in my shop, I have a full set of clamps for each of them, plus, if I need something clamping semi permanent or permanent I buy the correct nuts, bolts and studs to clamp it down to save robbing my full sets of clamps.

I have seen slots in table ripped out into big holes. How much damage would be done to the operator if those had been the chocolate nuts and studs that some people use. I would suspect that there would have been a few more missiles flying about.

In fact it was only two days ago a chap contacted me to see if I knew where he could get a bulge ground off the top of his mill table. In reality, it needs a new table, as his has been 'strained', most probably by the quill running into a large bit that was clamped to the table. Unfortunately, it is a rather rare beast and spares just aren't easy to come by, plus because it is now in the hands of a model engineer, not in a jobbing shop, where he got it from, he should be able to keep within acceptable limits and not overstrain it again.

John
 
Yes, indeed, John.

My first Myford Super 7 B had a distorted boring table caused by incorrect use. I had the awful job of having to scrape it because Myford could not/would not supply a new saddle casting.

As you are aware, Myford slots are not the standard way of doing things and I'm glad you've highlighted the dangers.

Meantime, my regards

Norman


One big issue with T-slots, that a lot of amateur machinist don't understand, is that the threads in the T-Nuts are suppose to dead end. This keeps bolts and rods from running down into the table. When that happens you basically have a screw jack push up on the table casting. This just doesn't happen to model engineers because I've seen broken tables on a number of larger machines in shops. Of course other practices can lead to table breakout so we can't blame them all on bad T-nuts.

In any event if you are making your own T-nuts make sure the threads end up short and do not allow bolts to protrude through the nut. I don't see homemade nuts as bad, you just need to take care that the thread properly prevent jacking of the tables T-slot ledges.
 
Of course I agree. Regularly lock my tee nuts with a drop of silver solder. However, the distortion mentioned was because the bolts were not fastened down- on top of the table and subsequently not spreading the load.

BIG topic!

Cheers

Norman
 
Back
Top