Rod's Aussie Shed

Home Model Engine Machinist Forum

Help Support Home Model Engine Machinist Forum:

This site may earn a commission from merchant affiliate links, including eBay, Amazon, and others.
Thanks guys, had a laugh at the killer moths in my shed. Yeh told my wife it was probably a python or tree snake.;)

RCFreak, now I know where the "freak" comes from. I grew up in the bush so am snake aware but it does not sound like you guys would approve of my snake handing techniques which re loosely based on the premise that the only good snake was a dead one!

As a kid, I had a brown mulga snake coiled up inside the house ready to strike but I saw him in time. Got him with the .22 under my mum's dressing table a couple of weeks later. Also tripped over a log and found a brown snake sunning himself on the other side right across my chest! Fortunately, he got a bigger fright than me and cleared out. And my mate wondered why I did not get up in a hurry!

In all my time in snake country, I only ever met 2 people who were ever bitten. One was my grandfather who got tagged through his boot leather while riding a horse well before I was born.
 
I'm with you Rod, I treat every snake that I see as deadly, and the only good snake is a dead one.
I have encountered a few tiger snakes swimming across rivers when I have been wading upstream fly fishing, I give them plenty of room.

Paul.
 
Strewth, Its been 4 months since I updated this thread. A lot has been happening in my neck of the woods. I had a bit of a hiccup back in November as I was invited out to celebrate Melbourne Cup day (the horse race that stops Australia). I never follow it, but in this instance, I partied a bit too hard and fell over and broke my wrist so progress was delayed.

The following is not really shed related but ight explain why I have been so quiet on the forum.

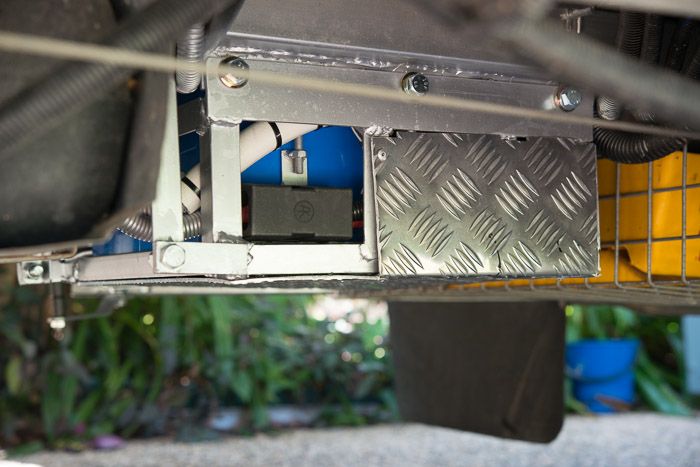
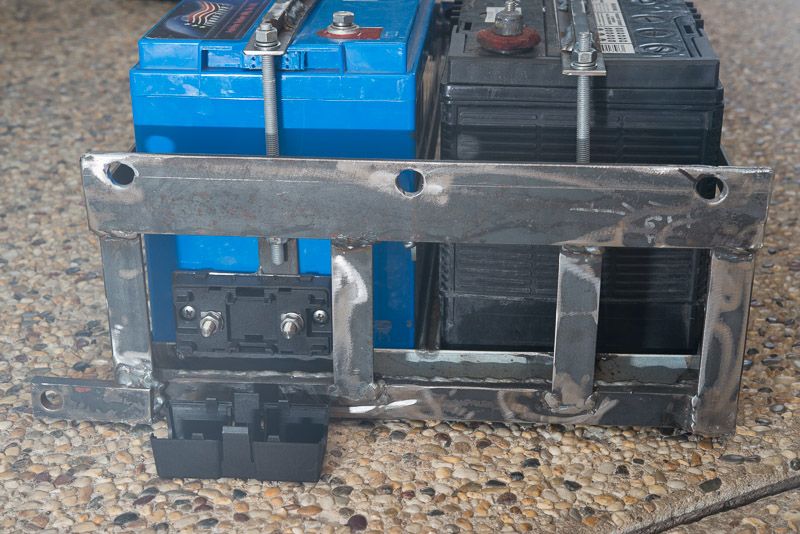
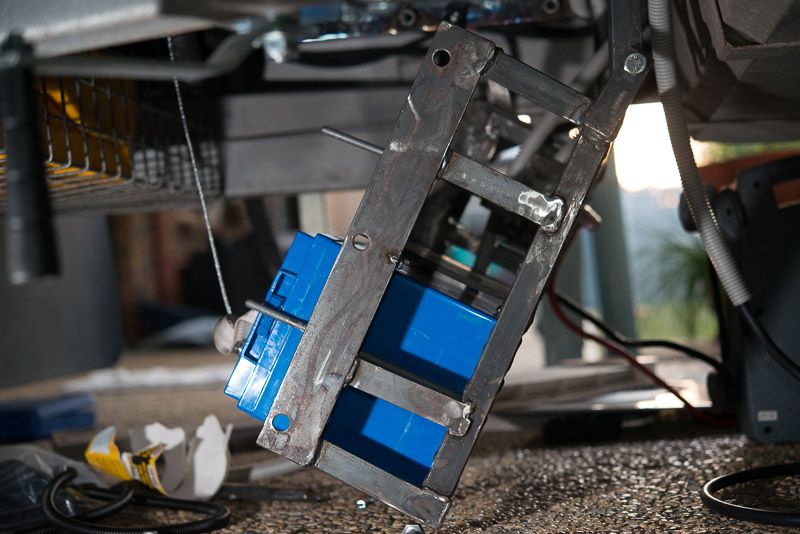
When I broke my wrist, I was part way through a major electrical upgrade on my caravan which installed a wind up battery tray right underneath the van itself to carry two batteries,

DSC_4423_zps492998cb.jpg


DSC_4386_zps2d94cde6.jpg


Not shown, but I used a $35 boat winch to winch it up and down to service the batteries

DSC_4415_zps5665dfe6.jpg


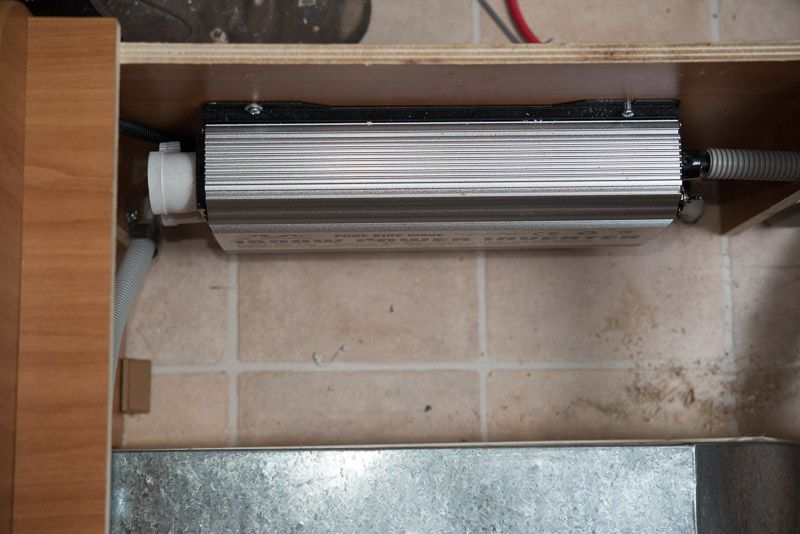
And then there was the 1500 W inverter tucked in under a seat.

DSC_4410_zpsf2e922f6.jpg


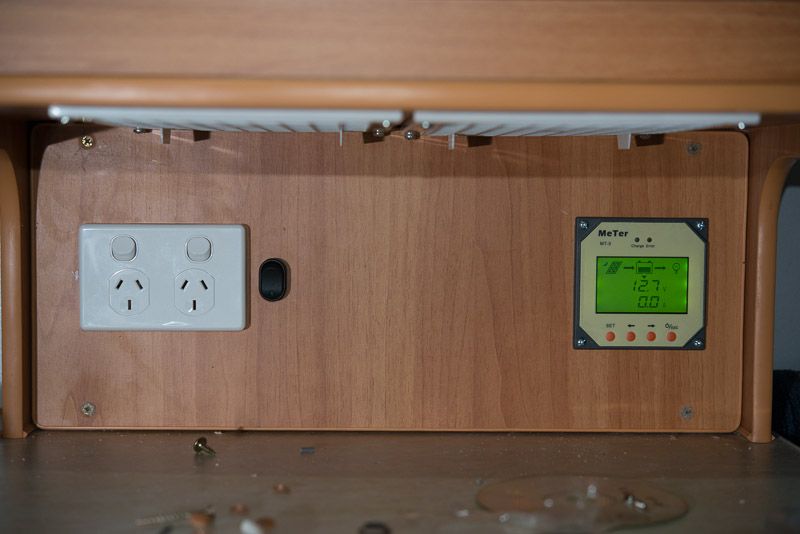
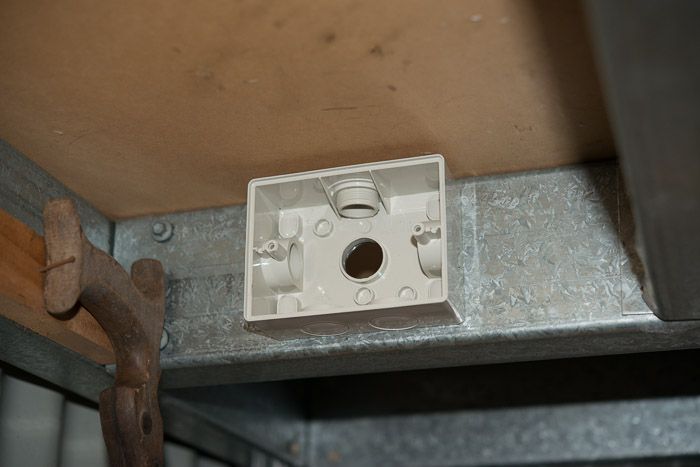
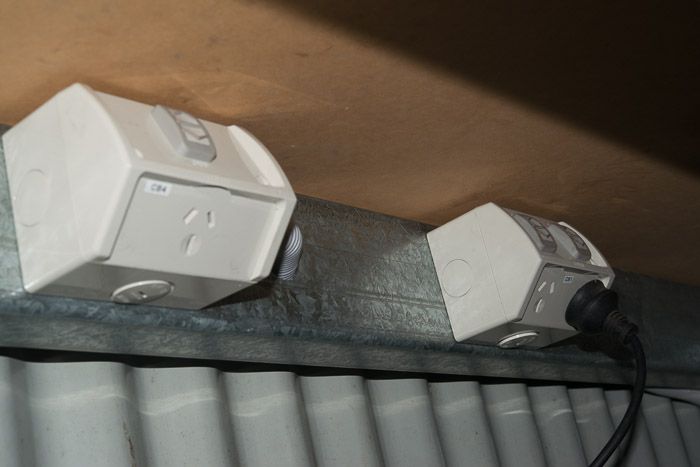
and a couple of power points.. one for the microwave

DSC_4409_zpsebd2d50f.jpg


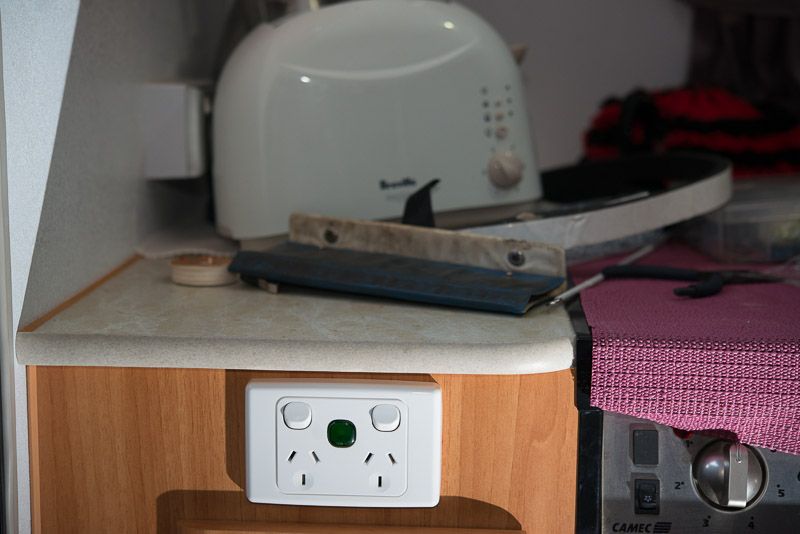
and one for the toaster and Nespresso Machine!

DSC_4408_zps237df75e.jpg


Who said you can't have a good coffee in the middle of the bush?

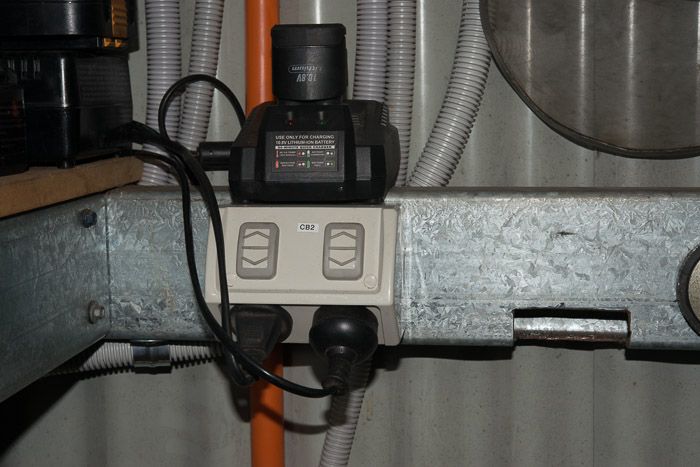
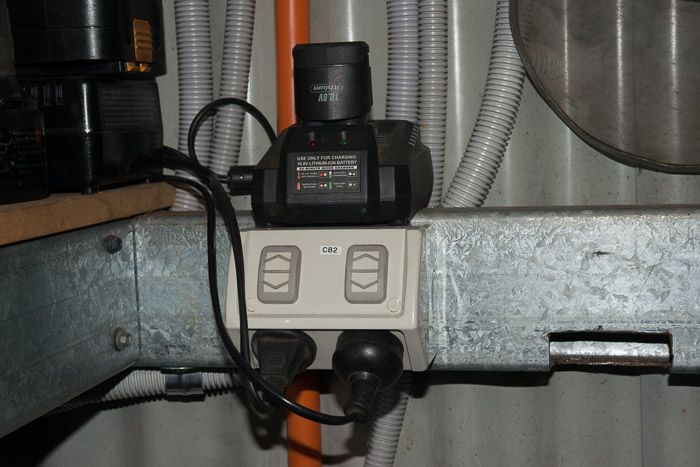
Well, with this stuff, I needed to add some solar power (you may have noticed the remote controller for the solar charger beside the first power point).

Fitting up the Tracer 30 amp regulator was easy as the van was already prewired for solar at the factory.

DSC_4378_zpsd9cdd9f5.jpg


You can see the blue cat 6 network cable running off to the remote console seen earlier. A couple of dual pole circuit breakers on both the panel and the charging circuit.

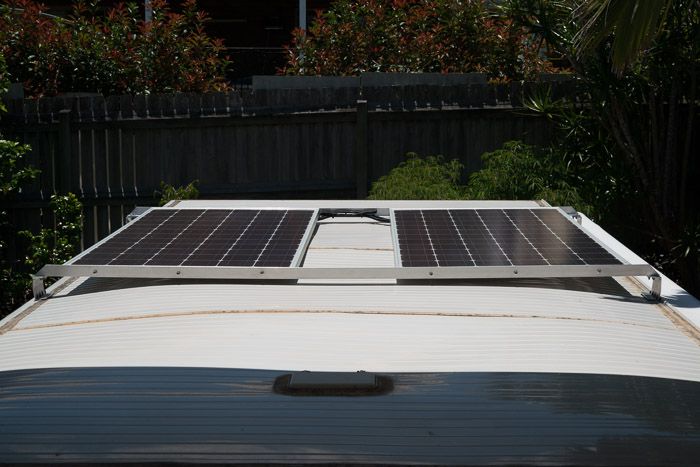
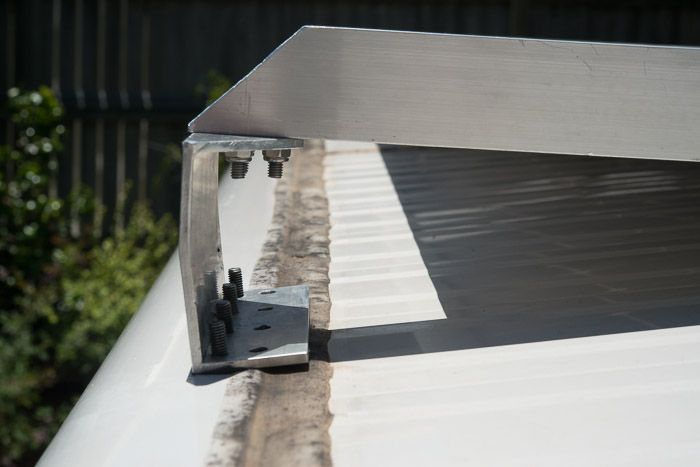
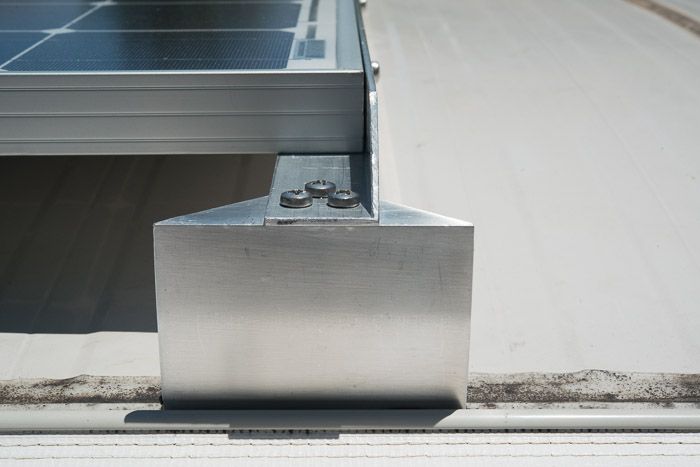
Once my wrist came good, I decided to get into the solar panels. This was pretty tricky because the van is a pop top and has no load bearing structure in the roof. Based on another mate who had done the same thing, I made up a roofrack from 40x40x3mm angle iron to carry the panels

DSC_4424_zpsb5faa2b6.jpg


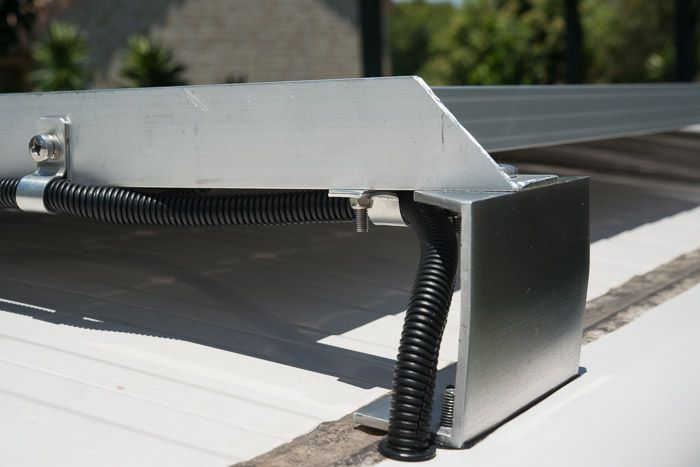
which required some brackets I machined up and drilled and tapped threads

DSC_4427_zps85044398.jpg


Including a couple of practice holes that ended up in the wrong position.

DSC_4430_zps72010d26.jpg


I had talked Chris down the road into making a press brake for his hydraulic press after reading one of Tin's threads and this was his first real job on it. The roof surround leaned out 5 degrees and the brackets needed a bit of a tweak to get things square.

DSC_4433_zps69357a68.jpg


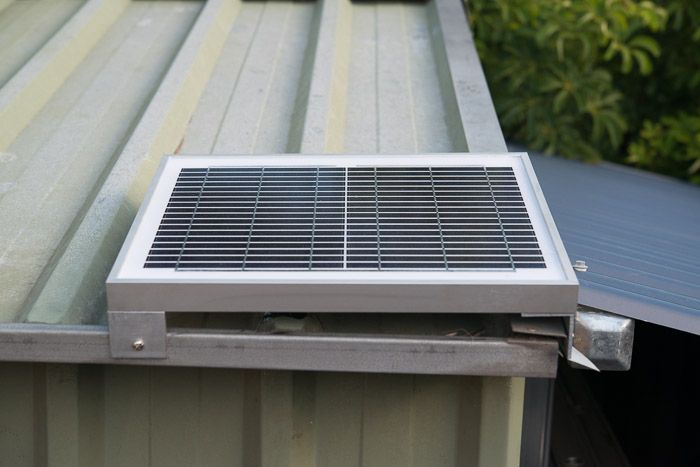
Whilst on the solar bandwagon, my son in law wanted to charge some motor bike batteries so I got him to order one more 10 W panel and a 3 amp regulator which cost about $35 all up and I gt him a roll of 12 volt cable in return.

And I whacked the panel on the garden shed roof (HINT: not my workshop shed)

DSC_4539_zpsdd0dba49.jpg


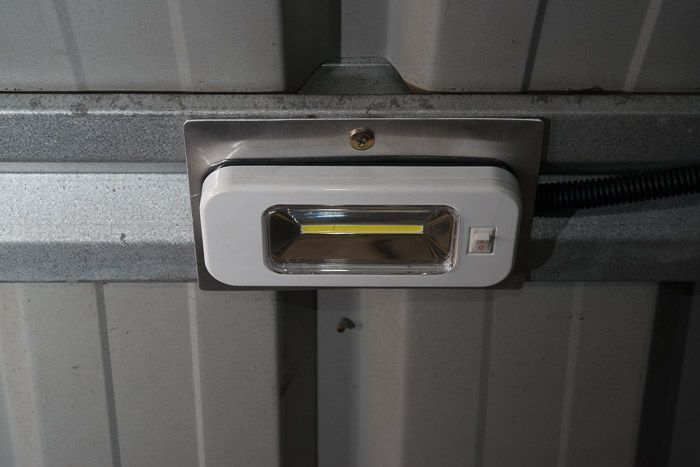
I bought a small gel cell battery and designed up a battery tray for it. I bought a spray can of repositionable glue and printed out the plan ful size on A3 size paper (roughly 11"x17" for non metric speakers). this made it so easy as I just cut it out and folded along the dotted lines before peeling off the pattern!

And added a 0.2 amp light

DSC_4547_zpsde9ff6f0.jpg


and now I have the brightest off-grid garden shed in Australia!

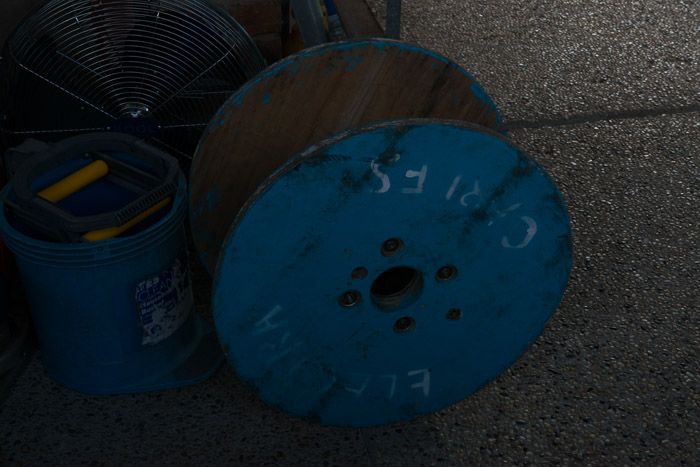
Wel back onto the real shed. You will be pleased to now that we finally got the 10mm electrical cable off the drum it had been sitting on for the last 6 months and pulled trough from the meter box on on corner of the house on Sunday.

DSC_4551_zps14c9b93c.jpg


and ran it through the ceiling to the diagonally opposite corner

DSC_4565_zpsbb0c797a.jpg


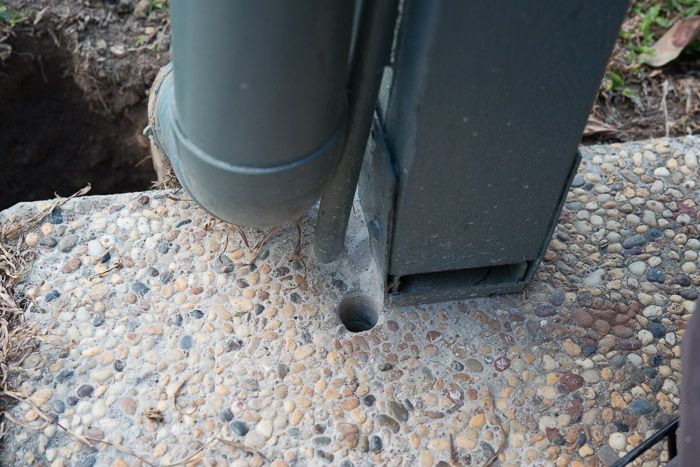
and across the patio and through a 26mm hole in the slab

DSC_4558_zpsc6719063.jpg


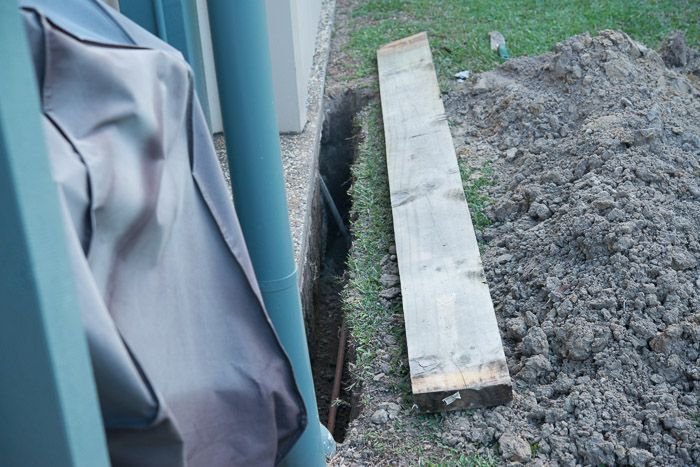
Into a trench beside the existing lightweight shed cabling

DSC_4556_zpse551f981.jpg


and out a new hole in the shed floor

DSC_4560_zps4c99c307.jpg


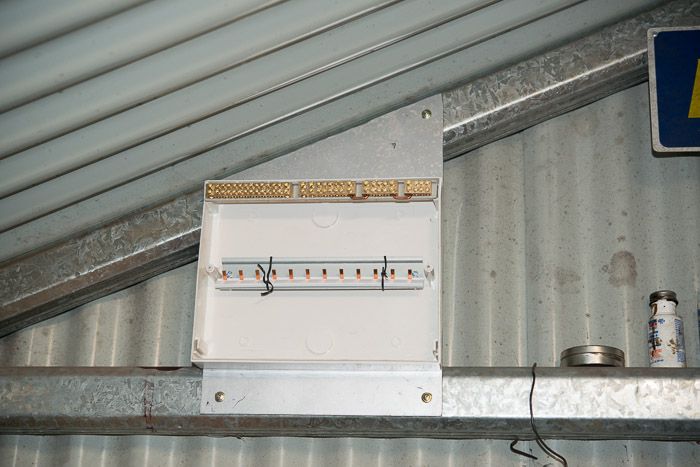
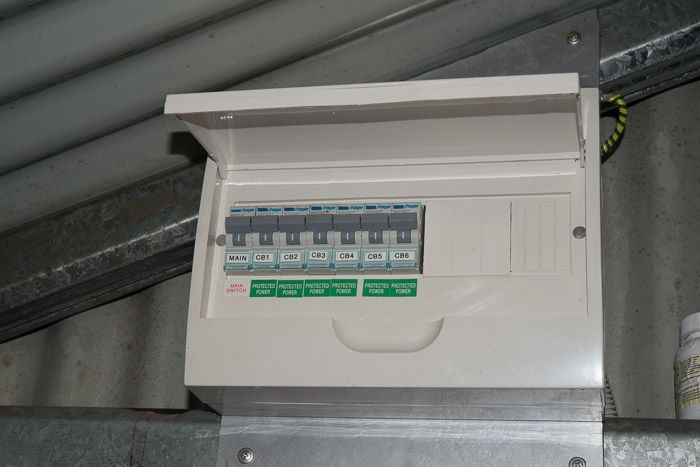
and up to a sub board full of circuit breakers

DSC_4561_zps129437f2.jpg


DSC_4577_zps94fe89e2.jpg


Now I have 15 amp power points everywhere!

DSC_4564_zps072d7d49.jpg


DSC_4579_zpsb222cc07.jpg


There are actually about the same number of circuits in the shed as in the house now!

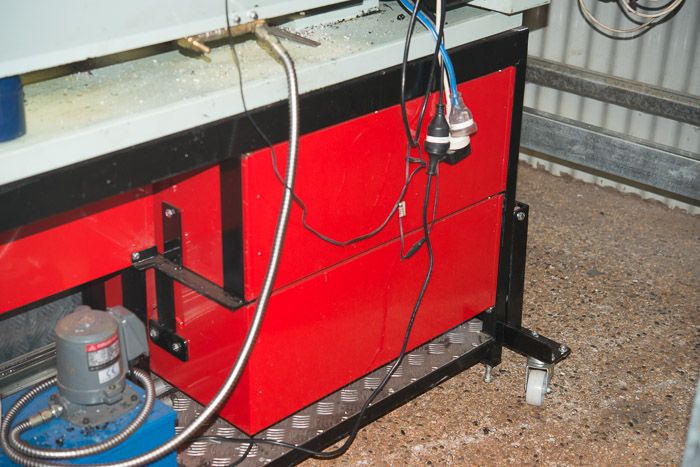
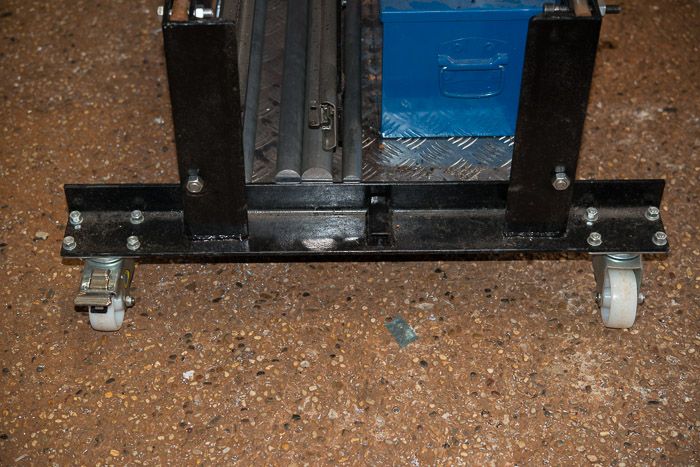
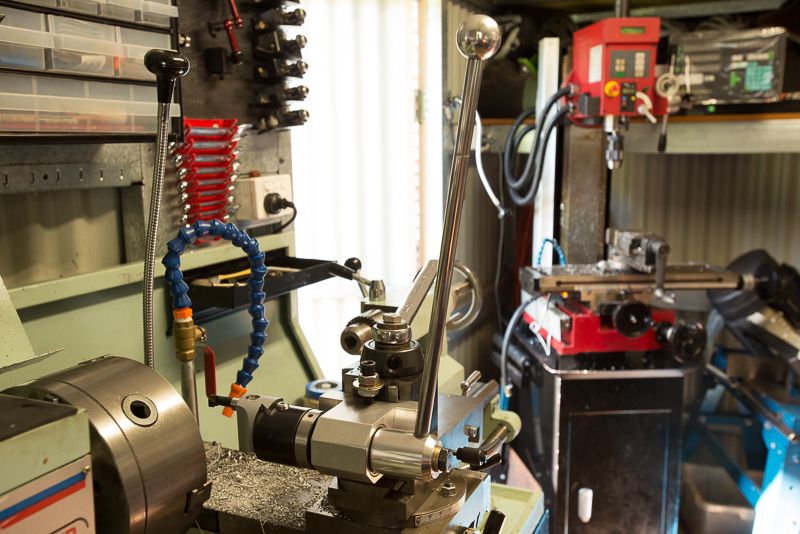
In amongt this all, I finally got around to ordering my Ditron DRO for the lathe and have started to fit it up while I have the lathe up on its mobile wheels for the first time ever!

DSC_4567_zpsc8deda53.jpg


DSC_4566_zpsbd183457.jpg


Must weigh about 400 kg now full of tools

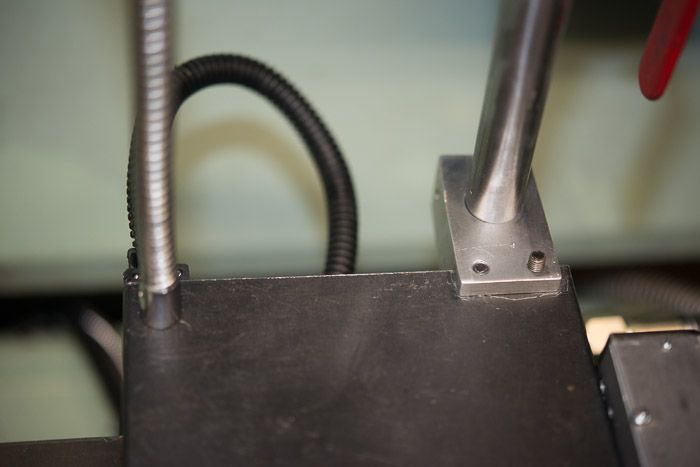
I made a start on the DRO installation. first the easy bit

DSC_4573_zps19f5bd6d.jpg


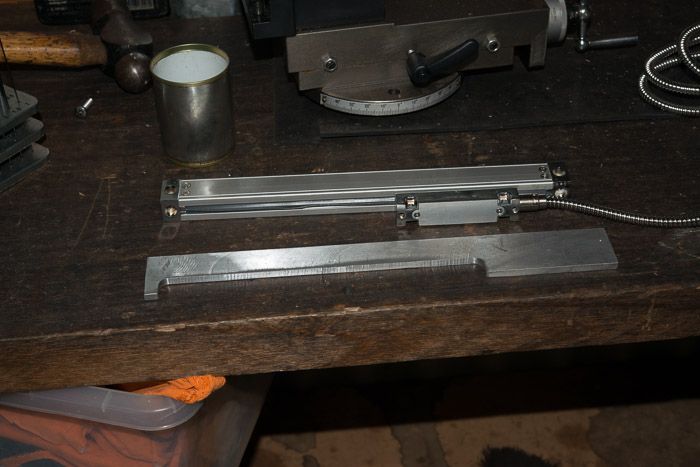
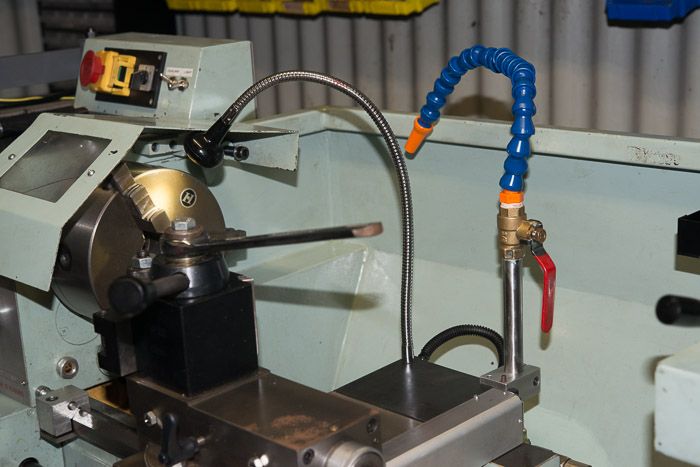
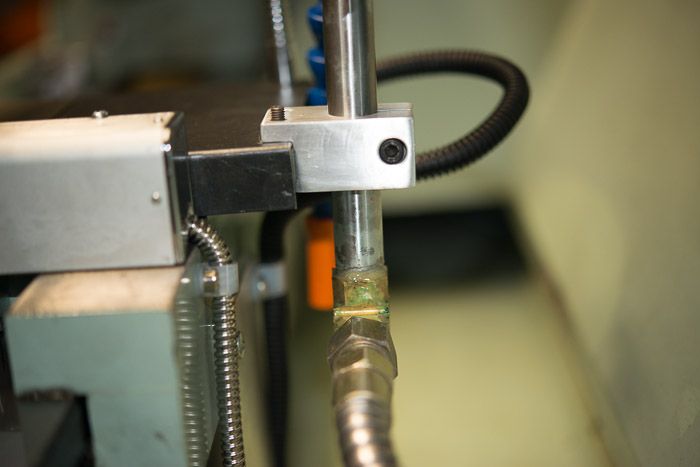
I have not got much to show for today's effort but have got this far with the cross slide scale after a lot of head scratching.

DSC_4588_zps1b5c4fb7.jpg


The scale needs to extend beyond the rear of the cross slide a bit so I decided to make a mounting strip that is cut out to allow access to the gib screws. I decided not to attempt to drill and tap this mount late this afternoon as in my experience, that is a recipe for disaster so I left it for another day. It should be pretty easy from here.

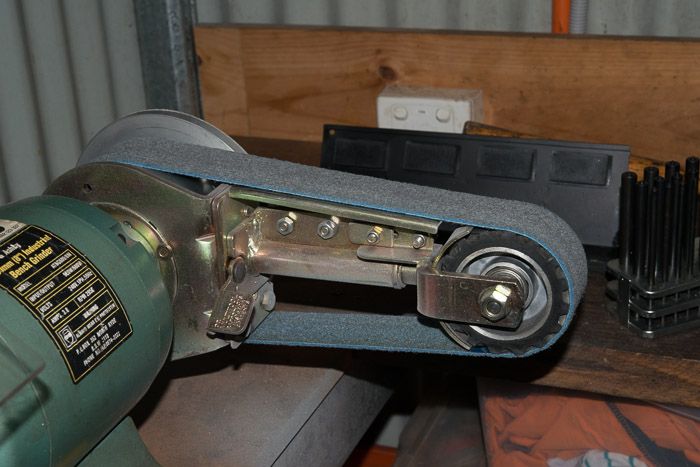
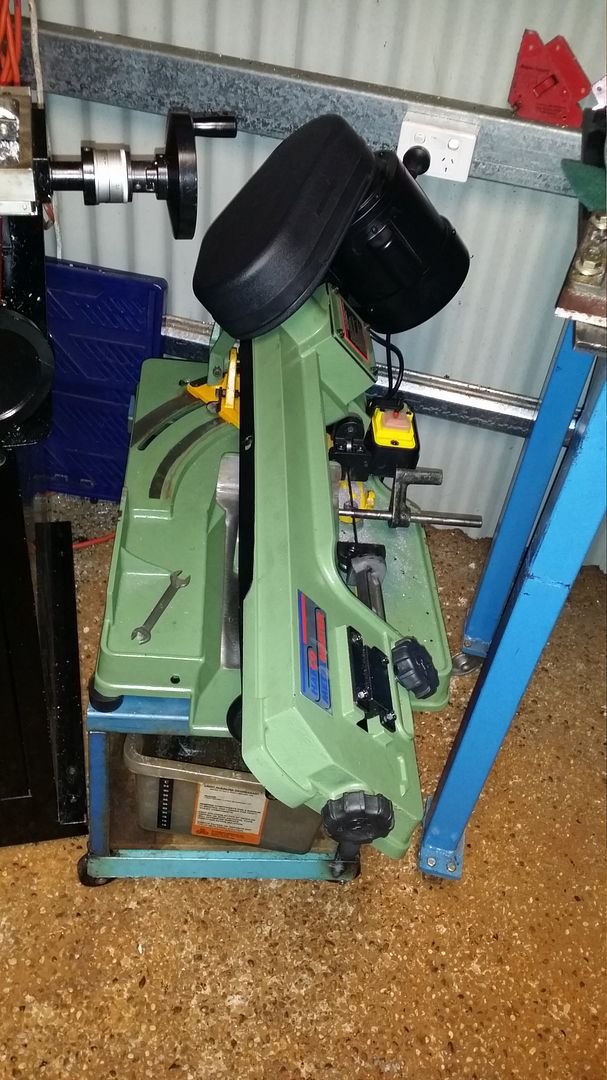
Oh almost forgot, finally got a linisher belt too. These are awesome bits of Gear.

DSC_4576_zpsc25ebf36.jpg


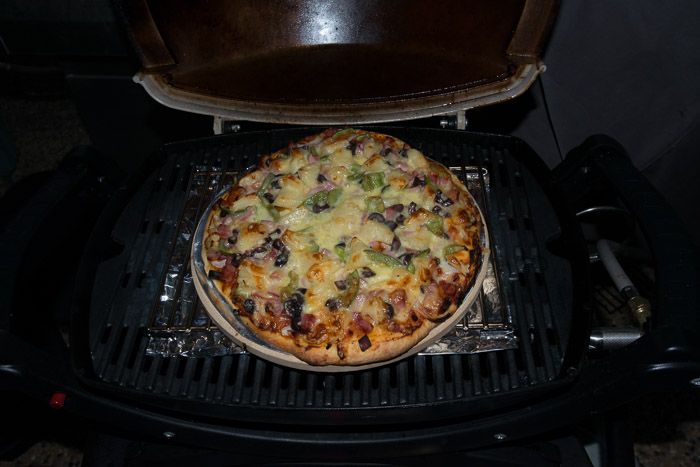
And have been practicing how to use a Weber Q which will replace our BBQ in the van.. Awesome gear!

DSC_4570_zps08c7b33b.jpg


Anyway, sorry I have deviated off topic a bit, stay tuned, I will update as the DRO proceeds. It is pretty much the last thing on my shed wish list.
 
  • Like
Reactions: gus
Hi Rod, while your off topic I will carry it on a bit. We had a van with 4 batteries and 4 solar panels, just be careful with the toaster it will flatten your 2 batteries in no time, my wife used a 650 watt hair dryer (it was the lowest wattage one we could get) in the van, and she was under strict instructions to only use it for a couple of minutes. We also ended up carrying a baby webber Q, they were great for legs of lamb etc.

Paul.
 
  • Like
Reactions: gus
Geez, it has been busy in my shed the last week or so.

There are an obscene number of circuits in my shed now.

DSC_4577_zps94fe89e2.jpg


and power points everywhere!

Under benches

DSC_4581_zpsb206ebff.jpg


and even ones we never planned on!

DSC_4578_zps51f5635f.jpg


I finished my DRO install. I thought I had taken some pics of the longnitudinal scale instal but apparently not. I'll update on another day.

While I was at it, I decided to permanently mount up a light I had been using and redo my coolant nozzle. I don't know about Bmac2 but I have used rolls and rolls of split conduit over the last few years Fortunately, I had a bit in a box of tricks which I used on the light wiring!

DSC_4752_zps635cdefa.jpg


DSC_4750_zpscef6fee8.jpg


DSC_4744_zps68bccdb3.jpg


The back part of the cross slide is just a pressed metal cover, so it was easy to drill a hole through it for the light and I milled up a coolant line clamp that is screwed on from below.

I moved the coolant plumbing down to the bottom where the pump.

DSC_4753_zps57a5e213.jpg


One day, I will get the coolant lines over to the mill on the other side of the doorway.

It will be 12 months next weekend since I upgraded my lathe and bought my mill. I have to say that once you actually start doing things on a mill, it is amazing how quickly your confidence grows. I have been sketching up parts on the PC and taking a printout down to the shed, sticking it to the wall near the mill and it has been a lot of fun! When I started, I did not want to touch the vice once I had laboriously dialed it in and now it is a breeze and I have been a bit more ambitious!

The DRO on the lathe just about concludes my wish list of tooling etc I have been maintaining so maybe I will get to some projects that have been pushed aside for months.
 
Sorry, guys, have not been here much for a while. I just posted my new radius turner using a boring head here

boring-head-ball-radius-turner-23019


DSC_4987_zpsf4bb0bed.jpg


DSC_5011_zpsc82de401.jpg


DSC_5017_zps21bc823f.jpg


DSC_5018_zps30554b5b.jpg


I need to try cutting a convex face yet but all that should be required is to put the cutter in the other way round (the right way actually!)
 
  • Like
Reactions: gus
Hi Rod,

That was a very smart idea to cut sphereical knobs. th_wav

Beats the RT ball turning. Since I have a DIY Boring Head,will try
cutting brass knobs the ''Rod Way".

So many ways to skin a cat.
 
Last edited:
Chris,

That goose neck tool looks impressive. Do you think it would work on a 7 x 12 lathe?
 
RodW,

I like the base plate on your bandsaw. I'm sure it's far better to use, as you have bypassed that irritable round insert around the blade. That said, I am going to make one for myself.
 
Hi Rod,

That was a very smart idea to cut sphereical knobs. th_wav

Beats the RT ball turning. Since I have a DIY Boring Head,will try
cutting brass knobs the ''Rod Way".

So many ways to skin a cat.

Gus, thanks, I am sure you will get it working! it wasn't my idea originally and I bought the extra flange for the boring head a year ago. Some others online have incorporated a stop to limit the radius you can turn but I did not bother.
 
RodW,

I like the base plate on your bandsaw. I'm sure it's far better to use, as you have bypassed that irritable round insert around the blade. That said, I am going to make one for myself.

Rob, thanks, it works well. I roughed out the T shaped block for the ball turner on the upright bandsaw with the base plate installed and it is 50mm thick. I have since seen another design that hinges the base plate so you can leave it installed and fold it up out of the way in horizontal mode. You just need to add a cross piece below the plate that mounts to the saw and extends the width of the plate. Pin it to the plate at the edge so it will act as a hinge. The plate I have is easy enough to modify to this design but I don't use it enough to worry about it.
 
Well, today was not a lot of fun in my shed. I was cutting a few pieces of plastic and the motor on my 6x5 bandsaw gave out eventually stalling half way through a cut. It has done an awesome amount of work over the last 4 years. I can remember running it for 8 hours straight in a day cutting steel. I checked with Hare and Forbes and they have a spare arriving at the end of June for $220 + GST or I can buy a new saw on their final runout of that model for $350 + GST.

Anyway, I pulled the motor apart and consulted with a mate and we decided to replace the bearings as we could see the armature had been hitting the windings. This was an interesting exercise as one bearing was pressed into a blind hole so you could not remove it easilly. Chris suggested filling the hole with gear oil and hammering a tightly machined shaft into the centre. This worked very well but I had to top the oil up a few times to get it right out.

While I had it apart, I skimmed the armature in the lathe, basically just taking the paint off.

After I reassembled it, the motor spins like a top by hand but when it runs, it makes an awful buzzing sound but now spins. We checked the capacitor on a multimeter and it was OK but maybe it is breaking down under power and the buzzing sound is the contacts flipping in and out so I have a bit more to check.

If anybody in Oz knows where to source a reasonably priced 1/3 HP (0.25kW) motor with a 5/8" shaft, please let me know.
 
Hmm, I was a bit disappointed, I fitted up a new electric motor after making a adapter base plate for it and I was still not happy with the end result so I made the mistake of opening up the gear box only to find it was dry and there was a heap of brass flakes in there. I decided to strip the gearbox which revealed the problem. The chinese had assembled it with an oil seal riding on a keyway. How was that going to work? It didn't obviously! I priced some parts and decided that I was so close to the replacement price that I took the motor back and bought a new one. I have severe space limitations but H&F did me a deal on one of these:
http://www.machineryhouse.com.au/B003

Made in Taiwan and heaps better in quality. every bolt and screw was a better quality and it was easy to tweak it so it cuts dead square. I decided to make a lower wheeled stand for it and realised it was the exact width of my previous saw so I hacked 235 mm out of the roller base I and made and built up a stand from there. A bit rough and ready but I got it in the shed and cutting away within the day. Photos to come.

I gotta say, setting it up was a breeze and the first cut was spot on, 100% square. The 7" throat is big by these standards, as big as the entry level real ones so I may look at adding coolant which will be easy to do.
 
I up graded to the same saw after I burnt the motor out on the bs-5 that I had. the bs-5s is so much better of a saw and heaps better for cutting angles on as well. cam
 
Very nice piece of kit Rod! Makes my inherited BS-4A look a bit tired... Oh well when its time to upgrade, I'll be looking at something similar :)
 
I up graded to the same saw after I burnt the motor out on the bs-5 that I had. the bs-5s is so much better of a saw and heaps better for cutting angles on as well. cam

Thanks Cam, nice to know I was not the first....

Very nice piece of kit Rod! Makes my inherited BS-4A look a bit tired... Oh well when its time to upgrade, I'll be looking at something similar :)

Colin, I think it leaves the others for dead if you can afford the extra cost but cant get up to the bigger ones.

Here is a quick phone pic (oops, sorry about the size). I have now got it on wheels and kept it low so it did not get in the road of the mill table.

20140521_172514_zpsfic3gkar.jpg


If you go back through my shed pics, you will see I had an angle iron base on wheels for my old saw. The first job was to thread the saw through it and cut out a 235mm piece from each side and weld it up again. Then I cut some 25x25mm SHS legs which I welded in place in each corner than put two 65x35mm RHS rails on top. The saw sits on rubber feet and is just held down with 2 bolts (fore and aft). To finish it off, this project needs a drip tray placed under the feet. Coolant can't escape from the saw table anywhere so it will be easy to drill a hole in the cast iron base so the coolant can drain down below. Anyway, that is my excuse for not painting the stand! I think coolant would be a good option for this saw as it is so easy to deal with.
 
A bandsaw is on my wish list of machines, I will keep a note of this model, I have seen them at Machinery House (H &F).

Paul.
 
Back
Top